If you're searching for a quick and tasty side dish, you've found it! My Sesame Garlic Green Beans recipe is packed with flavor and takes just minutes to prepare. Fresh green beans, vibrant garlic, and nutty sesame oil come together for a dish that brightens any meal. Follow my easy step-by-step guide to create this simple yet delicious recipe that’s healthy and satisfying. Let’s get cooking!
Why I Love This Recipe
- Quick and Easy: This recipe takes only 15 minutes from start to finish, making it perfect for a busy weeknight dinner.
- Flavor Packed: The combination of sesame oil, garlic, and ginger creates a deliciously aromatic and savory flavor that elevates the simple green beans.
- Healthy and Nutritious: Green beans are low in calories and high in vitamins, making this dish a healthy side option for any meal.
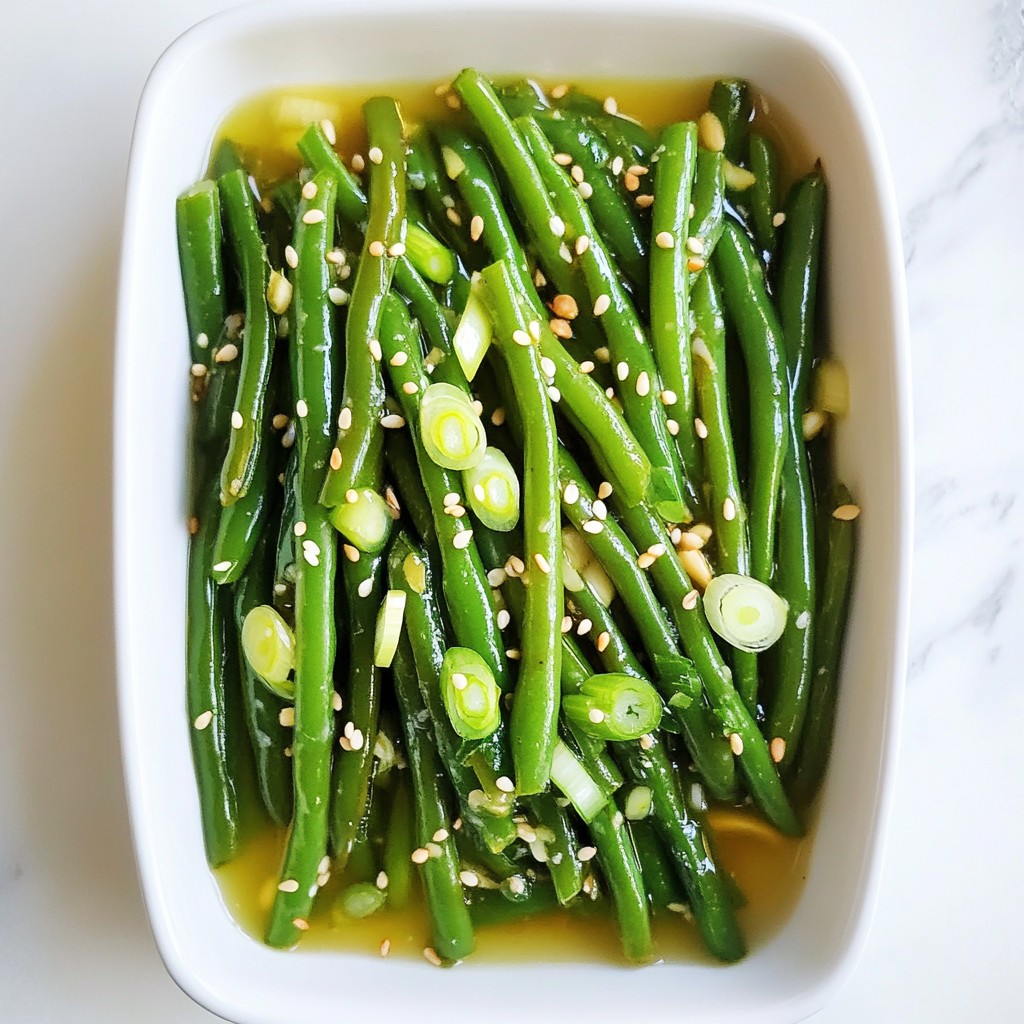
- Beautiful Presentation: The vibrant green color of the beans, along with the garnishes of sesame seeds and scallions, makes this dish visually appealing on any table.
Ingredients
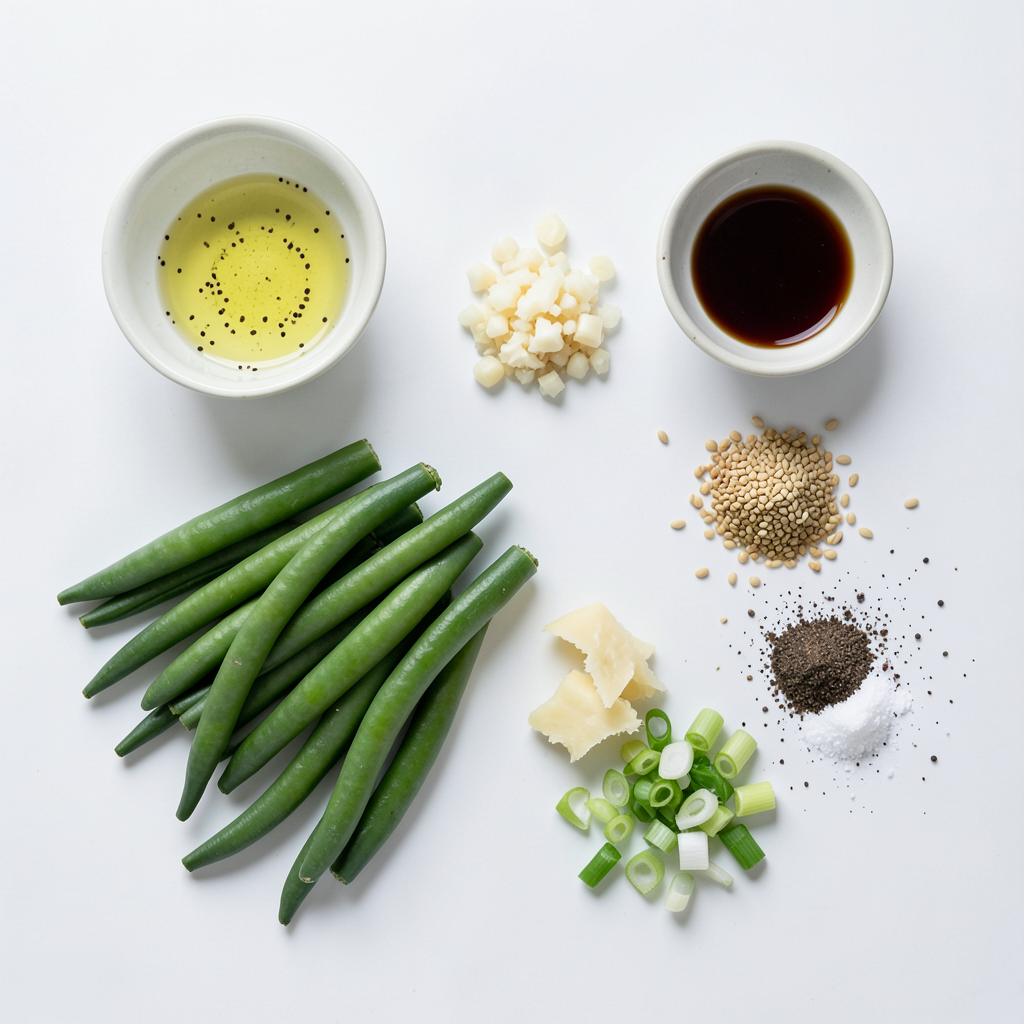
To make Sesame Garlic Green Beans, you need these simple ingredients:
- 1 pound fresh green beans, trimmed
- 3 tablespoons sesame oil
- 4 cloves garlic, minced
- 2 tablespoons soy sauce (or tamari for gluten-free)
- 1 tablespoon rice vinegar
- 1 tablespoon sesame seeds (toasted)
- 1 teaspoon fresh ginger, grated
- Salt and pepper to taste
- 2 scallions, chopped (for garnish)
These ingredients come together to create a dish that is both tasty and easy to make. Fresh green beans give the dish a bright crunch, while sesame oil adds a nutty flavor. Garlic and ginger bring warmth and depth to the mix. Soy sauce or tamari gives it that savory umami kick. Rice vinegar adds a hint of tanginess that balances everything beautifully.
Don't forget the toasted sesame seeds; they add a nice crunch and a pop of flavor. Finally, the scallions not only look great but also bring a fresh taste to the dish. You can easily find these ingredients at your local grocery store. Each one plays an important role in making this dish a favorite.
Step-by-Step Instructions
Preparing the Green Beans
- Start by rinsing the green beans under cold water. This removes dirt and impurities.
- Next, trim the ends of the beans. This step keeps them neat and easy to eat.
- In a large pot, bring salted water to a boil. Blanch the green beans for about 2 to 3 minutes. Look for bright green color and a tender-crisp feel.
- After blanching, immediately transfer the beans to an ice bath. This stops cooking and keeps their color. Drain well and set aside.
Sautéing the Aromatics
- Heat sesame oil in a large skillet over medium heat. The oil adds a rich, nutty flavor.
- Add minced garlic and grated ginger to the hot oil. Sauté for about 30 seconds. Watch closely to prevent burning. The aroma will be amazing!
Cooking the Green Beans
- Toss the blanched green beans into the skillet. Stir well to coat them in the garlic and ginger mixture.
- Drizzle soy sauce and rice vinegar over the beans. Toss again to combine all the flavors.
- Cook for an additional 2 to 3 minutes. This step warms the beans and melds the flavors.
- Finally, sprinkle toasted sesame seeds over the dish. Season with salt and pepper to taste.
- Remove from heat and garnish with chopped scallions before serving. The green beans will look colorful and inviting!
Tips & Tricks
Perfecting Cooking Time
To get the best crunch from your green beans, start with blanching. Blanching means boiling the beans for a short time. I suggest about 2-3 minutes. This method keeps the beans bright green and crisp. After boiling, dunk them in an ice bath. This stops the cooking and locks in color.
When cooking in a skillet, heat your sesame oil on medium. Add the garlic and ginger first. This way, they release their flavors. Then, toss in the blanched beans. Stir them well to coat every bean. This ensures even cooking and flavor.
Enhancing Flavor
If you want to switch up the flavor, try tamari instead of soy sauce. Tamari is gluten-free and still tastes great. You can also play with the seasoning. Taste the beans as you cook. Add more soy sauce or salt if needed. This lets you control the flavor to your liking.
Presentation Tips
For a stunning look, serve the green beans in a wide dish. This makes them stand out. Sprinkle some extra sesame seeds on top for a nice touch. Adding chopped scallions not only looks good but adds flavor too. A little color makes your dish pop!
Pro Tips
- Freshness Matters: Always choose bright green, crisp green beans for the best flavor and texture.
- Perfect Blanching: Blanch the green beans just until they are tender-crisp to maintain their vibrant color and crunch.
- Customize the Flavor: Feel free to add a pinch of red pepper flakes for a spicy kick or a splash of citrus juice for brightness.
- Serving Suggestions: These green beans pair beautifully with grilled meats or as part of a stir-fry for a complete meal.
Variations
Adding Protein
You can easily add protein to your sesame garlic green beans. Tofu works great for a plant-based option. Simply cube firm tofu and sauté it with the garlic and ginger. If you prefer meat, chicken adds a nice touch. Cook it in the skillet before adding the green beans. Both options boost the meal's nutrition.
Flavor Enhancements
To change the flavor, try different vinegars. Apple cider vinegar or balsamic vinegar can add a unique twist. For spice lovers, add red pepper flakes or a splash of hot sauce. You can also experiment with herbs like basil or cilantro. Each new ingredient can make the dish feel fresh and exciting.
Seasonal Variations
Use fresh, seasonal vegetables to keep it interesting. In spring, snap peas or asparagus can replace green beans. In the fall, try Brussels sprouts or butternut squash. These swaps not only change the flavor but also add color and nutrients. Enjoy the variety that each season brings to your cooking!
Storage Info
Short-term Storage
After making Sesame Garlic Green Beans, let them cool first. Place leftovers in airtight containers. Glass or plastic containers work well. Store them in the fridge. This keeps them fresh for up to three days.
Long-term Storage
You can freeze these green beans too. Lay them flat in a freezer-safe bag. This way, they freeze evenly. When you want to eat them, thaw the bag in the fridge overnight. Reheat them in a skillet over low heat. Add a splash of water for moisture.
Shelf Life
Leftovers last in the fridge for three days. Check for signs of spoilage. If the beans smell off or look slimy, toss them. Always trust your senses to keep your meals safe.
FAQs
What can I serve with Sesame Garlic Green Beans?
You can serve Sesame Garlic Green Beans with many dishes. Here are some great pairings:
- Grilled chicken: The smoky flavor works well.
- Steamed rice: This adds a nice base.
- Tofu stir-fry: A tasty vegetarian option.
- Salmon: The richness of fish complements the beans.
These dishes create a balanced meal full of flavors.
Can I make Sesame Garlic Green Beans ahead of time?
Yes, you can prepare Sesame Garlic Green Beans ahead of time. Here are some tips:
- Cook the beans: Blanch and sauté them as usual.
- Cool down: Let them cool before storing.
- Refrigerate: Place in a sealed container for up to three days.
When ready to eat, just reheat in a skillet. Add a splash of soy sauce for extra flavor.
Are there any health benefits to this dish?
Sesame Garlic Green Beans offer many health benefits. Here are some highlights:
- Green beans: They are low in calories and high in fiber.
- Garlic: This can boost your immune system.
- Sesame oil: It has healthy fats that are good for your heart.
These ingredients combine to make a nutritious and tasty dish.
In this blog post, we explored the ingredients and steps for making delicious Sesame Garlic Green Beans. You learned how to prepare the beans, sauté aromatics, and enhance the flavors. I shared tips on perfecting cooking time, adding protein, and even variations based on seasonal veggies. Remember, your meal can shine with good storage and reheating practices. Enjoy experimenting with this dish, and let your creativity guide you. It’s simple to make and offers great taste and nutrition. Dive in and enjoy your cooking adventure!