One-Pot Creamy Roasted Garlic White Chicken Chili Delight

WANT TO SAVE THIS RECIPE?

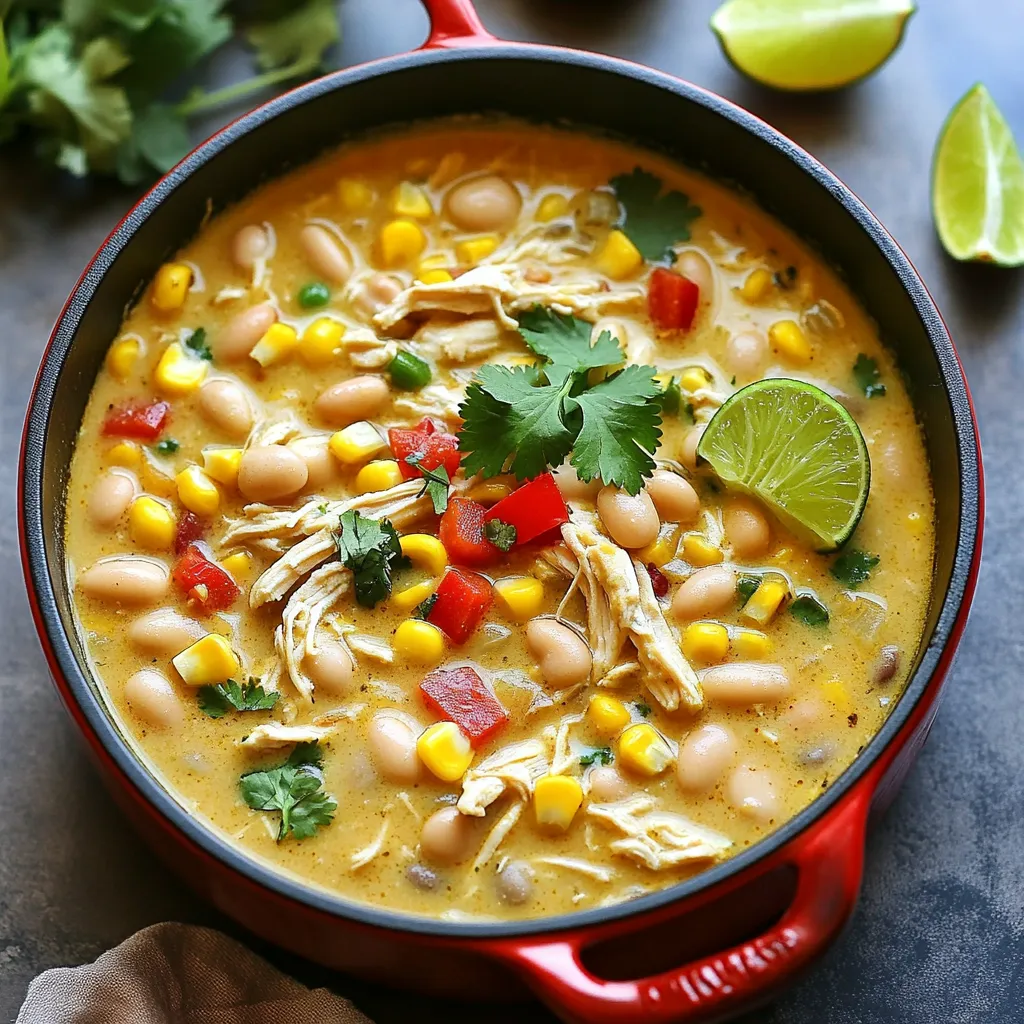
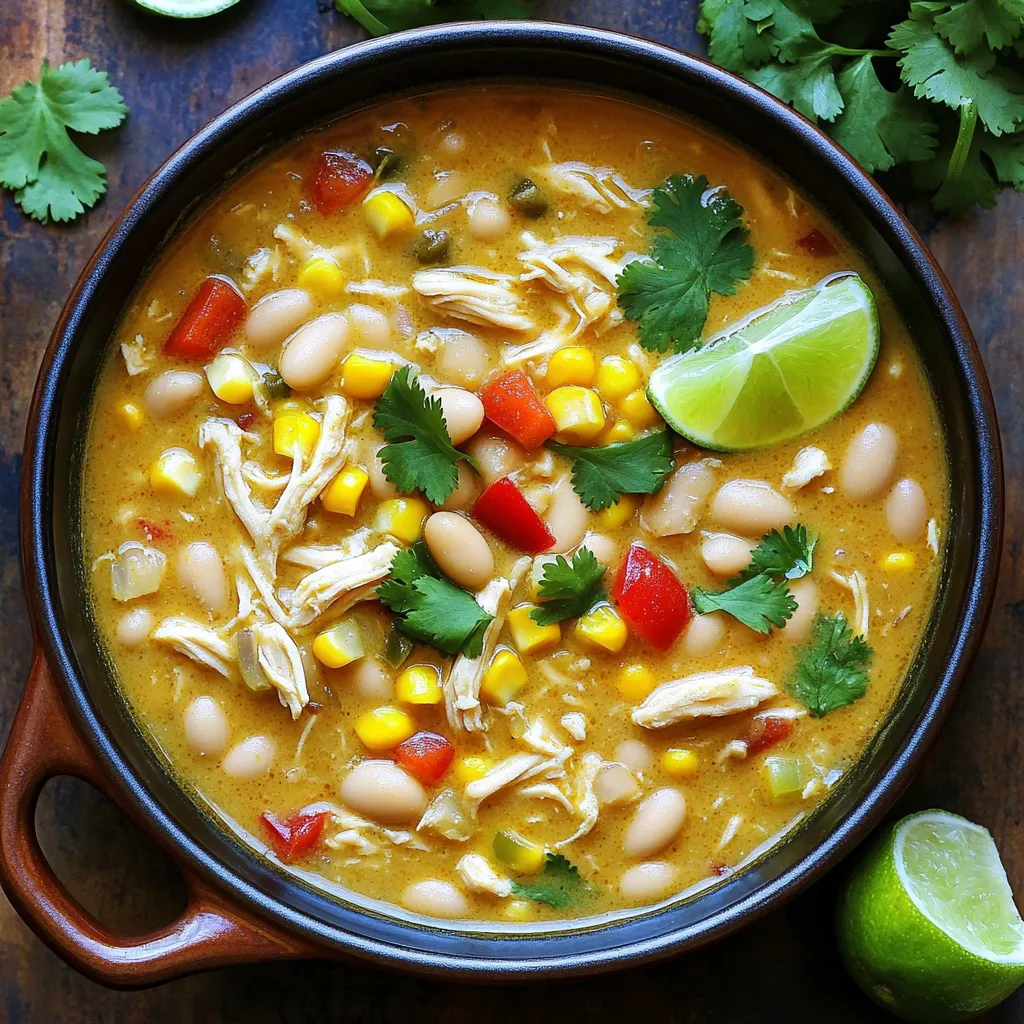
Get ready to warm your heart and satisfy your cravings with my One-Pot Creamy Roasted Garlic White Chicken Chili Delight! This creamy, flavorful comfort food is bursting with roasted garlic, tender chicken, and spices that will make your taste buds dance. Best of all, you’ll whip it up in just one pot. Join me as I guide you through simple steps to create a dish that’s perfect for any gathering or a cozy night in. Let’s dive in!

- 1 lb boneless, skinless chicken breasts - 1 head of garlic - 1 tablespoon olive oil - 1 small onion, chopped - 1 red bell pepper, diced - 1 can (15 oz) white beans (cannellini or great northern), drained and rinsed - 1 can (4 oz) diced green chilies - 4 cups chicken broth - 1 teaspoon ground cumin - 1 teaspoon chili powder - ½ teaspoon smoked paprika - 1 cup heavy cream - 1 cup corn (frozen or canned) - Salt and pepper to taste - Fresh cilantro for garnish - Lime wedges for serving - Large pot or Dutch oven - Aluminum foil - Whisk or wooden spoon Gathering the right ingredients is key to making this chili shine. You start with chicken breasts, which are lean and tender. Roasting a head of garlic adds a sweet, rich flavor. The olive oil helps sauté the veggies and chicken well. The onions and red bell peppers bring a nice crunch. White beans give the chili body and protein. Diced green chilies add a mild heat. Chicken broth keeps everything moist and flavorful. The spices—cumin, chili powder, and smoked paprika—give the chili depth. Heavy cream makes it rich and creamy. Corn adds sweetness and texture, while salt and pepper enhance all the flavors. For garnishes, fresh cilantro brightens the dish. Lime wedges offer a zesty kick when squeezed over the chili. Make sure you have a large pot or Dutch oven for cooking. Aluminum foil is needed to wrap the garlic for roasting. A whisk or wooden spoon helps you stir and mix all the ingredients together. 1. Start by preheating your oven to 400°F (200°C). 2. Cut off the top of the head of garlic to expose the cloves. 3. Drizzle the garlic with olive oil. 4. Wrap the garlic in aluminum foil and place it in the oven. 5. Roast for 30-35 minutes until the cloves are soft and fragrant. 1. In a large pot, heat 1 tablespoon of olive oil over medium heat. 2. Add the chopped onion and diced red bell pepper. 3. Sauté for about 5 minutes until the vegetables soften and become fragrant. 1. Now, add the boneless, skinless chicken breasts to the pot. 2. Cook for about 5 minutes on each side until lightly browned. 1. Stir in the ground cumin, chili powder, smoked paprika, salt, and pepper. 2. Let the spices cook for a minute to bloom and develop their flavors. 1. Squeeze the roasted garlic from its skins into the pot. 2. Add the white beans, diced green chilies, chicken broth, and corn. 3. Stir well and bring the mixture to a gentle simmer. 1. Let the chili simmer for 20-25 minutes to cook the chicken thoroughly. 2. Remove the chicken breasts and shred them using two forks. 3. Return the shredded chicken to the pot. 4. Stir in the heavy cream and let the chili simmer for another 5 minutes. 5. Taste and adjust the seasoning if needed for the perfect flavor. To boost the flavor of your chili, consider adding spices like cayenne pepper or oregano. A dash of lime juice can brighten the dish. Fresh herbs, like cilantro, give a nice taste. Use fresh herbs for a stronger flavor. Dried herbs work well too, but use less. About one-third of the amount is a good rule. If you want a creamier chili, try using half-and-half or coconut milk instead of heavy cream. You could also add cream cheese for extra richness. Adjust the creaminess by adding more or less cream. Start with a cup, then taste and tweak to your liking. Meal prepping is a game changer. Chop your veggies and roast the garlic in advance. Store them until you're ready to cook. Using rotisserie chicken is also a smart time-saver. Shred the chicken and add it directly to the pot. It cuts down on cooking time and gives great flavor. {{image_2}} You can make this chili without chicken if you want a vegetarian dish. Use plant-based protein, like tofu or tempeh. These options cook well and soak up flavors. Adjust the broth, too. Use vegetable broth instead of chicken broth. For cream, you can swap heavy cream for plant-based cream. This way, your dish stays creamy and tasty. If you like heat, add jalapeños or more chili powder. Start with one jalapeño, chopped fine. You can always add more spice later. To balance the heat, add extra cream or a dash of sugar. This helps to tone down the spice while keeping the flavor strong. White beans are great, but you can try different beans too! Black beans or pinto beans add a new twist. They change the texture and flavor of the chili. Mix and match to find your favorite combination. Each bean type brings its own taste and feel, making the dish unique. To keep your One-Pot Creamy Roasted Garlic White Chicken Chili fresh, store it in an airtight container. Make sure it cools down before sealing it. In the fridge, it stays good for about 3 to 4 days. Always check for any off smells or signs of spoilage before enjoying leftovers. You can freeze the chili for a longer shelf life. First, let it cool completely. Then, pour it into freezer-safe bags or containers. Remove as much air as possible to prevent freezer burn. It can last up to 3 months in the freezer. When you want to eat it, move it to the fridge for overnight thawing. For reheating, warm it on the stove over low heat. Stir often to keep it smooth. The chili is great for meal prep! Use leftovers for lunches or dinners throughout the week. You can also serve it over rice or quinoa for a filling meal. Another idea is to use it as a topping for baked potatoes or nachos. It adds a tasty twist to many dishes, making your meals more exciting! The total time is about 1 hour. You will spend 15 minutes prepping and 45 minutes cooking. This includes roasting the garlic, sautéing the veggies, and simmering the chili. It is quick and easy, perfect for a weeknight meal. Yes, you can use canned chicken. The pros are that it saves time and effort. However, the flavor may not be as rich as fresh chicken. Fresh chicken gives a better texture, while canned chicken is softer. Choose based on your needs. You can serve this chili with several sides. Some great options are: - Cornbread - Tortilla chips - Rice - Fresh avocado - Sour cream - Shredded cheese These toppings add flavor and fun to your meal. To make this chili gluten-free, use gluten-free chicken broth. Check the labels on your canned ingredients. Some canned beans and chilies may contain gluten. Most of the other ingredients are naturally gluten-free, making it easy to adjust. Yes, you can adapt this recipe for a slow cooker. First, roast the garlic as directed. Then, add all the ingredients, except for the cream, to the slow cooker. Cook on low for 6-8 hours. Add the cream in the last 30 minutes for a creamy finish. This blog post walked you through making a tasty One-Pot Creamy Roasted Garlic White Chicken Chili. You learned about key ingredients, step-by-step instructions, and creative variations. Remember to adjust spices and try different beans for added fun. This chili is easy to store and perfect for meal prep. Enjoy your cooking journey! Try this recipe and share it with friends. Your kitchen will be a little warmer and a lot tastier.

Ingredients

Main Ingredients

– 1 lb boneless, skinless chicken breasts

– 1 head of garlic

– 1 tablespoon olive oil

– 1 small onion, chopped

– 1 red bell pepper, diced

– 1 can (15 oz) white beans (cannellini or great northern), drained and rinsed

– 1 can (4 oz) diced green chilies

– 4 cups chicken broth

– 1 teaspoon ground cumin

– 1 teaspoon chili powder

– ½ teaspoon smoked paprika

– 1 cup heavy cream

– 1 cup corn (frozen or canned)

– Salt and pepper to taste

Garnishes

– Fresh cilantro for garnish

– Lime wedges for serving

Suggested Kitchen Tools

– Large pot or Dutch oven

– Aluminum foil

– Whisk or wooden spoon

Gathering the right ingredients is key to making this chili shine. You start with chicken breasts, which are lean and tender. Roasting a head of garlic adds a sweet, rich flavor. The olive oil helps sauté the veggies and chicken well.

The onions and red bell peppers bring a nice crunch. White beans give the chili body and protein. Diced green chilies add a mild heat. Chicken broth keeps everything moist and flavorful.

The spices—cumin, chili powder, and smoked paprika—give the chili depth. Heavy cream makes it rich and creamy. Corn adds sweetness and texture, while salt and pepper enhance all the flavors.

For garnishes, fresh cilantro brightens the dish. Lime wedges offer a zesty kick when squeezed over the chili.

Make sure you have a large pot or Dutch oven for cooking. Aluminum foil is needed to wrap the garlic for roasting. A whisk or wooden spoon helps you stir and mix all the ingredients together.

Step-by-Step Instructions

Roasting the Garlic

1. Start by preheating your oven to 400°F (200°C).

2. Cut off the top of the head of garlic to expose the cloves.

3. Drizzle the garlic with olive oil.

4. Wrap the garlic in aluminum foil and place it in the oven.

5. Roast for 30-35 minutes until the cloves are soft and fragrant.

Sautéing the Vegetables

1. In a large pot, heat 1 tablespoon of olive oil over medium heat.

2. Add the chopped onion and diced red bell pepper.

3. Sauté for about 5 minutes until the vegetables soften and become fragrant.

Cooking the Chicken

1. Now, add the boneless, skinless chicken breasts to the pot.

2. Cook for about 5 minutes on each side until lightly browned.

Seasoning the Chili

1. Stir in the ground cumin, chili powder, smoked paprika, salt, and pepper.

2. Let the spices cook for a minute to bloom and develop their flavors.

Combining the Ingredients

1. Squeeze the roasted garlic from its skins into the pot.

2. Add the white beans, diced green chilies, chicken broth, and corn.

3. Stir well and bring the mixture to a gentle simmer.

Finalizing the Chili

1. Let the chili simmer for 20-25 minutes to cook the chicken thoroughly.

2. Remove the chicken breasts and shred them using two forks.

3. Return the shredded chicken to the pot.

4. Stir in the heavy cream and let the chili simmer for another 5 minutes.

5. Taste and adjust the seasoning if needed for the perfect flavor.

Tips & Tricks

Enhancing Flavor

To boost the flavor of your chili, consider adding spices like cayenne pepper or oregano. A dash of lime juice can brighten the dish. Fresh herbs, like cilantro, give a nice taste. Use fresh herbs for a stronger flavor. Dried herbs work well too, but use less. About one-third of the amount is a good rule.

Making it Creamier

If you want a creamier chili, try using half-and-half or coconut milk instead of heavy cream. You could also add cream cheese for extra richness. Adjust the creaminess by adding more or less cream. Start with a cup, then taste and tweak to your liking.

Time-Saving Tips

Meal prepping is a game changer. Chop your veggies and roast the garlic in advance. Store them until you’re ready to cook. Using rotisserie chicken is also a smart time-saver. Shred the chicken and add it directly to the pot. It cuts down on cooking time and gives great flavor.

Variations

Vegetarian Option

You can make this chili without chicken if you want a vegetarian dish. Use plant-based protein, like tofu or tempeh. These options cook well and soak up flavors. Adjust the broth, too. Use vegetable broth instead of chicken broth. For cream, you can swap heavy cream for plant-based cream. This way, your dish stays creamy and tasty.

Spicy Kick

If you like heat, add jalapeños or more chili powder. Start with one jalapeño, chopped fine. You can always add more spice later. To balance the heat, add extra cream or a dash of sugar. This helps to tone down the spice while keeping the flavor strong.

Different Bean Choices

White beans are great, but you can try different beans too! Black beans or pinto beans add a new twist. They change the texture and flavor of the chili. Mix and match to find your favorite combination. Each bean type brings its own taste and feel, making the dish unique.

Storage Info

Refrigeration

To keep your One-Pot Creamy Roasted Garlic White Chicken Chili fresh, store it in an airtight container. Make sure it cools down before sealing it. In the fridge, it stays good for about 3 to 4 days. Always check for any off smells or signs of spoilage before enjoying leftovers.

Freezing

You can freeze the chili for a longer shelf life. First, let it cool completely. Then, pour it into freezer-safe bags or containers. Remove as much air as possible to prevent freezer burn. It can last up to 3 months in the freezer. When you want to eat it, move it to the fridge for overnight thawing. For reheating, warm it on the stove over low heat. Stir often to keep it smooth.

Meal Prep Ideas

The chili is great for meal prep! Use leftovers for lunches or dinners throughout the week. You can also serve it over rice or quinoa for a filling meal. Another idea is to use it as a topping for baked potatoes or nachos. It adds a tasty twist to many dishes, making your meals more exciting!

FAQs

How long does it take to prepare One-Pot Creamy Roasted Garlic White Chicken Chili?

The total time is about 1 hour. You will spend 15 minutes prepping and 45 minutes cooking. This includes roasting the garlic, sautéing the veggies, and simmering the chili. It is quick and easy, perfect for a weeknight meal.

Can I use canned chicken instead of fresh?

Yes, you can use canned chicken. The pros are that it saves time and effort. However, the flavor may not be as rich as fresh chicken. Fresh chicken gives a better texture, while canned chicken is softer. Choose based on your needs.

What can I serve with this chili?

You can serve this chili with several sides. Some great options are:

– Cornbread

– Tortilla chips

– Rice

– Fresh avocado

– Sour cream

– Shredded cheese

These toppings add flavor and fun to your meal.

How do I make this recipe gluten-free?

To make this chili gluten-free, use gluten-free chicken broth. Check the labels on your canned ingredients. Some canned beans and chilies may contain gluten. Most of the other ingredients are naturally gluten-free, making it easy to adjust.

Can I make this recipe in a slow cooker?

Yes, you can adapt this recipe for a slow cooker. First, roast the garlic as directed. Then, add all the ingredients, except for the cream, to the slow cooker. Cook on low for 6-8 hours. Add the cream in the last 30 minutes for a creamy finish.

This blog post walked you through making a tasty One-Pot Creamy Roasted Garlic White Chicken Chili. You learned about key ingredients, step-by-step instructions, and creative variations. Remember to adjust spices and try different beans for added fun. This chili is easy to store and perfect for meal prep.

Enjoy your cooking journey! Try this recipe and share it with friends. Your kitchen will be a little warmer and a lot tastier.

- 1 lb boneless, skinless chicken breasts - 1 head of garlic - 1 tablespoon olive oil - 1 small onion, chopped - 1 red bell pepper, diced - 1 can (15 oz) white beans (cannellini or great northern), drained and rinsed - 1 can (4 oz) diced green chilies - 4 cups chicken broth - 1 teaspoon ground cumin - 1 teaspoon chili powder - ½ teaspoon smoked paprika - 1 cup heavy cream - 1 cup corn (frozen or canned) - Salt and pepper to taste - Fresh cilantro for garnish - Lime wedges for serving - Large pot or Dutch oven - Aluminum foil - Whisk or wooden spoon Gathering the right ingredients is key to making this chili shine. You start with chicken breasts, which are lean and tender. Roasting a head of garlic adds a sweet, rich flavor. The olive oil helps sauté the veggies and chicken well. The onions and red bell peppers bring a nice crunch. White beans give the chili body and protein. Diced green chilies add a mild heat. Chicken broth keeps everything moist and flavorful. The spices—cumin, chili powder, and smoked paprika—give the chili depth. Heavy cream makes it rich and creamy. Corn adds sweetness and texture, while salt and pepper enhance all the flavors. For garnishes, fresh cilantro brightens the dish. Lime wedges offer a zesty kick when squeezed over the chili. Make sure you have a large pot or Dutch oven for cooking. Aluminum foil is needed to wrap the garlic for roasting. A whisk or wooden spoon helps you stir and mix all the ingredients together. 1. Start by preheating your oven to 400°F (200°C). 2. Cut off the top of the head of garlic to expose the cloves. 3. Drizzle the garlic with olive oil. 4. Wrap the garlic in aluminum foil and place it in the oven. 5. Roast for 30-35 minutes until the cloves are soft and fragrant. 1. In a large pot, heat 1 tablespoon of olive oil over medium heat. 2. Add the chopped onion and diced red bell pepper. 3. Sauté for about 5 minutes until the vegetables soften and become fragrant. 1. Now, add the boneless, skinless chicken breasts to the pot. 2. Cook for about 5 minutes on each side until lightly browned. 1. Stir in the ground cumin, chili powder, smoked paprika, salt, and pepper. 2. Let the spices cook for a minute to bloom and develop their flavors. 1. Squeeze the roasted garlic from its skins into the pot. 2. Add the white beans, diced green chilies, chicken broth, and corn. 3. Stir well and bring the mixture to a gentle simmer. 1. Let the chili simmer for 20-25 minutes to cook the chicken thoroughly. 2. Remove the chicken breasts and shred them using two forks. 3. Return the shredded chicken to the pot. 4. Stir in the heavy cream and let the chili simmer for another 5 minutes. 5. Taste and adjust the seasoning if needed for the perfect flavor. To boost the flavor of your chili, consider adding spices like cayenne pepper or oregano. A dash of lime juice can brighten the dish. Fresh herbs, like cilantro, give a nice taste. Use fresh herbs for a stronger flavor. Dried herbs work well too, but use less. About one-third of the amount is a good rule. If you want a creamier chili, try using half-and-half or coconut milk instead of heavy cream. You could also add cream cheese for extra richness. Adjust the creaminess by adding more or less cream. Start with a cup, then taste and tweak to your liking. Meal prepping is a game changer. Chop your veggies and roast the garlic in advance. Store them until you're ready to cook. Using rotisserie chicken is also a smart time-saver. Shred the chicken and add it directly to the pot. It cuts down on cooking time and gives great flavor. {{image_2}} You can make this chili without chicken if you want a vegetarian dish. Use plant-based protein, like tofu or tempeh. These options cook well and soak up flavors. Adjust the broth, too. Use vegetable broth instead of chicken broth. For cream, you can swap heavy cream for plant-based cream. This way, your dish stays creamy and tasty. If you like heat, add jalapeños or more chili powder. Start with one jalapeño, chopped fine. You can always add more spice later. To balance the heat, add extra cream or a dash of sugar. This helps to tone down the spice while keeping the flavor strong. White beans are great, but you can try different beans too! Black beans or pinto beans add a new twist. They change the texture and flavor of the chili. Mix and match to find your favorite combination. Each bean type brings its own taste and feel, making the dish unique. To keep your One-Pot Creamy Roasted Garlic White Chicken Chili fresh, store it in an airtight container. Make sure it cools down before sealing it. In the fridge, it stays good for about 3 to 4 days. Always check for any off smells or signs of spoilage before enjoying leftovers. You can freeze the chili for a longer shelf life. First, let it cool completely. Then, pour it into freezer-safe bags or containers. Remove as much air as possible to prevent freezer burn. It can last up to 3 months in the freezer. When you want to eat it, move it to the fridge for overnight thawing. For reheating, warm it on the stove over low heat. Stir often to keep it smooth. The chili is great for meal prep! Use leftovers for lunches or dinners throughout the week. You can also serve it over rice or quinoa for a filling meal. Another idea is to use it as a topping for baked potatoes or nachos. It adds a tasty twist to many dishes, making your meals more exciting! The total time is about 1 hour. You will spend 15 minutes prepping and 45 minutes cooking. This includes roasting the garlic, sautéing the veggies, and simmering the chili. It is quick and easy, perfect for a weeknight meal. Yes, you can use canned chicken. The pros are that it saves time and effort. However, the flavor may not be as rich as fresh chicken. Fresh chicken gives a better texture, while canned chicken is softer. Choose based on your needs. You can serve this chili with several sides. Some great options are: - Cornbread - Tortilla chips - Rice - Fresh avocado - Sour cream - Shredded cheese These toppings add flavor and fun to your meal. To make this chili gluten-free, use gluten-free chicken broth. Check the labels on your canned ingredients. Some canned beans and chilies may contain gluten. Most of the other ingredients are naturally gluten-free, making it easy to adjust. Yes, you can adapt this recipe for a slow cooker. First, roast the garlic as directed. Then, add all the ingredients, except for the cream, to the slow cooker. Cook on low for 6-8 hours. Add the cream in the last 30 minutes for a creamy finish. This blog post walked you through making a tasty One-Pot Creamy Roasted Garlic White Chicken Chili. You learned about key ingredients, step-by-step instructions, and creative variations. Remember to adjust spices and try different beans for added fun. This chili is easy to store and perfect for meal prep. Enjoy your cooking journey! Try this recipe and share it with friends. Your kitchen will be a little warmer and a lot tastier.

One-Pot Creamy Roasted Garlic White Chicken Chili

Warm up with this delicious One-Pot Creamy Roasted Garlic White Chicken Chili! Packed with tender chicken, roasted garlic, and flavorful spices, this easy recipe combines wholesome ingredients for a comforting meal. Perfect for family dinners or chilly nights, it’s a cozy bowl of goodness in just one hour! Click through to discover the full recipe and elevate your weeknight meals today!

Ingredients
  

1 lb boneless, skinless chicken breasts

1 head of garlic

1 tablespoon olive oil

1 small onion, chopped

1 red bell pepper, diced

1 can (15 oz) white beans (cannellini or great northern), drained and rinsed

1 can (4 oz) diced green chilies

4 cups chicken broth

1 teaspoon ground cumin

1 teaspoon chili powder

½ teaspoon smoked paprika

1 cup heavy cream

1 cup corn (frozen or canned)

Salt and pepper to taste

Fresh cilantro for garnish

Lime wedges for serving

Instructions
 

Roast the Garlic: Preheat the oven to 400°F (200°C). Cut the top off the head of garlic to expose the cloves. Drizzle with olive oil, wrap in foil, and roast in the oven for 30-35 minutes until soft.

    Sauté the Chicken: In a large pot, heat 1 tablespoon of olive oil over medium heat. Add the chopped onion and diced red bell pepper and sauté for about 5 minutes until they're softened.

      Cook the Chicken: Add the chicken breasts to the pot and cook for about 5 minutes on each side until they are lightly browned.

        Add Seasonings: Stir in the ground cumin, chili powder, smoked paprika, salt, and pepper. Cook for an additional minute to let the spices bloom.

          Combine Ingredients: Once the garlic is roasted, squeeze the cloves out of their skins into the pot. Add the white beans, diced green chilies, chicken broth, and corn. Bring the mixture to a gentle simmer.

            Simmer: Cook for 20-25 minutes, allowing the chicken to poach thoroughly. After cooking, remove the chicken breasts, shred them with two forks, and return the shredded chicken back to the pot.

              Make it Creamy: Stir in the heavy cream and let the chili simmer for another 5 minutes to thicken slightly. Taste and adjust seasoning if necessary.

                Serve: Ladle the chili into bowls, garnish with fresh cilantro, and serve with lime wedges on the side.

                  Prep Time: 15 minutes | Total Time: 1 hour | Servings: 6

                    WANT TO SAVE THIS RECIPE?