No-Bake Chocolate Hazelnut Cheesecake Cups Delight

WANT TO SAVE THIS RECIPE?

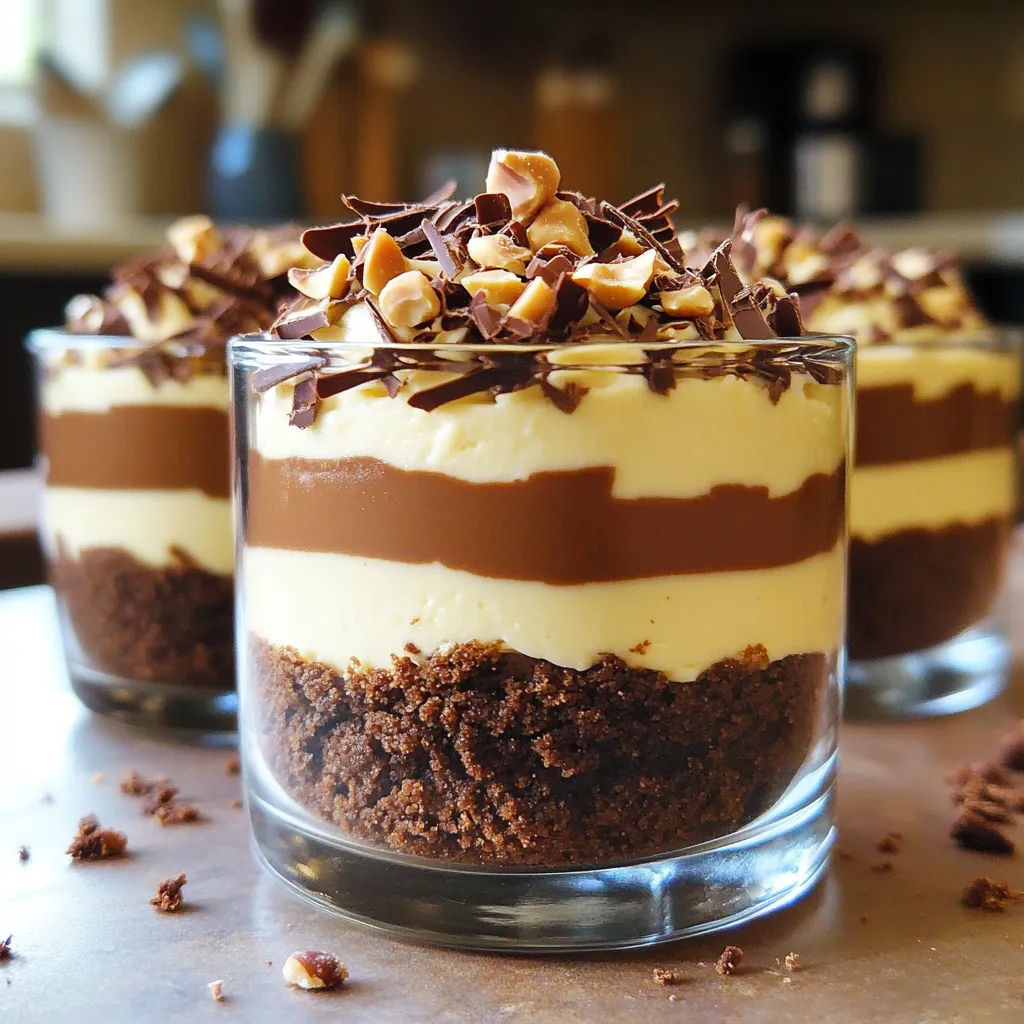
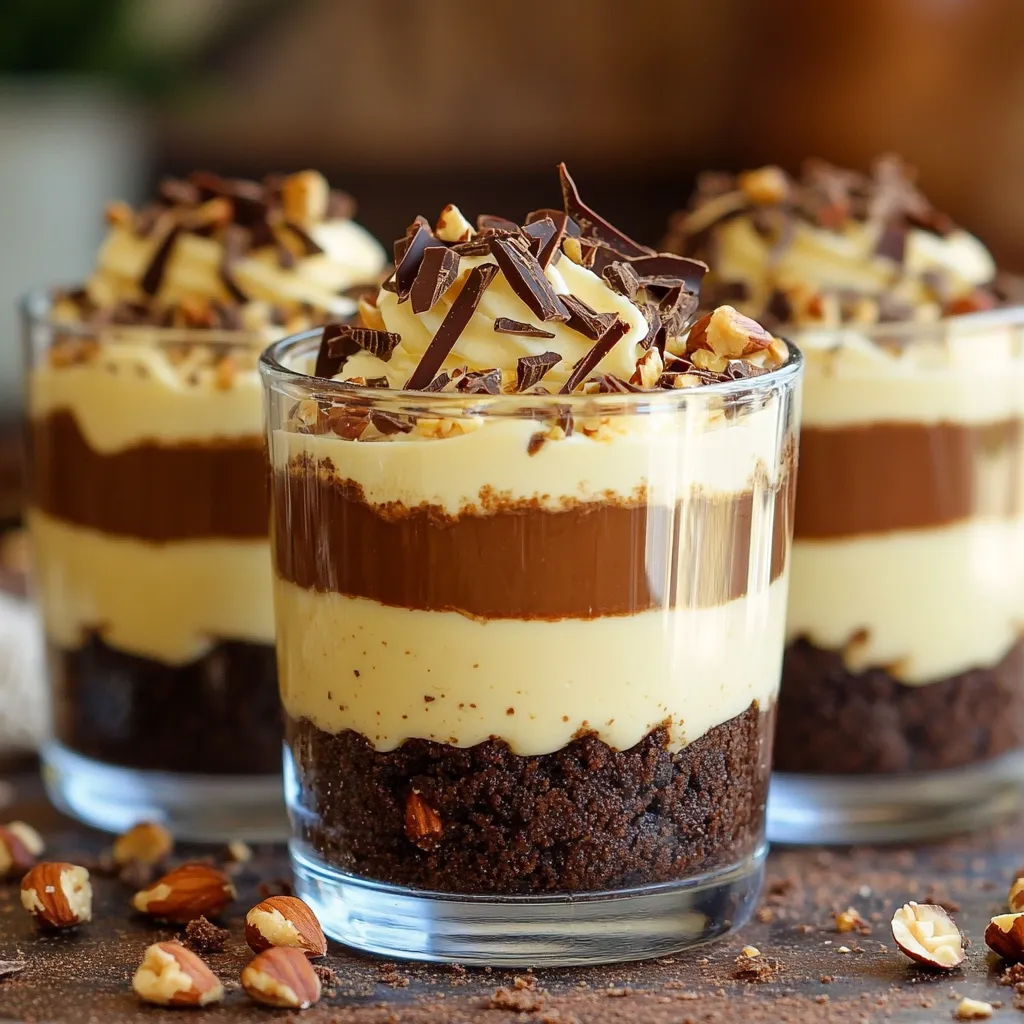
Imagine indulging in creamy, rich cheesecake without turning on the oven! My No-Bake Chocolate Hazelnut Cheesecake Cups offer a quick and easy way to satisfy your sweet tooth. Made with simple ingredients like chocolate cookie crumbs and hazelnut spread, these treats are perfect for any occasion. Let’s dive into the steps and tips to whip up this delightful dessert that will impress your friends and family. Ready to get started?

To create the No-Bake Chocolate Hazelnut Cheesecake Cups, you will need the following items: - 1 cup chocolate cookie crumbs - 4 tablespoons unsalted butter, melted - 8 oz cream cheese, softened - 1/2 cup powdered sugar - 1/2 cup hazelnut spread (like Nutella) - 1 teaspoon vanilla extract - 1 cup heavy cream - 1/2 cup crushed hazelnuts (for garnish) - Extra chocolate shavings (optional, for garnish) These ingredients blend to form a rich, creamy treat. The chocolate cookie crumbs provide a crunchy base. The melted butter helps bind them together. Cream cheese is the star of the filling, giving it a smooth texture. Powdered sugar adds sweetness without grittiness. Hazelnut spread brings a nutty flavor that pairs perfectly with chocolate. Vanilla extract enhances all the tastes. Heavy cream makes the filling light and airy. Finally, crushed hazelnuts and chocolate shavings add a delightful touch on top. Keep these ingredients handy, and get ready to enjoy a delicious dessert! - First, combine 1 cup of chocolate cookie crumbs with 4 tablespoons of melted butter in a bowl. - Mix well until the crumbs are fully coated and look like wet sand. - Next, divide this mixture evenly among your serving cups. - Press the crust firmly into the bottom of each cup. - Once done, place the cups in the fridge to set while you prepare the filling. - In another bowl, beat 8 ounces of softened cream cheese with an electric mixer until it is creamy. - Now, add 1/2 cup of powdered sugar, 1/2 cup of hazelnut spread, and 1 teaspoon of vanilla extract. - Mix until everything is fluffy and well combined. - In a separate bowl, whip 1 cup of heavy cream until soft peaks form. - Gently fold the whipped cream into the hazelnut cream cheese mixture. Be careful not to deflate the whipped cream. - Spoon the cheesecake filling over the chilled cookie crusts in each cup. - Use a spatula to smooth the tops. - Finally, chill the cups in the fridge for at least 2-3 hours. This allows the cheesecakes to set nicely. - Before serving, garnish with crushed hazelnuts and chocolate shavings if you want to impress! Using softened cream cheese is key. It mixes well and gives a smooth finish. If your cream cheese is cold, it clumps up. To soften it, let it sit outside for 30 minutes. You can also microwave it for 10 seconds. When you fold in whipped cream, do it gently. Use a spatula and scoop from the bottom. This keeps the air in the cream. If you mix too hard, the texture becomes flat. Aim for a light and fluffy filling. For a great look, add garnishes. Crushed hazelnuts give a nice crunch. Extra chocolate shavings add a rich touch. You can also drizzle some hazelnut spread on top for flair. Pair these cheesecake cups with coffee or tea. The flavors work well together. You can serve them at parties or for a sweet treat at home. Enjoy the creamy goodness! {{image_2}} You can change the flavor of your cheesecake cups easily. Try using different types of cookie crumbs. For example, ginger snaps or vanilla wafers add a unique twist. Each crumb type gives a new taste and texture. You can also swap out the hazelnut spread. Almond spread works well for a nutty flavor. Use peanut butter for a classic twist. Each choice creates a new dessert experience while keeping the same creamy texture. If you want vegan options, there are great alternatives. Use vegan cream cheese and coconut whip instead of regular products. Both options keep the dessert rich and tasty. For gluten-free needs, pick gluten-free cookies for the crust. There are many brands available that taste just as good. This way, everyone can enjoy these cheesecake cups without worry! Store your cheesecake cups in the fridge. Use an airtight container to keep them fresh. Place a piece of plastic wrap over the cups if you don’t have a container. This helps avoid any food odors. You can also freeze these cups. Just make sure to wrap them well. Use plastic wrap, then foil to protect them from freezer burn. These cheesecake cups stay fresh for about 3 days in the fridge. If you freeze them, they last up to a month. However, the texture might change after thawing. Look for signs of spoilage. If the cups smell off or have a watery layer on top, it’s time to toss them. Always trust your senses before enjoying. Yes, you can make these cheesecake cups in advance. They store well in the fridge. I suggest keeping them covered with plastic wrap or in an airtight container. You can prepare them up to two days ahead of time. Just make sure to add the garnishes before serving for the best look. To check if the cheesecake is set, gently touch the top. It should feel firm but not hard. If it jiggles too much, it needs more time. Chill the cups for at least 2-3 hours. For best results, let them sit overnight in the fridge. This gives the flavors time to blend and the texture to firm up. Yes, you can use other spreads if you like. Almond butter or sunflower seed butter works well. Each spread changes the flavor a bit. Almond butter gives a nutty twist, while sunflower seed butter adds a unique taste. Just remember, these substitutes will change the final flavor of your cheesecake cups. This blog post gave you a clear guide for making delicious cheesecake cups. You learned about the key ingredients, step-by-step instructions, and how to ensure the right texture. We explored serving ideas and variations for different tastes, too. In the end, these cheesecake cups are simple to make and perfect for any occasion. Enjoy trying out your own twists on this tasty treat. Happy baking!

Ingredients

To create the No-Bake Chocolate Hazelnut Cheesecake Cups, you will need the following items:

– 1 cup chocolate cookie crumbs

– 4 tablespoons unsalted butter, melted

– 8 oz cream cheese, softened

– 1/2 cup powdered sugar

– 1/2 cup hazelnut spread (like Nutella)

– 1 teaspoon vanilla extract

– 1 cup heavy cream

– 1/2 cup crushed hazelnuts (for garnish)

– Extra chocolate shavings (optional, for garnish)

These ingredients blend to form a rich, creamy treat. The chocolate cookie crumbs provide a crunchy base. The melted butter helps bind them together. Cream cheese is the star of the filling, giving it a smooth texture. Powdered sugar adds sweetness without grittiness. Hazelnut spread brings a nutty flavor that pairs perfectly with chocolate. Vanilla extract enhances all the tastes. Heavy cream makes the filling light and airy. Finally, crushed hazelnuts and chocolate shavings add a delightful touch on top.

Keep these ingredients handy, and get ready to enjoy a delicious dessert!

Step-by-Step Instructions

Preparing the Crust

– First, combine 1 cup of chocolate cookie crumbs with 4 tablespoons of melted butter in a bowl.

– Mix well until the crumbs are fully coated and look like wet sand.

– Next, divide this mixture evenly among your serving cups.

– Press the crust firmly into the bottom of each cup.

– Once done, place the cups in the fridge to set while you prepare the filling.

Making the Filling

– In another bowl, beat 8 ounces of softened cream cheese with an electric mixer until it is creamy.

– Now, add 1/2 cup of powdered sugar, 1/2 cup of hazelnut spread, and 1 teaspoon of vanilla extract.

– Mix until everything is fluffy and well combined.

– In a separate bowl, whip 1 cup of heavy cream until soft peaks form.

– Gently fold the whipped cream into the hazelnut cream cheese mixture. Be careful not to deflate the whipped cream.

Assembling the Cheesecake Cups

– Spoon the cheesecake filling over the chilled cookie crusts in each cup.

– Use a spatula to smooth the tops.

– Finally, chill the cups in the fridge for at least 2-3 hours. This allows the cheesecakes to set nicely.

– Before serving, garnish with crushed hazelnuts and chocolate shavings if you want to impress!

Tips & Tricks

Ensuring Perfect Texture

Using softened cream cheese is key. It mixes well and gives a smooth finish. If your cream cheese is cold, it clumps up. To soften it, let it sit outside for 30 minutes. You can also microwave it for 10 seconds.

When you fold in whipped cream, do it gently. Use a spatula and scoop from the bottom. This keeps the air in the cream. If you mix too hard, the texture becomes flat. Aim for a light and fluffy filling.

Serving Suggestions

For a great look, add garnishes. Crushed hazelnuts give a nice crunch. Extra chocolate shavings add a rich touch. You can also drizzle some hazelnut spread on top for flair.

Pair these cheesecake cups with coffee or tea. The flavors work well together. You can serve them at parties or for a sweet treat at home. Enjoy the creamy goodness!

Variations

Flavor Modifications

You can change the flavor of your cheesecake cups easily. Try using different types of cookie crumbs. For example, ginger snaps or vanilla wafers add a unique twist. Each crumb type gives a new taste and texture.

You can also swap out the hazelnut spread. Almond spread works well for a nutty flavor. Use peanut butter for a classic twist. Each choice creates a new dessert experience while keeping the same creamy texture.

Dietary Adjustments

If you want vegan options, there are great alternatives. Use vegan cream cheese and coconut whip instead of regular products. Both options keep the dessert rich and tasty.

For gluten-free needs, pick gluten-free cookies for the crust. There are many brands available that taste just as good. This way, everyone can enjoy these cheesecake cups without worry!

Storage Info

Best Practices for Storage

Store your cheesecake cups in the fridge. Use an airtight container to keep them fresh. Place a piece of plastic wrap over the cups if you don’t have a container. This helps avoid any food odors. You can also freeze these cups. Just make sure to wrap them well. Use plastic wrap, then foil to protect them from freezer burn.

Shelf Life

These cheesecake cups stay fresh for about 3 days in the fridge. If you freeze them, they last up to a month. However, the texture might change after thawing. Look for signs of spoilage. If the cups smell off or have a watery layer on top, it’s time to toss them. Always trust your senses before enjoying.

FAQs

Can I make the recipe ahead of time?

Yes, you can make these cheesecake cups in advance. They store well in the fridge. I suggest keeping them covered with plastic wrap or in an airtight container. You can prepare them up to two days ahead of time. Just make sure to add the garnishes before serving for the best look.

How do I know when the cheesecake is set?

To check if the cheesecake is set, gently touch the top. It should feel firm but not hard. If it jiggles too much, it needs more time. Chill the cups for at least 2-3 hours. For best results, let them sit overnight in the fridge. This gives the flavors time to blend and the texture to firm up.

Can I substitute the hazelnut spread?

Yes, you can use other spreads if you like. Almond butter or sunflower seed butter works well. Each spread changes the flavor a bit. Almond butter gives a nutty twist, while sunflower seed butter adds a unique taste. Just remember, these substitutes will change the final flavor of your cheesecake cups.

This blog post gave you a clear guide for making delicious cheesecake cups. You learned about the key ingredients, step-by-step instructions, and how to ensure the right texture. We explored serving ideas and variations for different tastes, too.

In the end, these cheesecake cups are simple to make and perfect for any occasion. Enjoy trying out your own twists on this tasty treat. Happy baking!

To create the No-Bake Chocolate Hazelnut Cheesecake Cups, you will need the following items: - 1 cup chocolate cookie crumbs - 4 tablespoons unsalted butter, melted - 8 oz cream cheese, softened - 1/2 cup powdered sugar - 1/2 cup hazelnut spread (like Nutella) - 1 teaspoon vanilla extract - 1 cup heavy cream - 1/2 cup crushed hazelnuts (for garnish) - Extra chocolate shavings (optional, for garnish) These ingredients blend to form a rich, creamy treat. The chocolate cookie crumbs provide a crunchy base. The melted butter helps bind them together. Cream cheese is the star of the filling, giving it a smooth texture. Powdered sugar adds sweetness without grittiness. Hazelnut spread brings a nutty flavor that pairs perfectly with chocolate. Vanilla extract enhances all the tastes. Heavy cream makes the filling light and airy. Finally, crushed hazelnuts and chocolate shavings add a delightful touch on top. Keep these ingredients handy, and get ready to enjoy a delicious dessert! - First, combine 1 cup of chocolate cookie crumbs with 4 tablespoons of melted butter in a bowl. - Mix well until the crumbs are fully coated and look like wet sand. - Next, divide this mixture evenly among your serving cups. - Press the crust firmly into the bottom of each cup. - Once done, place the cups in the fridge to set while you prepare the filling. - In another bowl, beat 8 ounces of softened cream cheese with an electric mixer until it is creamy. - Now, add 1/2 cup of powdered sugar, 1/2 cup of hazelnut spread, and 1 teaspoon of vanilla extract. - Mix until everything is fluffy and well combined. - In a separate bowl, whip 1 cup of heavy cream until soft peaks form. - Gently fold the whipped cream into the hazelnut cream cheese mixture. Be careful not to deflate the whipped cream. - Spoon the cheesecake filling over the chilled cookie crusts in each cup. - Use a spatula to smooth the tops. - Finally, chill the cups in the fridge for at least 2-3 hours. This allows the cheesecakes to set nicely. - Before serving, garnish with crushed hazelnuts and chocolate shavings if you want to impress! Using softened cream cheese is key. It mixes well and gives a smooth finish. If your cream cheese is cold, it clumps up. To soften it, let it sit outside for 30 minutes. You can also microwave it for 10 seconds. When you fold in whipped cream, do it gently. Use a spatula and scoop from the bottom. This keeps the air in the cream. If you mix too hard, the texture becomes flat. Aim for a light and fluffy filling. For a great look, add garnishes. Crushed hazelnuts give a nice crunch. Extra chocolate shavings add a rich touch. You can also drizzle some hazelnut spread on top for flair. Pair these cheesecake cups with coffee or tea. The flavors work well together. You can serve them at parties or for a sweet treat at home. Enjoy the creamy goodness! {{image_2}} You can change the flavor of your cheesecake cups easily. Try using different types of cookie crumbs. For example, ginger snaps or vanilla wafers add a unique twist. Each crumb type gives a new taste and texture. You can also swap out the hazelnut spread. Almond spread works well for a nutty flavor. Use peanut butter for a classic twist. Each choice creates a new dessert experience while keeping the same creamy texture. If you want vegan options, there are great alternatives. Use vegan cream cheese and coconut whip instead of regular products. Both options keep the dessert rich and tasty. For gluten-free needs, pick gluten-free cookies for the crust. There are many brands available that taste just as good. This way, everyone can enjoy these cheesecake cups without worry! Store your cheesecake cups in the fridge. Use an airtight container to keep them fresh. Place a piece of plastic wrap over the cups if you don’t have a container. This helps avoid any food odors. You can also freeze these cups. Just make sure to wrap them well. Use plastic wrap, then foil to protect them from freezer burn. These cheesecake cups stay fresh for about 3 days in the fridge. If you freeze them, they last up to a month. However, the texture might change after thawing. Look for signs of spoilage. If the cups smell off or have a watery layer on top, it’s time to toss them. Always trust your senses before enjoying. Yes, you can make these cheesecake cups in advance. They store well in the fridge. I suggest keeping them covered with plastic wrap or in an airtight container. You can prepare them up to two days ahead of time. Just make sure to add the garnishes before serving for the best look. To check if the cheesecake is set, gently touch the top. It should feel firm but not hard. If it jiggles too much, it needs more time. Chill the cups for at least 2-3 hours. For best results, let them sit overnight in the fridge. This gives the flavors time to blend and the texture to firm up. Yes, you can use other spreads if you like. Almond butter or sunflower seed butter works well. Each spread changes the flavor a bit. Almond butter gives a nutty twist, while sunflower seed butter adds a unique taste. Just remember, these substitutes will change the final flavor of your cheesecake cups. This blog post gave you a clear guide for making delicious cheesecake cups. You learned about the key ingredients, step-by-step instructions, and how to ensure the right texture. We explored serving ideas and variations for different tastes, too. In the end, these cheesecake cups are simple to make and perfect for any occasion. Enjoy trying out your own twists on this tasty treat. Happy baking!

No-Bake Chocolate Hazelnut Cheesecake Cups

Indulge in a dreamy dessert with these No-Bake Chocolate Hazelnut Cheesecake Cups! This easy recipe combines a crunchy chocolate crust with a creamy hazelnut filling for a decadent treat. Perfect for any occasion or just a sweet craving, these cups are quick to prepare and require no baking! Click through to discover the full recipe and surprise your family and friends with this delightful dessert.

Ingredients
  

1 cup chocolate cookie crumbs

4 tablespoons unsalted butter, melted

8 oz cream cheese, softened

1/2 cup powdered sugar

1/2 cup hazelnut spread (like Nutella)

1 teaspoon vanilla extract

1 cup heavy cream

1/2 cup crushed hazelnuts (for garnish)

Extra chocolate shavings (optional, for garnish)

Instructions
 

In a mixing bowl, combine the chocolate cookie crumbs and melted butter. Mix until the crumbs are fully coated and the mixture resembles wet sand.

    Divide the cookie mixture evenly among serving cups, pressing it down firmly to create a crust layer at the bottom of each cup. Place them in the refrigerator to set while you prepare the filling.

      In another bowl, beat the softened cream cheese with an electric mixer until smooth and creamy.

        Add the powdered sugar, hazelnut spread, and vanilla extract to the cream cheese. Mix until all ingredients are well combined and the mixture is fluffy.

          In a separate bowl, whip the heavy cream until soft peaks form.

            Gently fold the whipped cream into the hazelnut cream cheese mixture until fully incorporated, being careful not to deflate the whipped cream.

              Spoon the cheesecake filling over the chilled cookie crusts in each cup, smoothing the tops with a spatula.

                Chill the cups in the refrigerator for at least 2-3 hours, or until the cheesecakes have set.

                  Before serving, garnish each cheesecake cup with crushed hazelnuts and chocolate shavings, if desired.

                    Prep Time: 20 minutes | Total Time: 3 hours (including chilling) | Servings: 6

                      WANT TO SAVE THIS RECIPE?