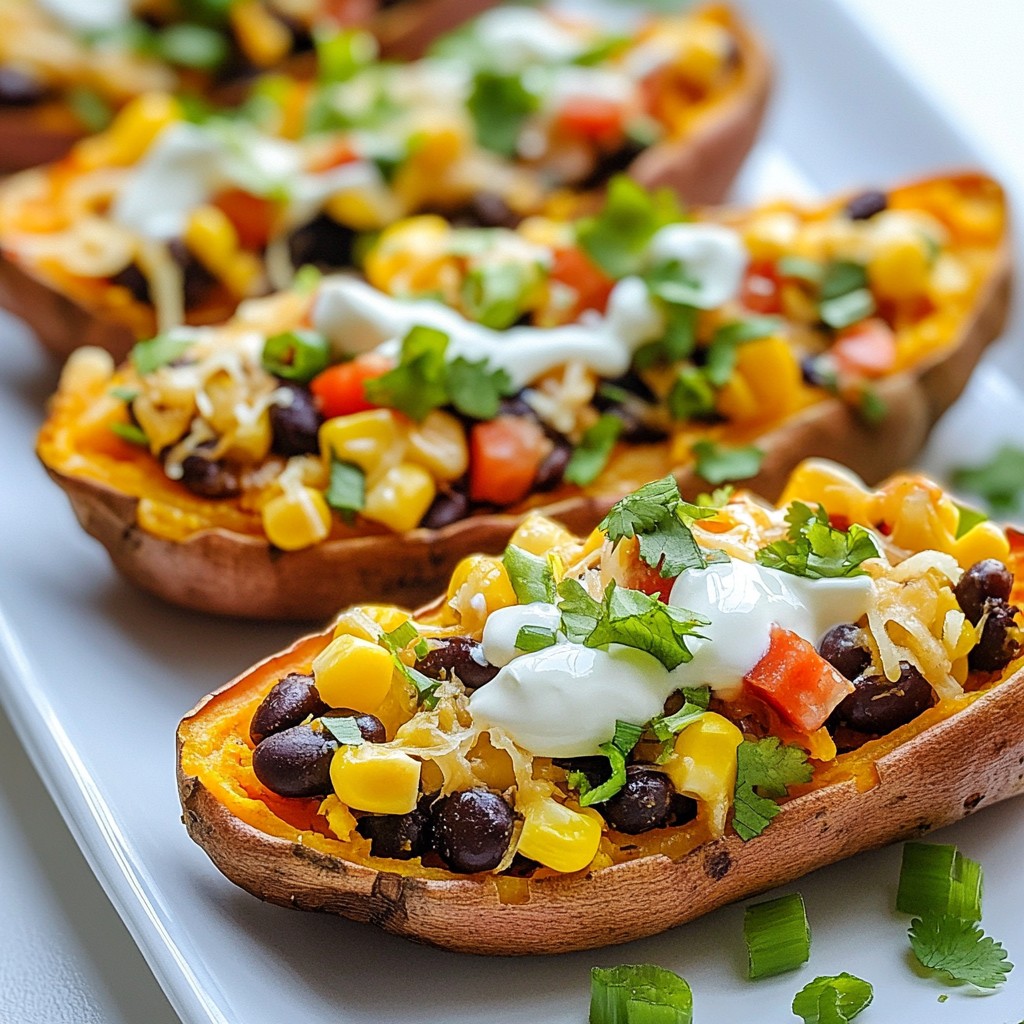
Craving a tasty snack that’s both filling and fun? You’ll love making Loaded Southwest Sweet Potato Skins. Packed with flavor and easy to prepare, these skins make for a great appetizer or healthy treat. In this article, I’ll guide you through the ingredients, cooking steps, and some creative twists. Let’s dive into a tasty way to enjoy sweet potatoes your friends and family will rave about!
Why I Love This Recipe
- Healthy and Delicious: These loaded sweet potato skins are a nutritious twist on a classic appetizer, packed with fiber and vitamins.
- Versatile Filling: The combination of black beans, corn, and spices creates a robust filling that can be adjusted to personal taste.
- Easy to Make: This recipe requires simple steps and minimal prep work, making it perfect for a quick weeknight dinner or a fun party dish.
- Great for Sharing: These sweet potato skins are perfect for gatherings, allowing guests to enjoy a tasty, shareable bite.
Ingredients
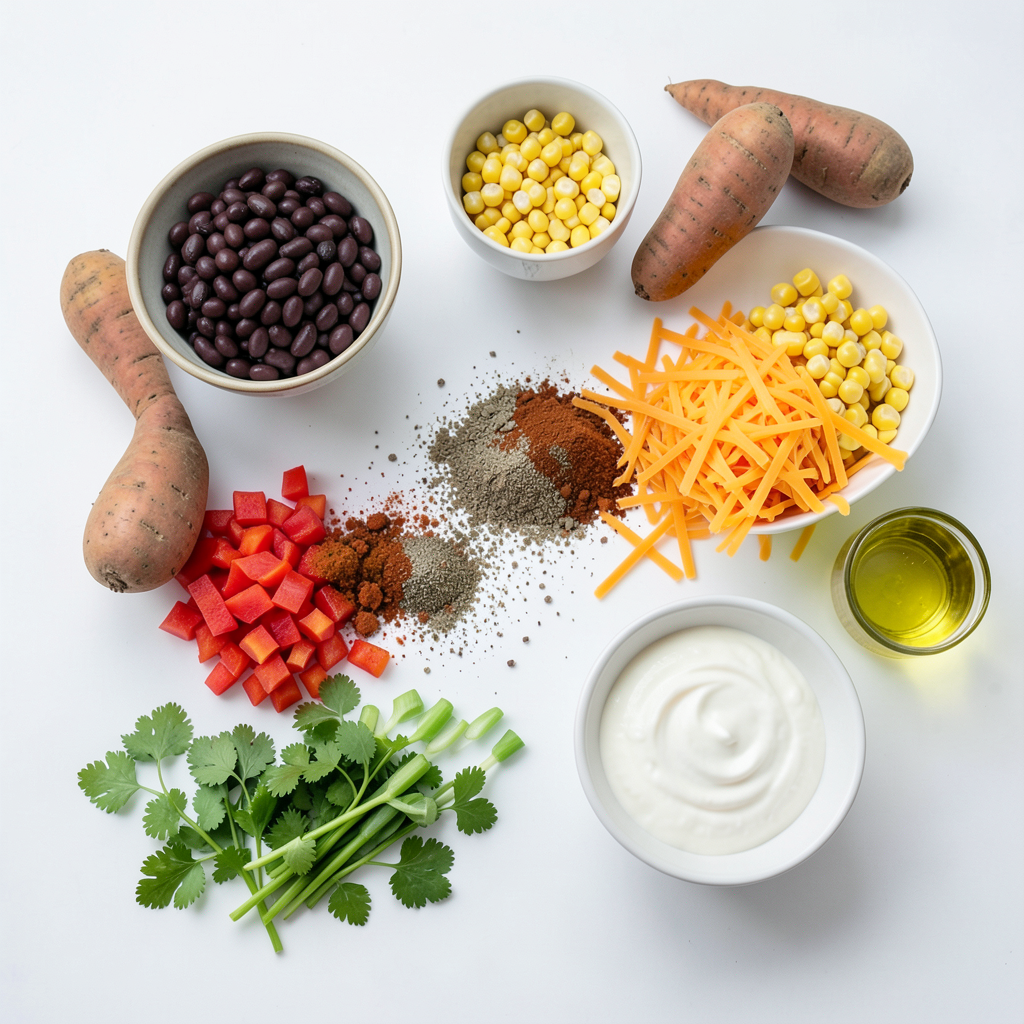
List of Ingredients
- 4 medium sweet potatoes
- 1 cup black beans, rinsed and drained
- 1 cup corn kernels (fresh or frozen)
- 1 red bell pepper, diced
- 1 teaspoon cumin
- 1 teaspoon smoked paprika
- ½ teaspoon chili powder
- 1 cup shredded cheddar cheese
- ½ cup sour cream (or Greek yogurt)
- 2 green onions, sliced
- Fresh cilantro for garnish
- Olive oil
- Salt and pepper to taste
Ingredient Notes and Substitutions
Sweet potatoes are the star here. They bring natural sweetness and creaminess. If you cannot find sweet potatoes, regular potatoes work too, but they will taste different. Black beans add protein and fiber. You can swap them with pinto beans if you like. Corn adds a nice crunch. Fresh corn is best, but frozen works well. Red bell pepper adds color and flavor. If you prefer heat, use jalapeños instead. For cheese, cheddar is classic, but feel free to try pepper jack for a kick. Sour cream is creamy and tart, but Greek yogurt is a great healthy swap.
Seasoning Importance
Seasonings make this dish pop. Cumin gives warmth and earthiness. Smoked paprika adds a rich, smoky flavor. Chili powder brings a touch of heat. Each spice builds layers of taste. They turn simple ingredients into a bold snack. Adjust the spices to fit your taste. More chili powder for heat or less for a milder flavor can make a big difference. Seasoning is key to making these loaded sweet potato skins truly delicious.
Step-by-Step Instructions
Preparation Steps
Start by washing the sweet potatoes well. Use a fork to prick each one several times. This helps them cook evenly. Next, rub the potatoes with olive oil. Sprinkle salt on them for flavor. Preheat your oven to 400°F (200°C).
Roasting Sweet Potatoes
Place the sweet potatoes on a baking sheet. Roast them in the oven for about 45 minutes. You will know they are done when a fork goes in easily. Once cooked, take them out and let them cool for a bit. Cut each potato in half lengthwise. Carefully scoop out some flesh, leaving about ¼ inch of potato on the skin.
Making the Filling
In a mixing bowl, combine the scooped sweet potato flesh, black beans, and corn. Add the diced red bell pepper, cumin, smoked paprika, and chili powder. Mix this well. Then, add half of the cheddar cheese and season with salt and pepper. Stuff the mixture into the sweet potato skins. Top each skin with the remaining cheddar cheese. Put the stuffed skins back in the oven and bake for another 15-20 minutes. The cheese should be melted and bubbly. After baking, drizzle sour cream on top and sprinkle with sliced green onions and fresh cilantro. Enjoy your tasty snack!
Tips & Tricks
How to Choose the Right Sweet Potatoes
Choose sweet potatoes that are firm and smooth. Look for ones that are free of bruises. Medium-sized sweet potatoes work best for this recipe. The richer the color, the sweeter the taste.
Cooking Tips for Perfectly Stuffed Skins
Roast the sweet potatoes until they are soft. This takes about 45 minutes at 400°F. Let them cool before cutting them in half. Be sure to leave enough flesh in the skins to hold the filling. Use a spoon to scoop out the flesh gently. Mix the filling well to ensure every bite is tasty.
Serving Suggestions and Pairing Ideas
Serve the skins on a colorful platter. Add extra sour cream for dipping. Sprinkle fresh cilantro on top for a bright look. Pair them with a light salad or some guacamole for a fun meal. These skins also go great with a cold drink. Enjoy your flavorful snack!
Pro Tips
- Choose the Right Sweet Potatoes: Look for firm, smooth sweet potatoes without any blemishes or soft spots for the best flavor and texture.
- Customize Your Filling: Feel free to add other ingredients like diced jalapeños or avocado for extra flavor and texture.
- Make Ahead: You can prepare the filling in advance and store it in the refrigerator. Just assemble and bake when ready to serve.
- Garnish Wisely: Fresh toppings like avocado, lime wedges, or hot sauce can elevate the dish and add a burst of flavor.
Variations
Vegetarian Alternatives
You can easily make Loaded Southwest Sweet Potato Skins vegetarian. Swap the black beans for lentils. They add protein and fiber, just like beans. You can also use quinoa for a nutty texture. Add more veggies, like zucchini or spinach, to boost flavor and nutrition.
Additional Toppings Options
Toppings can change the game for these sweet potato skins. Try diced avocados or guacamole for creaminess. Salsa adds a fresh kick, while jalapeños give heat. You could even sprinkle on some crushed tortilla chips for crunch. Each topping brings a new twist to the dish.
Recipe Adaptations for Dietary Needs
You can adapt this recipe for different diets easily. For a gluten-free option, ensure all toppings and ingredients are gluten-free. For dairy-free diets, use vegan cheese or skip the cheese altogether. If you're low-carb, use fewer sweet potatoes and add more filling. You can always adjust seasonings to match your taste.
Storage Info
Proper Storage Techniques
To keep your Loaded Southwest Sweet Potato Skins fresh, store them in an airtight container. Let them cool completely before sealing. Place parchment paper between layers if stacking. This step prevents sticking and keeps the skins nice. Store them in the fridge for up to three days.
Reheating Instructions
To reheat, preheat your oven to 350°F (175°C). Place the sweet potato skins on a baking sheet. Cover them with foil to keep them moist. Heat for about 10-15 minutes, or until warm. You can also use a microwave, but the skins may get soft. Heat for 1-2 minutes, checking often.
Freezing Guidelines
You can freeze these sweet potato skins for longer storage. First, prepare the skins but do not bake them. Once stuffed, wrap each skin tightly in plastic wrap. Then, place them in a freezer bag or container. They can stay in the freezer for up to three months. When ready to eat, thaw in the fridge overnight and bake as directed.
FAQs
What can I substitute for cheddar cheese?
You can use mozzarella or Monterey Jack cheese. Both melt well and taste great. You might also try vegan cheese for a dairy-free option. This choice offers a nice flavor without using dairy.
Can I make Loaded Southwest Sweet Potato Skins ahead of time?
Yes, you can prepare the filling a day in advance. Store it in an airtight container in the fridge. You can also bake the sweet potatoes ahead. Just keep them in the fridge after cooking. When you're ready to eat, stuff the skins and bake until warm.
How do I make this recipe spicier?
To add heat, increase the chili powder in the filling. You can also add diced jalapeños or hot sauce. Another option is to serve them with a spicy dip. These additions will give your sweet potato skins a nice kick!
In this post, we explored how to make loaded southwest sweet potato skins. We covered key ingredients, their substitutes, and the importance of seasoning. The step-by-step guide helped you prepare, roast, and make the filling with ease. We shared tips for choosing sweet potatoes and perfect cooking techniques. Finally, we discussed variations, storage methods, and answered common questions.
Try these sweet potato skins for a fun meal or snack. Enjoy the flavors and feel free to get creative with your own toppings!