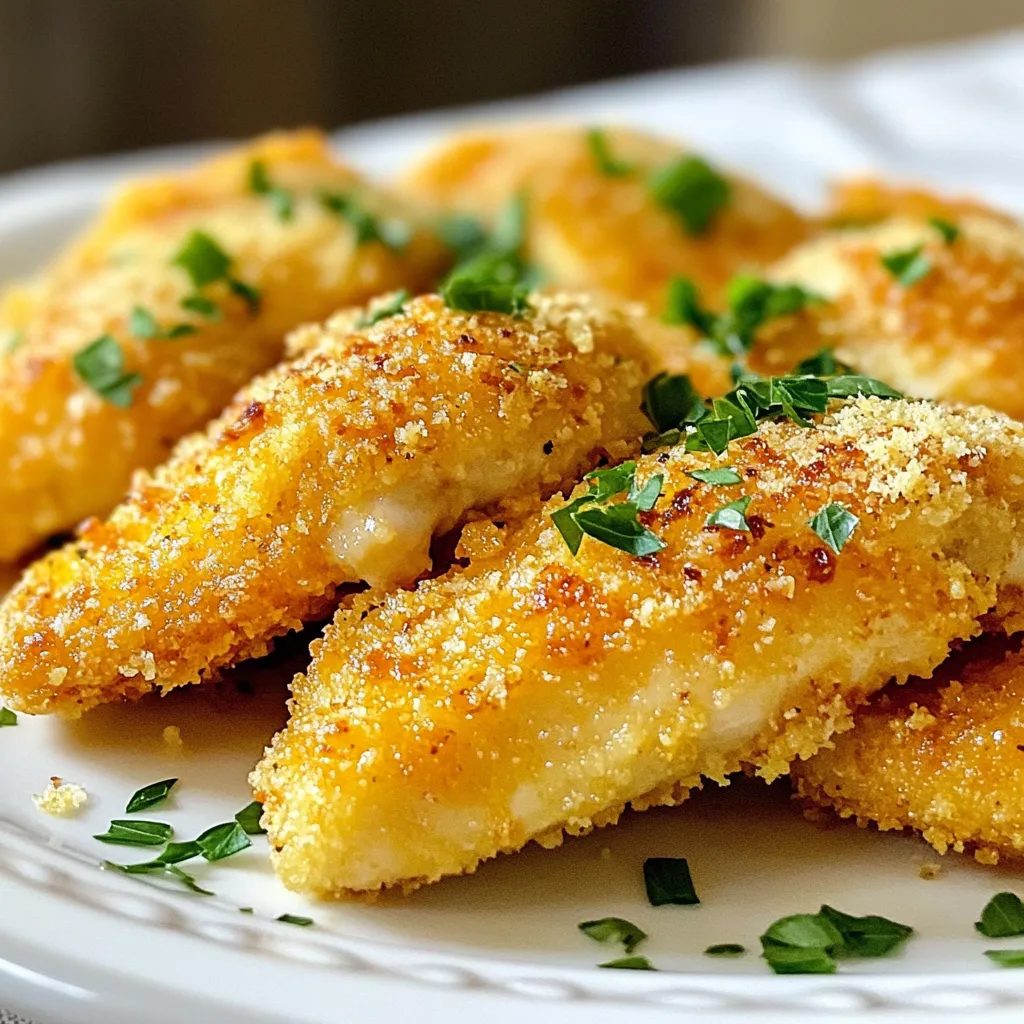
If you’re craving something crispy and packed with flavor, Garlic Parmesan Chicken Tenders are the answer! These delicious bites are easy to make at home and perfect for any meal. In this guide, I’ll show you step-by-step how to create the ultimate chicken tenders that are golden, crunchy, and smothered in garlicky goodness. Let’s dive into this tasty recipe that will have everyone asking for more!
Why I Love This Recipe
- Easy to Prepare: This recipe is simple enough for beginners, requiring minimal cooking skills while still delivering amazing flavor.
- Crispy and Flavorful: The combination of panko breadcrumbs and Parmesan creates a delightful crunch, complemented by the savory taste of garlic.
- Versatile Dish: These chicken tenders can be served as an appetizer, a main dish, or even in wraps and salads for a tasty twist.
- Quick Cooking Time: With a prep time of just 15 minutes, you can have a delicious meal on the table in 30 minutes total, perfect for busy weeknights.
Ingredients
List of Ingredients
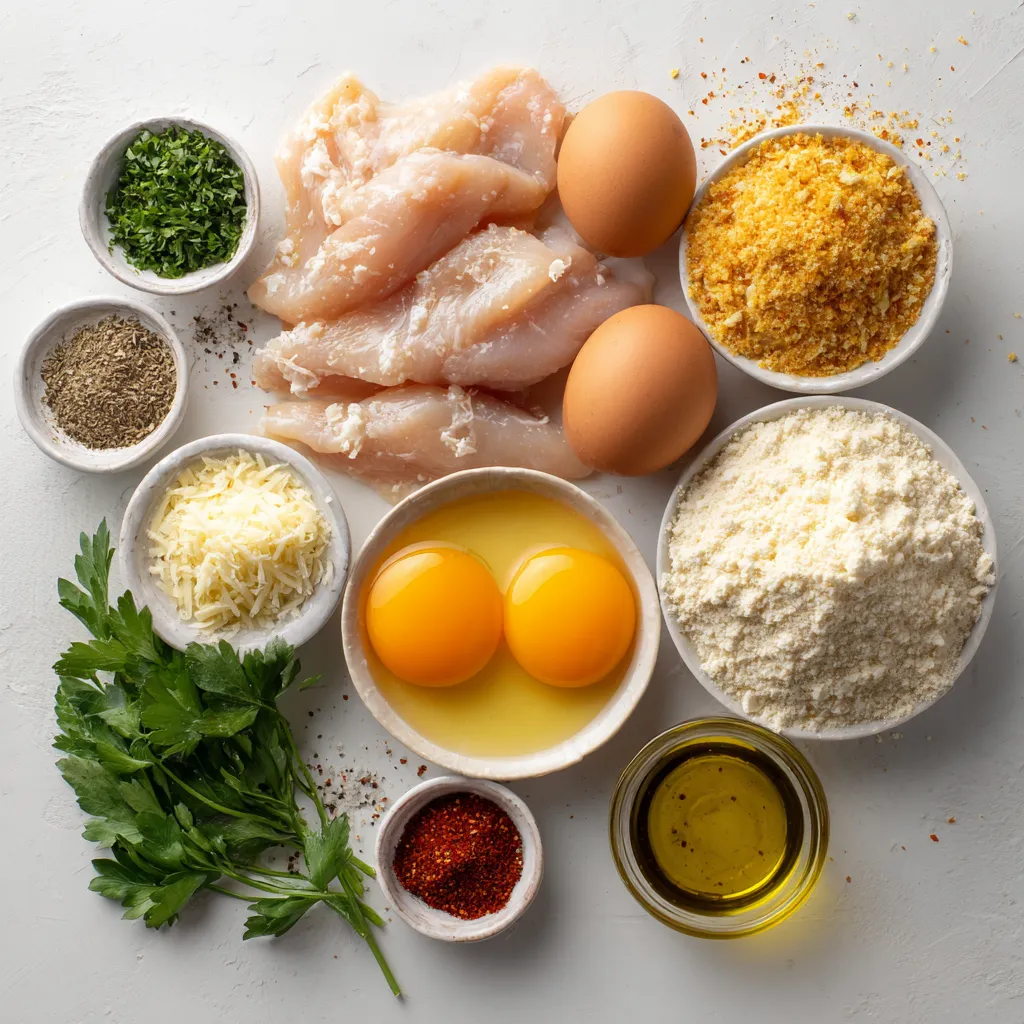
To make Garlic Parmesan Chicken Tenders, gather these ingredients:
– 1 pound chicken tenders
– 1 cup all-purpose flour
– 2 large eggs
– 1 cup breadcrumbs (panko works best)
– 1 cup grated Parmesan cheese
– 4 cloves garlic, minced
– 1 teaspoon dried oregano
– 1 teaspoon paprika
– Salt and pepper to taste
– 1/4 cup fresh parsley, chopped (for garnish)
– 1/4 cup olive oil (for frying)
Ingredient Substitutions
You can swap ingredients based on what you have:
– For gluten-free, use gluten-free flour and breadcrumbs.
– Try other cheeses like mozzarella or cheddar if you prefer.
– If you don’t have fresh garlic, use garlic powder (1/2 teaspoon).
– Instead of parsley, use basil or cilantro for a different flavor.
Cooking Tools Needed
Having the right tools makes cooking easier:
– Three mixing bowls for the breading station.
– A large skillet for frying the chicken.
– Tongs for flipping the tenders.
– A paper towel-lined plate to drain excess oil.
– A whisk for beating the eggs.
These tools help you make crispy, tasty chicken tenders with ease. Enjoy the process!
Step-by-Step Instructions
Setting Up Your Breading Station
Start by gathering your bowls. You need three. In the first bowl, add one cup of all-purpose flour. This flour gives your tenders a nice base. In the second bowl, crack two large eggs. Whisk them until they blend well. In the last bowl, mix one cup of breadcrumbs with one cup of grated Parmesan cheese. Add four minced garlic cloves, one teaspoon of dried oregano, one teaspoon of paprika, and salt and pepper. This mix will give your chicken a yummy flavor.
Preparing the Chicken Tenders
Take one pound of chicken tenders and pat them dry with a paper towel. This helps the coating stick better. Lightly season the tenders with salt and pepper. Now, it’s time to coat them. First, dredge each tender in the flour. Shake off any extra flour. Next, dip it in the egg mix, making sure it’s fully coated. Finally, place it in the breadcrumb mixture. Press down gently to help the crumbs stick.
Cooking Instructions
Heat a large skillet over medium heat. Add one-fourth cup of olive oil. Wait until the oil is hot but not smoking. This step is key for crispy tenders. Add the breaded chicken tenders in batches. Be careful not to crowd the pan. Cook each side for about 4-5 minutes. You want them golden brown and cooked through. When done, use tongs to remove the tenders from the skillet. Place them on a paper towel-lined plate to soak up extra oil. Serve warm and garnish with chopped fresh parsley for a bright touch.
Tips & Tricks
Achieving Extra Crunch
To make your chicken tenders extra crunchy, use panko breadcrumbs. Panko is lighter and flakier than regular breadcrumbs. This gives you a crispier texture. You can also double coat your tenders. First, coat them in flour, dip in egg, and then coat again in breadcrumbs. This adds even more crunch!
Flavor Variations
You can change the flavor of your chicken tenders easily. Try adding lemon zest for a bright taste. A pinch of cayenne pepper gives a spicy kick. You can also mix in different herbs. Basil or thyme would work well. Experiment to find your favorite!
Cooking Safety Tips
Always wash your hands before and after handling raw chicken. Use separate cutting boards for raw meat and veggies. This prevents cross-contamination. Make sure the chicken reaches an internal temperature of 165°F. Use a meat thermometer to check this. Finally, let the oil heat before adding the chicken. This helps it cook evenly and keeps it crispy.
Pro Tips
- Tip Title: Use Panko Breadcrumbs: Panko breadcrumbs provide an extra crunch that regular breadcrumbs can’t match, making your chicken tenders even more delicious.
- Tip Title: Season Each Layer: Don’t skip seasoning the flour and egg mixture. This adds depth to the flavor of the chicken tenders at every layer of breading.
- Tip Title: Maintain Oil Temperature: Ensure the oil is hot enough before adding the chicken. If it’s not hot enough, the tenders will absorb too much oil and become greasy.
- Tip Title: Let Rest After Cooking: Allow the chicken tenders to rest on a paper towel-lined plate for a few minutes after frying. This helps to keep them crispy and reduces excess oil.
Variations
Baked Garlic Parmesan Chicken Tenders
You can make a healthier version of garlic Parmesan chicken tenders by baking them. To do this, follow the same steps for breading the chicken. Instead of frying, place the chicken on a baking sheet lined with parchment paper. Spray the tenders lightly with olive oil. Bake in a preheated oven at 400°F (200°C) for about 20 minutes. This method gives you crunchy tenders with less oil.
Spicy Garlic Parmesan Chicken Tenders
If you like heat, add spice to your chicken tenders. Mix in some cayenne pepper or crushed red pepper flakes with the breadcrumb mixture. You can also add a dash of hot sauce to the egg mixture. This variation brings a nice kick and pairs well with the garlic and Parmesan flavors.
Gluten-Free Version
For a gluten-free option, swap the all-purpose flour and breadcrumbs. Use a gluten-free flour blend instead. For the breadcrumbs, try crushed gluten-free crackers or panko. The taste will still be amazing, and you won’t miss the gluten at all. Just follow the same steps as before, and you’ll have delicious gluten-free garlic Parmesan chicken tenders.
Storage Info
How to Store Leftovers
To keep your garlic Parmesan chicken tenders fresh, place them in an airtight container. Let them cool to room temperature first. Then, store them in the fridge. They will stay good for about 3 to 4 days. Make sure to label the container with the date you made them. This way, you’ll know when to use them.
Reheating Instructions
When you’re ready to enjoy your leftovers, reheating them right is key. Preheat your oven to 375°F (190°C). Place the chicken tenders on a baking sheet. Bake them for about 10 to 15 minutes. This will make them crispy again. If you’re in a hurry, you can use the microwave. Heat them on a plate for about 1 to 2 minutes. But, keep in mind they might not be as crispy.
Freezing Chicken Tenders
If you want to save some chicken tenders for later, freezing is a great option. First, let them cool completely. Then, place them in a freezer-safe bag or container. Try to remove as much air as possible to prevent freezer burn. They can last in the freezer for about 2 to 3 months. When you’re ready to eat them, thaw them in the fridge overnight before reheating.
FAQs
How long do garlic Parmesan chicken tenders last?
Garlic Parmesan chicken tenders last about three to four days in the fridge. Make sure to store them in an airtight container. This keeps them fresh and tasty. If you want to keep them longer, freeze them. In the freezer, they can last for up to three months.
Can I use chicken breasts instead of tenders?
Yes, you can use chicken breasts instead of tenders. Just cut the breasts into strips that are about the same size as tenders. This helps them cook evenly. Keep in mind that cooking times may change. Thicker pieces may need a bit more time in the skillet.
What can I serve with garlic Parmesan chicken tenders?
You can serve garlic Parmesan chicken tenders with many sides. Some great options include:
– French fries
– Coleslaw
– Salad
– Garlic bread
– Mashed potatoes
These sides pair well and add variety to your meal. Enjoy mixing and matching to find your favorite combinations!
You learned how to make delicious garlic Parmesan chicken tenders. We discussed the key ingredients and substitutions you can use. I provided easy steps for cooking and offered tips for extra crunch and flavor. We explored variations like baked and spicy tenders. Finally, we covered how to store and reheat your leftovers.
Remember, with simple tweaks, you can make these tenders your own. Enjoy your cooking adventures and impress your family and friend