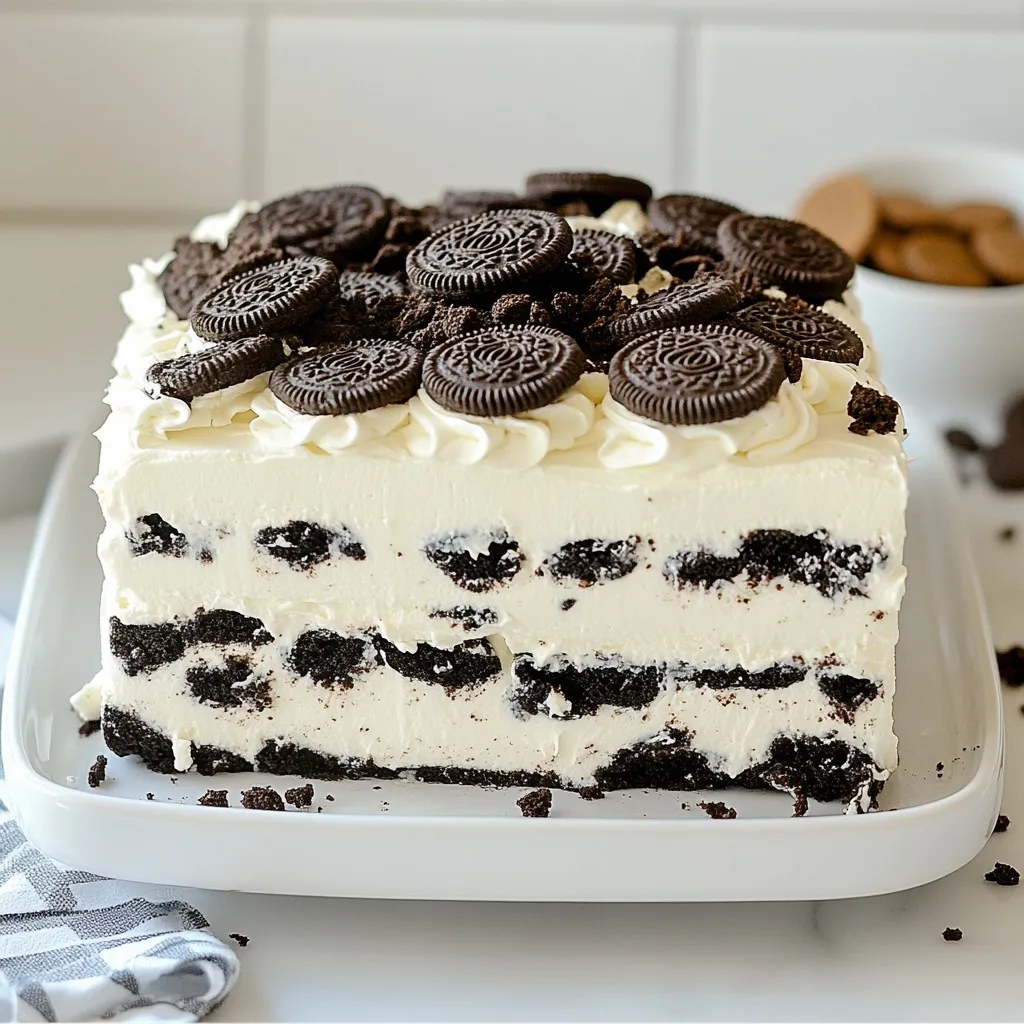
Looking for an easy, no-bake dessert that impresses? You’re in the right spot! This Cookies and Cream Icebox Cake is creamy, crunchy, and incredibly satisfying. With just a few simple ingredients and layer-by-layer fun, you’ll create a scrumptious treat that everyone loves. Perfect for hot days or any special occasion, this cake is a go-to for sweet lovers. Let’s dive into the sweet details that will make your dessert unforgettable!
Why I Love This Recipe
- Decadent Flavor: This icebox cake combines the rich flavors of cookies and cream, making it a delightful treat for any dessert lover.
- Easy Preparation: No baking is required! Simply layer the ingredients and let the fridge do the work.
- Perfect for Gatherings: With generous servings, this cake is ideal for parties or family gatherings, ensuring everyone gets a taste.
- Customizable: Feel free to add your favorite toppings or cookie variations to personalize this dessert to your liking.
Ingredients
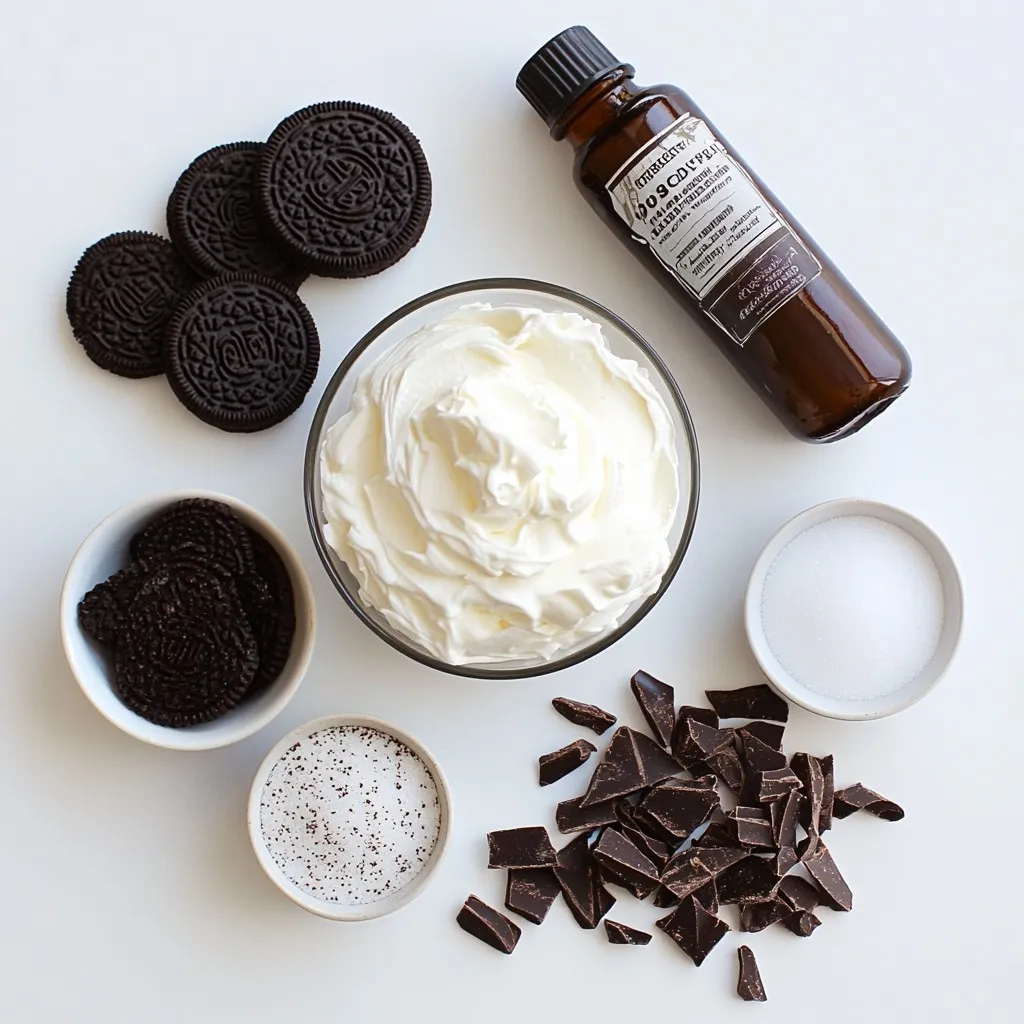
List of Ingredients
– 2 cups heavy whipping cream
– 1/2 cup powdered sugar
– 1 teaspoon vanilla extract
– 18-20 Oreo cookies, crushed (plus a few extra for garnish)
– 1 cup chocolate sandwich cookies, crushed
– 1/2 cup cream cheese, softened
– 1/4 cup granulated sugar
– 1/2 cup milk
– Optional: chocolate shavings or sprinkles for garnish
To make Cookies and Cream Icebox Cake, gather the ingredients first. You need heavy whipping cream, powdered sugar, and vanilla extract. The Oreo cookies and chocolate sandwich cookies add flavor and texture. Cream cheese gives a nice creaminess, while granulated sugar sweetens the mix. Milk helps blend the cream cheese smoothly.
Feel free to use chocolate shavings or sprinkles as optional garnishes. These can add a fun touch to your cake. The ingredients work well together. They create a rich and tasty dessert that is easy to make.
When you have all these items, you’re ready to start. This no-bake dessert is perfect for any gathering. It takes little time to prepare but needs some chilling. The longer it sits, the better the flavors meld. Enjoy making this sweet treat!
Step-by-Step Instructions
Preparing the Whipped Cream
First, grab a large mixing bowl. Pour in the 2 cups of heavy whipping cream. Beat it with an electric mixer on medium speed. Watch it thicken as you mix. After a minute, add 1/2 cup of powdered sugar and 1 teaspoon of vanilla extract. Keep beating until you see stiff peaks form. This might take a few minutes. Once done, set this whipped cream aside.
Combining the Cream Cheese Mixture
Next, take another bowl. Add 1/2 cup of softened cream cheese and 1/4 cup of granulated sugar. Mix it until it’s smooth and creamy. Now, slowly pour in 1/2 cup of milk. Keep mixing until no lumps are left. This mixture should be nice and creamy. After that, gently fold in one-third of the whipped cream. Mix until it’s well combined. Then, add the rest of the whipped cream, folding it in gently.
Assembling the Icebox Cake
Layering Cookies
Get a 9×13 inch baking dish. Start with the first layer of cookies. Take half of the crushed Oreo cookies and dip them in milk for a few seconds. Place them on the bottom of the dish in a single layer.
Spreading the Whipped Cream Mixture
Now, spread half of your whipped cream mixture over the cookies. Smooth it out evenly with a spatula. Repeat this process with another layer of dipped cookies. On top of that, spread the remaining whipped cream mixture. To finish, sprinkle the top with the crushed chocolate sandwich cookies and any extra Oreo pieces.
Cover your dish with plastic wrap. Refrigerate it for at least 4 hours, or better yet, overnight. This allows all the flavors to blend perfectly.
Tips & Tricks
Achieving Stiff Peaks in Whipped Cream
To get stiff peaks in your whipped cream, start with cold tools. Use a chilled bowl and beaters. Pour 2 cups of heavy whipping cream into the bowl. Beat it on medium speed. When it thickens, add 1/2 cup of powdered sugar and 1 teaspoon of vanilla extract. Keep beating until peaks form. The cream should hold its shape. If it looks runny, keep beating a bit longer.
Proper Layering Techniques
Layering is key for a great icebox cake. Begin with dipped cookies. Take 18-20 Oreo cookies and dip them in milk. Don’t soak them too long or they will fall apart. Place half of the cookies in your dish. Next, spread half of the whipped cream mixture evenly over the cookies. Repeat this with another layer of dipped cookies and the rest of the whipped cream. Finish with crushed chocolate sandwich cookies on top.
Creative Garnishing Ideas
– Using Chocolate Shavings
For a rich touch, add chocolate shavings on top. Use a vegetable peeler on a chocolate bar. Scatter the shavings over the cake before serving. This adds a nice look and taste.
– Incorporating Sprinkles
For fun and color, sprinkle some colorful sprinkles on top. They make the cake pop and look festive. You can use any sprinkles you like, from classic to themed.
Pro Tips
- Use Cold Ingredients: Make sure your heavy cream and cream cheese are chilled before starting. This helps achieve better whipping and a smoother texture.
- Don’t Overmix: When folding the whipped cream into the cream cheese mixture, be gentle to keep the mixture light and airy.
- Experiment with Flavors: Feel free to add a splash of mint extract or almond extract for a unique twist on traditional cookies and cream flavor.
- Chill Longer for Best Results: While 4 hours is sufficient, letting the cake chill overnight allows the flavors to meld beautifully and the texture to set perfectly.
Variations
Flavor Enhancements
You can change up the flavor of your Cookies and Cream Icebox Cake. Try adding different extracts. Almond or mint extracts can add a unique twist. You can also mix in some cocoa powder for a rich chocolate taste. If you want a fruity flavor, fold in crushed strawberries or raspberries. This can add freshness and color to your cake.
Cookie Substitutions
You don’t have to stick with just Oreos. Try using different cookies for a new taste. Chocolate chip cookies work great too. You can also use graham crackers for a lighter feel. For a fun change, use peanut butter cookies for a nutty flavor. Each cookie brings its own charm to the cake.
Dietary Adjustments
Gluten-Free Options
If you need a gluten-free dessert, there are tasty choices. Look for gluten-free sandwich cookies. Many brands offer this option today. Just make sure to check the labels. You can use gluten-free graham crackers as well. They work well in place of regular cookies.
Dairy-Free Options
You can make this cake dairy-free too. Use coconut cream instead of heavy cream. It whips up nicely and adds a tropical hint. Replace cream cheese with a dairy-free version, like cashew cream. Use almond or oat milk instead of regular milk for a great taste. These swaps make the cake friendly for everyone.
Storage Info
Recommended Storage Methods
To keep your Cookies and Cream Icebox Cake fresh, store it in the fridge. Use an airtight container or cover the dish tightly with plastic wrap. This helps prevent the cake from absorbing other odors in the fridge. If you want to keep it longer, freezing is also an option.
How Long It Lasts in the Fridge
In the fridge, your icebox cake will last about 3 to 5 days. The cake may soften a bit over time, but it will still taste great. Just make sure to check for any signs of spoilage before serving. If you notice any changes, it’s best to toss it out.
Freezing the Icebox Cake
You can freeze this cake for about a month. To freeze, cut the cake into slices. Wrap each slice in plastic wrap, then place them in a freezer bag. This makes it easy to grab a slice whenever you want a treat. When you’re ready to eat, just thaw it in the fridge overnight.
FAQs
Can I use different types of cookies?
Yes, you can use different types of cookies! While Oreos are classic, try chocolate chip or peanut butter cookies. Each cookie adds a unique taste and texture. You can mix and match for fun flavors. Just remember, the cookies should hold up well when dipped in milk. Experiment to find your favorite combo!
How do I know when the whipped cream is stiff enough?
You know the whipped cream is stiff enough when it holds firm peaks. To check, lift the beaters out of the bowl. If the peaks stand tall without drooping, you’re good to go. Be careful not to overbeat, as it can turn into butter. Keep an eye on it!
Is it necessary to refrigerate overnight?
Refrigerating overnight is best for flavor and texture. It gives the cookies time to soften and soak up the cream. If you’re in a hurry, chill for at least four hours. Just remember, longer chilling makes the cake even more delicious!
In this blog post, we covered how to make a delicious icebox cake. We explored the key ingredients, like heavy whipping cream and Oreo cookies, and went through each step for making it perfect. I shared tips on achieving stiff peaks and creative garnishes to impress. You can even try different cookie types to customize your cake.
Icebox cake is easy, fun, and a real treat. With some practice, you’ll master it. I hope you enjoy making your own icebox cak