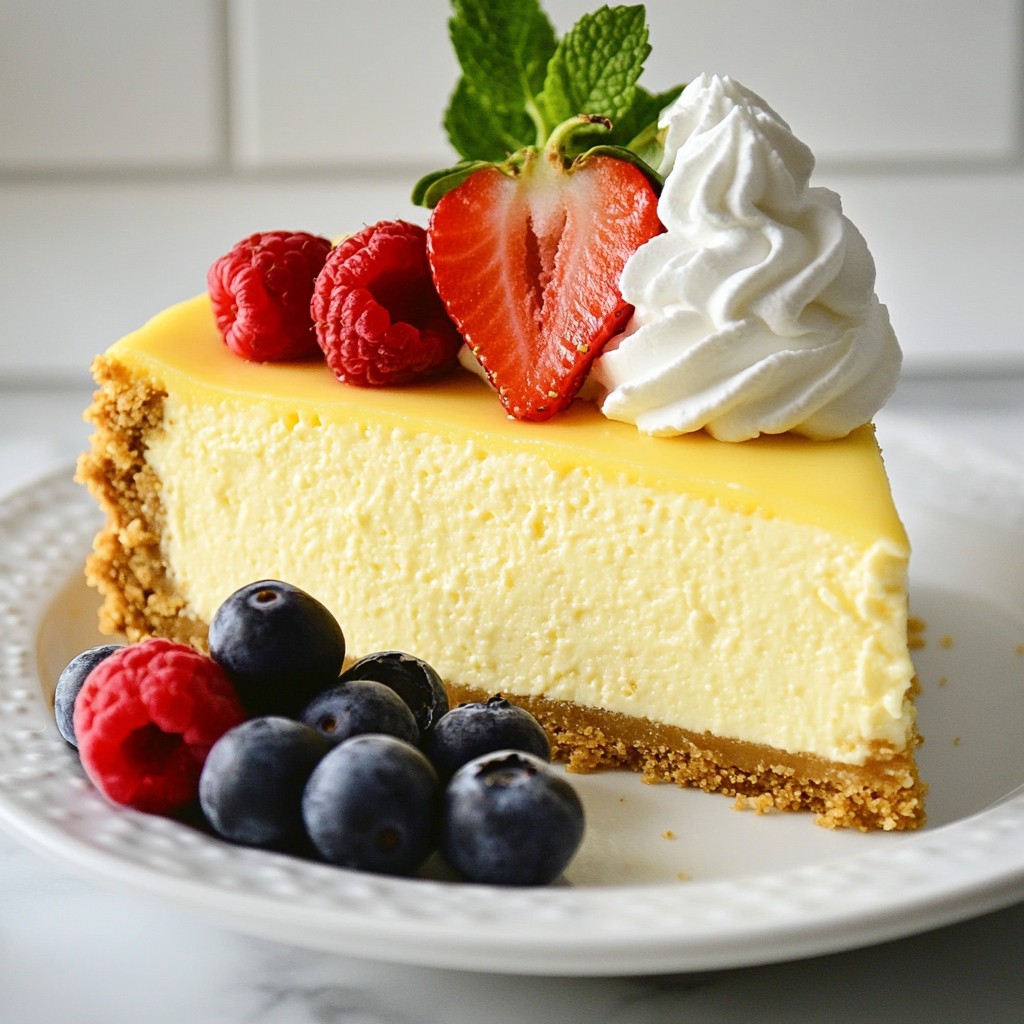
Are you ready to indulge in a rich and creamy delight? My Classic Vanilla Bean Cheesecake is here to satisfy your sweet tooth. This treat blends smooth cream cheese with fragrant vanilla bean for unforgettable flavor. Whether you're hosting a party or treating yourself, you'll love how easy it is to create this classic dessert. Let’s dive into the ingredients and get started on your new favorite cheesecake!
Why I Love This Recipe
- Decadent Flavor: This cheesecake is rich and creamy, with the luxurious taste of vanilla beans that elevates it above standard cheesecakes.
- Perfect Texture: The combination of sour cream and cream cheese creates a smooth and velvety texture that melts in your mouth.
- Versatile Topping: This cheesecake pairs wonderfully with a variety of toppings, allowing you to customize each slice to your liking.
- Make Ahead Option: With a recommended overnight chill time, this cheesecake can be prepared in advance, making it ideal for gatherings.
Ingredients
Main Ingredients for Classic Vanilla Bean Cheesecake
To make a classic vanilla bean cheesecake, you need the best ingredients. Here’s what you will need:
- 2 cups graham cracker crumbs
- 1/2 cup unsalted butter, melted
- 1/4 cup granulated sugar
- 3 (8 oz) packages cream cheese, softened
- 1 cup granulated sugar
- 1 teaspoon vanilla extract
- 2 vanilla beans, split and scraped
- 3 large eggs
- 1 cup sour cream
- 1 tablespoon lemon juice
- A pinch of salt
Each ingredient plays a big role in the taste and texture. The cream cheese gives it a rich flavor, while the vanilla beans add a lovely aroma.
Suggested Brands for Cream Cheese & Chocolate
When it comes to cream cheese, I recommend using brands like Philadelphia or mascarpone for a creamier texture. These brands mix well and yield a smooth filling. For chocolate toppings, consider using Ghirardelli or Callebaut. They provide a rich depth of flavor that enhances your dessert.
Customizing Your Ingredients (Gluten-free Options)
If you need a gluten-free cheesecake, you can swap the graham crackers for gluten-free options. Look for gluten-free graham cracker crumbs or use crushed nuts like almonds or pecans. This way, you can enjoy the same rich taste while meeting dietary needs.
Step-by-Step Instructions
Preparing the Crust
To start, preheat your oven to 325°F (160°C). In a medium bowl, combine 2 cups of graham cracker crumbs, 1/2 cup of melted unsalted butter, and 1/4 cup of granulated sugar. Mix these ingredients until they look like wet sand. This is the base for your cheesecake. Next, press this mixture firmly into the bottom of a 9-inch springform pan. Make sure the crust is even. Bake in the oven for 10 minutes, then take it out and let it cool completely.
Making the Filling
Now, let's make the filling. In a large bowl, beat 3 packages of softened cream cheese with an electric mixer until smooth and creamy. Gradually add in 1 cup of granulated sugar, 1 teaspoon of vanilla extract, and the seeds from 2 split vanilla beans. Mix until it’s fluffy and combined. Next, add 3 large eggs one at a time, mixing on low speed after each egg. Don’t overmix. Finally, stir in 1 cup of sour cream, 1 tablespoon of lemon juice, and a pinch of salt until everything is smooth.
Baking and Cooling the Cheesecake
Pour the cheesecake filling over the cooled crust in the springform pan. Smooth the top with a spatula. Bake for about 55-60 minutes. The center should be set but still a bit jiggly. Once done, turn off the oven and crack the door open. Let the cheesecake cool in the oven for an hour. After that, take it out and let it cool to room temperature. Refrigerate for at least 4 hours, or overnight if you can wait. When ready to serve, run a knife around the edges before releasing the springform. Cut into slices and enjoy your classic vanilla bean cheesecake!
Tips & Tricks
Achieving the Perfect Creamy Texture
To get that smooth texture, beat the cream cheese well. Start with soft cream cheese. It should feel like a pillow. Use an electric mixer to blend it until creamy. Add in the sugar slowly. Mixing it gradually helps keep the air in. This makes your cheesecake light and fluffy. When you add eggs, do it one at a time. Mix them just until blended. Overmixing can make the cheesecake dense.
Common Mistakes to Avoid
One big mistake is not cooling the cheesecake properly. After baking, leave it in the oven with the door cracked. This helps prevent cracks on the surface. Another mistake is skipping the chilling time. The cheesecake needs at least four hours in the fridge. Preferably, let it sit overnight. This helps the flavors mix and the texture set. Lastly, don’t forget the pinch of salt. It enhances the flavors and balances the sweetness.
How to Decorate Your Cheesecake
For a pretty finish, top each slice with fresh berries. Strawberries, blueberries, or raspberries work well. You can also add a dollop of whipped cream for extra creaminess. Drizzle some chocolate sauce for a sweet touch. If you want a bit of crunch, sprinkle crushed nuts on top. These simple additions make your cheesecake look and taste gourmet.
Pro Tips
- Use Room Temperature Ingredients: Bring your cream cheese, eggs, and sour cream to room temperature before mixing. This helps create a smoother batter and prevents lumps.
- Prevent Cracking: To prevent cracks on the surface of your cheesecake, bake it in a water bath. Wrap the outside of your springform pan in aluminum foil and place it in a larger pan filled with hot water.
- Let It Chill: Allow the cheesecake to cool in the oven with the door slightly ajar before refrigerating. This gradual cooling process helps maintain the texture and prevents cracking.
- Garnish for Elegance: For a beautiful presentation, top each slice with fresh berries, a sprinkle of powdered sugar, or a dollop of whipped cream just before serving.
Variations
Flavor Variations (Chocolate, Fruit, etc.)
You can change the taste of your cheesecake easily. To make a chocolate cheesecake, mix in melted chocolate with your cream cheese. You can also add cocoa powder for a rich flavor. For fruit flavors, try adding pureed strawberries or blueberries. Just fold in the fruit after mixing the cream cheese. This gives you endless options to match your mood or the season.
Alternative Crust Options
Switching the crust can make a big difference. Instead of graham crackers, use crushed cookies like Oreos or gingersnaps for a fun twist. If you want a gluten-free option, almond flour or ground oats work well too. Just mix with melted butter and press it into your pan. Each crust adds its own unique flavor and texture.
Seasonal Toppings to Enhance Flavor
Toppings can take your cheesecake to the next level. In spring and summer, fresh berries are a great choice. Raspberries, strawberries, or blueberries add color and taste. In fall, drizzle caramel sauce or add spiced apples. For winter, consider chocolate shavings or peppermint. These toppings not only look pretty but also add extra flavor.
Storage Info
Best Practices for Storing Cheesecake
To keep your cheesecake fresh, store it in the fridge. Use an airtight container or wrap it tightly with plastic wrap. This will prevent it from absorbing other smells. Always let it cool completely before storing. If you cut the cheesecake, cover the exposed edges with plastic wrap. This will help maintain its creamy texture.
Freezing Instructions
You can freeze cheesecake for later use. First, let it cool and set in the fridge. Then, wrap it tightly in plastic wrap. After that, place it in a freezer-safe container or bag. Make sure to label it with the date. Cheesecake can last up to three months in the freezer. When you're ready to enjoy it, thaw it overnight in the fridge before serving.
How Long Does Cheesecake Last?
A cheesecake stored in the fridge will last about 5 to 7 days. If you freeze it, it can last much longer, up to three months. Always check for signs of spoilage, such as an off smell or discoloration. When in doubt, it's safer to throw it out. Keeping these tips in mind will help you savor every bite of your classic vanilla bean cheesecake.
FAQs
What can I use instead of sour cream?
You can use Greek yogurt as a great substitute for sour cream. It has a similar tangy taste and creamy texture. You can also try cream cheese. Just soften it first and mix it well. This change will still give your cheesecake that rich flavor.
Can I make cheesecake without a springform pan?
Yes, you can! Use a regular cake pan instead. Just make sure to line the bottom with parchment paper. This way, you can lift out the cheesecake easily after it cools. You might need to run a knife around the edges to help it come out nicely.
How do I know when my cheesecake is done?
Check the center of your cheesecake. It should look set but still have a slight jiggle. If it looks too wobbly, give it more time in the oven. You can also use a toothpick to test. Insert it into the edge; if it comes out clean, your cheesecake is ready.
You learned how to make a classic vanilla bean cheesecake from scratch. We covered key ingredients, step-by-step instructions, and tips for avoiding mistakes. You can customize it with various flavors and toppings. Proper storage will keep your cheesecake fresh and tasty. Remember, your cheesecake journey is fun and creative, so feel free to try new ideas. Enjoy every bite and impress your friends with your delicious creation!