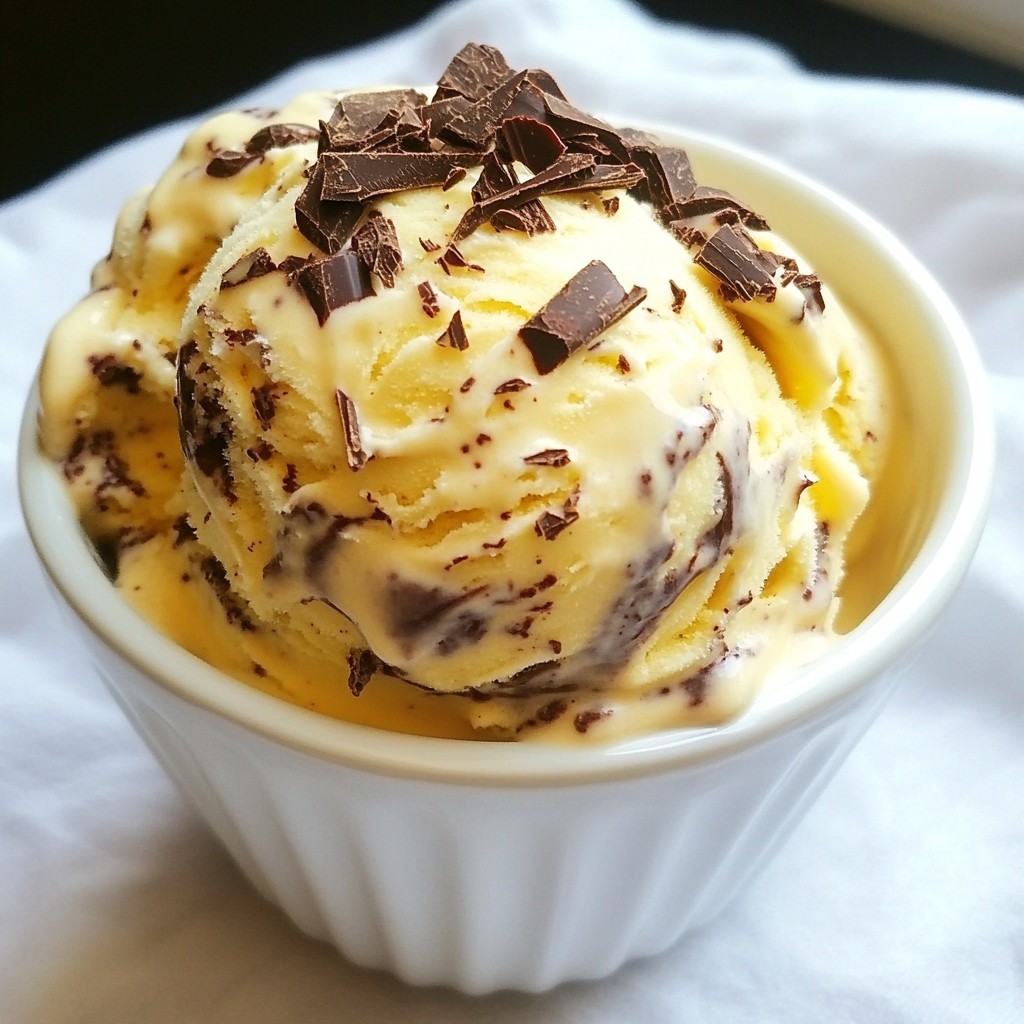
If you’re craving a cool treat that’s both chocolatey and fruity, you’re in for a delight! Today, I’m excited to share my easy recipe for Chocolate Swirl Banana Ice Cream. This creamy and dreamy dessert is simple to whip up and perfect for any day. I’ll guide you through each step, plus share tips and variations for a personalized twist. Get ready to enjoy a scoop of happiness!
Why I Love This Recipe
- Healthier Treat: This ice cream is made with natural ingredients, making it a guilt-free dessert option.
- Simple to Make: With just a few ingredients and minimal steps, this recipe is perfect for any skill level.
- Deliciously Creamy: The combination of bananas and coconut milk creates a rich, creamy texture that’s irresistible.
- Customizable Flavors: You can easily adjust the sweetness or add mix-ins to suit your taste preferences.
Ingredients
List of Ingredients
To make Chocolate Swirl Banana Ice Cream, you will need:
- 4 ripe bananas
- 1 cup coconut milk (or any milk of choice)
- 1/4 cup cocoa powder
- 1/4 cup honey or maple syrup
- 1 teaspoon vanilla extract
- A pinch of sea salt
- Dark chocolate shavings or chips (optional for topping)
Alternative Ingredient Options
You can swap some of the ingredients for different flavors. Try these options:
- Use almond milk or oat milk instead of coconut milk for a different taste.
- Replace honey with agave syrup if you want a vegan option.
- Use unsweetened cocoa powder if you prefer less sweetness.
- Add a tablespoon of peanut butter for a nutty twist.
Nutritional Information (per serving)
Each serving of this ice cream is not just yummy; it can be good for you too! Here’s a rough estimate of what you get:
- Calories: 180
- Protein: 3g
- Fat: 7g
- Carbohydrates: 30g
- Fiber: 3g
- Sugar: 12g
This ice cream offers a tasty treat that packs some nutrients. You get energy from the bananas and healthy fats from the coconut milk. Enjoy this creamy and dreamy dessert guilt-free!

Step-by-Step Instructions
Preparation of Bananas
Start with ripe bananas. Their sweetness makes this ice cream taste amazing. Peel the bananas and slice them into round pieces. Place the slices in a freezer-safe container. Freeze them for at least 2 hours. Make sure they are completely solid. This step makes the ice cream creamy.
Blending the Mixture
Once the bananas are frozen, it’s time to blend. Put the frozen banana slices into a high-speed blender. Add 1 cup of coconut milk. Then, add 1/4 cup cocoa powder, 1/4 cup honey or maple syrup, 1 teaspoon vanilla extract, and a pinch of sea salt. Blend on high until smooth and creamy. If needed, scrape down the sides to mix well.
Layering and Swirling Techniques
Now, we create layers! Take half of the banana mixture and move it to a separate bowl. Add about 1 tablespoon of cocoa powder to the rest in the blender. Blend again until mixed. In a large container, start with the plain banana mixture at the bottom. Add a layer of the chocolate mixture on top. Use a spatula to swirl them together gently. This creates a beautiful marbled effect. For an extra touch, sprinkle dark chocolate shavings or chips on top. Cover the container and freeze for 2-3 more hours. This helps firm up the ice cream. When you’re ready, scoop it into bowls and enjoy!
Tips & Tricks
How to Achieve the Creamiest Texture
To get the best texture, use ripe bananas. Ripe bananas are sweeter and creamier. Freeze them for at least two hours. This helps the ice cream become smooth. When blending, add coconut milk slowly. This adds creaminess and helps blend well. If you want even more creaminess, use full-fat coconut milk.
Storing Leftover Ice Cream
If you have leftover ice cream, store it in an airtight container. This keeps it fresh and prevents ice crystals. Cover the ice cream with plastic wrap before sealing the lid. This extra layer helps keep it creamy. You can freeze it for up to two weeks. After that, the texture may change.
Serving Suggestions and Pairings
Serve your chocolate swirl banana ice cream in bowls. Top it with dark chocolate shavings for added flavor. Fresh fruit, like berries or sliced bananas, makes a great addition too. For a fun treat, add crushed nuts or granola on top. Enjoy it with a drizzle of honey or maple syrup for extra sweetness.
Pro Tips
- Use Overripe Bananas: The riper the bananas, the sweeter and creamier your ice cream will be. Look for bananas with brown spots for the best flavor.
- Experiment with Milk: While coconut milk adds a wonderful flavor, feel free to substitute with almond, oat, or any other milk you prefer for a different taste.
- Freeze in Portions: If you want to enjoy this treat later, consider freezing the ice cream in individual portions. This makes it easy to grab a scoop whenever you crave something sweet!
- Make It Vegan: To keep this recipe vegan, use maple syrup instead of honey. It will maintain the sweetness and keep your ice cream plant-based.
Variations
Dairy-Free Alternatives
You can easily make this ice cream dairy-free. Use coconut milk, almond milk, or oat milk. These options provide a creamy texture and rich taste. Coconut milk is my favorite choice. It enhances the flavor and makes the ice cream smoother.
Flavor Additions
Want to mix it up? Try adding peanut butter or almond butter. Just a few spoonfuls can add a nutty taste. You can also add chopped nuts for crunch. Walnuts or pecans work great. They add a fun texture to each scoop.
Augmenting with Other Fruits
Feel free to get creative with fruits! Add berries for a tangy twist. Strawberries or raspberries pair well with chocolate. You can also try mango or pineapple for a tropical vibe. Just blend in a few pieces when mixing. These fruits add flavor and make your treat even more special.
Storage Info
Best Practices for Freezing Ice Cream
To keep your Chocolate Swirl Banana Ice Cream fresh, store it in an airtight container. This prevents ice crystals from forming and keeps the texture smooth. Before sealing, press plastic wrap against the surface. This extra layer helps lock in creaminess. Freeze it as soon as you make it. Avoid leaving it out at room temperature for too long.
Shelf Life of Chocolate Swirl Banana Ice Cream
When stored correctly, your ice cream lasts about two weeks in the freezer. After this time, the flavor and texture may change. It might become icy and less enjoyable. For the best taste, enjoy it within the first week.
Re-freezing Tips
If you need to refreeze melted ice cream, do so carefully. First, stir it well to break up any ice crystals. Then, put it back in the container and freeze again. This can help maintain some texture, though it may not be as creamy as the first time. Try to limit how often you refreeze to keep your treat as delightful as possible.
FAQs
Can I use frozen bananas instead of fresh?
Yes, you can use frozen bananas. Frozen bananas work well and save time. They blend into a creamy texture. Just make sure they are ripe before freezing. Ripe bananas taste sweeter and add more flavor. If you have leftover ripe bananas, freeze them for this treat!
How can I make this recipe vegan?
To make this recipe vegan, simply use maple syrup. Replace honey with maple syrup for a vegan option. You can also choose any plant-based milk. Coconut milk is a great choice, but almond or oat milk works too. This way, you still get a delicious and creamy ice cream without animal products.
Is there a way to make it sugar-free?
Yes, you can make this recipe sugar-free! Use a sugar substitute like stevia or erythritol. These options provide sweetness without sugar. You can also rely on the natural sweetness of ripe bananas. Just be sure to taste it as you go. Adjust the sweetness to your liking while keeping it healthy!
This blog post covers how to make creamy chocolate swirl banana ice cream. We explored key ingredients, easy steps, and unique variations. I shared tips on achieving the best texture and storing your ice cream for later.
In conclusion, making this treat is simple and fun. With the right methods, you can enjoy a tasty dessert any time. Don't be afraid to get creative with flavors and ingredients. Enjoy your homemade ice cream!