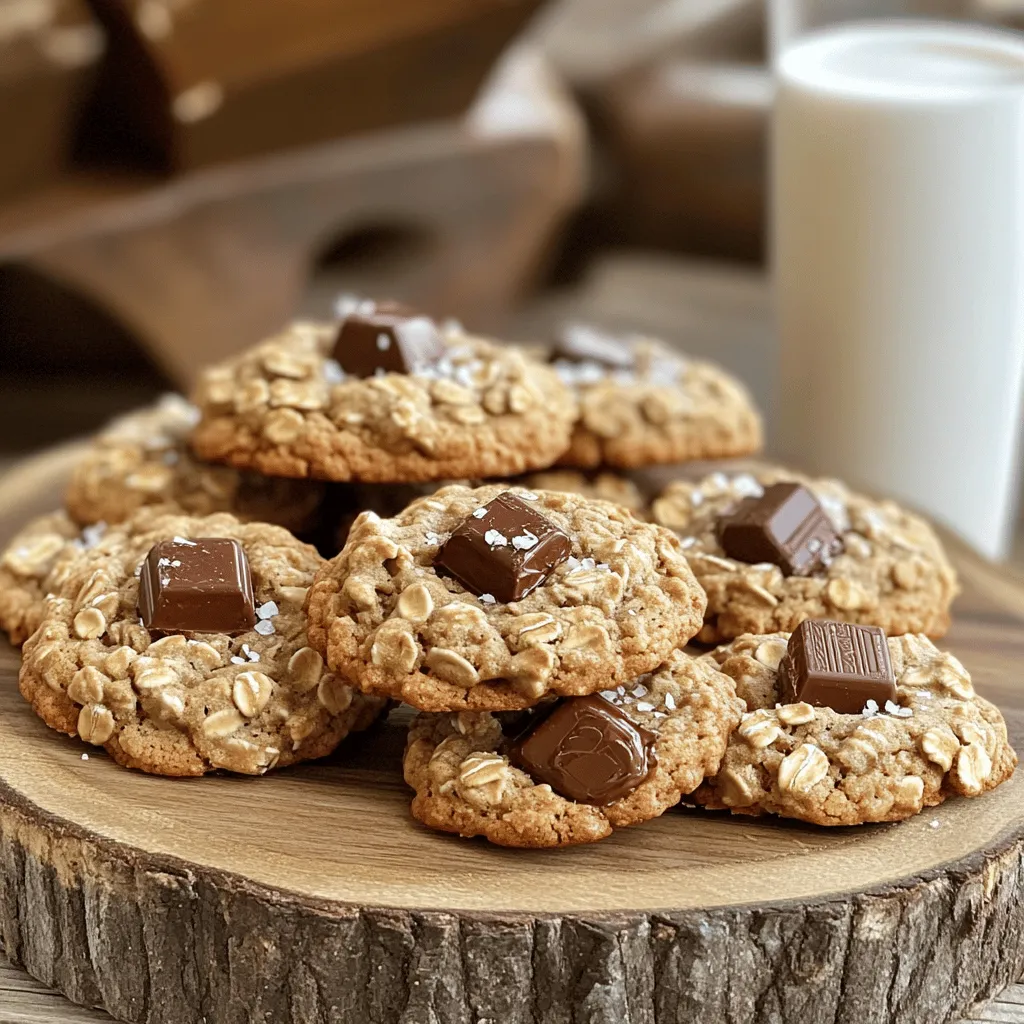
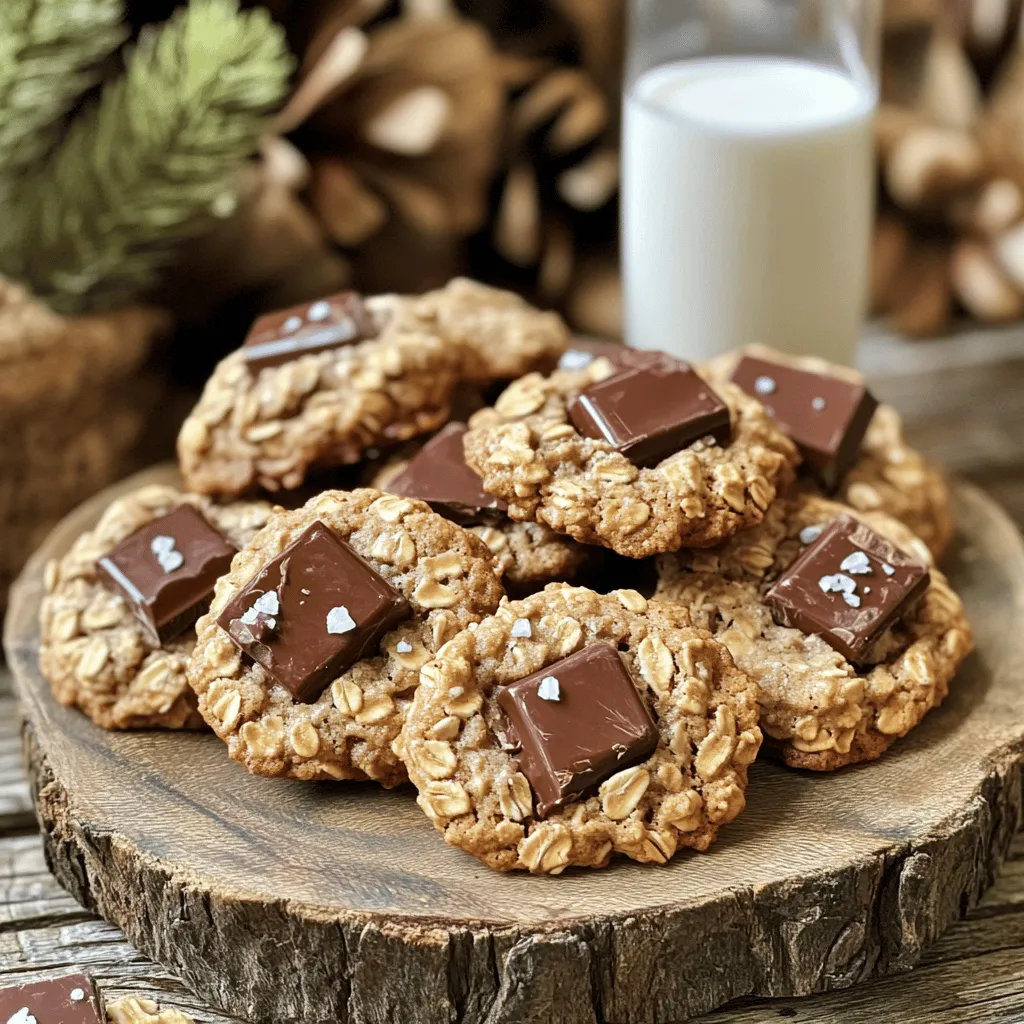
If you love warm, chewy cookies, you’re in for a treat! My Chocolate Chunk Oatmeal Cookies blend the hearty goodness of oats with rich chocolate chunks. This recipe is easy to follow and packed with tips to help you bake like a pro. I’ll guide you through the ingredients, step-by-step instructions, and even share some fun variations. Get ready to impress your taste buds and enjoy the perfect cookie!
Ingredients
Essential Ingredients for Chocolate Chunk Oatmeal Cookies
To make chocolate chunk oatmeal cookies, you need some key ingredients. Here’s what to gather:
– 1 cup rolled oats
– 1 cup all-purpose flour
– 1/2 teaspoon baking soda
– 1/2 teaspoon baking powder
– 1/4 teaspoon salt
– 1/2 cup unsalted butter, softened
– 1/2 cup brown sugar, packed
– 1/2 cup granulated sugar
– 1 teaspoon vanilla extract
– 1 large egg
– 1 cup semi-sweet chocolate chunks
– 1/2 cup chopped nuts (optional)
These ingredients bring great flavor and texture to the cookies. The oats give a nice chew, while the chocolate chunks melt and create pockets of sweetness.
Measurements for Perfect Cookies
Getting the right measurements is important. Use measuring cups and spoons for accuracy. For the flour, make sure to spoon it into the cup, then level it off. This keeps the cookies from being too dense. The butter should be softened but not melted. This helps it mix well with the sugars.
Optional Add-Ins to Enhance Flavor
You can boost the flavor of your cookies with some optional add-ins. Here are a few ideas:
– Chopped nuts (like walnuts or pecans)
– Dried fruits (such as cranberries or raisins)
– A pinch of cinnamon for warmth
These add-ins can change the cookie’s taste and texture. Feel free to mix and match to find your favorite combination.
Step-by-Step Instructions
Preparation Steps Overview
Making chocolate chunk oatmeal cookies is fun and easy. First, gather your ingredients. You will need rolled oats, flour, baking soda, baking powder, salt, butter, sugars, vanilla, an egg, chocolate chunks, and optional nuts. Preheat your oven to 350°F (175°C). Line your baking sheet with parchment paper. This step helps prevent sticking.
Detailed Mixing and Baking Instructions
1. Mix Dry Ingredients: In a medium bowl, whisk together the rolled oats, flour, baking soda, baking powder, and salt. Set this bowl aside for now.
2. Cream Butter and Sugars: In a large bowl, cream the softened butter and both sugars together. Mix for about 2-3 minutes until it looks light and fluffy.
3. Add Egg and Vanilla: Beat in the vanilla extract and the egg. Mix until everything is well combined.
4. Combine Mixtures: Gradually add the dry oat mixture to the wet ingredients. Mix just until you see no more flour. Don’t overmix, or your cookies may be tough.
5. Add Chocolate and Nuts: Fold in the chocolate chunks and nuts if you are using them.
6. Scoop the Dough: Use a tablespoon or cookie scoop to drop heaping spoonfuls of dough onto the prepared baking sheet. Space them about 2 inches apart.
7. Bake the Cookies: Place the baking sheet in your preheated oven. Bake for 10-12 minutes. The edges should be lightly golden, and the centers should stay soft.
8. Cool the Cookies: Remove the cookies from the oven. Let them cool on the baking sheet for 5 minutes. Then transfer them to a wire rack to cool completely.
Tips for Perfect Cookie Texture
For soft cookies, do not bake too long. The centers should look a bit underdone. They will firm up as they cool. If you want chewier cookies, use more brown sugar. For crispier cookies, increase the white sugar. Keep these tips in mind to get the texture you love!
Tips & Tricks
Best Practices for Mixing Dough
Mixing dough well is key to tasty cookies. Start by creaming the softened butter with both sugars. This step adds air to the mix. It makes your cookies fluffy. After that, add the egg and vanilla extract. Beat until they blend in well.
When you mix the dry and wet ingredients, do it gently. Stir just until you see no more flour. Overmixing can lead to tough cookies. Finally, fold in those chocolate chunks and nuts. This keeps the dough light and airy.
How to Know When Cookies Are Done
Watch for the edges. They should turn a light golden brown. The centers might look soft. This is okay; they will firm up as they cool. If you bake them too long, they will dry out. Use a timer to check them at the 10-minute mark.
If you like chewier cookies, take them out at 10 minutes. For crunchier cookies, let them bake a minute or two longer. Trust your eyes and nose! The scent of warm cookies is a great hint they are close to done.
Common Baking Mistakes to Avoid
One big mistake is not measuring ingredients correctly. Always use a kitchen scale or measuring cups. This helps keep your cookie dough balanced. Another common error is skipping the parchment paper. It makes clean-up easy and helps cookies bake evenly.
Don’t crowd the baking sheet. Leave space between the dough balls. This allows cookies to spread and bake well. Lastly, don’t skip the cooling time. Letting cookies rest on the sheet helps set their shape.
Variations
Gluten-Free Options for Oatmeal Cookies
You can make these cookies gluten-free. Use gluten-free rolled oats and a gluten-free flour blend. Make sure the oats are certified gluten-free. This way, everyone can enjoy these tasty cookies!
Flavor Variations
Want to switch things up? You can add spices like cinnamon or nutmeg. These spices give the cookies a warm, cozy taste. You could also mix in dried fruits, like cranberries or raisins. These fruits add sweetness and chewiness. Get creative with flavors!
Alternative Chocolate Choices
You can choose different types of chocolate for your cookies. Dark chocolate gives a rich taste. Milk chocolate is sweeter and creamier. White chocolate adds a smooth, sweet touch. Each type of chocolate brings its own flavor. Try them all to find your favorite!
Storage Info
How to Store Chocolate Chunk Oatmeal Cookies
After baking, let your cookies cool on a wire rack. Once cool, store them in an airtight container. This keeps them fresh. You can keep them at room temperature for about a week. If you want to keep them longer, choose the freezer option.
Freezing Food Prep Tips
To freeze your cookies, first let them cool completely. Then, place them in a single layer on a baking sheet. Freeze them for about an hour. Once frozen, transfer the cookies to a freezer-safe bag. Make sure to remove as much air as possible before sealing. They can stay frozen for up to three months.
Best Ways to Refresh Cookies After Storing
If your cookies lose some softness while stored, you can refresh them easily. Preheat your oven to 350°F (175°C). Place the cookies on a baking sheet. Heat them for about 5 minutes. This will warm them and restore some of their original texture. Enjoy them warm for a delightful treat!
FAQs
Can I Use Quick Oats Instead of Rolled Oats?
Yes, you can use quick oats. They will change the texture. Quick oats are finer, making cookies softer. If you use them, expect a chewier cookie. Rolled oats give more bite and texture. I prefer rolled oats for their heartiness.
What is the Best Way to Measure Flour?
The best way to measure flour is to spoon it into a cup. Avoid scooping directly from the bag. Scooping packs the flour and adds too much. Use a knife to level it off. This method gives you the right amount for great cookies.
How Can I Make These Cookies Vegan?
To make these cookies vegan, replace the butter with coconut oil or vegan butter. Use a flax egg instead of a regular egg. Mix one tablespoon of ground flaxseed with three tablespoons of water. Let it sit for five minutes to thicken. You will enjoy tasty vegan cookies!
In this post, we explored the fun of making chocolate chunk oatmeal cookies. We covered essential ingredients, step-by-step instructions, and helpful tips for perfect results. You learned about gluten-free options and flavor variations that can make your cookies special. Remember, the key to great cookies is the right mix and careful baking. With these tips, you can avoid common mistakes and store your cookies well. Now, you’re ready to bake delicious cookies that everyone will love! Enjoy your time in the kitchen!