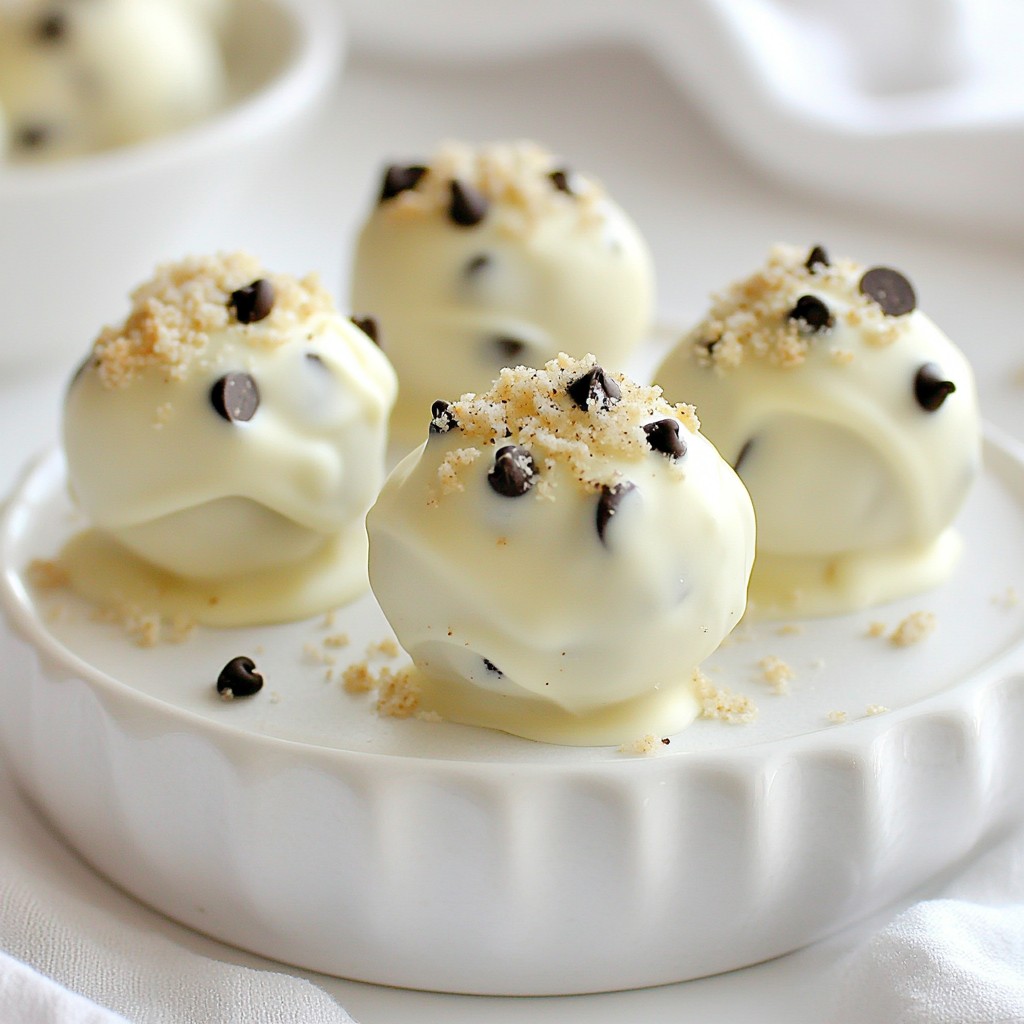
Looking for a sweet treat that’s easy to make and full of flavor? Chocolate Chip Cookie Dough Truffles are your answer! With just a few simple steps, you’ll create a creamy, dreamy bite-sized dessert. I'll guide you through heating flour, creaming butter, and choosing tasty mix-ins. By the end, you’ll have a delicious dessert to impress your friends and family. Let’s dive into this fun recipe!
Why I Love This Recipe
- Delicious Flavor Combination: The rich taste of cookies and cream combined with the creamy white chocolate coating makes these truffles a delightful treat.
- Easy to Make: This recipe requires simple ingredients and straightforward steps, making it perfect for bakers of all skill levels.
- Perfect for Any Occasion: These truffles are great for parties, holidays, or just a sweet snack at home, making them versatile for any event.
- Customizable: You can easily add your favorite mix-ins or toppings, allowing you to personalize each batch to your liking.
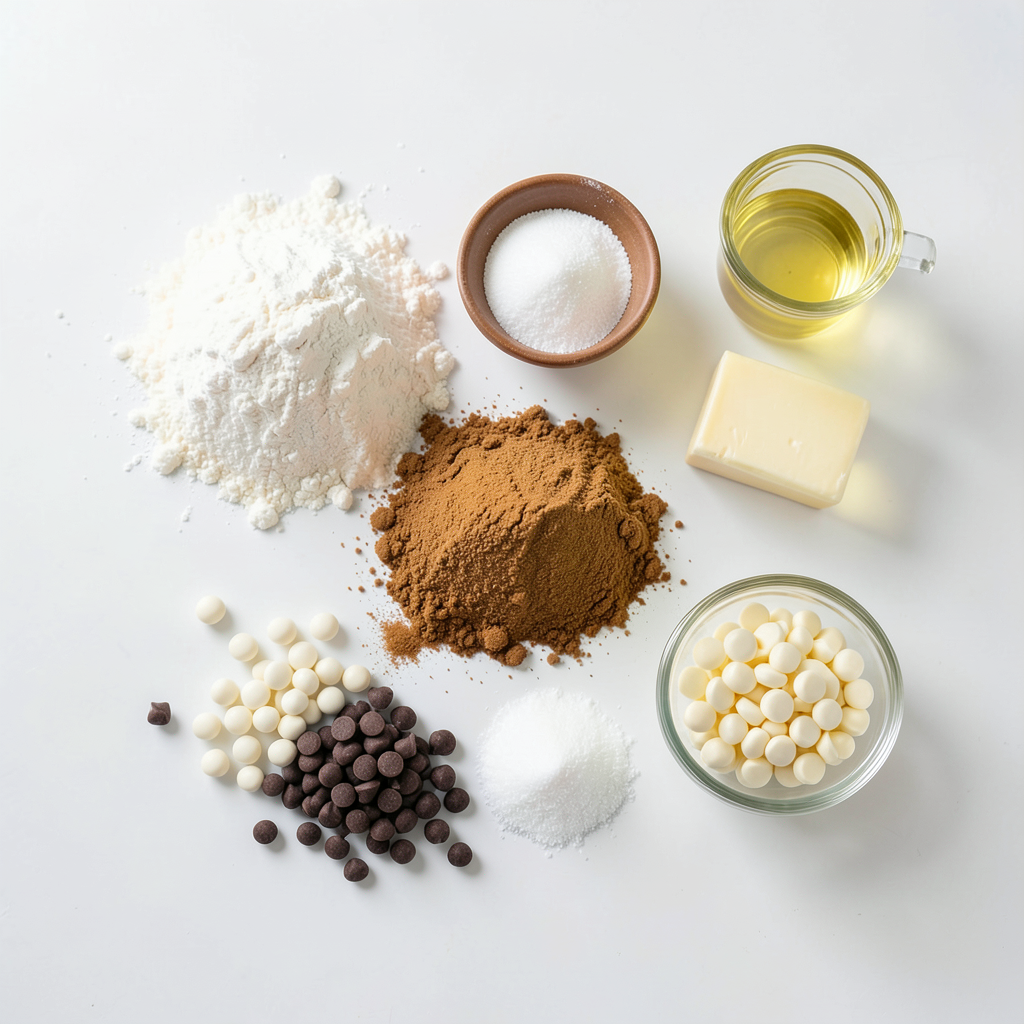
Ingredients
List of ingredients
To make these tasty truffles, gather these items:
- 1 cup all-purpose flour
- 1/2 cup unsalted butter, softened
- 1/2 cup brown sugar, packed
- 1/4 cup granulated sugar
- 1 teaspoon vanilla extract
- 1/4 teaspoon salt
- 1/2 cup mini chocolate chips
- 1 cup white chocolate chips (for coating)
- 1 tablespoon vegetable oil (for coating)
Measurement conversions
Here are some useful conversions:
- 1 cup = 240 ml
- 1/2 cup = 120 ml
- 1/4 cup = 60 ml
- 1 tablespoon = 15 ml
- 1 teaspoon = 5 ml
These conversions help if you need to adjust the recipe.
Ingredient substitutions
If you need to swap ingredients, here are some ideas:
- Use almond flour instead of all-purpose flour for a gluten-free option.
- Coconut oil can replace unsalted butter for a dairy-free version.
- Brown sugar can be replaced with coconut sugar for a healthier choice.
- If you don’t have white chocolate, milk chocolate works great too!
These substitutions keep your truffles delicious while fitting your needs.
Step-by-Step Instructions
Heating the flour
Heat the flour first. This step is key for safety. Spread 1 cup of all-purpose flour on a baking sheet. Bake it at 350°F (175°C) for 5-7 minutes. This kills any bacteria. Let the flour cool completely before using it. This ensures your truffles are safe to eat.
Creaming the butter and sugars
Next, cream the butter and sugars together. In a medium bowl, add 1/2 cup of softened unsalted butter, 1/2 cup of brown sugar, and 1/4 cup of granulated sugar. Mix them with a hand mixer for about 2-3 minutes. You want the mixture to be light and fluffy. This step adds great texture to your dough.
Forming and chilling the dough
Now it’s time to form the dough. Mix in 1 teaspoon of vanilla extract and 1/4 teaspoon of salt. Gradually add in the cooled flour. Mix until just combined. Then, gently fold in 1/2 cup of mini chocolate chips. Roll the dough into bite-sized balls, about 1 inch wide. Place them on a parchment-lined baking sheet. Chill the balls in the fridge for about 30 minutes. This helps them firm up.
Coating with white chocolate
While the dough chills, prepare the coating. Melt 1 cup of white chocolate chips with 1 tablespoon of vegetable oil. Do this in a microwave-safe bowl. Heat in 30-second intervals, stirring in between, until smooth. Once the dough balls are firm, dip each one in the melted chocolate. Make sure they are fully coated. Use a fork to lift them and tap off excess chocolate. Place the coated truffles back on the baking sheet. If you like, sprinkle crushed cookies or extra chocolate chips on top before the chocolate sets. Let the truffles sit at room temperature or chill them to set faster.
Tips & Tricks
How to achieve a smooth coating
To get a smooth coat on your truffles, melt the white chocolate slowly. Use short bursts in the microwave. Stir often to avoid lumps. Adding vegetable oil thins the chocolate. This makes it easier to coat the truffles. Ensure each ball is fully covered. Lift it with a fork and tap off the extra.
Best ways to store leftovers
Store your truffles in an airtight container. This keeps them fresh and tasty. They can last up to a week in the fridge. If you want them to last longer, freeze them. Just place them in a freezer-safe bag. Make sure to separate layers with parchment paper to avoid sticking.
Troubleshooting common issues
If your chocolate coating is clumpy, it may be too hot. Let it cool slightly before dipping. If the dough is too soft, chill it longer. This helps the balls hold their shape. If they fall apart while coating, use a spoon to help. It’s all about finding the right balance!
Pro Tips
- Heat-Treating Flour: Always heat-treat your flour to eliminate any bacteria, especially when making no-bake recipes like these truffles.
- Chilling the Dough: Chilling the cookie dough balls is crucial for easier handling and ensures they hold their shape when dipped in chocolate.
- Coating Tips: For a smoother coating, ensure the white chocolate is fully melted and has a bit of vegetable oil mixed in to help it adhere better.
- Decoration Options: Get creative with toppings! Use crushed cookies, sprinkles, or even drizzles of dark chocolate for added flair and flavor.
Variations
Adding different flavors (e.g., mint, peanut butter)
You can easily change the taste of these truffles. Try adding mint extract for a fresh twist. Just use 1/4 teaspoon to start. For a rich flavor, mix in 1/4 cup of creamy peanut butter. This gives a nutty touch that pairs well with chocolate.
Using dark chocolate or milk chocolate coating
While I love white chocolate, dark or milk chocolate works great too. Melt dark chocolate chips for a deep, rich taste. Milk chocolate gives a sweeter flavor. Just follow the same melting method. Dip the truffles in whichever chocolate you prefer for a unique finish.
Incorporating nuts or dried fruits
Add some crunch or chew by mixing in nuts or dried fruits. Chopped walnuts or pecans add a nice texture. Dried cranberries or raisins can bring a sweet surprise. Just fold them into the dough before shaping the truffles. This makes each bite more exciting and adds extra flavor.
Storage Info
Best storage methods for freshness
To keep your chocolate chip cookie dough truffles fresh, store them in an airtight container. Line the container with parchment paper to avoid sticking. Place a layer of truffles, then add another layer of parchment. Cover and seal tightly. This method helps maintain their softness.
Freezing truffles for later use
Freezing is a great option for saving truffles. Place the truffles in a single layer on a baking sheet. Freeze them for about an hour until solid. Once frozen, transfer them to a freezer-safe bag. They can last up to three months this way. Thaw them in the fridge before serving.
Shelf life of the truffles
These truffles can last in the fridge for about one week. If stored properly, they will stay fresh and tasty. Keep an eye on them for any signs of dryness or changes in texture. If you see any, it’s best to enjoy them right away!
FAQs
Can I eat raw cookie dough?
Yes, you can eat raw cookie dough, but be careful. Raw flour can have germs. To make it safe, heat-treat the flour first. This means baking it at 350°F for 5-7 minutes. Let it cool before mixing. This step kills harmful bacteria. Always use safe ingredients when making cookie dough.
How do I know when the truffles are set?
You can tell the truffles are set when they feel firm to the touch. If you chill them, they will harden faster. After coating, let them sit at room temp or in the fridge. You can also check if the white chocolate coating is not shiny. This means it has set properly.
Where can I buy pre-made cookie dough truffles?
You can find pre-made cookie dough truffles in many grocery stores. Look in the freezer aisle or the candy section. Some sweet shops also sell them. Online stores like Amazon offer various brands too. If you want them fresh, check local bakeries. They might have their own special version!
You’ve learned about making delicious cookie dough truffles. We covered key ingredients, step-by-step instructions, and helpful tips for success. I shared tasty variations to try and showed you how to store your truffles for the best taste. Remember, you can experiment with flavors and coatings. Enjoy the fun of creating your truffles. They'll impress anyone who tastes them!