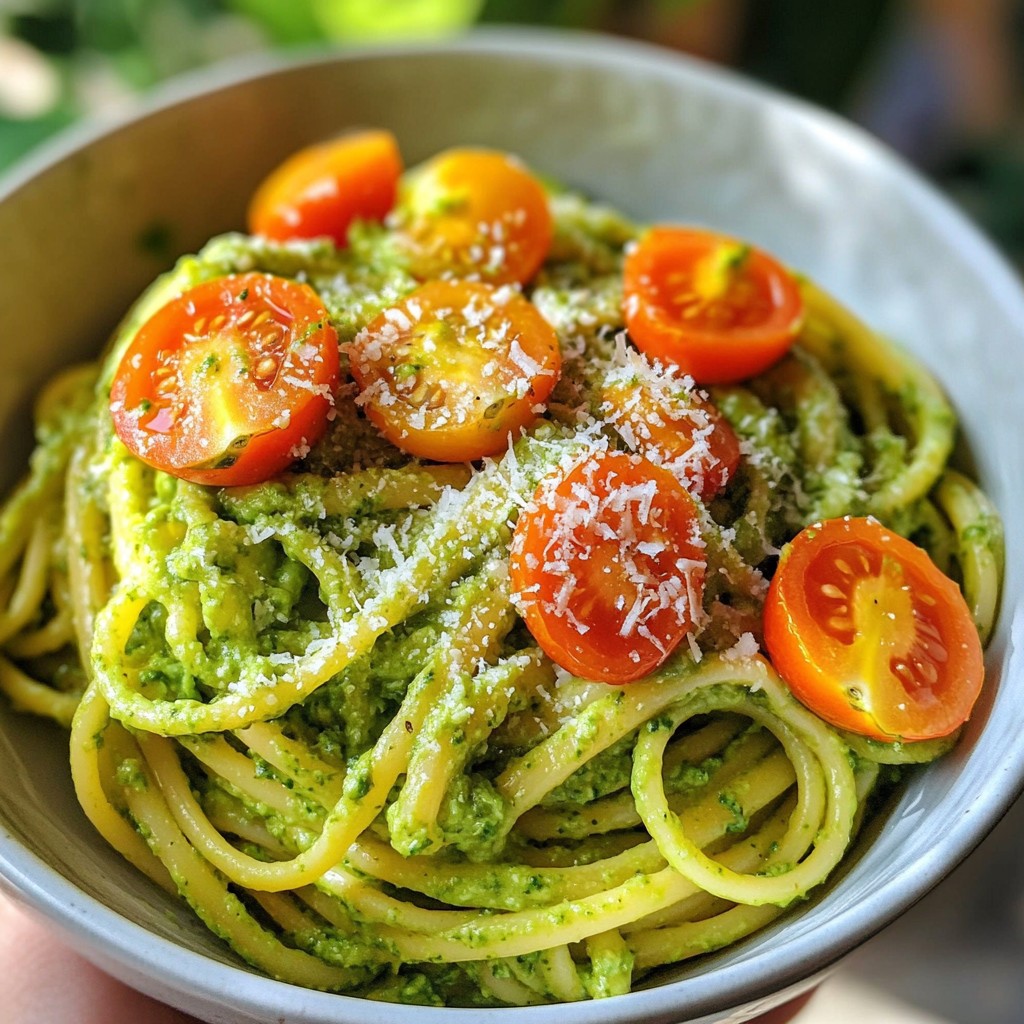
Are you ready to make a delicious Avocado Pesto Pasta? This simple and vibrant dish packs a punch of flavor while staying healthy. With ripe avocados, fresh basil, and your choice of nuts, you’ll create a creamy sauce that coats every strand of pasta perfectly. Follow my step-by-step guide, and soon you’ll impress everyone at the dinner table. Let’s dive into this tasty recipe that’s easy to master!
Why I Love This Recipe
- Deliciously Creamy: This avocado pesto adds a rich, creamy texture to the pasta without the need for heavy creams or sauces.
- Nutritious Ingredients: Packed with healthy fats from avocados and protein from nuts, this dish is as nourishing as it is tasty.
- Quick and Easy: With just a few simple steps, you can whip up a gourmet meal in under 20 minutes!
- Customizable: This recipe is versatile; feel free to swap out nuts or add your favorite vegetables for a personal touch.
Ingredients
Detailed ingredient list
- 2 ripe avocados
- 1 cup fresh basil leaves
- 1/3 cup pine nuts or walnuts
- 2 cloves garlic, peeled
- 1/4 cup nutritional yeast or grated Parmesan
- 1/4 cup olive oil
- Juice of 1 lemon
- Salt and pepper to taste
- 8 oz pasta (linguine or spaghetti)
- Cherry tomatoes, halved for garnish
- Grated cheese for serving (optional)
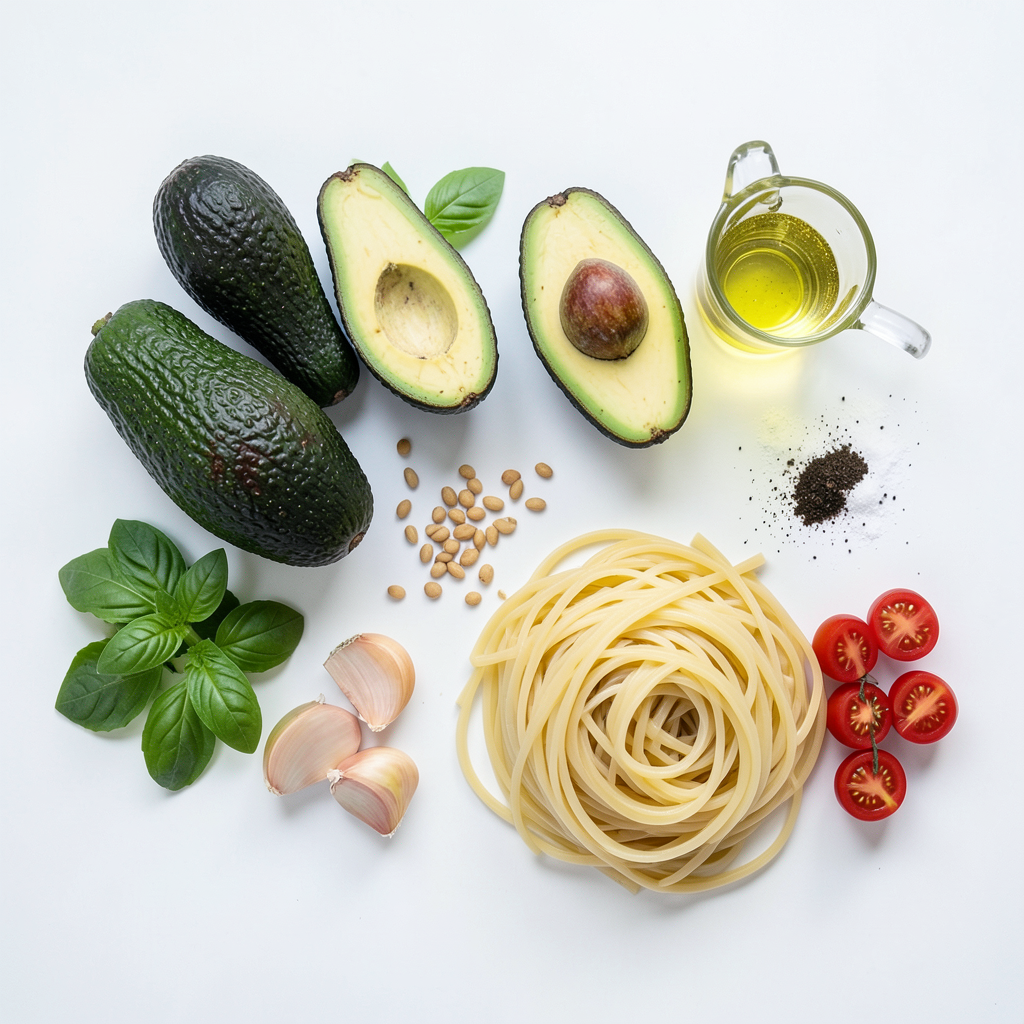
To make avocado pesto pasta, gather these fresh ingredients. Ripe avocados are the star here. They give the sauce its creamy texture. Fresh basil leaves add a bright flavor. Pine nuts or walnuts give a nutty taste. Garlic adds a punch to every bite. Nutritional yeast or Parmesan brings a cheesy depth. Olive oil adds richness to the mix. Lemon juice brightens the whole dish. Don't forget salt and pepper to taste!
You need 8 ounces of pasta. I recommend linguine or spaghetti for a nice balance. Cherry tomatoes make a lovely garnish. They add color and sweetness. Grated cheese is optional but adds a nice touch.
Now you have all the ingredients to create a delightful meal. Each item plays a key role in the dish. Let’s get cooking!
Step-by-Step Instructions
Cooking the pasta
1. First, fill a large pot with water. Add a generous amount of salt.
2. Bring the water to a rolling boil over high heat.
3. Add 8 ounces of pasta, like linguine or spaghetti.
4. Cook the pasta according to the package instructions. This usually takes about 8-10 minutes.
5. Before draining, save 1/2 cup of pasta water in a bowl. Then, drain the pasta in a colander.
Preparing the avocado pesto
1. While the pasta cooks, grab a food processor.
2. Add 2 ripe avocados, 1 cup of fresh basil leaves, and 1/3 cup of pine nuts or walnuts.
3. Toss in 2 peeled garlic cloves, 1/4 cup of nutritional yeast or grated Parmesan, and the juice of 1 lemon.
4. Add salt and pepper to taste.
5. Pulse the mixture until it is smooth.
6. With the food processor running, slowly pour in 1/4 cup of olive oil. Mix until well combined.
7. If the pesto is too thick, add a bit of the reserved pasta water to adjust the consistency.
Combining pasta and pesto
1. Return the drained pasta to the pot.
2. Pour the avocado pesto over the pasta.
3. Use tongs or a large spoon to toss the pasta and sauce together. Ensure the pasta is evenly coated.
4. If the sauce is still too thick, add more reserved pasta water, one tablespoon at a time, until it is just right.
5. Serve the pasta hot. You can garnish it with halved cherry tomatoes and grated cheese if you like.
Tips & Tricks
Perfecting the avocado pesto
- Choosing ripe avocados: Look for avocados that yield slightly when you press them. A ripe avocado is key to a smooth pesto.
- Flavor enhancements: Add fresh garlic for a nice kick. Squeeze in lemon juice to brighten the flavor. Both make the pesto tastier.
Pasta cooking tips
- How to avoid overcooking: Follow the package instructions closely. Test the pasta a minute before the suggested time. It should be al dente, which means firm to the bite.
- Saving pasta water effectively: Before draining, use a measuring cup to scoop out 1/2 cup of pasta water. This starchy water helps adjust your pesto.
Serving suggestions
- Best garnishes and pairings: Top your pasta with halved cherry tomatoes. They add color and freshness. A sprinkle of grated cheese can enhance the dish too.
- Presentation tips for a beautiful dish: Serve the pasta in a large bowl. Toss it well so the pesto coats every noodle. Add garnishes on top for a vibrant look.
Pro Tips
- Use Ripe Avocados: Ensure your avocados are perfectly ripe for a creamy texture in your pesto. They should yield slightly to gentle pressure when squeezed.
- Customize Your Nuts: Feel free to swap pine nuts with walnuts or even pecans for a different flavor profile. Toasting the nuts enhances their flavor.
- Adjust Consistency: If your pesto is too thick, add reserved pasta water a tablespoon at a time until you achieve your desired consistency.
- Fresh Basil is Key: Use fresh basil for the best flavor. Dried basil won’t give you the same vibrant taste and aroma in your pesto.
Variations
Avocado Pesto alternatives
You can switch up the nuts in your avocado pesto. Try using almonds or cashews instead of pine nuts. Each nut brings a unique flavor and texture. If you want a dairy-free option, simply use nutritional yeast instead of Parmesan cheese. This keeps it creamy without dairy, making it perfect for everyone.
Pasta variations
Feel free to experiment with the type of pasta you use. Whole wheat pasta adds fiber, while gluten-free pasta works for those with gluten issues. You can also add protein to your dish. Chicken, shrimp, or beans are great options. They make the meal heartier and more filling.
Spicing it up
If you like some heat, add red pepper flakes or jalapeños to your pesto. This gives your dish a nice kick! You can also add seasonal vegetables. Try mixing in some cherry tomatoes or spinach for extra color and taste. This not only enhances flavor but also makes your meal more nutritious.
Storage Info
Storing leftovers
To keep your avocado pesto pasta fresh, use airtight containers. Glass or BPA-free plastic works well. The pasta lasts in the fridge for 2 to 3 days. Be sure to store it soon after cooking to keep it tasty.
Freezing avocado pesto
You can freeze avocado pesto for later. First, put the pesto in an ice cube tray. Once frozen, pop the cubes into a freezer bag. They can last for about 3 months in the freezer. When you're ready to use it, thaw the cubes overnight in the fridge or use the microwave for a quick thaw.
Reheating tips
To reheat your pasta, use a pan on low heat. Add a splash of water or olive oil to keep it moist. Stir gently to avoid mushy pasta. To prevent browning, cover the dish while reheating. This helps keep the bright green color of the avocado pesto.
FAQs
Can I use frozen avocados for the pesto?
Yes, you can use frozen avocados. Just make sure to thaw them first. Frozen avocados still taste good and work well in the pesto. You may notice a slight change in texture, but they blend nicely.
What can I substitute for nutritional yeast?
If you don't have nutritional yeast, you can use grated Parmesan cheese. This will give your pesto a nice, cheesy flavor. Another option is to skip it entirely if you want a lighter taste.
Is avocado pesto healthy?
Yes, avocado pesto is healthy! It offers good fats from the avocado and nutrients from the basil. This dish is packed with vitamins and minerals, making it a smart choice for a meal.
Can I make this dish vegan?
Yes, you can easily make this dish vegan. Simply use nutritional yeast instead of cheese. Make sure to double-check the pasta ingredients to ensure it’s egg-free.
How do I prevent avocado from browning?
To prevent browning, add lemon juice to the avocado right away. The acid in lemon stops oxidation. You can also store any leftover pesto in an airtight container to keep it fresh longer.
This blog post has covered how to make a delicious avocado pesto pasta. We explored ingredients, step-by-step cooking methods, and tips for perfect results. Remember, using ripe avocados and enhancing flavors with lemon and garlic can elevate your dish. Try different pasta types or nuts to find your favorite variation. Don’t forget to store leftovers properly and reheat them gently. With this guide, you’re set to impress your friends and family with a tasty, fresh meal. Enjoy your cooking adventure!