FREE DINNER EBOOK! Get your copy!
  • Cookie Policy
  • GDPR Policy
  • Disclaimer
  • Terms Of Use
  • Visit my other site: Fun Cookie Recipes
quick dish kitchen
  • Home
  • Dinner
  • Desserts
  • Drinks
  • Appetizers
  • Contact
  • About
  • Privacy Policy
  • Home
  • Dinner
  • Desserts
  • Drinks
  • Appetizers
  • Contact
  • About
  • Privacy Policy
  • Cookie Policy
  • GDPR Policy
  • Disclaimer
  • Terms Of Use
Visit my other site: Fun Cookie Recipes

HOME / CATEGORIES /

Latest

- 500g chicken breast, cut into thin strips - 3 tablespoons soy sauce - 2 tablespoons lime juice - 1 tablespoon brown sugar - 1 tablespoon grated fresh ginger - 2 garlic cloves, minced - 1 teaspoon turmeric powder - Wooden skewers (soaked in water for 30 minutes) For the marinade, I use chicken breast because it cooks quickly and stays juicy. The marinade is a mix of flavors. Soy sauce adds saltiness, while lime juice gives a nice tang. Brown sugar balances these flavors with sweetness. Ginger and garlic add warmth, and turmeric gives a lovely color. - 1/2 cup natural peanut butter - 1/4 cup coconut milk - 2 tablespoons soy sauce - 2 tablespoons lime juice - 1 tablespoon honey or maple syrup - 1 teaspoon chili paste (adjust to taste) - Crushed peanuts and fresh cilantro for garnish For the peanut sauce, natural peanut butter provides creaminess. Coconut milk adds richness. The soy sauce and lime juice here create a savory base. Honey or maple syrup sweetens the sauce, while chili paste adds heat. You can adjust the chili for your taste. Garnishing with crushed peanuts and cilantro enhances both flavor and look. {{ingredient_image_1}} First, gather your marinade ingredients. You need: - 3 tablespoons soy sauce - 2 tablespoons lime juice - 1 tablespoon brown sugar - 1 tablespoon grated fresh ginger - 2 minced garlic cloves - 1 teaspoon turmeric powder In a bowl, mix all these ingredients together. Stir well until the sugar dissolves and the marinade is smooth. This mix gives flavor to the chicken. Next, add the chicken strips to the marinade. Make sure each piece is covered well. Cover the bowl with plastic wrap or a lid. Let it marinate for at least 30 minutes. If you have time, marinate it overnight in the fridge for even more flavor. Now, it’s time to grill! First, preheat your grill or grill pan over medium-high heat. This step is key for getting nice grill marks. While the grill heats, take your soaked wooden skewers. Thread the marinated chicken strips onto the skewers. Pack them closely together, but not too tight. This allows heat to circulate and cook the chicken evenly. Once your grill is hot, place the skewers on it. Grill the chicken for about 5-7 minutes on each side. Look for nice grill marks and check that the chicken is cooked through. It should reach an internal temperature of 165°F. While the chicken grills, let’s make the peanut sauce. Gather these ingredients: - 1/2 cup natural peanut butter - 1/4 cup coconut milk - 2 tablespoons soy sauce - 2 tablespoons lime juice - 1 tablespoon honey or maple syrup - 1 teaspoon chili paste (adjust to taste) In a small saucepan, whisk together the peanut butter, coconut milk, soy sauce, lime juice, honey, and chili paste. Cook this mixture over low heat. Keep whisking until it is smooth. This sauce adds a rich flavor that pairs perfectly with the chicken. Once the chicken is done, take it off the grill. Serve it warm with the peanut sauce drizzled on top or in a bowl for dipping. Enjoy your delicious Thai Peanut Chicken Satay! To get the best flavor, marinate your chicken for at least 30 minutes. If you have time, marinating overnight gives deeper flavor. You can adjust the taste by adding more lime juice for tang or sugar for sweetness. Feel free to play with the garlic or ginger for a stronger kick. For nice grill marks, make sure your grill is hot before adding the skewers. Place the skewers at an angle on the grill. Flip them only once to get good marks. To check if the chicken is done, cut a piece in the thickest part. The meat should be white all the way through with no pink. These skewers pair well with jasmine rice or a fresh cucumber salad. You can also serve with dipping bowls of peanut sauce. For a fun presentation, arrange skewers on a large platter and sprinkle crushed peanuts and cilantro on top. This makes a bright and inviting dish for any table. Pro Tips Marinate Longer for Flavor: For the best taste, marinate the chicken overnight. This allows the flavors to penetrate deeply, resulting in a more flavorful dish. Soak Skewers Properly: Ensure you soak wooden skewers for at least 30 minutes before grilling. This prevents them from burning on the grill and helps your chicken stay secure while cooking. Adjust the Heat: If you prefer a spicier peanut sauce, increase the amount of chili paste gradually. Always taste as you go to find your perfect balance. Garnish for Presentation: Garnishing with crushed peanuts and fresh cilantro not only enhances presentation but also adds texture and freshness to the dish. {{image_2}} You can switch the chicken with shrimp or tofu. Shrimp cooks quick and adds a nice flavor. Simply marinate the shrimp as you would the chicken. For tofu, use firm tofu and press it to remove excess water. Cut it into strips and marinate. Vegetarian options give you great flexibility. You can use vegetables like bell peppers, zucchini, or mushrooms. These can be skewered alongside the tofu or on their own. The marinade works well to infuse flavor. For a spicy kick, you can try a spicier peanut sauce. Just add more chili paste or fresh chilies. This makes the dish more exciting for those who love heat. If you need a nut-free option, you can use sunflower seed butter. It has a similar creamy texture. Mixing it with coconut milk keeps the sauce smooth and tasty. You can serve these skewers as appetizers or as a main course. As appetizers, make smaller skewers for easy eating. For a main dish, serve larger skewers and pair with rice or noodles. Don’t forget to skewer different vegetables. Cherry tomatoes, onions, or eggplant can add color. Grilling these adds a smoky taste that pairs well with the chicken and peanut sauce. To store your leftovers, place the chicken skewers in an airtight container. Make sure they are cool before sealing. This method helps keep them fresh. Store in the fridge for up to three days. If you plan to eat them later, it’s best to freeze them. When reheating, the microwave is quick but may dry out the chicken. Instead, use the oven for a better result. Preheat your oven to 350°F (175°C). Place the skewers on a baking sheet and cover with foil. Heat for about 10-15 minutes. This keeps the chicken juicy and flavorful. To freeze, wrap each chicken skewer tightly in plastic wrap. Place them in a freezer bag, removing as much air as possible. For the peanut sauce, store it in a separate container. It freezes well for up to two months. When you're ready to eat, thaw the skewers in the fridge overnight. Reheat them in the oven as mentioned above. For the sauce, warm it on low heat until smooth. Enjoy your delicious meal again! Yes, you can prepare Thai Peanut Chicken Satay ahead of time. It is great for meal prep. You can marinate the chicken strips the night before. This gives the meat more flavor. Store the marinated chicken in the fridge until you are ready to grill. You can also make the peanut sauce in advance. Just keep it in an airtight container in the fridge. When you are ready to serve, just reheat the sauce and grill the chicken. This way, you save time on busy days. If you have a peanut allergy, you can use sunflower seed butter. It has a similar creamy texture. Almond butter is another good option. It gives a nutty taste that works well. You can also try tahini, which is made from sesame seeds. This will change the flavor, but it still tastes great. Just pick a substitute that you enjoy. Adjust the other sauce ingredients as needed for balance. The spice level really depends on your taste. The recipe calls for chili paste, which adds heat. If you like it mild, start with less chili paste. You can always add more later. If you want it spicier, use more chili paste or add red pepper flakes. Taste the sauce as you mix it. This way, you get the heat just right for you. Remember, everyone’s spice tolerance is different. Adjust to suit your own taste buds. Thai Peanut Chicken Satay is simple and tasty. We reviewed essential ingredients, like chicken and peanut sauce components. We covered making a great marinade, grilling tips, and perfecting your dish. Variations allow you to use different proteins and flavors, while smart storage keeps leftovers fresh. In my experience, try new twists and enjoy the fun. With these tips, you will impress everyone. Enjoy making this dish and share it with friends!

Thai Peanut Chicken Satay Flavorful Skewers Recipe

- 4 medium zucchini - 3 tablespoons olive oil - 4 cloves garlic, minced - 1/2 teaspoon red pepper flakes (optional) - 1/2 cup grated Parmesan cheese - Salt and black pepper to taste - Fresh parsley, chopped (for garnish) - Lemon wedges (for serving) To make garlic parmesan zucchini noodles, you need just a few easy ingredients. First, grab your zucchini. Four medium ones will do. They become the base of your dish. Next, use three tablespoons of olive oil. This oil adds flavor and helps cook the noodles. Garlic is a must. Use four cloves, minced for the best taste. If you like a bit of heat, add a half teaspoon of red pepper flakes. This step is optional, but it does kick things up. You can’t forget about the cheese! Half a cup of grated Parmesan cheese gives a rich taste. Season your dish with salt and black pepper to your liking. For a fresh touch, chop some parsley as a garnish. Finally, have some lemon wedges ready for serving. They add a bright zing to the noodles. With these ingredients, you will create a fast, flavorful meal. The mix of garlic, cheese, and zucchini makes for a delightful dish. {{ingredient_image_1}} To start, you need to make your zucchini into noodles. You can use a spiralizer for this task. Simply insert the zucchini and twist to create long strands. If you don’t have one, a vegetable peeler works too. Just peel the zucchini into wide ribbons. Aim for thin noodles for a tender bite. Tips for Consistency: - Choose firm zucchini for better texture. - Try to keep the noodles similar in size. This helps them cook evenly. Next, heat the olive oil in a large skillet. Use medium heat for the best results. Once hot, add the minced garlic. If you like a bit of spice, sprinkle in the red pepper flakes. Sauté the mix for about one minute. You want the garlic fragrant but not burnt. Once the garlic is ready, toss in the zucchini noodles. Sauté them for about 3-4 minutes. You want them tender but still slightly crunchy. Stir gently to coat the noodles with the garlic and oil. After cooking, remove the skillet from the heat. Stir in the grated Parmesan cheese until it melts and coats the noodles. Adjusting Seasoning: - Taste your dish and add salt and black pepper as needed. Serving Suggestions: - Serve the noodles in a pasta bowl. - Top with more Parmesan cheese and chopped parsley. - Add a lemon wedge for a fresh, zesty flavor. - Cooking Time Recommendations: Cook your zucchini noodles for just 3 to 4 minutes. This keeps them tender yet firm. If you cook them too long, they turn mushy. You want a nice bite! - Importance of Keeping Zucchini Crunchy: Crunchy noodles give your dish a great texture. They soak up the sauce without losing their shape. Taste and texture are key to a great meal. - Alternative Ingredients: If you can’t find zucchini, use summer squash. It works just as well. You can also try other cheeses if you want a different flavor. - Making it Vegetarian or Vegan: To make this dish vegan, skip the Parmesan cheese. You can use nutritional yeast for a cheesy taste. This keeps the meal light and healthy. - Serving Suggestions: Serve the zucchini noodles in a nice pasta bowl. Top them with more Parmesan cheese if you like. A lemon wedge on the side adds a fresh touch. - Garnishing Ideas with Parsley and Lemon: Fresh parsley brightens the dish. A squeeze of lemon juice adds a zesty flavor. This makes your meal look appealing and taste even better. Pro Tips Use Fresh Zucchini: Opt for firm and glossy zucchini for the best flavor and texture. Avoid any that have soft spots or blemishes. Don’t Overcook: Zucchini noodles cook quickly, so keep an eye on them. Sauté just until tender to maintain a pleasant bite and avoid mushiness. Customize Your Cheese: While Parmesan is delicious, feel free to experiment with other cheeses like Pecorino Romano or nutritional yeast for a vegan option. Add More Flavors: Enhance the dish with additional ingredients such as cherry tomatoes, olives, or cooked chicken for a heartier meal. {{image_2}} Adding Other Cheeses You can change up the flavor by adding other cheeses. Try mozzarella for a creamy touch. Feta adds a salty bite. Goat cheese gives a tangy twist. Mix and match to find your favorite blend. Incorporating Vegetables You can also add more veggies to your dish. Cherry tomatoes bring sweetness and color. Spinach adds nutrients and a nice texture. Bell peppers provide crunch and a hint of sweetness. Get creative with your favorite vegetables. Adding Chicken or Shrimp To make the dish more filling, add protein like chicken or shrimp. Grilled chicken gives it a hearty taste. Sautéed shrimp cooks quickly and adds a seafood flair. Both options pair well with garlic and Parmesan. Plant-Based Protein Options If you prefer plant-based protein, choose options like chickpeas or tofu. Chickpeas add fiber and protein. Tofu soaks up flavors and adds creaminess. These choices make the dish healthy and satisfying. Using Pesto or Marinara For a flavor twist, try using pesto or marinara sauce. Pesto gives a fresh, herby taste. Marinara adds a rich, tomato flavor. Both sauces work well with zucchini noodles and can elevate your dish. Creamy Options If you like creamy sauces, consider adding a simple cream sauce. Mix heavy cream with garlic and Parmesan for a rich flavor. This option makes the dish even more comforting and indulgent. How do you store leftovers? Place your garlic Parmesan zucchini noodles in an airtight container. This keeps them fresh. You can store them in the fridge for up to three days. What are the best containers for storage? I recommend glass containers or BPA-free plastic ones. These materials prevent odors and keep your food safe. What are the best methods for reheating? The best way to reheat zucchini noodles is in a skillet. Heat it over medium heat and add a splash of olive oil. This method keeps the noodles from becoming mushy. What tips help maintain texture? Do not overcook the noodles when reheating. Only heat them until warm, about two to three minutes. This helps keep their nice, crunchy bite. To spiralize zucchini, you need a spiralizer. This tool turns zucchini into noodle shapes. You can find spiralizers in stores or online. If you don't have one, use a vegetable peeler instead. The peeler makes wide ribbons. Both methods work well for this recipe. Yes, you can prepare them ahead of time. Store the cooked noodles in an airtight container. Keep them in the fridge for up to two days. To reheat, use a skillet over low heat. Add a splash of olive oil to keep them moist. Avoid microwaving, as it can make them soggy. Zucchini noodles offer many health benefits. They are low in calories and high in nutrients. A medium zucchini has about 33 calories and is rich in vitamins A and C. They are also high in fiber, which helps your digestion. You can enjoy them as a low-carb alternative to pasta. In this article, we covered how to create delicious garlic parmesan zucchini noodles from scratch. We explored essential ingredients, step-by-step instructions, and helpful tips. You now know how to achieve the perfect texture, substitute ingredients, and enhance flavors. These noodles are nutritious and easy to make, fitting various diets. Remember, cooking should be fun and creative. Enjoy experimenting with your own variations and serving them to others. With practice, you’ll master this dish and impress your friends and family. Happy cooking!

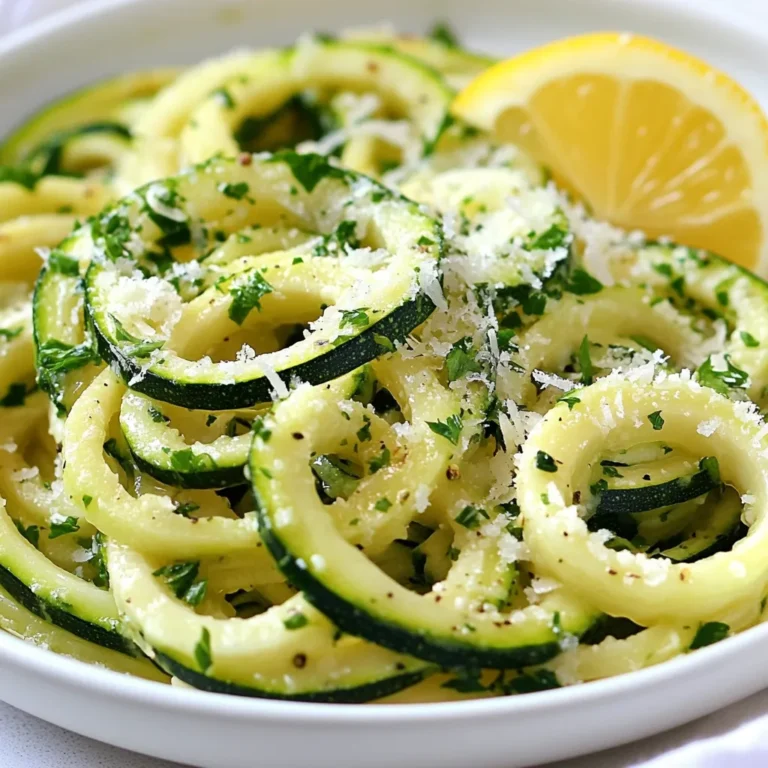
Garlic Parmesan Zucchini Noodles Quick and Easy Recipe

- 1 cup red lentils, rinsed - 1 can (14 oz) coconut milk - 1 large onion, finely chopped - 3 cloves garlic, minced - 1-inch piece of ginger, grated - 2 cups vegetable broth - 1 can (14 oz) diced tomatoes - 1 cup fresh spinach - Salt and pepper to taste Red lentils form the base of this dish. They cook quickly and add protein. Coconut milk gives a rich creaminess that balances the spices. Fresh vegetables, like onion and garlic, enhance the flavors and add depth. - 1 tablespoon curry powder - 1 teaspoon ground turmeric - 1 teaspoon ground cumin - 1 tablespoon olive oil The spices are key to the flavor. Curry powder adds warmth and depth. Turmeric gives a vibrant color and earthy taste. Cumin brings a nutty aroma that ties everything together. Olive oil helps to sauté the veggies and spices, creating a wonderful base. - Fresh cilantro for garnish - Fresh spinach for added color and nutrition Garnishing with fresh cilantro adds a burst of brightness. You can serve the curry with jasmine rice or naan bread. This makes for a complete and satisfying meal. Enjoying this dish with a side adds texture and flavor. {{ingredient_image_1}} 1. Start by heating olive oil in a large pot over medium heat. 2. Add the finely chopped onion. Sauté for about 5 minutes until it turns soft and clear. 3. Next, add the minced garlic and grated ginger. Cook for 2 more minutes until you smell their nice aroma. 4. Now, stir in the curry powder, turmeric, and cumin. Mix well and toast the spices for 1 minute. This step brings out their best flavors. 1. Pour in the vegetable broth, coconut milk, and diced tomatoes. Stir everything together and bring it to a gentle simmer. 2. Rinse the red lentils under cold water, then add them to the pot. Mix well to combine. 3. Cover the pot and cook on low heat for 20-25 minutes. Stir occasionally and add more broth if it gets too thick. The lentils should be soft when ready. 4. After the lentils are cooked, add the fresh spinach to the pot. Cook for another 5 minutes until the spinach wilts down. 1. Taste the curry and add salt and pepper as needed. Stir well to distribute the seasoning evenly. 2. Remove the pot from heat and let it sit for a few minutes. This helps it thicken slightly. 3. Serve your creamy coconut lentil curry in bowls. Garnish with fresh cilantro for a pop of color and flavor. Enjoy it with jasmine rice or naan for a complete meal! To cook lentils just right, check the time. For red lentils, cook for 20-25 minutes. They should be soft but not mushy. To avoid mushy lentils, rinse them well before cooking. This helps remove excess starch. Stir them gently while cooking. Avoid overcooking for the best texture. Want more flavor? Add spices like coriander or garam masala. They give a nice twist to the dish. Using vegetable broth adds depth. It enhances the curry more than plain water. The broth brings rich flavors that pair well with coconut and spices. Pair your curry with jasmine rice or warm naan. Both bring out the dish's flavors. For a nice touch, serve in bowls and top with fresh cilantro. This makes the dish look vibrant and inviting. A sprinkle of lime juice adds a zesty kick, enhancing the overall taste. Pro Tips Use Fresh Spices: Always use fresh spices for the best flavor. Ground spices lose potency over time, so consider buying whole spices and grinding them as needed. Adjust Consistency: If you prefer a thicker curry, let it simmer uncovered for a few additional minutes to reduce the liquid. For a soupier consistency, add extra vegetable broth. Add More Veggies: Feel free to toss in other vegetables like bell peppers, carrots, or peas to enhance the nutritional value and color of your curry. Garnish Creatively: Besides cilantro, consider garnishing with lime wedges, sliced red chili, or a dollop of yogurt for an extra layer of flavor and presentation. {{image_2}} You can add many vegetables to this curry. Carrots, bell peppers, and peas mix well. You can even add cauliflower or zucchini for more texture. Seasonal options like butternut squash or sweet potatoes are great in fall. They will add a nice sweetness and depth. Want a heartier dish? Add tofu or chickpeas. Tofu gives a nice bite, while chickpeas add a creamy texture. Both options are easy to include. Just toss them in during the last 10 minutes of cooking. They will soak up the flavors and make your meal filling. If you like spice, add more curry powder or some chili flakes. You can also use fresh chilies for an extra kick. Adjust your creaminess by using different types of milk. Almond milk or cashew milk can lighten the dish. Coconut cream will make it richer. Choose what fits your taste! To keep your creamy coconut lentil curry tasty, refrigerate it right away. Use airtight containers. This helps keep the flavors fresh. Let the curry cool down before sealing it. If you store it well, it can last for up to four days in the fridge. You can freeze this curry to enjoy later. Divide it into smaller portions for easy use. Use freezer-safe containers or bags. Make sure to remove excess air to prevent freezer burn. When ready to eat, thaw the curry overnight in the fridge. To reheat, warm it gently on the stove or in the microwave. Stir it well to ensure even heating. In the fridge, creamy coconut lentil curry stays good for about four days. In the freezer, it can last up to three months. Always check for spoilage before using. Signs include off smells or unusual textures. If it looks or smells bad, it’s best to throw it away. Yes, Creamy Coconut Lentil Curry is vegan. It contains no animal products. You can enjoy this dish while following a plant-based diet. The main ingredients, like lentils and coconut milk, are fully vegan-friendly. You can use other lentils, but they will change the cooking time and texture. For example, green or brown lentils take longer to cook. They also stay firmer than red lentils. If you choose these, check for doneness before serving. You can use almond milk or cashew cream for a different taste. Both options give a creamy texture. However, they will not taste the same as coconut milk. If you want a rich flavor, try using soy or oat milk. The spice level depends on the curry powder you use. Most curry powders are mild to medium. If you prefer more heat, add chili flakes or fresh peppers. Taste as you go to find the perfect balance for you. This blog post covered how to make a tasty Creamy Coconut Lentil Curry. We discussed key ingredients like red lentils, coconut milk, and fresh veggies. I shared steps for cooking, how to enhance flavors, and smart serving tips. Remember, you can vary the recipe by adding proteins or changing spices. Lastly, storing your leftovers properly keeps them fresh longer. Enjoy this dish and feel free to make it your own! Cooking should be fun and rewarding.

Creamy Coconut Lentil Curry Rich and Flavorful Dish

- 1 lb flank steak - 2 tablespoons chipotle in adobo sauce, blended - 1 red bell pepper, sliced - 1 green bell pepper, sliced - 1 medium onion, sliced - 2 tablespoons lime juice - 1 teaspoon cumin - 2 garlic cloves, minced - 1 teaspoon smoked paprika - Salt and pepper to taste - Fresh cilantro - Flour or corn tortillas For these Chipotle Lime Steak Fajitas, I love using flank steak. It cooks quickly and stays tender when sliced right. The chipotle in adobo sauce brings a smoky heat that pairs perfectly with lime juice. Fresh vegetables like red and green bell peppers add color and crunch. The marinade makes a huge difference in flavor. You can play with spices like cumin and smoked paprika to enhance the taste. I recommend fresh cilantro as a garnish; it adds a nice touch. Don’t forget the tortillas! You can choose flour or corn, depending on your taste. These ingredients work together to create a delightful meal that is sure to impress. {{ingredient_image_1}} To marinate the steak, first, mix chipotle sauce, lime juice, cumin, minced garlic, smoked paprika, salt, and pepper in a bowl. This mixture gives the steak a great flavor. Next, add the flank steak and coat it well with the marinade. Cover the bowl and let it sit. I suggest marinating for at least 30 minutes at room temperature. For a deeper flavor, refrigerate for up to 2 hours. In a large skillet, heat 1 tablespoon of olive oil over medium-high heat. Add your sliced red and green bell peppers and onion to the skillet. Sauté these for about 5 to 7 minutes. You want the vegetables to get tender and start to caramelize. A pinch of salt and pepper will enhance their taste. When they look good, remove them from the skillet and set them aside. Now, let’s cook the steak. In the same skillet, add another tablespoon of olive oil and raise the heat to high. Take the flank steak out of the marinade and discard any leftover marinade. Place the steak in the hot skillet. Cook it for about 4 to 5 minutes on each side for medium-rare. If you prefer it more done, adjust your cooking time. After cooking, let the steak rest for 5 minutes before slicing against the grain. For assembly, slice the steak thinly and return it to the skillet. Add the cooked vegetables over low heat. This warms everything together. It’s a great way to blend the flavors. Before serving, warm your tortillas in a skillet or microwave. Fill each tortilla with the steak and vegetable mix. Don’t forget to garnish with fresh cilantro for a burst of flavor! To make the best marinade, blend chipotle in adobo sauce with lime juice. This mix adds a smoky and tangy kick. Add cumin, minced garlic, and smoked paprika for depth. Coat the flank steak well to soak up all the flavor. Try marinating for at least 30 minutes. For even better taste, let it sit in the fridge for up to 2 hours. I love using a cast iron skillet for cooking steak. It holds heat well and gives a nice sear. If you use a non-stick pan, ensure you heat it well, too. Start cooking the steak on high heat to get a good crust. Keep an eye on the temperature. For medium-rare, cook about 4-5 minutes on each side. Use a meat thermometer to check. Aim for 130°F for the perfect doneness. To impress your guests, serve fajitas on a large platter. Add lime wedges for a pop of color. A bowl of fresh cilantro lets everyone add their own touch. You can even layer the tortillas on the side. It makes for a fun, DIY meal. For extra flair, sprinkle some smoked paprika on top for a vibrant look. Pro Tips Marinate for Flavor: Allowing the flank steak to marinate for at least 30 minutes will enhance the flavors significantly. For a deeper taste, consider marinating it overnight in the refrigerator. High Heat for Searing: Make sure your skillet is hot before adding the steak. This will give you a nice sear, locking in the juices and creating a delicious crust. Slice Against the Grain: To ensure tenderness, always slice the steak against the grain. This helps break down the muscle fibers, making each bite easier to chew. Customize Your Toppings: Feel free to add your favorite toppings such as avocado, sour cream, or salsa to personalize your fajitas and enhance their flavor profile. {{image_2}} You can switch up the meat in this recipe for a fun twist. Chicken or shrimp fajitas are great options. Both cook quickly and soak up the flavors well. For a vegetarian option, try using tofu or seitan. They provide a nice texture and absorb the marinade beautifully. Experiment with spices and sauces to change the flavor profile. Adding chili powder gives a richer heat. You can also try adding fresh herbs like oregano or thyme for a fresh taste. Seasonal vegetables can also add variety. Spring onions in the spring or zucchini in the summer make great choices. Choosing the right tortilla can change your fajita experience. Flour tortillas are soft and chewy, while corn tortillas offer a sturdy texture. If you need gluten-free options, many brands sell corn tortillas that taste great. You can even find gluten-free flour tortillas for a softer bite. To store leftover fajitas, first cool them down. Let them sit at room temperature for no more than two hours. This helps prevent bacteria growth. After cooling, place them in airtight containers. Glass or plastic containers work well. Make sure to seal them tightly to keep the flavors locked in. When reheating, you want to keep the flavors and texture. The stovetop is best for this. Heat a skillet over medium. Add a splash of water or oil to help steam the fajitas. Stir gently until everything is hot. If using a microwave, place the fajitas on a microwave-safe plate. Cover with a damp paper towel. Heat in short bursts, checking often to avoid overcooking. You can freeze fajitas for later use. To freeze, let the cooked fajitas cool completely. Then, place them in freezer-safe bags. Remove as much air as you can before sealing. To thaw, place the bag in the fridge overnight. This keeps the flavor fresh. You can also use the microwave for quick thawing, but this may affect the texture slightly. Yes, you can use other cuts of steak. Skirt steak, sirloin, or ribeye work well. Just remember to adjust cooking times slightly. Skirt steak cooks quickly, about 3-4 minutes per side. Sirloin takes about 5-6 minutes per side for medium-rare. Ribeye, being thicker, may need 6-7 minutes. You can marinate the steak for at least 30 minutes. For best flavor, let it sit for up to 2 hours in the fridge. Avoid marinating longer than 24 hours; the meat may become too tender and mushy. Great side options include Mexican rice, refried beans, or a fresh salad. You can also serve corn on the cob or guacamole. For drinks, try a cold beer or a refreshing limeade. These will complement the fajitas nicely. Yes, you can prep fajitas in advance! Marinate the steak the night before. Cook the vegetables and steak, then store them in the fridge. When ready to serve, just reheat them in a skillet. This saves time and makes meal planning easy. You’ve learned how to make delicious Chipotle Lime Steak Fajitas, from marinating flank steak to cooking fresh vegetables. Remember the importance of using fresh ingredients and the right techniques for cooking. Fajitas are versatile, so feel free to try different proteins and toppings. Proper storage lets you enjoy leftovers too. With these tips, you can impress friends and family with a flavorful meal. Enjoy your fajitas and get creative with your favorite ingredients!

Chipotle Lime Steak Fajitas Flavorful and Easy Recipe

- Fresh baby carrots (or regular carrots) - Unsalted butter - Pure maple syrup - Brown sugar - Ground cinnamon - Salt and pepper - Fresh parsley for garnish - 1 pound baby carrots - 3 tablespoons unsalted butter - 2 tablespoons pure maple syrup - 1 tablespoon brown sugar - 1 teaspoon ground cinnamon - If you don't have baby carrots, regular carrots work well. Just peel and slice them. - You can swap pure maple syrup with honey if needed. - If you prefer, use coconut sugar instead of brown sugar. {{ingredient_image_1}} - Rinse the baby carrots under cold water. - If using regular carrots, peel and cut them into even sticks. Aim for about 2-3 inches long. Uniform pieces cook better. - In a large skillet, melt 3 tablespoons of unsalted butter over medium heat. Watch it closely; you want it melted, not browned. - Add the carrots to the skillet. Sauté them for about 5 minutes. Stir occasionally until they begin to soften. - Sprinkle 1 tablespoon of brown sugar and 1 teaspoon of ground cinnamon over the carrots. Mix well to coat them evenly. - Drizzle 2 tablespoons of pure maple syrup over the carrots. Make sure each carrot gets a good coating. - Season with salt and pepper to taste. Adjust as needed. - Reduce the heat to low and cover the skillet. Let the carrots cook for 10-12 minutes. Stir occasionally. They should become tender and caramelized. To ensure even cooking, start with uniform carrot sizes. Use baby carrots or cut regular carrots into similar sticks. This way, they cook at the same rate. Stir the carrots often to promote even heat. It helps them brown nicely without burning. Caramelization is key to flavor. After sautéing, add brown sugar and cinnamon. Stir them in well, then drizzle maple syrup. This combination creates that lovely glaze. Cook on low heat with a lid. It allows the carrots to soak in the sweet flavors while getting tender. For presentation, serve the glazed carrots in a decorative bowl. Arrange them neatly and drizzle extra glaze on top. A sprinkle of parsley adds color and freshness. This simple touch makes the dish pop. These carrots pair well with many main dishes. They go great with roasted chicken or grilled steak. The sweet glaze balances savory flavors. You can also serve them with a holiday ham for a festive touch. Feel free to experiment with spices. Try adding a pinch of nutmeg for warmth or a dash of cayenne for heat. These small tweaks can elevate the dish in fun ways. Using fresh herbs as garnishes makes a big difference. Chopped parsley is perfect, but you can also try mint or dill. These herbs add brightness and a fresh taste that complements the sweetness. Pro Tips Choose the Right Carrots: For best flavor and texture, opt for fresh, crisp baby carrots or young carrots that are in season. Don’t Overcook: Keep an eye on the cooking time. Overcooked carrots can become mushy; you want them tender yet firm. Adjust Sweetness: Feel free to adjust the amount of maple syrup and brown sugar based on your sweetness preference. Garnish for Flavor: Fresh herbs like parsley not only add color but enhance the overall flavor of the dish. {{image_2}} You can change the sweet taste by using other sweeteners. Honey adds a floral note, while agave syrup offers a mild flavor. Both options work well with the carrots. Just swap them in for the maple syrup in equal amounts. This switch can create a new twist in flavor. Adding nuts can bring a nice crunch to your dish. Chopped walnuts or pecans add texture and flavor. They pair well with the sweet glaze. You can also try dried fruits like raisins or cranberries. They add chewiness and a burst of sweetness that balances the carrots. Just sprinkle them in during the last few minutes of cooking. Carrots are great, but you can also try other veggies. Sweet potatoes or parsnips work well with the glaze. They have a similar sweetness that complements the dish. Mixing vegetables like green beans or bell peppers can create a colorful side. This mix brings different flavors and textures to your table. Enjoy the variety and make this dish your own! Store your glazed carrots in an airtight container. This helps keep them fresh. They last about 3 to 5 days in the fridge. If you notice any changes in color or smell, it's best to toss them. The best way to reheat glazed carrots is on the stove. Use a skillet over low heat. Stir gently to avoid breaking them. You can add a splash of water or butter to keep them moist. Microwaving is quick too. Just cover them to trap steam and heat in short bursts. You can freeze glazed carrots for longer storage. First, let them cool completely. Place them in a freezer-safe bag or container. They can last up to 3 months in the freezer. When you're ready to eat, thaw them overnight in the fridge. Reheat them on the stove or in the microwave until warm. Yes, you can use frozen carrots. However, they will have a softer texture. Frozen carrots also cook faster than fresh ones. Plan for a shorter cooking time. Start checking them after five minutes to avoid overcooking. You can tell the carrots are done when they are tender. They should have a slight bite but not be mushy. Look for a nice caramel color on the surface. This shows they have cooked well in the glaze. Yes, you can prepare these carrots ahead of time. Cook them and let them cool. Store the glazed carrots in the fridge for up to three days. When ready to serve, reheat them gently on the stove or in the microwave. This guide covers everything you need for delicious glazed carrots. We explored the main ingredients, measurements, and how to prepare and cook them. I shared tips for perfecting the dish and creative variations to try. Lastly, we discussed storage and reheating methods to keep your carrots tasty. With these insights, you can confidently make a standout side dish that impresses. Enjoy the cooking journey and savor every bite!

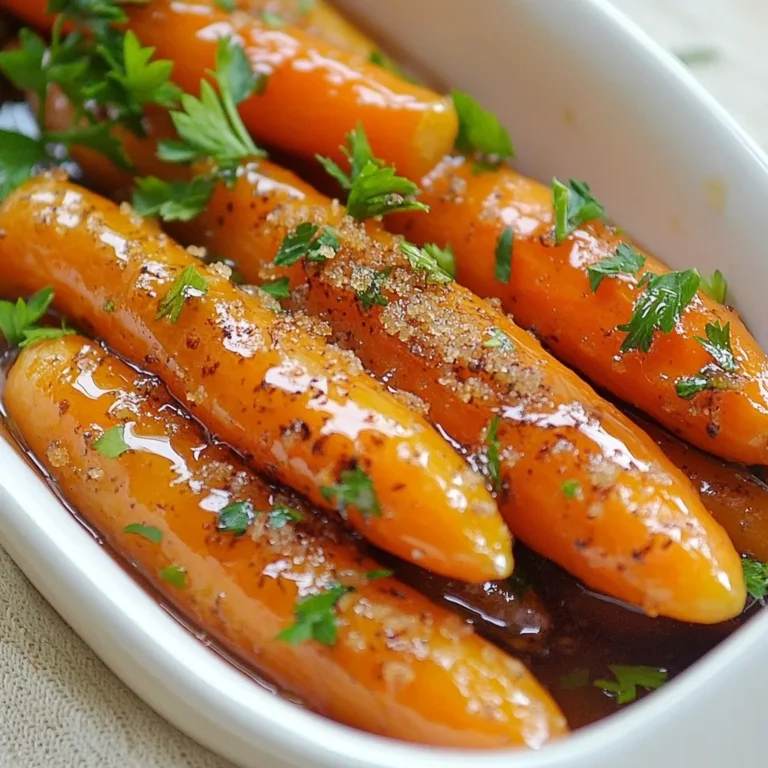
Maple Brown Sugar Glazed Carrots Flavorful Side Dish

To make tasty chili lime shrimp tacos, you need the following ingredients: - 1 lb shrimp, peeled and deveined - 2 tablespoons olive oil - 2 tablespoons fresh lime juice - 1 tablespoon chili powder - 1 teaspoon cumin - 1/2 teaspoon paprika - 1 clove garlic, minced - Salt and pepper to taste - 8 small corn tortillas - 1 cup red cabbage, thinly sliced - 1 avocado, sliced - Fresh cilantro, for garnish - Lime wedges, for serving These ingredients come together to create a zesty and fresh meal. The shrimp provide protein, while the spices add flavor. The lime juice gives a bright twist, and the tortillas hold everything perfectly. You can enhance these tacos with fun extras. Here are some ideas: - Sour cream - Hot sauce - Fresh salsa - Chopped green onions - Diced tomatoes Adding these garnishes can add more taste and texture to your tacos. Feel free to mix and match based on what you like. If you want to adjust the recipe, here are some easy swaps: - Use chicken or tofu instead of shrimp for different proteins. - Choose gluten-free tortillas for a gluten-free meal. - Try a different type of cabbage, like green or Napa. These substitutions help fit your diet and let you enjoy the tacos your way. {{ingredient_image_1}} First, take a bowl. Add 1 pound of shrimp that is peeled and deveined. Pour in 2 tablespoons of olive oil and 2 tablespoons of fresh lime juice. Then, mix in 1 tablespoon of chili powder, 1 teaspoon of cumin, and 1/2 teaspoon of paprika. Don’t forget to add 1 clove of minced garlic, along with salt and pepper to taste. Stir everything well until the shrimp are coated. Let the shrimp sit for about 15 minutes to soak up the flavors. Next, heat a skillet over medium-high heat. When the skillet is hot, add the marinated shrimp in a single layer. Cook the shrimp for about 2 to 3 minutes on each side. You want them to turn pink and opaque. Once cooked, remove the skillet from heat. The shrimp will have a bright, spicy flavor. Now, it’s time to warm the corn tortillas. In the same skillet, add the tortillas one at a time. Warm them for about 30 seconds on each side. You want them to be soft and pliable. This step helps the tortillas hold all the tasty fillings. To assemble your tacos, take a warm tortilla and place a portion of shrimp on top. Then, add some sliced red cabbage for crunch. Next, top with slices of avocado for creaminess. Finally, garnish with fresh cilantro. Serve with lime wedges on the side for extra zest. Enjoy each bite of your flavorful Chili Lime Shrimp Tacos! When you buy shrimp, look for bright, shiny shells. They should smell like the ocean, not fishy. Choose shrimp that feel firm and springy when you touch them. If they are frozen, ensure they are not stuck together. This means they were frozen too long. Fresh shrimp is the best choice for tasty tacos. To make your shrimp burst with flavor, marinate them well. Use the lime juice, chili powder, and garlic to add zest. Let the shrimp sit for 15 minutes before cooking. This helps the shrimp soak up all the spices. When cooking, make sure your skillet is hot. Cook the shrimp until they turn pink, about 2-3 minutes on each side. This way, they stay juicy and tender. Corn tortillas are classic for tacos, but you can try other options. Flour tortillas are soft and work well too. Lettuce wraps are a great low-carb choice. You can even use pita bread for a unique twist. Choose what fits your taste best and enjoy! Pro Tips Marinate for Maximum Flavor: Allow the shrimp to marinate for at least 15 minutes to absorb the chili lime flavors deeply. Perfect Tortilla Technique: Warm the tortillas in the skillet right before assembling to keep them soft and pliable. Fresh Ingredients Matter: Use fresh lime juice and ripe avocados for the best taste and texture in your tacos. Customize Your Toppings: Feel free to add other toppings like diced tomatoes, jalapeños, or a drizzle of crema for extra flavor. {{image_2}} You can make tasty chili lime tacos without shrimp! Use vegetables like zucchini or bell peppers. Slice them thin and marinate just like the shrimp. You can use lime juice, olive oil, and chili powder for flavor. Cook them in a skillet until they are soft and warm. Add red cabbage and avocado as toppings for crunch. If you love heat, add more chili powder or fresh jalapeños. You can mix diced jalapeños into the shrimp marinade. This will give your tacos a nice kick. For extra spice, try a hot sauce on top. It adds flavor and heat in every bite. Adjust the spice level to fit your taste. Tropical salsa can brighten up your tacos. You can mix diced mango or pineapple with red onion and lime juice. This will add sweetness and freshness. You can also include cilantro for added flavor. Spoon this salsa over your shrimp tacos for a fun twist. The sweet and spicy combo keeps things exciting! To store leftover Chili Lime Shrimp Tacos, first let them cool down. Place the shrimp and toppings in separate containers. Use an airtight container for the shrimp. The shrimp stays fresh for up to two days in the fridge. Keep the tortillas in a separate bag to avoid sogginess. To reheat the shrimp, place them in a skillet over medium heat. Cook for about 2-3 minutes until hot. You can also use a microwave, but a skillet keeps the shrimp juicy. Warm the tortillas in the skillet for 30 seconds on each side. This step helps keep them soft and tasty. Freezing the shrimp is easy. After cooking, let them cool, then place them in a freezer-safe bag. Remove as much air as possible before sealing. The shrimp can stay in the freezer for up to three months. When ready to use, thaw in the fridge overnight before reheating. You can marinate shrimp for about 15 to 30 minutes. This time gives the shrimp a nice flavor. If you marinate too long, the shrimp can become mushy. I recommend sticking to 15 minutes for the best texture. Yes, you can use frozen shrimp. Just remember to thaw them first. You can place them in cold water for quick thawing. Once thawed, pat them dry before marinating. This helps the flavors to stick better. Chili lime shrimp tacos go well with several side dishes. Here are some great options: - Black beans with lime - Mexican rice - Grilled corn - A fresh salad with avocado and lime dressing - Chips with salsa or guacamole These sides add balance and enhance the taco experience! You now know the key steps to make Chili Lime Shrimp Tacos. We covered the main ingredients, how to marinate and cook shrimp, and tips for perfect tacos. Remember, you can switch ingredients to fit your diet. Enjoy fresh shrimp or try tasty vegan options. Store leftovers and reheat easily for a quick meal. With these ideas, you can impress friends and family. Tacos are a fun way to eat, so explore your flavors!

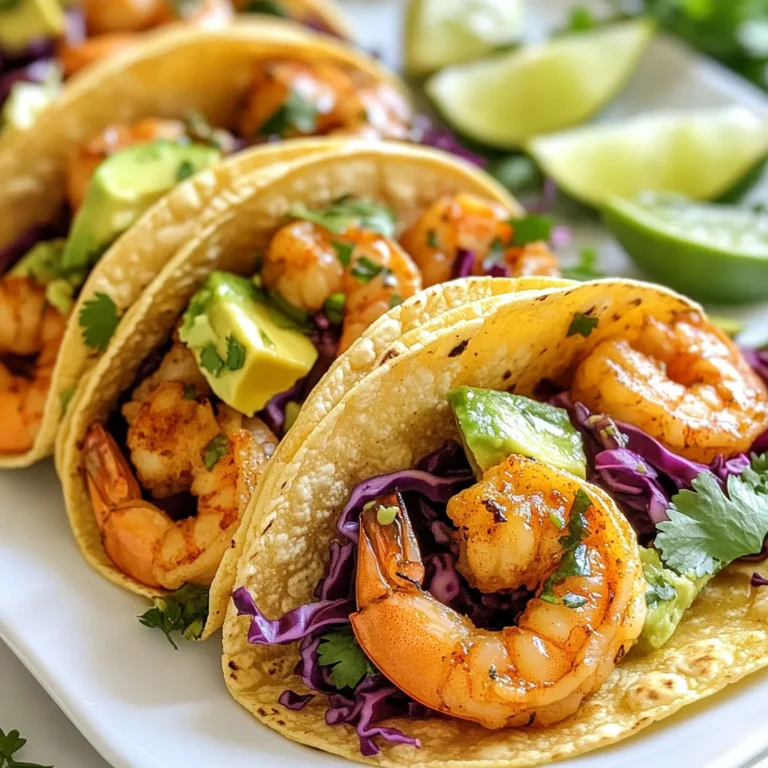
Chili Lime Shrimp Tacos Flavorful and Simple Meal

To make these tasty maple glazed doughnut holes, gather the following: - 2 cups all-purpose flour - 1/2 cup granulated sugar - 2 tsp baking powder - 1/2 tsp baking soda - 1/2 tsp salt - 1/2 tsp ground cinnamon - 1/4 cup unsalted butter, melted - 3/4 cup buttermilk - 1 large egg - 1 tsp vanilla extract - Oil for frying (vegetable or canola) - 1/2 cup maple syrup - 1/4 cup powdered sugar (for glazing) Choosing quality ingredients makes a big difference. Here are my tips: - Flour: Use fresh all-purpose flour. Check the date on the bag. - Buttermilk: Look for real buttermilk, not powdered. It adds moisture and flavor. - Maple syrup: Opt for pure maple syrup. It has a richer taste than imitation syrup. - Eggs: Choose large, fresh eggs. They help bind the doughnut holes well. - Butter: Use unsalted butter for better control of salt in your recipe. Feel free to get creative! Here are some optional ingredients: - Nuts: Chop walnuts or pecans for a crunchy topping. - Spices: Add nutmeg or ginger for extra warmth. - Chocolate: Drizzle melted chocolate over the glaze for a sweet twist. - Fruits: Toss in some dried fruit like cranberries or raisins for added flavor. These additions can make your doughnut holes unique and fun! {{ingredient_image_1}} Start by grabbing a large mixing bowl. Add 2 cups of all-purpose flour. Then, mix in 1/2 cup of granulated sugar, 2 teaspoons of baking powder, 1/2 teaspoon of baking soda, 1/2 teaspoon of salt, and 1/2 teaspoon of ground cinnamon. Whisk all these together until they blend well. This step is key for an even dough. In a separate bowl, combine 1/4 cup of melted unsalted butter and 3/4 cup of buttermilk. Crack in 1 large egg, and add 1 teaspoon of vanilla extract. Whisk until the mixture is smooth and creamy. This blend adds richness to our doughnut holes, making them soft and moist. Get a large pot or deep fryer ready. Heat oil to 350°F (175°C). Make sure you have enough oil so the doughnut holes can float freely. Using a small cookie scoop or a spoon, drop tablespoon-sized amounts of dough into the hot oil. Fry them in batches to avoid crowding. Cook for about 3-4 minutes, turning them occasionally. They should turn a lovely golden brown. Once done, use a slotted spoon to take them out and place them on a paper towel-lined plate to drain excess oil. This helps keep them light and fluffy! Now, you are ready to glaze these treats and enjoy! Frying doughnut holes is an art. Start by heating your oil to 350°F (175°C). Use a deep pot. This helps the doughnut holes cook evenly. If the oil is too hot, they burn. If it’s too cool, they soak up oil. Both ruin the taste. Fry in small batches. This keeps the temperature steady. Turn each hole with a slotted spoon. Cook until golden brown, about 3-4 minutes. Remove them with the slotted spoon. Let them drain on paper towels. The glaze is key to great doughnut holes. Mix maple syrup and powdered sugar in a bowl. Stir until smooth. The glaze should be thick but pourable. If it’s too runny, add more powdered sugar. If it’s too thick, add a bit of maple syrup. Dip warm doughnut holes in the glaze. Make sure they are well-coated. Let excess glaze drip off before setting them on a rack. This helps the glaze set nicely. Don’t skip the sifting step. Sifting flour adds air. This makes your doughnut holes light and fluffy. Avoid overmixing the batter. A few lumps are fine. Overmixing can make them tough. Watch the frying time closely. If you leave them too long, they become dry. Lastly, glaze them while warm. This helps the icing stick better. Enjoy your tasty treats! Pro Tips Use Fresh Ingredients: Ensure your baking powder and baking soda are fresh for the best rise and texture in your doughnut holes. Monitor Oil Temperature: Use a thermometer to keep the oil at a consistent 350°F (175°C) for even cooking and to prevent greasy doughnuts. Don't Overmix: Mix the batter until just combined to keep your doughnut holes light and fluffy; a few lumps are perfectly fine. Glaze While Warm: Dip the doughnut holes in the maple glaze while they are still warm for better adhesion and a shinier finish. {{image_2}} You can make these doughnut holes even more fun. Try adding spices like nutmeg or ginger to the dough for a warm kick. You can also swap the maple glaze for chocolate or a simple vanilla glaze. This lets you play with flavors based on what you like. If you want a lighter treat, consider baking instead of frying. Preheat your oven to 350°F (175°C) and place the doughnut holes on a greased baking sheet. Bake for 12-15 minutes until golden. They won’t be as crispy, but they will still taste great and save some calories. You can change these doughnut holes with the seasons. In fall, add pumpkin spice to the dough for a cozy flavor. You can also use cocoa powder in the dough for a rich chocolate taste. During the holidays, try adding a splash of peppermint extract to the glaze. These options keep your treats exciting all year long. To keep your doughnut holes fresh, store them in an airtight container. Use wax paper between layers to avoid sticking. This method helps preserve their soft texture. If you have leftover doughnut holes, refrigerate them for longer storage. They can last for up to three days in the fridge. Reheating is simple. Preheat your oven to 350°F (175°C). Place the doughnut holes on a baking sheet. Heat them for about 5-7 minutes or until warm. This method keeps them soft and tasty. Avoid using the microwave, as it can make them chewy. Glazed doughnut holes last for about two days at room temperature. Keep them in a cool, dry place. Unglazed doughnut holes can last a bit longer, around three days. If you want to keep them even longer, consider freezing them. They can stay fresh in the freezer for up to three months. When ready to eat, simply thaw and reheat. Yes, you can use other flours. Whole wheat flour works well. It gives a nutty taste. If you want to make them gluten-free, use a gluten-free flour mix. Just ensure it has a good binding agent for the best texture. You can make a quick substitute for buttermilk. Mix one cup of milk with one tablespoon of lemon juice or vinegar. Let it sit for five minutes. This will give you a similar tangy flavor. You can also use plain yogurt or sour cream mixed with water. You can prepare the dough ahead of time. Keep it in the fridge for up to 24 hours. Just remember to let it warm up a bit before frying. You can also fry them ahead of time and store them in an airtight container. Reheat them in the oven for a few minutes before glazing. This keeps them warm and fresh! In this blog post, we explored the key ingredients to make delicious doughnut holes. I shared tips on choosing the best options and ways to customize your treat. We outlined simple steps to prepare and fry your doughnut holes perfectly. I offered tricks to help you avoid common mistakes and achieve the best glaze. Lastly, we discussed variations for flavor and storage tips. Enjoy creating your sweet treats, and remember to experiment with flavors to make them your own!

Maple Glazed Doughnut Holes Tasty and Simple Treat

- 2 cans of good quality tuna in olive oil, drained - 1 cup cherry tomatoes, halved - 1/2 cup cucumber, diced - 1/4 cup red onion, finely chopped - 1/3 cup Kalamata olives, pitted and sliced - 1/4 cup feta cheese, crumbled - 2 tablespoons capers, rinsed and drained - 3 tablespoons fresh parsley, chopped - 3 tablespoons lemon juice - 2 tablespoons extra virgin olive oil - Salt and pepper to taste Choosing the best quality tuna Look for tuna packed in olive oil. It tastes better than water-packed tuna. Check labels for "line caught" or "pole caught" for sustainability. This choice enhances flavor and supports ocean health. Importance of fresh vegetables Fresh vegetables make a big difference. Use ripe cherry tomatoes and crisp cucumbers. These add crunch and brightness to your salad. Always pick veggies that feel firm and smell fresh. Selecting authentic Kalamata olives Kalamata olives should be dark purple and shiny. Buy them pitted for convenience. Look for jars labeled "Greek" or "authentic" to ensure quality. Their rich, fruity flavor elevates your salad to a new level. {{ingredient_image_1}} 1. Start with a large bowl. Add the drained tuna first. 2. Next, toss in the halved cherry tomatoes and diced cucumber. 3. Add the finely chopped red onion and sliced Kalamata olives. 4. Then, sprinkle in the crumbled feta cheese and rinsed capers. 5. Finally, add the chopped parsley. To mix the salad, use a large spoon. Gently fold the ingredients together. Be careful not to break the tuna too much. You want nice chunks in your salad. Letting the salad rest is key. After mixing, leave it for about 10 minutes. This time helps all the flavors blend well. The salad will taste better after resting. For serving, you can chill the salad in the fridge. It tastes great cold, but room temperature works too. Pair it with crusty bread or a light wine for a perfect meal. Enjoy! Chopping ingredients evenly helps your salad look great. Use a sharp knife for smooth cuts. For tomatoes, cut them in half and place them cut-side down. This way, they stay stable while you chop. Dice the cucumber into small pieces for a crunchy bite. Finely chop the red onion to mix well without overpowering the taste. Adjusting seasoning is crucial. Start with a pinch of salt and pepper. Taste the salad before serving. You can always add more salt if needed. Remember, feta and olives are salty. This makes it easy to add too much salt. Prepping ingredients ahead of time can save you minutes. You can chop the veggies and store them in the fridge. This way, when you’re ready to make the salad, it takes less time. Using canned tuna is a great choice. It is quick and still very tasty. If you have fresh tuna, you can grill or sear it for a different flavor. Both options work well. Just drain the canned tuna well to avoid excess oil. Pro Tips Quality Tuna Matters: Use good quality tuna packed in olive oil for the best flavor and texture. Fresh Ingredients: Opt for fresh vegetables and herbs to enhance the salad's taste and freshness. Let It Rest: Allow the salad to sit for about 10 minutes before serving to let the flavors meld together. Serve It Right: Enjoy the salad chilled or at room temperature for a refreshing dish. {{image_2}} If you want a vegetarian version, you can use chickpeas instead of tuna. Chickpeas offer a great texture and protein. You can also try using white beans or lentils for a similar effect. They add heartiness and flavor to the salad. Adding more vegetables enhances color and taste. You can include bell peppers, radishes, or even artichoke hearts. These additions offer crunch and freshness. Fresh herbs like basil or mint can also brighten the dish. To kick up the heat, add diced jalapeños or a sprinkle of red pepper flakes. This adds a spicy kick to each bite. If you prefer a milder flavor, try adding diced avocado. It gives a creamy texture without heat. Herbs can really change the flavor. Besides parsley, you can try dill or cilantro. Each herb brings its own unique flavor. Experimenting with these options can make your salad even more enjoyable. To store your Mediterranean tuna salad, use an airtight container. Glass or plastic containers work well. They keep the flavors sealed in and the salad fresh. If you have leftovers, separate the salad from any extra dressing. This helps keep the salad crisp. When you store the salad, place it in the fridge right away. To keep the ingredients fresh longer, try covering the container with plastic wrap or a lid. This prevents air from getting in. If you notice any cut vegetables, wrap them in a damp paper towel. This helps maintain moisture and keeps them from wilting. In the fridge, your Mediterranean tuna salad lasts about 3 days. Make sure to check the smell and look of the salad before eating. If you see any signs of spoilage, such as a sour smell or slimy texture, throw it away. Additionally, if the tomatoes or cucumbers start to get soggy, it's time to let go. Fresh ingredients are key to a tasty salad. Always remember: when in doubt, toss it out! Can you use different types of tuna? Yes, you can use different types of tuna. I recommend solid white albacore or skipjack. Both offer great taste and texture. Just ensure they are packed in olive oil for richness. You can also try tuna packed in water if you seek a lighter option. How to make the salad more filling? To make the salad more filling, add some cooked quinoa or chickpeas. These ingredients boost protein and fiber levels. You can also serve the salad on a bed of greens like spinach or arugula. This adds volume and more nutrients. What are the nutritional benefits of this salad? This salad is packed with nutrients. Tuna provides lean protein and omega-3 fatty acids, which are good for heart health. Cherry tomatoes add vitamins A and C. Cucumbers provide hydration. Feta cheese gives calcium and flavor, while olives add healthy fats. Overall, it's a balanced meal rich in vitamins and minerals. This article covered all you need to know about making a delicious tuna salad. We discussed key ingredients like tuna, fresh veggies, and feta cheese. Quality matters, so choose the best ingredients. I shared steps for mixing and flavoring the salad, along with tips for prep and storage. Remember, you can customize this salad to fit your taste. Try different veggies or spices for fun variations. With these tips, you can enjoy a fresh, tasty dish with confidence. Happy cooking!

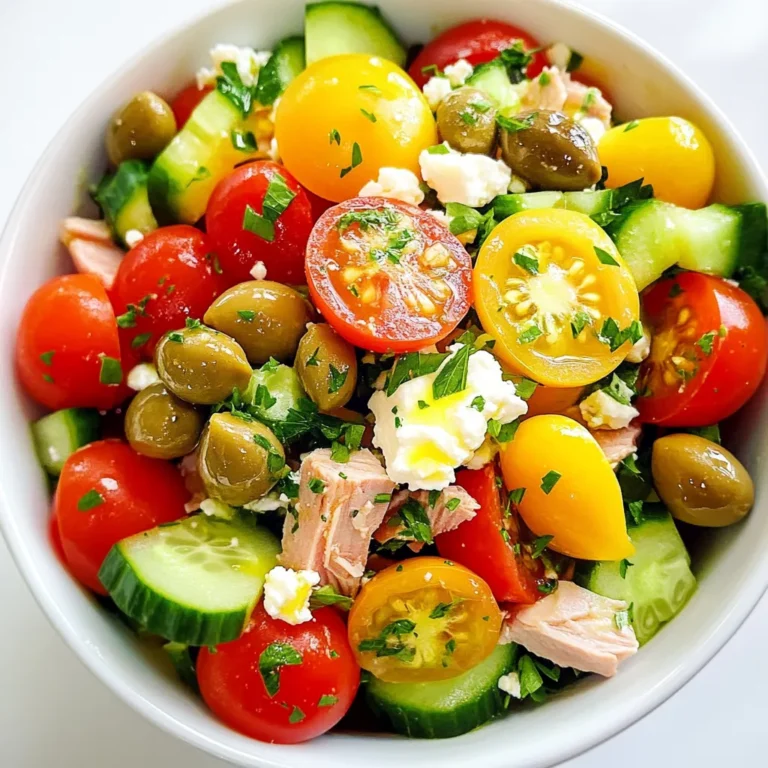
Mediterranean Tuna Salad Fresh and Flavorful Delight

- 2 pounds ripe tomatoes, halved - 1 large onion, quartered - 4 cloves garlic, peeled - 2 tablespoons olive oil - 1 teaspoon salt - 1/2 teaspoon black pepper - 1 teaspoon sugar (optional) - 2 cups vegetable broth - 1 cup fresh basil leaves, packed - 1/2 cup heavy cream (optional) - Fresh basil leaves and croutons for garnish In this recipe, ripe tomatoes are key. They add sweetness and depth. Onions and garlic bring a strong, savory flavor. Olive oil helps to roast the veggies and adds richness. Seasonings like salt, pepper, and sugar balance the tastes. Vegetable broth gives the soup a nice body. Fresh basil adds that classic taste you expect. If you want a creamy soup, heavy cream works well. Garnishes like fresh basil and croutons make it look great. - Alternatives for heavy cream: You can use coconut milk or cashew cream for a lighter soup. - Substitutes for fresh basil: Dried basil works, but use less, as dried herbs are stronger. - Choosing the best tomatoes: Look for tomatoes that feel heavy and smell sweet. Varieties like Roma or vine-ripened are great choices. These substitutions can keep your soup just as tasty. They also allow you to use what you have on hand. This flexibility makes the recipe even more accessible. {{ingredient_image_1}} 1. Preheating the oven Start by preheating your oven to 425°F (220°C). This high heat helps caramelize the veggies. 2. Preparing the vegetables Take 2 pounds of ripe tomatoes and halve them. Quarter 1 large onion and peel 4 cloves of garlic. Place all the veggies on a baking sheet. Drizzle with 2 tablespoons of olive oil. Sprinkle 1 teaspoon of salt, 1/2 teaspoon of black pepper, and 1 teaspoon of sugar if you like a hint of sweetness. Toss everything so each piece is coated well. 1. Baking times and temperatures Roast the veggies in the oven for 25 to 30 minutes. Check if the tomatoes are caramelized and slightly charred. The onions should be soft and sweet. 2. Signs of perfect roasting You know the veggies are ready when they look golden and smell amazing. If you see some dark spots, that’s good! It adds flavor. 1. Using an immersion blender After the veggies cool for a few minutes, transfer them to a large pot. Add 2 cups of vegetable broth and bring it to a simmer over medium heat. Let it cook for about 10 minutes. Then, use an immersion blender to blend until smooth. If you like some chunks, blend only half. 2. Adjusting seasoning for taste Taste the soup. If it needs more flavor, adjust the seasoning. You might add more salt or pepper. 3. Presentation tips for serving Serve the soup hot in rustic bowls. For a fancy touch, drizzle some olive oil or heavy cream on top. Add fresh basil leaves and croutons for crunch. Enjoy this warm bowl of goodness! To make your soup shine, balance acidity with sugar. Adding one teaspoon of sugar can bring out the rich taste of tomatoes. This small addition helps cut through the tanginess, creating a deeper flavor profile. You can also choose between fresh and dried herbs. Fresh basil gives a bright taste, while dried basil offers more depth. If you use dried herbs, remember to add them early to let their flavors bloom. You can decide if you want a chunky or smooth soup. For a chunky texture, blend just half of the soup. This keeps some roasted veggies intact for a heartier bite. On the other hand, if you prefer a smooth soup, blend it all until silky. If you want creamy soup, stir in heavy cream for a rich finish. This will make the soup velvety and satisfying. Storing leftovers is easy. Keep the soup in an airtight container in the fridge. It will stay fresh for about 3 to 5 days. To reheat, use the stove or microwave. If using a microwave, stir often to heat evenly. For the best taste, add a splash of fresh broth or a bit of cream while reheating. This keeps the flavors bright and delicious. Pro Tips Choose the Right Tomatoes: Select ripe, in-season tomatoes for the best flavor. Heirloom varieties are particularly delicious for roasting. Adjusting Acidity: If your soup tastes too acidic, a pinch of sugar can help balance the flavors. Start with a small amount and adjust to taste. Herb Variations: Experiment with other herbs like thyme or oregano for a different flavor profile. Fresh herbs added just before blending will maintain their vibrant taste. Storage Tips: This soup can be stored in the refrigerator for up to 4 days or frozen for up to 3 months. Just remember to leave out the cream until reheating for the best texture. {{image_2}} For a vegan option, you can skip the heavy cream. Use extra vegetable broth instead. This keeps the soup light and fresh while still being tasty. You can also add toppings like avocado or pumpkin seeds for a nice crunch. Fresh herbs can make your dish pop. Try adding a sprinkle of nutritional yeast for a cheesy flavor. Want some heat? Add red pepper flakes or diced jalapeños to your soup. This gives it a nice kick. You can also add other vegetables like bell peppers or carrots. These add sweetness and color to the mix. Roasting them with the tomatoes can enhance their flavor too. If you love creaminess, try coconut milk or cashew cream instead of heavy cream. These options add a rich taste and keep the soup smooth. For a richer flavor, sauté onion and garlic in olive oil before blending. This small step can make a big difference. Consider adding a dash of balsamic vinegar for depth. Roasted tomato basil soup is not just tasty; it has great nutrition too. Each serving has about 150 calories. The main parts of this soup include ripe tomatoes, onions, and garlic. These ingredients give you healthy vitamins and minerals. - Tomatoes: Rich in vitamin C and antioxidants. They help boost your immune system. - Onions: Good for heart health. They contain compounds that can lower blood pressure. - Garlic: Known for its health benefits. It can help fight colds and improve heart health. - Olive oil: A healthy fat that supports heart health. It contains healthy fatty acids. - Basil: Adds flavor and has anti-inflammatory properties. It can help with digestion. This soup is great for many diets. It is naturally gluten-free and vegan if you skip the cream. You can use vegetable broth to keep it plant-based. For those on low-sodium diets, use less salt. You can also choose low-sodium vegetable broth. This way, you can enjoy a tasty soup without too much salt. Roasted tomato basil soup lasts about 4 to 5 days in the fridge. Store it in a tight container. Make sure to let it cool before sealing it. This keeps it fresh and tasty. Yes, you can freeze roasted tomato basil soup. Place it in freezer-safe bags or containers. It can last for up to 3 months in the freezer. When ready to eat, thaw it in the fridge overnight. Reheat it on the stove or in the microwave. You can serve many things with this soup. Here are some great options: - Grilled cheese sandwiches - Crusty bread or baguette - A fresh green salad - Garlic bread These sides add texture and flavor. Yes, you can use canned tomatoes. Choose whole or diced tomatoes for the best results. Drain the juice to avoid a watery soup. Roasting fresh tomatoes adds great flavor, but canned tomatoes work well in a pinch. To spice up your soup, try these tips: - Add red pepper flakes during cooking. - Mix in chopped jalapeños or serrano peppers. - Stir in hot sauce before serving. These options give your soup a nice heat without losing the tomato flavor. You now know how to make delicious roasted tomato basil soup. Start with ripe tomatoes, onion, and garlic, and adjust with your preferred ingredients. Remember, you can always swap out items to match your taste. Enhance the flavor and texture with helpful tips shared in this guide. Whether you enjoy it creamy or spicy, this versatile soup fits many diets. This dish is simple, tasty, and nutritious. Dive into your kitchen today and enjoy your homemade soup!

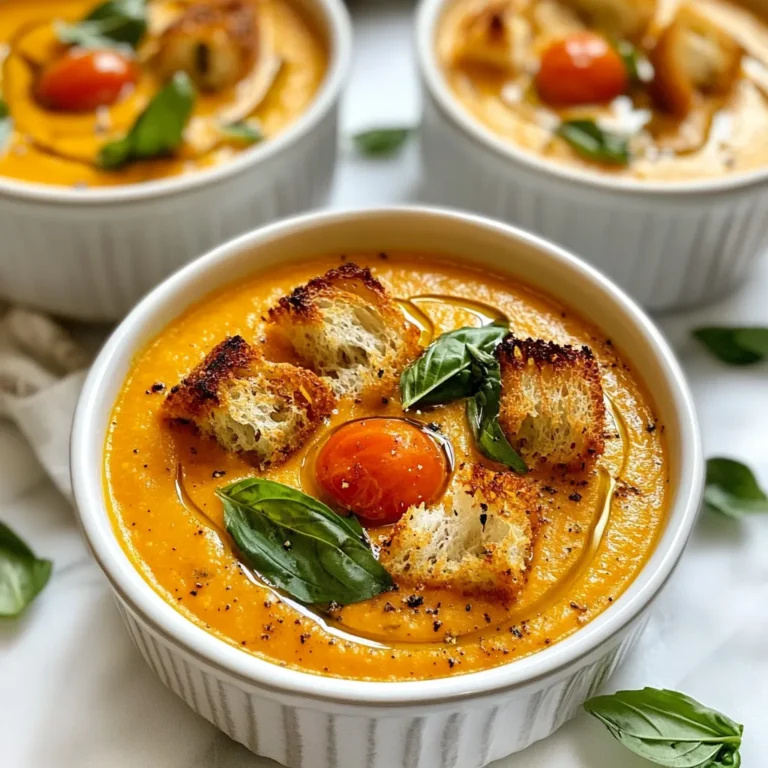
Roasted Tomato Basil Soup Easy and Flavorful Recipe

- 4 cups fresh corn kernels (about 6 ears of corn) - 1 medium onion, finely chopped - 2 cloves garlic, minced - 2 medium potatoes, peeled and diced - 3 cups vegetable broth The fresh corn kernels give the chowder a sweet, crunchy bite. I love using about six ears of corn for this recipe. They bring a bright yellow color and pack a punch of flavor. Next, I add a medium onion and two cloves of minced garlic. These aromatics create a tasty base. For texture, I use two medium potatoes. They add heartiness and help thicken the chowder. Lastly, I add three cups of vegetable broth. This broth is the soul of the soup, blending all the flavors together. - 1 cup heavy cream (or coconut milk for a dairy-free alternative) - 1 tablespoon olive oil - 1 teaspoon smoked paprika - Salt and pepper to taste - 1/2 teaspoon cayenne pepper (optional for a kick) To make chowder creamy, I use one cup of heavy cream or coconut milk. Coconut milk is perfect for a dairy-free option. I start by heating one tablespoon of olive oil in a pot. This makes the onions and garlic sizzle and smell great. For flavor, I like to add one teaspoon of smoked paprika. It gives depth to the dish. Season it with salt and pepper. If you want a spicy kick, add half a teaspoon of cayenne pepper. - Fresh parsley To finish, I sprinkle fresh parsley on top. It adds a pop of color and a fresh taste. This simple touch makes the chowder look beautiful. {{ingredient_image_1}} To start, gather your ingredients. You will need fresh corn kernels, onion, garlic, and potatoes. Chop the onion finely and mince the garlic. Dice the potatoes into small pieces. This makes cooking easier and faster. You will need a large pot for cooking. An immersion blender is great for blending the chowder. If you don’t have one, a regular blender will work too, but let the chowder cool a bit before blending. First, heat olive oil in your large pot over medium heat. Add the chopped onion. Sauté it until it turns translucent, about five minutes. Next, add the minced garlic and cook for one to two minutes. This step brings out the flavors. Now, add the diced potatoes and vegetable broth to the pot. Bring it to a boil, then lower the heat. Simmer for ten minutes or until the potatoes are tender. Then, stir in the corn kernels. Add smoked paprika and cayenne pepper for a bit of heat if you want. Simmer for another five minutes to combine the flavors. Once the chowder is cooked, use your immersion blender to blend it. Aim for a smooth texture while leaving some chunks of corn and potato for a nice bite. If you’re using a regular blender, be careful and let the chowder cool slightly first. After blending, stir in the heavy cream or coconut milk. Season with salt and pepper to taste. Heat it through for another two to three minutes until warm. Now, your creamy corn chowder is ready! You can garnish it with fresh parsley before serving. Enjoy this hearty and flavorful delight! To get the right consistency in your chowder, blend it just enough. You want it creamy but still have some corn and potato chunks. If you prefer a thicker chowder, add a bit more potato or blend less. When sautéing garlic, keep an eye on the heat. Garlic burns quickly and gets bitter. Sauté it on medium-low heat for just 1-2 minutes. Stir it often to help it cook evenly. This brings out its rich flavor. You can enhance the taste of your chowder with spices. Try adding thyme or bay leaves for warmth. Smoked paprika adds a nice depth, and cayenne gives it a kick. For a heartier meal, consider adding proteins like cooked bacon or shredded chicken. These additions make your chowder filling and delicious. You can also toss in some cooked beans for extra texture and protein. To make your chowder dairy-free, swap heavy cream for coconut milk. It gives a creamy texture without the dairy. For broth, use vegetable broth to keep it vegan. You can add more veggies too! Chopped bell peppers or zucchini can boost nutrition and flavor. Try adding a splash of lime juice for a fresh twist. Pro Tips Fresh Corn Matters: Use fresh corn for the best flavor; frozen corn can also work in a pinch, but fresh will give a sweeter taste and better texture. Blend for Texture: For a creamier chowder, blend the soup until smooth; leave some chunks for a heartier texture if desired. Spice it Up: Adjust the cayenne pepper according to your spice preference; start with a little and add more if you like it hot! Garnish for Freshness: Always garnish with fresh herbs right before serving to enhance the flavors and add a pop of color to your dish. {{image_2}} You can switch up the corn in your chowder. Use frozen or canned corn if fresh corn is not available. This makes the recipe quick and easy. Canned corn can add a nice sweetness. Frozen corn, when thawed, gives a fresh taste. Feel free to add seasonal vegetables. Think about diced zucchini in summer or root veggies in fall. These additions can bring new flavors and textures to your chowder. Want a kick? Add some diced jalapeños for a spicy corn chowder. They can make the dish lively and exciting. You can adjust the heat by using more or fewer peppers. For a zesty twist, try adding citrus juice. A squeeze of lime or lemon brightens the flavors. It also adds a nice contrast to the creaminess of the chowder. If you want a low-calorie version, use less cream or substitute with coconut milk. This keeps the chowder rich while cutting calories. You can also add more vegetables for extra fiber. For those needing gluten-free options, ensure all your ingredients are gluten-free. Both vegetable broth and seasonings should fit this need. This way, everyone can enjoy your creamy corn chowder without worry. When you have leftover creamy corn chowder, store it in an airtight container. This keeps it fresh. Place it in the fridge right away. It lasts about 3 to 4 days. Make sure it cools down before sealing. This helps prevent moisture buildup. You can freeze creamy corn chowder for longer storage. First, let it cool completely. Then, pour it into freezer-safe containers. Leave some space at the top for expansion. It can last up to 3 months in the freezer. When you are ready to eat it, thaw it in the fridge overnight. To maintain texture, avoid freezing it with cream. Instead, add the cream after thawing. This keeps your chowder creamy and smooth. For reheating, you have two great options. You can use the stove or the microwave. On the stove: Pour the chowder into a pot. Heat it over medium heat. Stir often until it is hot. In the microwave: Place the chowder in a microwave-safe bowl. Heat it for 1-2 minutes. Stir halfway through to ensure even heating. Check the temperature before serving. Enjoy your warm and delicious chowder! You can use coconut milk, almond milk, or cashew cream. These give a rich taste. They also keep the chowder creamy. If you want a thicker texture, try blending soaked cashews with water. It works great and is dairy-free! Yes, you can! Start by sautéing the onion and garlic in a pan. Then, add them to the slow cooker with the other ingredients. Combine corn, potatoes, broth, and spices. Cook on low for 6-8 hours or high for 3-4 hours. Blend before serving for a smooth chowder! Corn chowder lasts in the fridge for 3-4 days. Store it in a sealed container. Check for changes in smell or color. If it smells sour or looks off, throw it away. In this post, we explored how to make a creamy corn chowder. We covered the main ingredients like fresh corn, onion, and potatoes. You learned how to blend flavors using cream and spices. I shared tips for perfecting your chowder and explored tasty variations. Whether you want vegan options or seasonal twists, there's a way to enjoy this dish. Now, you’re ready to create a delicious chowder that everyone will love. Enjoy making this comforting meal!

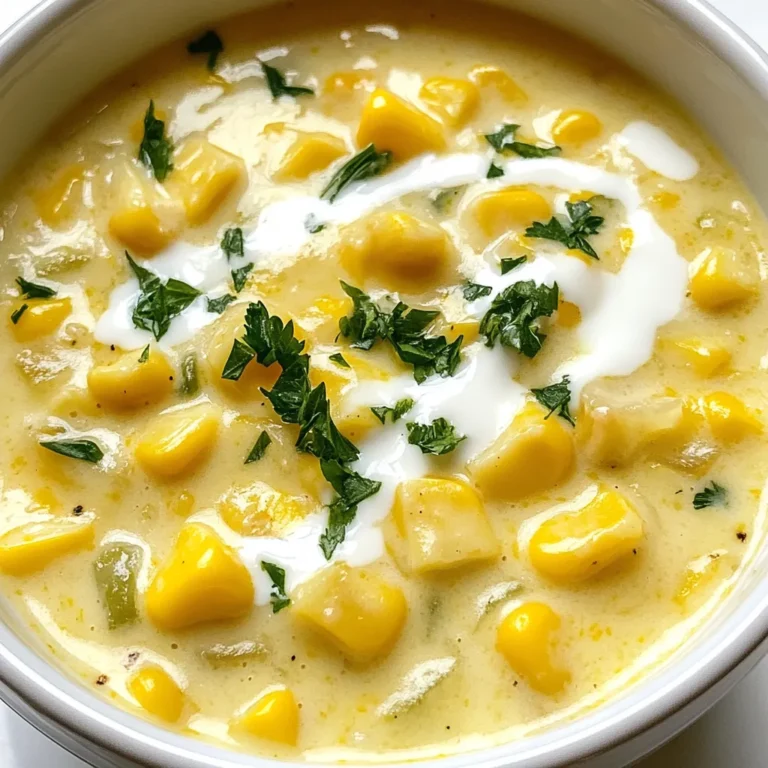
Creamy Corn Chowder Hearty and Flavorful Delight

PREV 1 … 53 54 55 … 57 NEXT
quick dish kitchen

explore

DessertsDinnerAppetizersDrinks

Our Policies

  • Cookie Policy
  • Copyright Policy
  • Disclaimer
  • GDPR Policy
  • Terms Of Use
Back to Top
  • About
  • Contact Us
  • Privacy Policy
© 2025 quick dish kitchen