FREE DINNER EBOOK! Get your copy!
  • Cookie Policy
  • GDPR Policy
  • Disclaimer
  • Terms Of Use
  • Visit my other site: Fun Cookie Recipes
quick dish kitchen
  • Home
  • Dinner
  • Desserts
  • Drinks
  • Appetizers
  • Contact
  • About
  • Privacy Policy
  • Home
  • Dinner
  • Desserts
  • Drinks
  • Appetizers
  • Contact
  • About
  • Privacy Policy
  • Cookie Policy
  • GDPR Policy
  • Disclaimer
  • Terms Of Use
Visit my other site: Fun Cookie Recipes

HOME / CATEGORIES /

Latest

To create my creamy spinach orzo soup, you need simple yet tasty ingredients. Here’s what you'll need: - 1 tablespoon olive oil - 1 small onion, finely chopped - 2 cloves garlic, minced - 4 cups vegetable broth - 1 cup orzo pasta - 2 cups fresh spinach, roughly chopped - 1 cup heavy cream or coconut milk - 1 teaspoon dried thyme - Salt and pepper to taste - Grated Parmesan cheese (optional, for garnish) - Fresh parsley, chopped (for garnish) Each ingredient plays a key role in making this soup rich and comforting. The olive oil adds a smooth base, while the onion and garlic bring depth. Vegetable broth gives it a warm flavor, and the orzo pasta adds a nice texture that fills you up. Fresh spinach not only adds color but also packs in nutrients. The heavy cream or coconut milk makes the soup creamy and luscious. Dried thyme adds a hint of earthiness, while salt and pepper balance all the flavors. Finally, Parmesan cheese and parsley give a lovely finish to the dish. You can easily find all these ingredients at your local market. They are fresh, simple, and perfect for a cozy night in or a gathering with friends. Happy cooking! {{ingredient_image_1}} First, gather all your ingredients. You will need olive oil, onion, garlic, vegetable broth, orzo pasta, fresh spinach, heavy cream or coconut milk, dried thyme, salt, pepper, and optional garnishes like Parmesan cheese and parsley. This prep makes cooking smooth and fun. 1. Heat the olive oil in a large pot over medium heat. 2. Add the finely chopped onion. Sauté for 3-4 minutes until soft and clear. 3. Add the minced garlic. Cook for 1 more minute until it smells great. 4. Pour in the vegetable broth. Bring it to a gentle boil. 5. Add the orzo pasta. Cook it according to the package instructions, about 8-10 minutes, until it's just right. 6. Once the orzo is ready, lower the heat. Stir in the roughly chopped spinach and heavy cream or coconut milk. Mix until the spinach wilts and the soup turns creamy. 7. Season with dried thyme, salt, and pepper. Let it simmer for 5 more minutes. This step blends all the flavors together. Serve your soup hot. For a special touch, sprinkle grated Parmesan cheese on top. Add chopped parsley for a fresh look. Enjoy your creamy spinach orzo soup, which is both comforting and tasty! To make your soup even creamier, try these simple tips. First, use heavy cream for rich flavor. If you prefer a lighter option, coconut milk works great. Blend a small portion of the soup for a smooth texture. This adds depth and creaminess without extra fat. You can also stir in a dollop of cream cheese or sour cream before serving. These additions will elevate the taste and richness. This soup stores well for a few days. Place any leftovers in an airtight container. Keep it in the fridge for up to three days. When you want to reheat, add a splash of broth to thin it out. Heat it slowly on the stove until warm. You can also use the microwave, but stir often. This helps the soup heat evenly. Avoid overcooking the orzo. It can turn mushy if you cook it too long. Follow the package instructions for the best results. Also, don’t skip the seasoning. Salt and pepper bring out the flavors. Taste as you go, adjusting as needed. Lastly, remember that fresh spinach cooks down. Always add it at the end to keep some texture. Pro Tips Use Fresh Spinach: Fresh spinach adds vibrant color and flavor to your soup. If using frozen spinach, ensure it’s thoroughly thawed and drained to avoid excess water in the soup. Customize Your Creaminess: For a lighter soup, opt for coconut milk or a lower-fat cream. Adjust the amount to achieve your desired creaminess without overwhelming the flavors. Enhance Flavor with Herbs: Fresh herbs like basil or dill can elevate the taste of your soup. Add them at the end for a fresh burst of flavor. Perfectly Cooked Orzo: To prevent orzo from becoming mushy, cook it just until al dente. Remember that it will continue to cook slightly after being added to the soup. {{image_2}} You can easily make this soup vegan. Swap heavy cream for coconut milk. This keeps the soup rich and tasty. Use vegetable broth for the base. It brings all the flavors together. You can also add nutritional yeast for a cheesy flavor without dairy. This gives a nice, savory touch while keeping it plant-based. Adding fresh herbs can enhance your soup. Try basil or dill for a fresh twist. You can also add a pinch of red pepper flakes for some heat. This adds a nice kick without overpowering the dish. Don't forget about lemon juice! A squeeze before serving brightens all the flavors. Feel free to mix in other vegetables. Carrots or celery add a nice crunch. You could also add peas or corn for sweetness. If you want protein, try adding chickpeas or cooked chicken. These options make the soup heartier and more filling. Each addition brings its unique taste, making the soup your own! To keep your creamy spinach orzo soup fresh, store it in an airtight container. Let the soup cool to room temperature before sealing it. This helps to prevent moisture build-up inside the container. You can keep the soup in the fridge for up to 3 days. If you're not sure you'll eat it in that time, freezing is a great option. You can freeze this soup for up to 3 months. However, cream-based soups may change texture when thawed. To freeze, portion the soup into freezer-safe bags or containers. Remove as much air as possible to prevent freezer burn. When you're ready to eat, thaw it in the fridge overnight. Reheat on the stove over low heat. Stir well to restore creaminess. - Olive oil: Lasts for a year if stored in a cool, dark place. - Onion: Good for a few weeks in a cool, dry spot. - Garlic: Keeps for several weeks in a cool area. - Vegetable broth: Use within 1 week once opened; can last months if sealed. - Orzo pasta: Lasts for 1-2 years in a pantry. - Fresh spinach: Best used within a week of purchase. - Heavy cream or coconut milk: Check expiration; usually lasts a week after opening. - Dried thyme: Stays fresh for years if stored properly. - Salt and pepper: Indefinite shelf life if kept dry. - Parmesan cheese: Store in the fridge for about a week after opening. - Fresh parsley: Use within a week for best flavor. You can make the soup healthier by adding more vegetables. Try carrots, zucchini, or celery. You can also use whole grain orzo instead of regular pasta. For a lighter option, swap heavy cream for coconut milk or a low-fat milk. Reducing the amount of salt helps too. Use fresh herbs instead of salt for flavor. Yes, you can use different types of pasta. Small shapes like ditalini or small shells work well. You can even use gluten-free pasta if needed. Just adjust the cooking time based on the pasta you choose. Make sure it fits well in the soup. Yes, you can make this soup ahead of time. It tastes great after a day in the fridge. Just let it cool, then store it in an airtight container. When reheating, add a splash of broth or water to restore creaminess. Avoid cooking the orzo too long to keep it firm. This soup recipe uses simple and fresh ingredients to create a comforting dish. The steps make it easy to prepare, cook, and add final touches. I shared tips to enhance creaminess and avoid common mistakes. There are many variations to suit your taste, whether you want it vegan or packed with flavor boosts. Proper storage extends shelf life and keeps leftovers fresh. Try this soup for a warm meal any day. It’s both easy and satisfying, so enjoy making it!

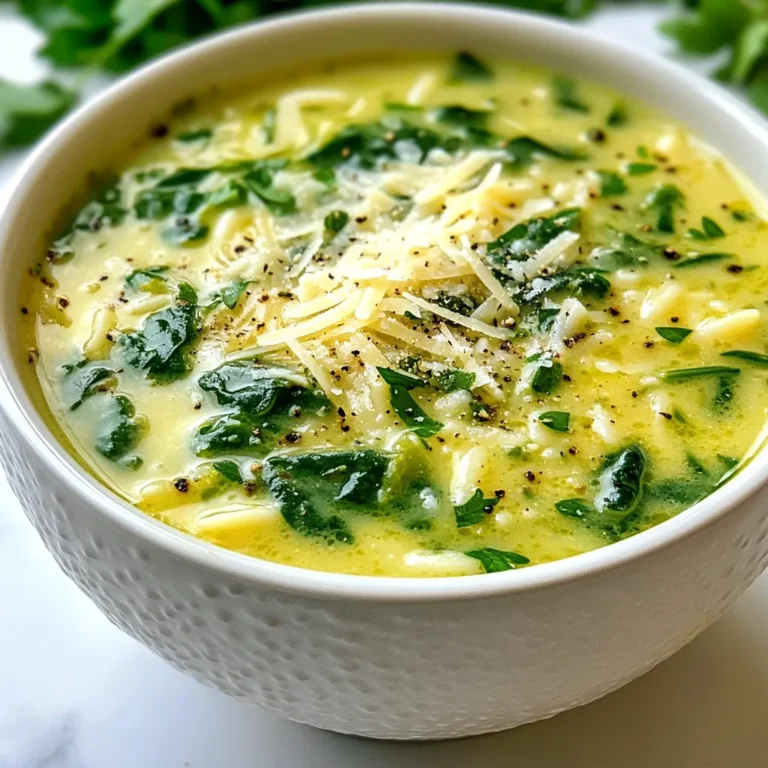
Creamy Spinach Orzo Soup Simple and Cozy Dish

To make a tasty Creamy Sausage Tortellini Soup, you need simple ingredients. Here’s what to gather: - 1 pound Italian sausage (choose sweet or spicy) - 1 medium onion, diced - 3 cloves garlic, minced - 4 cups chicken broth - 2 cups fresh spinach - 1 package (9 oz) cheese tortellini - 1 cup heavy cream - 1 teaspoon Italian seasoning - Salt and pepper to taste These ingredients form the base of your soup. The sausage adds flavor, while the tortellini gives it heartiness. You can enhance this soup with several tasty additions. Consider these options: - Carrots, diced, for sweetness and color - Celery, diced, for extra crunch - Red pepper flakes, for some heat - Fresh herbs like thyme or basil, for freshness These additions can make your soup even richer and more enjoyable. Garnishing your soup makes it look nice and adds flavor. Here are some ideas: - Grated Parmesan cheese, for a salty touch - Chopped fresh parsley, for color and freshness - A drizzle of olive oil, for richness These garnishes not only add visual appeal but also enhance the taste. Enjoy your delicious and creamy soup! {{ingredient_image_1}} Start with a large pot over medium heat. Add 1 pound of Italian sausage. Break it up with a spatula as it cooks. You want it browned, which takes about 5-7 minutes. If there is too much fat, drain it. Now, add 1 medium diced onion to the pot. Cook it for about 3-4 minutes until it softens. Next, stir in 3 minced garlic cloves. Cook for another minute until the garlic smells great. Pour in 4 cups of chicken broth. Bring the mix to a gentle simmer. Once it simmers, add 1 package (9 oz) of cheese tortellini. Sprinkle in 1 teaspoon of Italian seasoning. Cook the tortellini according to the package, usually 3-5 minutes. You want the tortellini to be tender but not mushy. Once the tortellini is ready, stir in 2 cups of fresh spinach. Then add 1 cup of heavy cream. Let the soup simmer for another 2-3 minutes. This helps the spinach wilt and heats the soup through. Finally, season with salt and pepper to taste. Serve hot, topped with grated Parmesan cheese and fresh parsley. Enjoy your creamy sausage tortellini soup! Pick high-quality Italian sausage for great flavor. Look for fresh sausage at the store. You can choose sweet or spicy based on your taste. Sweet sausage adds a nice balance, while spicy sausage gives more kick. Check the ingredients to avoid fillers. Always go for sausage made with real meat. To get the creamiest soup, use heavy cream. Add it at the end of cooking. This keeps the cream from curdling. Stir it in slowly and let it heat gently. You can also blend a bit of the soup for extra creaminess. Using fresh spinach adds a nice touch and keeps the texture light. Avoid overcooking the tortellini. Follow package instructions closely. Overcooked tortellini can become mushy. Don’t skip draining the sausage fat if there is too much. This helps keep the soup from being greasy. Lastly, taste as you go. Adjust the salt and pepper for your perfect flavor. Pro Tips Choose Your Sausage Wisely: The type of Italian sausage you use will greatly affect the flavor of your soup. Sweet sausage offers a mild flavor, while spicy sausage adds a kick. Feel free to mix both for a balanced taste! Fresh Spinach Boost: Adding the spinach at the end of cooking ensures it retains its vibrant color and nutrients. If you prefer a stronger spinach flavor, you can add it earlier in the cooking process. Perfect Creaminess: For a richer soup, consider using half-and-half or a combination of heavy cream and whole milk. This will give you a creamy texture without being overly heavy. Garnish for Flavor: Don't skip the Parmesan and parsley garnish! They not only enhance the presentation but also add layers of flavor that elevate the overall dish. {{image_2}} If you want a meat-free version, swap the sausage for mushrooms. Use about 1 pound of sliced mushrooms. They add great flavor and texture. You can also add more veggies like zucchini or carrots for extra nutrients. For protein, use beans or lentils. They make the soup hearty and filling. To boost the flavor, try adding sun-dried tomatoes or roasted red peppers. These ingredients add sweetness and depth. You could also use vegetable broth instead of chicken broth. This makes the soup lighter and adds a nice herb taste. For a spicy kick, sprinkle in some crushed red pepper flakes. If you can’t find tortellini, don’t worry! You can use any small pasta. Try shells, ditalini, or even elbow macaroni. Just make sure to adjust the cooking time. Cook the pasta according to package directions before adding it to the soup. This way, the texture stays just right. You can store leftover creamy sausage tortellini soup in an airtight container. Let the soup cool first. Then, place it in the fridge. It stays fresh for about 3-4 days. Make sure to label the container with the date. This helps you keep track of how long it has been stored. If you want to freeze the soup, use a freezer-safe container. Leave some space at the top for expansion. You can freeze it for up to 3 months. When you want to eat it, move it to the fridge overnight. This helps it thaw slowly and safely. Reheat the soup on the stove over medium heat. Stir it often to prevent sticking. If the soup is too thick, add a splash of broth or cream. Heat until it is hot all the way through. You can also use a microwave, but stir halfway to heat evenly. Enjoy your warm bowl of soup! To make creamy sausage tortellini soup gluten-free, use gluten-free tortellini. Many stores sell this option. Also, check the chicken broth label. Some brands add gluten. This way, you still enjoy the same rich taste without gluten. Yes, you can use frozen tortellini! Just add it to the pot straight from the freezer. Increase the cooking time by a few minutes. Frozen tortellini cooks well in the soup and still tastes great. This soup stays fresh in the fridge for about 3-4 days. Store it in an airtight container. If you want to keep it longer, consider freezing it. I suggest pairing this soup with fresh bread or a side salad. Garlic bread works well too! These sides add crunch and flavor, making your meal even better. This blog post covered all you need to make creamy sausage tortellini soup. We explored the main ingredients, tasty additions, and garnishes to enhance flavor. I shared step-by-step instructions to guide you through cooking. Tips helped you choose the right sausage and avoid common mistakes. We also looked at delicious variations and storage tips for leftovers. Now, grab your ingredients and get cooking! Enjoy your warm bowl of soup.

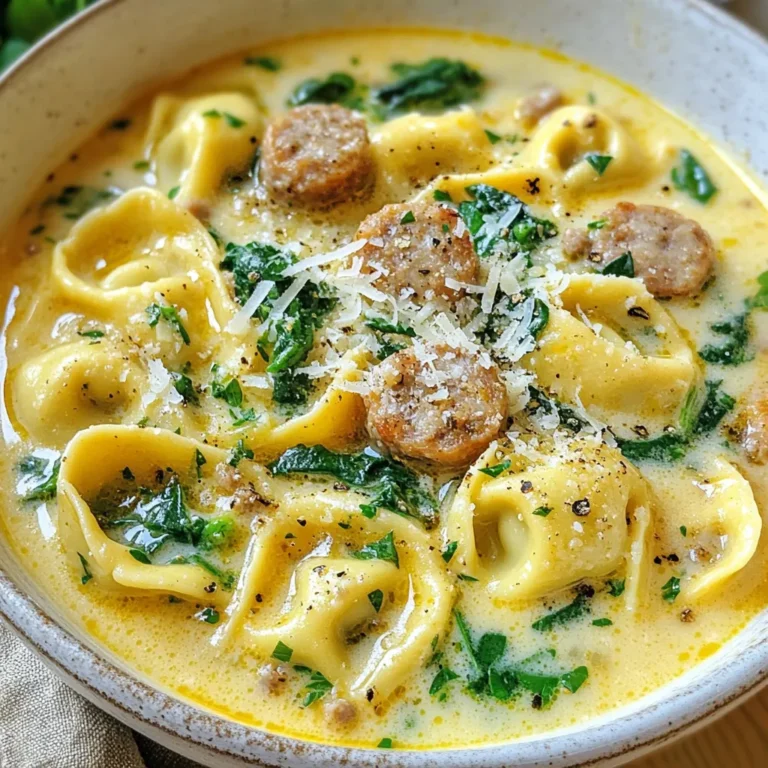
Creamy Sausage Tortellini Soup Quick and Easy Recipe

To make this creamy pasta, you need a few key items. Here’s what you'll need: - 8 oz (225g) pasta of your choice (like fettuccine or penne) - 1 cup fresh spinach, chopped - 1 cup canned artichoke hearts, drained and chopped - 1 tablespoon olive oil - 3 cloves garlic, minced - 1 cup heavy cream (or coconut cream for a dairy-free option) - 1 cup cream cheese, softened - 1/2 cup grated Parmesan cheese (or nutritional yeast for a vegan option) - Salt and pepper to taste - Red pepper flakes (optional, for heat) - Fresh basil, for garnish You can add more flavor to your pasta with some optional ingredients. Here are a few ideas: - Cooked chicken or shrimp for extra protein - Cherry tomatoes for a burst of freshness - Mushrooms for an earthy touch If you have dietary needs, don’t worry. You can swap some ingredients easily: - For a vegan dish, use coconut cream and nutritional yeast. - Gluten-free pasta works well in this recipe. - If you're lactose-free, try a dairy-free cream cheese alternative. These options let you enjoy creamy spinach artichoke pasta no matter your diet! {{ingredient_image_1}} First, bring a large pot of water to a boil. Add salt to the water to flavor the pasta. Cook 8 oz of your favorite pasta, like fettuccine or penne, until it is al dente. This usually takes about 8 to 10 minutes. Once done, drain the pasta, but save about 1 cup of the pasta water for later. Set the pasta aside. Next, heat 1 tablespoon of olive oil in the same pot or a large skillet over medium heat. Add 3 cloves of minced garlic and sauté for about 1-2 minutes. You want it fragrant, not burnt. Then, stir in 1 cup of chopped fresh spinach and 1 cup of chopped artichoke hearts. Cook this mixture for 3-4 minutes. The spinach should wilt down, and everything should blend well together. Now, lower the heat and add 1 cup of heavy cream and 1 cup of softened cream cheese to the skillet. Stir constantly until the cream cheese melts into the sauce. If the sauce is too thick, add some of that reserved pasta water, a little at a time, until you reach the right consistency. The sauce should be smooth and creamy. Once your sauce is ready, add the cooked pasta to the skillet. Toss gently to coat all the pasta in that delicious creamy sauce. Heat everything together for about a minute, allowing the flavors to blend. When ready to serve, divide the creamy spinach artichoke pasta into bowls. For a lovely touch, sprinkle fresh basil on top. You can also add extra grated Parmesan and a pinch of red pepper flakes if you like a bit of heat. Enjoy your meal! To get that creamy sauce just right, start with low heat. High heat can cause the cream to separate. When you add the heavy cream and cream cheese, stir slowly. If the sauce feels too thick, add reserved pasta water a little at a time. This water helps the sauce cling to the pasta well. You want a smooth and rich sauce that coats every bite. Fettuccine and penne work great for this dish. Fettuccine has a flat shape that holds the sauce well. Penne, with its tube shape, allows the sauce to sneak inside. You can also try farfalle or rotini for fun shapes. Just make sure to cook your pasta until it is al dente. This gives the perfect bite and helps it mix well with the creamy sauce. Using fresh ingredients makes a big difference. Fresh spinach adds great taste and color. Good-quality cream cheese and Parmesan give a rich flavor. If you can, choose a brand with simple ingredients. This helps keep the taste clean and bright. For a dairy-free option, coconut cream and nutritional yeast provide lovely flavors. Always taste as you go; this helps you balance the salt and pepper just right. Pro Tips Perfect Pasta Texture: To achieve the ideal al dente texture, cook the pasta for 1-2 minutes less than the package instructions. This ensures it remains firm and doesn't become mushy when combined with the sauce. Enhance the Flavor: For added depth of flavor, sauté the garlic in a combination of olive oil and butter. This not only enhances the taste but also adds richness to the overall dish. Make It Vegan: To make this dish vegan, substitute heavy cream with full-fat coconut milk and use nutritional yeast in place of Parmesan cheese. This keeps the creaminess without any dairy. Garnish for Freshness: Always garnish with fresh basil just before serving. This not only adds a pop of color but also a burst of freshness that elevates the dish. {{image_2}} To make this creamy spinach artichoke pasta vegan, swap out the dairy. Use coconut cream instead of heavy cream. For the cheese, replace Parmesan with nutritional yeast. This swap gives the dish a cheesy flavor without dairy. Nutritional yeast is packed with B vitamins and adds a nice umami taste. You’ll still enjoy a creamy texture while keeping it plant-based. If you need a gluten-free meal, choose gluten-free pasta. There are many options available, like rice or chickpea pasta. These alternatives cook well and still taste great. Just follow the package directions for cooking time. You won't lose any flavor or creaminess, and everyone can enjoy this dish. Want to boost the protein in your pasta? You can add cooked chicken or shrimp for a hearty meal. Alternatively, mix in some cooked lentils or chickpeas for a plant-based protein option. They blend well with the creamy sauce and add a nice bite. This way, you can tailor the dish to fit your needs and make it more filling. Store your creamy spinach artichoke pasta in an airtight container. Let it cool first. Keep it in the fridge for up to three days. If you wish to keep it longer, freeze it. To reheat, use the stove or microwave. If using the stove, add a splash of water or cream. Heat on low, stirring until warm. In the microwave, heat in short bursts. Stir in between to avoid hot spots. To freeze, place the cooled pasta in a freezer-safe bag. Remove as much air as possible before sealing. Label and date the bag. You can freeze it for up to three months. When ready to eat, thaw overnight in the fridge before reheating. Yes, you can make this pasta ahead of time. Cook the pasta and make the sauce as usual. After mixing them, let the dish cool. Then, store it in the fridge in an airtight container. When you are ready to eat, reheating it on the stove works best. Add a splash of water to help bring back the creaminess. If you want a substitute for cream cheese, you can use Greek yogurt or ricotta cheese. Both options will still give you a creamy texture. For a dairy-free option, try using cashew cream or silken tofu blended until smooth. Each choice will change the flavor a bit, but they all work well. To add some heat to your creamy spinach artichoke pasta, sprinkle in some red pepper flakes. You can also add chopped fresh jalapeños or a dash of hot sauce. Start with a little, and taste as you go. This way, you can find the perfect level of spice for your taste buds. This blog post covers everything you need for creamy spinach artichoke pasta. We discussed the main and optional ingredients, plus swaps for various diets. You learned simple steps to cook and combine the dish. I shared tips on getting the right creamy texture and best pasta types. We explored variations like vegan and gluten-free options, along with storage and reheating advice. In the end, this dish is easy and fun to make. Enjoy your pasta and get creative with your own flavors!

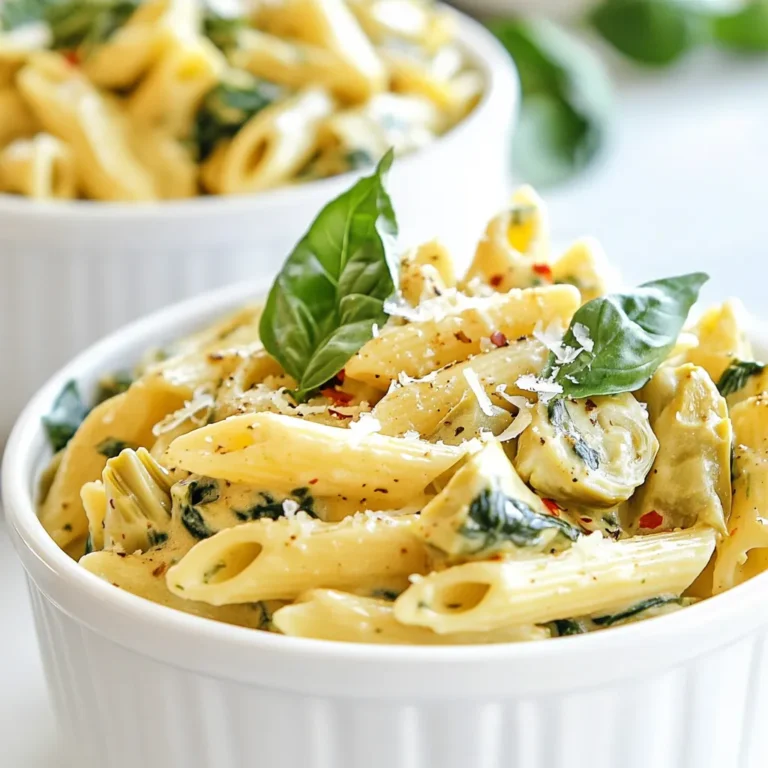
Creamy Spinach Artichoke Pasta Flavorful Weeknight Meal

To make this creamy spinach gnocchi bake, gather these simple ingredients: - 1 pound potato gnocchi - 2 cups fresh spinach, chopped - 1 cup ricotta cheese - 1 cup mozzarella cheese, shredded - 1/2 cup grated Parmesan cheese - 1 cup heavy cream - 2 cloves garlic, minced - 1 tablespoon olive oil - Salt and pepper to taste - 1/4 teaspoon nutmeg - Fresh basil leaves for garnish These ingredients create a rich and tasty meal that everyone will love. The cheeses bring creaminess, while the spinach adds freshness. You can swap ingredients easily. If you do not have gnocchi, use pasta like penne or fusilli. For the ricotta cheese, cottage cheese works well, too. If you want a lighter option, use Greek yogurt in place of heavy cream. Want to keep it dairy-free? Use almond or coconut milk and vegan cheese options. Fresh spinach can be replaced with frozen spinach; just drain it well before using. Always choose fresh spinach for the best flavor. Look for bright green leaves without any brown spots. When using garlic, fresh cloves will give you a stronger taste than jarred. For the potatoes in gnocchi, choose starchy potatoes like Russets. This ensures a light and fluffy texture. Wash all your fresh ingredients well to remove dirt and grit. Use a sharp knife to chop your spinach finely, which helps it blend into the dish. By using fresh and high-quality ingredients, you can elevate this simple dish into something truly special. Enjoy your cooking! {{ingredient_image_1}} First, gather your ingredients. You will need: - 1 pound potato gnocchi - 2 cups fresh spinach, chopped - 1 cup ricotta cheese - 1 cup mozzarella cheese, shredded - 1/2 cup grated Parmesan cheese - 1 cup heavy cream - 2 cloves garlic, minced - 1 tablespoon olive oil - Salt and pepper to taste - 1/4 teaspoon nutmeg - Fresh basil leaves for garnish Next, preheat your oven to 375°F (190°C). This helps the dish cook evenly. Now, fill a large pot with salted water. Bring it to a boil. Once boiling, add the potato gnocchi. Cook them until they float to the top, about 2-3 minutes. This means they are done. Drain the gnocchi and set them aside for later. In a skillet, heat the olive oil over medium heat. Add the minced garlic and sauté for about 30 seconds. You want it fragrant but not burnt. Then, add the chopped spinach. Cook it until it wilts, about 2-3 minutes. Once done, remove it from the heat. In a large mixing bowl, combine the ricotta cheese, half of the mozzarella cheese, heavy cream, nutmeg, salt, and pepper. Mix well. Add the cooked gnocchi and the spinach mixture into the bowl. Stir until everything is coated nicely. Now, transfer the gnocchi mixture into a greased baking dish. Sprinkle the remaining mozzarella and all of the Parmesan cheese on top. It should look cheesy and delicious. Place the dish in the preheated oven. Bake for 20-25 minutes. You want the cheese to be bubbly and golden brown. After baking, let it cool for a few minutes. Garnish with fresh basil leaves before serving. Enjoy your meal! To make your Creamy Spinach Gnocchi Bake extra creamy, use full-fat ingredients. Opt for heavy cream and whole-milk ricotta. These will give you the rich texture you desire. Add a pinch of nutmeg for warmth and depth. It enhances the creaminess without overpowering the other flavors. Stir everything together well, so the gnocchi absorbs the sauce fully. Baking is key to a bubbly top. Preheat your oven to 375°F before you start. This way, the cheese melts evenly and gets golden brown. Use a greased baking dish to prevent sticking. Cover the dish with foil for the first half of baking. This helps keep moisture in. Remove the foil halfway to let the cheese brown nicely. Save time by using pre-made potato gnocchi. You can find it in most stores. Wash and chop the spinach in advance. This makes cooking quick and easy. You can also make the cheese mixture ahead of time and store it in the fridge. Just assemble everything when you're ready to bake. This way, you can enjoy a delicious meal without the rush. Pro Tips Use Fresh Spinach: Fresh spinach has a better flavor and texture compared to frozen. Be sure to wash and chop it just before using for the best results. Cheese Variations: Feel free to experiment with different cheeses like goat cheese or feta for a unique twist on the traditional flavor profile. Nutmeg Boost: A touch of nutmeg enhances the creaminess of the dish. Just a pinch can elevate the overall flavor, so don’t skip it! Rest Before Serving: Allow the dish to cool for a few minutes after baking. This helps the gnocchi set and makes serving easier. {{image_2}} You can easily add protein to this dish. Cooked chicken or turkey works well. Just shred or chop it into small pieces before mixing it in. Try adding cooked sausage for a richer flavor. If you want seafood, shrimp or crab can be delicious options too. They pair nicely with the creamy sauce. To make this dish vegetarian, simply skip the meat options. For a vegan version, swap the ricotta and mozzarella for plant-based cheeses. Cashew cheese or tofu can serve as great substitutes. Use coconut cream instead of heavy cream for a creamy texture. Don't forget to check that your gnocchi is egg-free! Play around with flavors to make it your own. Add sun-dried tomatoes or roasted red peppers for a new twist. A dash of lemon juice can brighten up the dish. Fresh herbs like thyme or oregano add depth as well. For spice, consider adding red pepper flakes for a kick. After your meal, let the Creamy Spinach Gnocchi Bake cool down. Place the leftovers in an airtight container. They stay fresh in the fridge for about three days. Label the container with the date. This way, you know when to eat them. To reheat, use the oven for the best results. Preheat it to 350°F (175°C). Place the gnocchi bake in an oven-safe dish. Cover it with foil to keep it moist. Heat for about 15-20 minutes. You can also use the microwave. Just warm it in short bursts. Stir to heat evenly, but it won't be as crispy. You can freeze the Creamy Spinach Gnocchi Bake for later. First, let it cool completely. Then, cut it into serving sizes. Wrap each piece tightly in plastic wrap. Place them in a freezer-safe bag. This way, you can enjoy it for up to three months. When ready to eat, thaw it in the fridge overnight. Reheat as mentioned before. Enjoy a quick homemade meal! You can use cottage cheese or cream cheese. Both have similar textures. If you want a lighter option, try Greek yogurt. This will add a nice tangy flavor. Each substitute will change the taste a bit. Experiment to find what you like best. Gnocchi cooks quickly. Watch for them to float. This usually takes about 2-3 minutes. When they float, they are ready. You can taste one to check if it's soft. Yes, you can prepare it the day before. Just follow all the steps and stop before baking. Cover the dish and store it in the fridge. When you're ready, bake it straight from the fridge. Just add a few extra minutes to the cooking time. Yes, you can freeze this dish. Make sure it cools fully before you freeze it. Place it in an airtight container or wrap it well. It can last up to three months in the freezer. To reheat, bake it from frozen for about 30-35 minutes. This blog post covered all you need for a delicious Creamy Spinach Gnocchi Bake. We explored the ingredients, offered cooking tips, and provided step-by-step instructions for success. You learned variations, storage tips, and answered common questions. Making this dish can be easy and fun. Now you have the tools to enjoy it your way. Try it out, get creative, and make it your own!

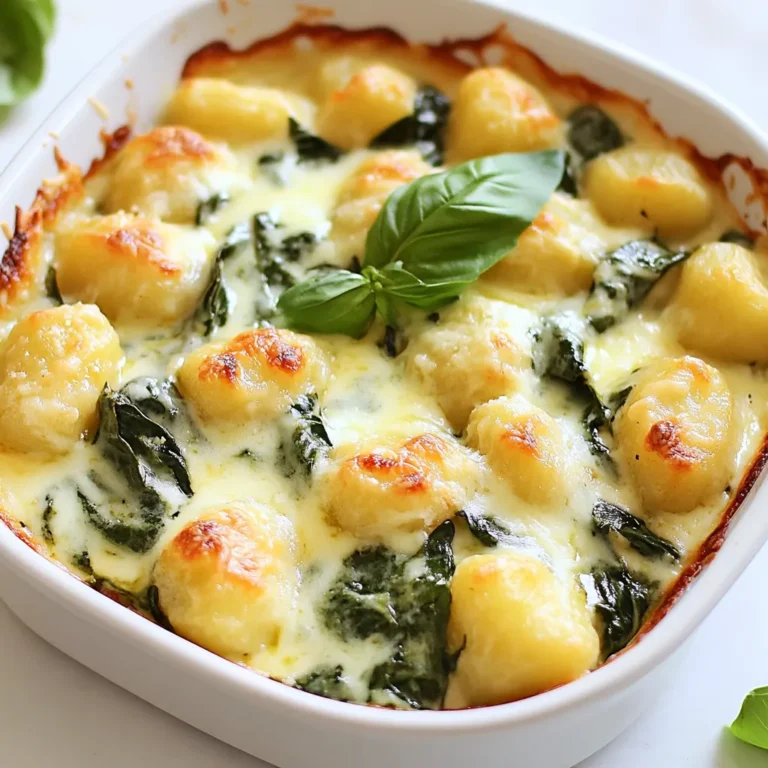
Creamy Spinach Gnocchi Bake Simple Dinner Delight

- 4 boneless, skinless chicken breasts - 1 cup cherry tomatoes, halved - 8 oz fresh mozzarella balls, halved - 1 cup fresh basil leaves - 1/2 cup balsamic glaze - 3 tablespoons olive oil - 2 cloves garlic, minced - Salt and pepper to taste - Optional: 1/4 teaspoon red pepper flakes for heat To make Balsamic Glazed Caprese Chicken, gather these simple ingredients. Each one plays a key role in creating rich flavors. The chicken breasts serve as the base, while cherry tomatoes add some sweetness. Fresh mozzarella brings creaminess, and basil adds a fresh touch. The balsamic glaze ties everything together with a tangy sweetness. Garlic enhances the aroma, and olive oil helps with cooking. You can add salt, pepper, and red pepper flakes for extra flavor. This ingredient list is easy to follow. You can find these items at any grocery store. Choosing fresh ingredients is crucial for the best taste. If you like, you can make small changes to suit your tastes. Enjoy the process of cooking and feel free to experiment! {{ingredient_image_1}} 1. First, preheat your oven to 400°F (200°C). This makes sure the chicken cooks evenly. 2. Next, grab a large oven-safe skillet. Heat three tablespoons of olive oil over medium heat. 3. Add two cloves of minced garlic and sauté for about one minute. You want it fragrant but not burnt. 1. Now, take your four boneless, skinless chicken breasts. Season them with salt, pepper, and red pepper flakes if you like a little heat. 2. Place the chicken in the hot skillet. Cook each side for about 5-7 minutes. Look for a golden brown color on both sides. 3. To check for perfect browning, ensure the chicken lifts easily from the skillet. If it sticks, give it more time. 1. While the chicken cooks, prepare the balsamic glaze. Mix half a cup of balsamic glaze with a tablespoon of water if you want it thinner. 2. Once the chicken is browned, lower the heat. Add one cup of halved cherry tomatoes around the chicken in the skillet. 3. Drizzle the balsamic glaze over the chicken and tomatoes. This adds great flavor! 4. Place eight ounces of halved fresh mozzarella balls on top of the chicken. 5. Transfer the skillet to your preheated oven. Bake for 15-20 minutes. The chicken should reach 165°F (74°C) inside. 6. In the last five minutes, sprinkle fresh basil leaves on top. This will make your dish look and taste amazing. To ensure chicken is cooked through, use a meat thermometer. Aim for an internal temperature of 165°F (74°C). This guarantees the chicken is safe to eat and juicy. If you don’t have a thermometer, cut into the thickest part of the breast. The meat should be white, not pink. You can cook this dish on the grill or stovetop. For grilling, marinate the chicken with olive oil and spices. Grill it over medium heat for about 7-8 minutes per side. On the stovetop, follow the same steps as the oven method. Just keep an eye on the heat. Fresh herbs make a big difference in flavor. Use fresh basil for a bright taste. If you have dried herbs, you can use them too, but reduce the amount. Dried herbs are stronger, so use about one-third of the amount. For a homemade balsamic glaze, combine balsamic vinegar and brown sugar in a saucepan. Heat until it thickens. This gives you a rich flavor that’s hard to beat. You can adjust the sweetness to your liking. Serve the chicken on a large platter. Scatter extra cherry tomatoes and mozzarella around it. This adds color and makes the dish look inviting. Drizzle some balsamic glaze on top for shine. Garnish with whole basil leaves for an extra pop of green. You can also add a sprinkle of freshly cracked black pepper. This adds a nice touch and makes the dish even more appealing. Pro Tips Use Fresh Ingredients: Always opt for fresh basil, mozzarella, and ripe cherry tomatoes for the best flavor and texture in your dish. Rest the Chicken: Allow the chicken to rest for a few minutes after baking. This helps retain its juices, ensuring it stays moist and flavorful. Customize the Glaze: Adjust the balsamic glaze thickness by mixing with a bit of water if desired. This can help it coat the chicken and tomatoes evenly. Experiment with Seasoning: Feel free to add different herbs such as oregano or thyme for an extra layer of flavor that complements the basil. {{image_2}} Using different types of cheese can change the dish. You might try goat cheese or feta instead of mozzarella. Each cheese adds its unique flavor. Alternatives to cherry tomatoes are also easy. You can use grape tomatoes or even diced bell peppers. These options provide a nice twist while keeping the dish fresh. Making it keto-friendly is simple. Swap the balsamic glaze for a low-carb version. You can also reduce the tomatoes to cut carbs. This keeps your meal tasty and healthy. For gluten-free variations, ensure all ingredients are gluten-free. The chicken, tomatoes, and cheese are naturally gluten-free. Just check the glaze, as some may contain gluten. Adding Mediterranean flavors gives a new touch. Consider adding olives or artichokes for depth. These ingredients can enhance the dish's taste profile. Suggestions for spice variations include using smoked paprika or cumin. These spices can add warmth and complexity to the flavors. You can adjust the spice level based on your taste. To keep your Balsamic Glazed Caprese Chicken fresh, let it cool first. Place the chicken in an airtight container. Refrigerate it for up to three days. If you want to keep it longer, freezing is a great option. Wrap the chicken tightly in plastic wrap and then place it in a freezer bag. It can last up to three months in the freezer. When it’s time to eat your leftovers, avoid drying them out. The best method is to reheat in the oven. Preheat your oven to 350°F (175°C). Place the chicken in an oven-safe dish, cover it with foil, and heat for about 20 minutes. Check to ensure it’s hot throughout. If you’re in a hurry, a microwave works too. Heat on medium power for 2-3 minutes, stirring halfway through. Enjoy your meal that tastes almost as good as fresh! Can I prepare this dish ahead of time? Yes, you can prepare parts of this dish ahead. Season and brown the chicken, then store it in the fridge. You can add the tomatoes and glaze when you are ready to bake. What can I serve with Caprese Chicken? Caprese Chicken pairs well with simple sides. Try serving it with garlic bread or a fresh green salad. Pasta tossed in olive oil is also a great option. How do I know when the chicken is fully cooked? The chicken is done when it reaches an internal temperature of 165°F (74°C). You can use a meat thermometer to check this. If you cut into the chicken, the juices should run clear. Can I use another glaze instead of balsamic? Yes, feel free to switch the glaze! A honey garlic glaze or a teriyaki sauce would work well. Each option gives a unique flavor. Just adjust the seasoning to match your glaze choice. This blog post covered a simple and tasty balsamic glazed Caprese chicken recipe. You learned about key ingredients, step-by-step cooking tips, and creative variations. We discussed storage practices and answered common questions about this dish. In summary, this recipe is easy and flexible. You can adjust it to suit your tastes. Try it out and enjoy a delicious meal that impresses everyone!

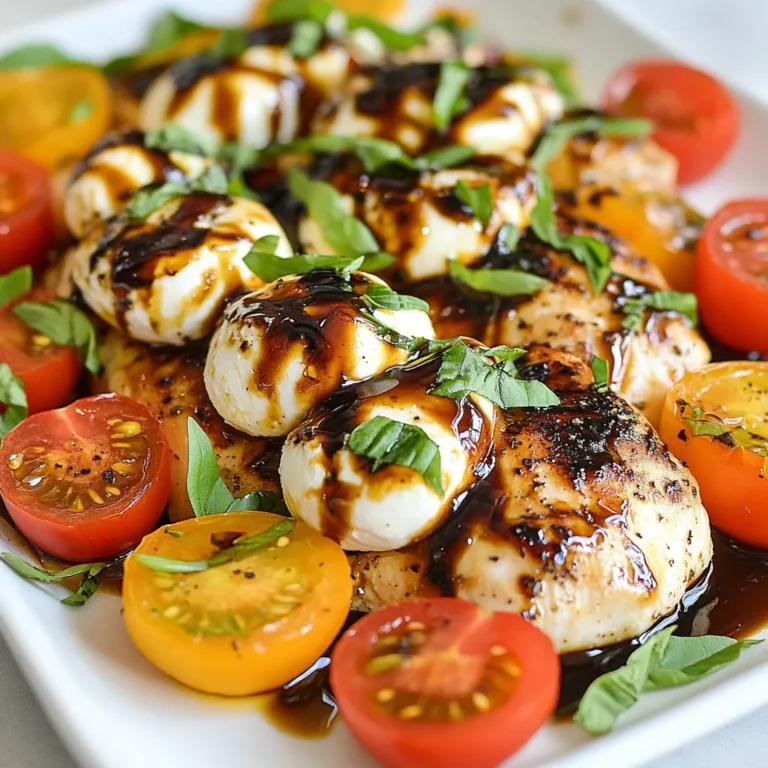
Balsamic Glazed Caprese Chicken Simple and Delicious

For this recipe, you need 2 cups of fresh strawberries. Make sure to hull and slice them. Fresh strawberries give the popsicles a bright flavor. They bring sweetness and a lovely color to this treat. You can choose ripe berries for the best taste. Use 1/2 cup of granulated sugar. You can adjust this based on how sweet you like it. Sugar helps balance the tartness of the lemon juice. It also enhances the flavor of strawberries. If you want a healthier option, try using honey or agave syrup instead. You will need 1 cup of freshly squeezed lemon juice. This usually takes about 4 to 6 lemons. Fresh juice is key for a bright, tangy flavor. It adds the perfect zing to the popsicles. Do not use bottled lemon juice, as it lacks freshness and taste. {{ingredient_image_1}} Start by taking 2 cups of fresh strawberries. Remove the green tops and slice them up. Place the sliced strawberries into a blender. Add 1/2 cup of granulated sugar to the blender. Blend on high until the mixture is smooth and creamy. This makes a sweet strawberry puree. Set this mixture aside for later. Now, grab a large mixing bowl. Squeeze the juice from about 4 to 6 lemons. You need 1 cup of freshly squeezed lemon juice. Pour this lemon juice into the bowl. Add 2 cups of water, 1 teaspoon of lemon zest, and a pinch of salt. Stir the mixture well until everything is combined. This will be your refreshing lemonade base. Take half of the strawberry puree and add it to the lemonade mixture. Stir them together until well mixed. Carefully pour this mix into popsicle molds, filling them about 3/4 full. Next, take the remaining strawberry puree and add it to each mold. Use a skewer to gently swirl the puree into the lemonade mix. This creates a beautiful marbled effect. Now, insert popsicle sticks into the molds. Freeze the popsicles for at least 6 hours or until they are solid. To remove the popsicles, run warm water over the outside of the mold for a few seconds. Then, gently pull out the popsicles and enjoy! You can change the sweetness of your popsicles easily. Start with half a cup of sugar. Blend it with the strawberries. Taste the mixture. If it’s not sweet enough, add a bit more sugar. Blend again until it dissolves. Remember, the lemon juice adds tang. So, balance is key! Swirling the strawberry puree adds a fun look. Pour the lemonade mix into the molds first. Then, take the rest of the strawberry puree. Use a skewer to swirl it in. Go slowly to create nice patterns. Don't mix it too much. You want to see both colors! Getting popsicles out of molds can be tricky. Once they freeze solid, run warm water over the mold’s outside. This helps loosen them. Hold the mold upside down. Gently pull on the popsicle stick. If it does not come out, try running the water again. Enjoy your perfectly shaped treat! Pro Tips Choose Ripe Strawberries: Make sure to use fully ripe strawberries for the sweetest flavor in your popsicles. Adjust Sweetness to Taste: Feel free to adjust the sugar amount based on the sweetness of your strawberries and personal preference. Experiment with Add-Ins: Consider adding fresh mint leaves or other fruits like blueberries for a unique twist on flavor. Storage Tips: Store the popsicles in an airtight container in the freezer to keep them fresh and prevent freezer burn. {{image_2}} You can mix in other fruits for more flavor. Try adding blueberries, raspberries, or peaches. They blend well with strawberries. Just slice them up and toss them in the blender. You can also layer slices of different fruits in the molds. This adds color and texture to your popsicles. You don’t have to stick to granulated sugar. You can use honey or agave syrup for a different taste. Maple syrup works, too, for a unique twist. Adjust the amount based on how sweet you like it. Just remember to blend well so the sweetener mixes in smoothly. For a creamy treat, add yogurt or coconut milk to the mix. This gives the popsicles a rich texture. Start with one cup of yogurt or milk. Blend it in with the strawberries and lemon juice. You’ll create a smooth, creamy popsicle that feels like a dessert. To store your homemade strawberry lemonade popsicles, place them in the freezer. Keep them in their molds until you are ready to eat them. Once frozen, remove the popsicles and wrap them in plastic wrap. This helps keep them fresh. You can also place them in a zip-top bag. Make sure to remove as much air as possible. Label the bags with the date to track freshness. For longer shelf life, freeze the popsicles for a full day. This ensures they are completely solid. You can also add a little lemon juice to the mix. This can help slow down freezer burn. If you notice ice crystals forming, it’s time to enjoy them! Ideally, eat your popsicles within two months for the best taste and texture. The best containers for storing popsicles are airtight bags or hard containers. If you use hard containers, make sure they are freezer-safe. Popsicle molds work great, but using silicone molds can help with easy removal. Always make sure the container is clean before adding your popsicles. This prevents any off-flavors or odors from affecting your tasty treat. Yes, you can use frozen strawberries. Just thaw them first. This helps them blend better. The flavor might be slightly different. Fresh strawberries taste brighter, but frozen ones work fine. These popsicles can last up to two months in the freezer. Just keep them in a sealed container. This prevents ice crystals from forming. For best taste, enjoy them within a month. You can use small cups or ice cube trays instead of molds. Fill them three-quarters full with the mixture. Insert popsicle sticks after a short freeze. Once they are firm, you can enjoy your treats! You learned how to make tasty homemade popsicles using fresh ingredients like strawberries, sugar, and lemon juice. The step-by-step guide makes it easy to blend, prepare, and fill molds. I shared tips for adjusting sweetness and achieving the perfect swirl. Variations can keep things fun, letting you add other fruits or make creamy versions. Lastly, I provided storage tips to help your popsicles last longer. Enjoying these delightful treats is simple and rewarding!

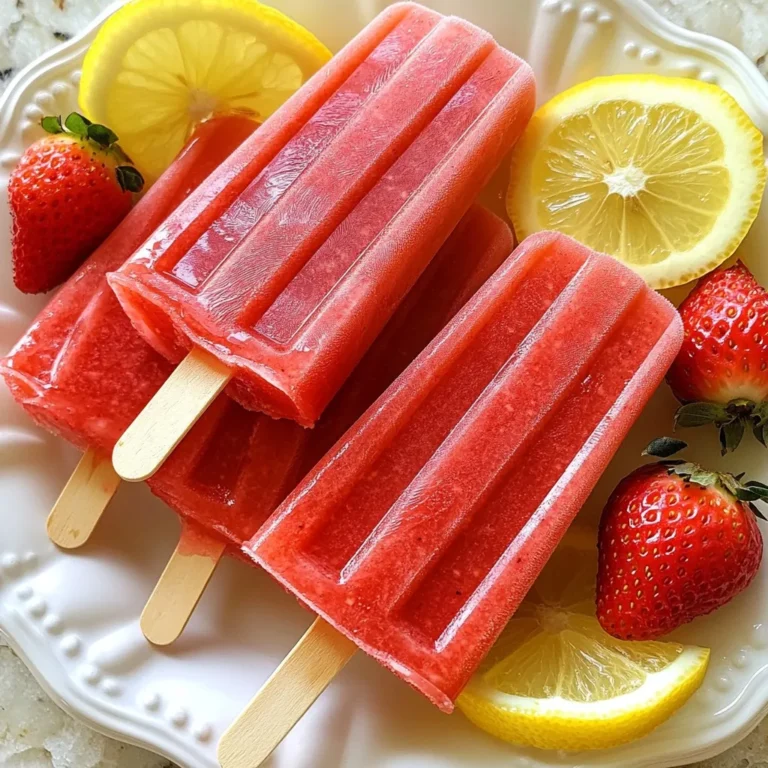
Strawberry Lemonade Popsicles Refreshing Summer Treat

- 4 boneless, skinless chicken breasts - 2 cups fresh spinach, chopped - 1 can (14 oz) diced tomatoes, drained - 1/2 cup heavy cream - 1/2 cup chicken broth - 3 cloves garlic, minced - 1 medium onion, diced - 1 teaspoon Italian seasoning - 1 tablespoon olive oil - Salt and pepper to taste - Fresh basil leaves for garnish This recipe uses simple yet fresh ingredients to create a tasty dish. The chicken breasts are the star of the show. They provide a nice base for all the flavors. Spinach adds a vibrant color and healthy touch. Diced tomatoes bring a sweet and tangy note, while heavy cream gives the dish a rich texture. Seasoning is key. The chicken broth adds depth, and garlic and onion boost flavor. Italian seasoning ties it all together, making each bite delicious. Don't forget the olive oil for cooking. It helps the chicken brown nicely and adds flavor. For finishing touches, salt and pepper balance the dish. Fresh basil leaves on top not only look great but also add a fresh taste. Each ingredient works together to create a meal that's sure to impress. {{ingredient_image_1}} First, season the chicken breasts. Use salt, pepper, and Italian seasoning on both sides. This adds great flavor. Next, heat olive oil in a large skillet over medium-high heat. Sauté the seasoned chicken for about 6-7 minutes on each side. You want it golden brown and cooked through. Once done, take the chicken out and set it on a plate. In the same skillet, add the diced onions. Sauté them until they become translucent, about 2-3 minutes. This brings out their sweetness. Now, add the minced garlic and cook for one more minute. The aroma will be amazing! Stir in the drained diced tomatoes next. Let them cook for 2-3 minutes. Then, add the chopped spinach and stir until it wilts, which takes about 2 minutes. Now, pour in the heavy cream and chicken broth. Bring it to a gentle simmer. Stir well and let it simmer for about 4-5 minutes until it thickens slightly. Now, return the cooked chicken to the skillet. Spoon the creamy tomato-spinach sauce over the chicken. Allow it to simmer for another 2 minutes to heat through. Finally, remove from heat and garnish with fresh basil leaves before serving. This adds a fresh touch! To keep chicken breasts tender and juicy, start with even thickness. You can pound the chicken to about 1 inch. This helps them cook evenly and prevents dryness. Cook the chicken for about 6-7 minutes on each side over medium-high heat. Always check that the internal temperature reaches 165°F. For smaller breasts, reduce the cooking time. Larger pieces may need an extra minute or two. To adjust the thickness of the sauce, you can add more or less heavy cream. If you want it thicker, let it simmer longer. For a thinner sauce, add a splash of chicken broth. Taste as you season with salt and pepper. This way, you can make it just right for your liking. This dish pairs well with rice or pasta. A bed of fluffy rice absorbs the creamy sauce nicely. If you prefer pasta, choose something like fettuccine or penne. For presentation, serve the chicken on the side with a generous drizzle of sauce. A sprinkle of fresh basil adds a nice touch and color. Pro Tips Perfectly Cooked Chicken: Use a meat thermometer to ensure chicken reaches an internal temperature of 165°F (75°C) for safety and juiciness. Fresh Spinach Flavor: For the best flavor, use fresh spinach instead of frozen. It wilts quickly and retains its vibrant color. Customize the Creaminess: Adjust the amount of heavy cream according to your preference for a richer or lighter sauce. Add a Kick: For a spicy twist, add a pinch of red pepper flakes to the sauce while it simmers. {{image_2}} You can change the main protein in this dish. If you want, swap chicken for turkey or shrimp. Turkey gives a nice flavor and is lean. Shrimp cooks fast and adds a sweet taste. If you prefer a vegetarian option, use tofu. Tofu absorbs flavors well, making it a tasty choice in this creamy sauce. To make this dish hotter, add red pepper flakes. This spice warms up each bite. You can also mix in other vegetables. Bell peppers add crunch, while mushrooms bring a deep, earthy flavor. Both options enhance the dish and make it more colorful. If you want a lighter sauce, try using half-and-half or coconut cream. These options keep the dish creamy without as many calories. For a vegan version, use cashew cream or coconut milk. Both give a rich taste while keeping it dairy-free. To store leftovers, place the chicken and sauce in an airtight container. This keeps the dish fresh and prevents spills. Make sure to cool the dish to room temperature before sealing it. For best quality, enjoy your leftovers within three to four days. Yes, you can freeze this dish. To do it well, let the chicken cool completely. Then, place it in a freezer-safe container or bag. This helps avoid freezer burn. You can freeze it for up to three months. For thawing, move the container to the fridge overnight. To reheat, warm it in a skillet over medium heat. Add a splash of chicken broth if the sauce seems too thick. Stir until heated through, and enjoy! Yes, you can prepare Creamy Tomato Spinach Chicken ahead of time. Cook the dish as usual, then let it cool. Store it in an airtight container in the fridge. This will keep it fresh for up to three days. When you're ready to eat, heat it gently on the stove over low heat. Stir often to prevent sticking. You can also microwave it in a safe dish for a quick option. Creamy Tomato Spinach Chicken pairs well with many sides. Here are some great options: - Steamed rice - Pasta, like fettuccine or penne - Quinoa for a healthy twist - Garlic bread to soak up the sauce - A fresh salad for a crunchy contrast Each of these sides will balance the creamy sauce and add variety to your meal. Yes, Creamy Tomato Spinach Chicken can be gluten-free. The main ingredients, like chicken and vegetables, do not contain gluten. Just be careful with the chicken broth. Some brands add gluten. Always check the label to ensure it is gluten-free. If you want to be safe, use homemade chicken broth to control the ingredients. This blog post shared a simple, tasty recipe for Creamy Tomato Spinach Chicken. You learned about the key ingredients, cooking steps, and tips for perfecting the dish. I also covered storage methods and variations for added creativity. Keep this recipe in mind for your next meal. It’s easy to follow and great for any occasion. Enjoy cooking and remember to make it your own! Your version will be unique and just as delicious.

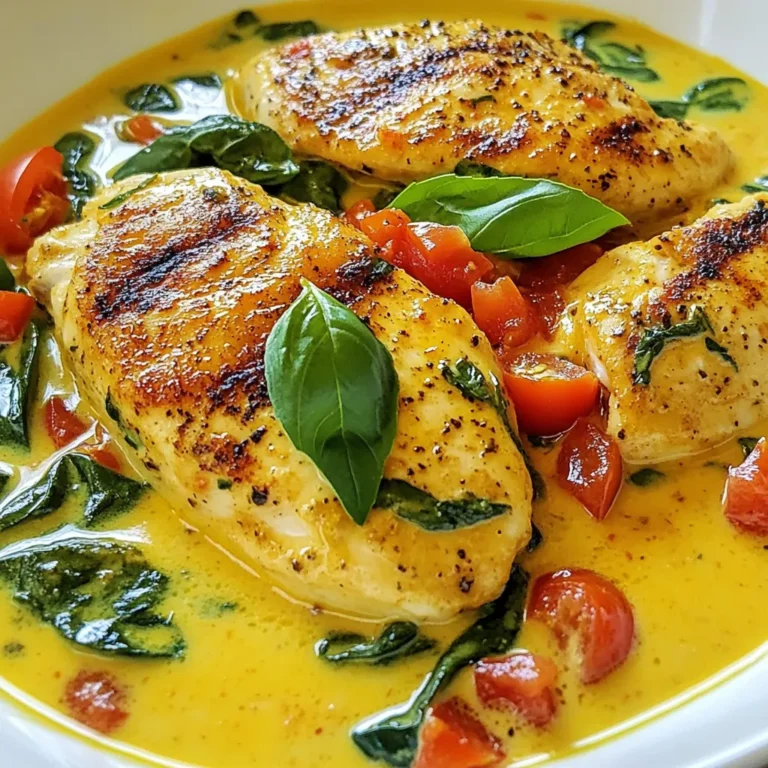
Creamy Tomato Spinach Chicken Flavorful Easy Recipe

- 1 cup cream cheese, softened - 1/2 cup Greek yogurt - 1/2 cup powdered sugar - 1 teaspoon vanilla extract - 2 cups mixed berries (strawberries, blueberries, raspberries) - 1 cup graham cracker crumbs - Mint leaves for garnish You can swap cream cheese for mascarpone for a richer taste. If you want a lighter option, use low-fat cream cheese. Instead of Greek yogurt, regular yogurt works too. For sweetness, you can use honey or maple syrup instead of powdered sugar. If you don't have graham crackers, crushed cookies or even nuts make a great base. When picking berries, look for bright colors and firm texture. Avoid berries that look dull or mushy. Smell the berries; fresh ones should have a sweet scent. Check for any signs of mold. It’s best to buy organic when possible to avoid pesticides. Store them in the fridge, but don’t wash until you are ready to use them. This keeps them fresh longer. {{ingredient_image_1}} To start, gather your ingredients. You will need cream cheese, Greek yogurt, powdered sugar, and vanilla extract. First, take one cup of softened cream cheese and place it in a medium bowl. Then, add half a cup of Greek yogurt and half a cup of powdered sugar. Pour in one teaspoon of vanilla extract. Use an electric mixer to beat this mixture until it is smooth and creamy. This step makes the base for your cheesecake salad. Next, take two cups of mixed berries. You can use strawberries, blueberries, and raspberries. Place the berries in a large bowl. Gently fold the creamy mixture into the berries. Be careful not to squish them. You want each berry to be well coated but still whole. This step adds a burst of flavor to your salad and keeps it colorful. Now it’s time to assemble your salad. Find serving bowls or parfait glasses. Start with a layer of the berry cheesecake mixture at the bottom. Then, add a layer of graham cracker crumbs. Repeat these layers until you use all the mixture and crumbs. Finish with a sprinkle of graham cracker crumbs on top. For a nice touch, add a few fresh mint leaves for color and flavor. Finally, chill the salad in the fridge for at least 30 minutes. This waiting time helps the flavors mix well. Enjoy your delicious berry cheesecake salad! To make your berry cheesecake salad pop, use clear bowls or glasses. This way, you can show off the pretty layers. Start with the cheesecake mixture at the bottom. Then, add a layer of graham cracker crumbs. Next, pile on the mixed berries. Repeat these layers until you reach the top. Finish with a dollop of the cream cheese mix and a sprinkle of crumbs. Top it off with fresh mint leaves. This adds color and makes it look fancy. When mixing the cream cheese, it’s key to use a soft block. Let it sit at room temperature for about 30 minutes. This makes it easier to blend with yogurt and sugar. Use an electric mixer to get a smooth and creamy texture. Mix until there are no lumps. Then, gently fold in the berries. This avoids smashing them and keeps their shape. Be careful not to over-mix. You want those beautiful berries to shine. For the best cream cheese consistency, focus on temperature. Start with softened cream cheese. Cold cream cheese will not mix well. You can cut it into small pieces to soften faster. Beat it with Greek yogurt and powdered sugar until creamy. If it’s too thick, add more yogurt, a spoonful at a time. Mixing should be smooth, not runny. You want it creamy enough to hold the berries but light enough to enjoy. Pro Tips Use Fresh Berries: Using fresh, ripe berries will enhance the flavor and texture of your salad. Look for berries that are plump and fragrant for the best results. Chill for Flavor: Allowing the salad to chill in the refrigerator for at least 30 minutes helps the flavors meld together, resulting in a more delicious dessert. Variations: Feel free to mix in other fruits like sliced bananas or peaches for a unique twist. Just make sure they complement the berries. Presentation: Layer the salad in clear glasses to show off the colorful berries and graham cracker crumbs for an appealing presentation. {{image_2}} You can switch up the berries in this salad. Try blackberries, peaches, or even mangoes. Each fruit adds a unique taste. Mix and match to find your favorite. You can also add bananas for creaminess. Just remember to cut them into small pieces. If you want a twist, try different cream cheese bases. You can use mascarpone for a richer flavor. Ricotta cheese can give a lighter texture. Greek yogurt alone can make it lighter and tangy. Each option changes the taste. You can explore these bases based on what you like. To make this salad gluten-free, swap graham crackers for gluten-free crumbs. You can find many options in stores. Some brands offer delicious gluten-free cookies for this. Just crush them up to use as layers. This way, everyone can enjoy the dessert! To store leftover Berry Cheesecake Salad, use an airtight container. Place it in the fridge right after serving. This keeps the salad fresh and tasty. If you have individual servings, you can pack them in small containers too. Make sure to seal them well to prevent air from getting in. Chilling is key for this dessert. It helps the flavors blend and makes the salad cool and refreshing. After you make it, put the salad in the fridge for at least 30 minutes. For best results, chill it longer if you have time. Cover the salad with plastic wrap or a lid to keep it cold and delicious. The Berry Cheesecake Salad lasts up to three days in the fridge. After that, the berries may lose their texture. If you notice any signs of spoilage, like a change in color or smell, it’s best to toss it. Always trust your senses when it comes to food safety. Yes, you can make this salad in advance. It tastes even better after chilling. I suggest making it a few hours before you serve it. Just keep it in the fridge. This way, the flavors blend nicely. You can store it for up to two days. Mixed berries work best for this salad. I love using strawberries, blueberries, and raspberries. They add a nice mix of flavors and colors. You can also try blackberries if you like their taste. Fresh, ripe berries are best for the sweetest flavor. To make this recipe healthier, you can use low-fat cream cheese. Greek yogurt is already a great choice. You can reduce the powdered sugar, too. Try using honey or maple syrup instead. You can also add more berries for extra fiber and vitamins. In this blog post, we covered ingredients, steps, and tips for making berry cheesecake salad. We explored how to choose fresh berries, layer your salad, and mix it well. You can swap ingredients and try different fruits to suit your taste. Proper storage keeps leftovers fresh for longer. Remember, you can make this salad in advance for gatherings. Enjoy your delicious creation and share it with others. Happy cooking!

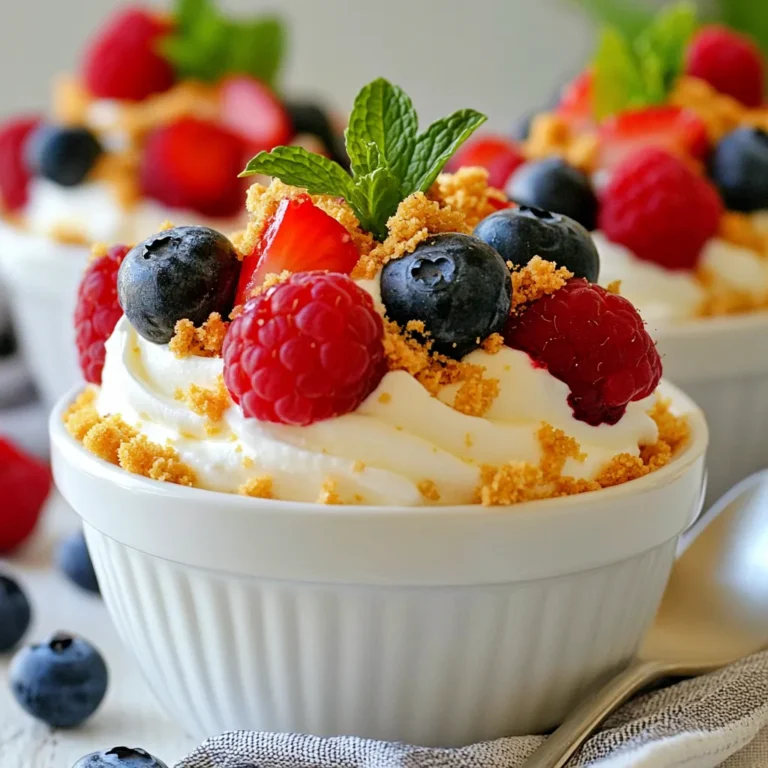
Berry Cheesecake Salad Refreshing and Easy Dessert

- 1 lb boneless chicken thighs, cut into bite-sized pieces - 1 cup plain yogurt - 2 tablespoons tandoori masala - 1 tablespoon lemon juice - 1 tablespoon ginger-garlic paste - 1 teaspoon turmeric powder - 1 teaspoon cayenne pepper - 1 teaspoon garam masala - Salt to taste - 2 tablespoons vegetable oil - Fresh cilantro for garnish - Lemon wedges for serving For Tandoori Chicken Skewers, you need fresh ingredients. I prefer using chicken thighs. They stay juicy and full of flavor. The plain yogurt helps tenderize the chicken. It also adds a creamy texture to the marinade. Tandoori masala is key. You can buy it or make your own blend. Ginger-garlic paste adds a nice kick. The spices bring warmth and depth. Turmeric powder gives a beautiful color, while cayenne adds heat. Use good vegetable oil to brush the skewers. It helps prevent sticking. Fresh cilantro adds brightness on top. Lemon wedges serve for a zesty finish. These ingredients create a flavor explosion. You will love the taste in every bite! {{ingredient_image_1}} 1. Start with a large mixing bowl. 2. Add 1 cup of plain yogurt. 3. Mix in 2 tablespoons of tandoori masala. 4. Pour in 1 tablespoon of lemon juice. 5. Add 1 tablespoon of ginger-garlic paste. 6. Sprinkle in 1 teaspoon of turmeric powder. 7. Add 1 teaspoon of cayenne pepper, or less if you want less heat. 8. Toss in 1 teaspoon of garam masala and salt to taste. 9. Stir everything until well mixed. 10. Add the chicken pieces and coat them evenly. 11. Cover the bowl with plastic wrap. 12. Refrigerate for at least 2 hours. For the best flavor, let it marinate overnight. 1. If you're using wooden skewers, soak them in water for at least 30 minutes. 2. This helps prevent burning during cooking. 3. Preheat your grill or oven to 400°F (200°C). 1. Take the marinated chicken out of the fridge. 2. Thread the chicken pieces onto the soaked or metal skewers. 3. Pack the pieces tightly, but don’t overcrowd them. 4. Brush the skewers with 2 tablespoons of vegetable oil. 5. Place the skewers on the grill or in the oven. 6. Grill for about 15-20 minutes. 7. Turn them halfway through cooking for even browning. 8. The chicken should be cooked through and golden. 9. Check that the internal temperature hits 165°F (75°C). 10. Once done, take them off and let them rest for a few minutes. Marination time is key for juicy chicken. I recommend marinating the chicken for at least 2 hours. For the best taste, let it sit overnight. This allows the flavors to soak in deeply. You can also adjust spices for your taste. Want more heat? Add more cayenne pepper. Prefer it milder? Cut back on spicy ingredients. You can grill or oven-bake these skewers. Grilling gives a smoky flavor. Oven baking is easy and still delicious. If you use wooden skewers, soak them in water first. This prevents burning while cooking. Brush the skewers with vegetable oil. This keeps the chicken from sticking. For serving, arrange the Tandoori Chicken Skewers on a nice platter. Fresh lettuce makes a great base. You can add a small bowl of mint yogurt sauce for dipping. Lemon wedges add a fresh touch and zesty flavor. For side dishes, consider rice or a fresh salad. They pair well with the skewers and add to the meal. Pro Tips Marinate Longer: For the best flavor and tenderness, marinate the chicken overnight. This allows the spices and yogurt to penetrate deeply into the meat. Use Fresh Spices: If possible, use freshly ground spices for the tandoori masala. This enhances the aroma and flavor of the dish. Check Doneness: Always use a meat thermometer to check the chicken's internal temperature. It should reach at least 165°F (75°C) for safe consumption. Experiment with Vegetables: Feel free to add bell peppers, onions, or zucchini to the skewers. They grill beautifully alongside the chicken and add color and flavor. {{image_2}} You can switch out chicken thighs for chicken breasts if you prefer. Chicken breasts cook faster and can still be juicy if you don’t overcook them. Shrimp makes a great substitute too. They cook quickly and soak up the marinade well. Vegetables like bell peppers, zucchini, and mushrooms are also tasty on skewers. Just remember to cut them into similar sizes for even cooking. If you need a yogurt alternative, try using coconut yogurt or cashew cream. They offer a similar texture and enhance flavor. For a twist, experiment with different spice blends. You could use curry powder or even a mix of paprika and cumin. This will give your skewers a unique taste, making them even more exciting. You can serve Tandoori Chicken Skewers in wraps. Use flatbreads or tortillas and add fresh veggies. This makes a fun, hands-on meal. They also work well as appetizers. Just cut the skewers into smaller pieces for easy eating. Another great idea is to integrate the chicken into salads. Toss with greens, cucumbers, and a zesty dressing for a light, flavorful dish. - Refrigeration tips: Store leftover Tandoori chicken skewers in an airtight container. Keep them in the fridge. They stay fresh for up to three days. Make sure they cool down before sealing. - Freezing for longer storage: If you want to save them longer, freeze the skewers. Wrap them tightly in plastic wrap, then put them in a freezer bag. They can last for up to three months. - Best methods for reheating: To reheat, use an oven or a skillet. Preheat the oven to 350°F (175°C). Place the skewers on a baking tray and heat for about 10-15 minutes. In a skillet, heat on medium until warm. - Ensuring chicken remains moist: To keep the chicken juicy, add a splash of water or broth to the skillet. This steam helps keep the meat moist. - Shelf life in the fridge: Tandoori chicken skewers last about three days in the fridge. After that, they may lose taste and texture. - Signs of spoilage: Look for off smells, a sticky texture, or discoloration. If you see any of these signs, it's best to throw them away. To make Tandoori Chicken Skewers, start with marinating the chicken. Mix yogurt, tandoori masala, lemon juice, ginger-garlic paste, turmeric, cayenne, garam masala, and salt in a bowl. Add bite-sized chicken pieces and stir until they are well coated. Cover the bowl and refrigerate for at least 2 hours, or overnight for better flavor. Next, prepare your skewers. If using wooden skewers, soak them in water for 30 minutes. Preheat your grill or oven to 400°F (200°C). Thread the marinated chicken onto the skewers. Make sure to pack the pieces closely but not too tight. Brush the skewers with vegetable oil to stop them from sticking. Cook on the grill or in the oven for 15-20 minutes, turning halfway. Check that the chicken reaches an internal temperature of 165°F (75°C) before serving. You can serve Tandoori Chicken Skewers with many tasty sides. Here are some great ideas: - Mint yogurt sauce: This cool sauce pairs well with the spices. - Naan bread: Soft and warm, it’s perfect for holding chicken. - Rice: Serve with basmati or jasmine rice for a filling meal. - Salad: A fresh salad with cucumber and tomatoes adds crunch. - Grilled veggies: Zucchini, bell peppers, or onions work nicely. The spice level of Tandoori Chicken Skewers can vary. The cayenne pepper adds heat, so you can adjust it to your taste. If you prefer less spice, reduce the amount of cayenne or skip it. If you want more heat, increase the cayenne or add a dash of hot sauce to the marinade. Remember, the yogurt helps cool down the spice, so don’t worry too much! You learned how to make tasty Tandoori Chicken Skewers using simple ingredients. Marinating chicken thighs in yogurt and spices gives rich flavor. I shared cooking tips for grilling or baking, plus ideas for sides. Don't hesitate to customize the spices to suit your taste. Store leftovers properly to enjoy them later. Tandoori Chicken Skewers are fun to make and delicious to eat! Get creative with the recipe and enjoy every bite.

Tandoori Chicken Skewers Juicy Flavor Explosion

For this dish, you will need: - 4 boneless, skinless chicken thighs - 1 cup cherry tomatoes, halved - 1 red bell pepper, sliced - 1 yellow onion, sliced - 1 zucchini, sliced - 3 cloves garlic, minced These main ingredients give the dish its hearty base. The chicken is juicy and tender. The veggies add color and nutrition. The flavors come from: - 1 teaspoon dried oregano - 1 teaspoon dried thyme - 1 teaspoon smoked paprika - Salt and pepper to taste - 2 tablespoons olive oil These spices work well together. They add depth and warmth to the dish. The olive oil helps to cook everything evenly. For a fresh finish, consider: - Fresh basil or parsley for garnish - Lemon wedges for serving Garnishing with herbs brightens the dish. The lemon adds a zesty touch. Both make the meal look and taste even better. {{ingredient_image_1}} First, set your oven to 400°F (200°C). Grab a large oven-safe skillet. This pan will hold all the flavors. If you don't have one, a baking dish works too. Make sure it is ready to hold the chicken and veggies. In a small bowl, combine the dried oregano, thyme, smoked paprika, salt, and pepper. This mix will add lots of flavor. Pat the chicken thighs dry with paper towels. Rub half of the olive oil on both sides of each thigh. Then, sprinkle half of the spice mix over them. Make sure to cover the chicken well. Heat the remaining olive oil in your skillet over medium heat. Once it is hot, add the chicken thighs. Sear them for about 4-5 minutes on each side. Look for a nice golden brown color. This step locks in juices. When done, take the chicken out and set it aside. In the same skillet, toss in the sliced onion and minced garlic. Sauté them for about 2-3 minutes. Watch for the onion to turn translucent. Next, add the sliced bell pepper and zucchini. Stir them occasionally. Cook for another 3-4 minutes until they are slightly tender. This makes the veggies soft and sweet. Now, add the halved cherry tomatoes and the remaining spice mix to the skillet. Stir everything to mix well. Nestle the browned chicken thighs back into the skillet. Make sure they are partly submerged in the veggies. This helps the chicken absorb all the flavors. Transfer the skillet to the oven. Roast for 20-25 minutes. The chicken is ready when it reaches 165°F (75°C). After baking, let it rest for a few minutes before serving. To make your chicken juicy, choose boneless, skinless thighs. They stay moist during cooking. After seasoning and searing, let them rest for a few minutes. This helps lock in the juices. Cooking at the right temperature is key. Always check the internal temperature. It should reach 165°F (75°C) for safety. Feel free to change the spices to suit your taste. Add more smoked paprika for a richer flavor. If you love heat, consider adding red pepper flakes. Fresh herbs like basil or parsley can brighten the dish. Taste the veggie mix before adding the chicken. Adjust salt and pepper as needed. Cooking time may vary based on your oven and chicken size. If your chicken is large, add 5-10 more minutes. Always check for doneness with a meat thermometer. For crispier skin, broil for a few minutes at the end. Just watch it closely to avoid burning! Pro Tips Use Fresh Herbs: Fresh basil or parsley can elevate the dish's flavors, adding brightness and a pop of color. Perfect Chicken Thighs: Ensure the chicken thighs are at room temperature before cooking for even cooking and better texture. Customize Veggies: Feel free to swap in seasonal vegetables like eggplant or asparagus to keep the dish fresh and exciting. Rest Before Serving: Allow the chicken to rest for a few minutes after baking to keep it juicy and tender when you cut into it. {{image_2}} You can mix in many veggies. Try carrots, green beans, or eggplant. These add color and crunch. Each vegetable brings its own taste and texture. You can also adjust cooking times. Harder veggies, like carrots, need more time. Add them first with the onion. Softer veggies, like zucchini, can go in later. Chicken thighs are tender and juicy, but you can use other cuts. Chicken breasts work well too. They cook faster, so check them early. Drumsticks and wings can add fun to your meal. Just remember to adjust cooking time based on the cut you choose. Always aim for an internal temperature of 165°F. To boost flavor, add olives or feta cheese. Kalamata olives give a briny taste. Feta adds a creamy, salty touch. You can also use capers for a tangy kick. Fresh herbs like rosemary or dill add a pop of freshness. Each ingredient brings a taste of the Mediterranean to your dish. Feel free to get creative! To keep your Mediterranean One-Pan Chicken fresh, let it cool first. Place the chicken and veggies in an airtight container. Store it in the fridge for up to three days. This way, you can enjoy the leftovers without losing flavor. When you're ready to eat leftovers, reheating is easy. You can use the microwave. Heat it for about 2-3 minutes. Make sure to stir halfway through. You can also reheat it in the oven. Set the oven to 350°F (175°C) and heat for about 15 minutes. If you want to save some for later, freezing works well. Place the cooled chicken and veggies in a freezer-safe bag. Squeeze out as much air as possible. This helps prevent freezer burn. You can store it in the freezer for up to three months. When you’re ready to eat, thaw it overnight in the fridge before reheating. You can serve this dish with many sides. I suggest rice, couscous, or a fresh salad. These options add nice flavors and textures. Garlic bread also pairs well, soaking up the juices. For a light touch, try a Greek yogurt dip. This adds creaminess and balance to the meal. Yes, you can prepare Mediterranean One-Pan Chicken ahead of time. Cook it and let it cool. Then, store it in an airtight container in the fridge. It will last for up to three days. When ready, reheat it gently in the oven or on the stove. To check if the chicken is done, use a meat thermometer. The internal temperature should reach 165°F (75°C). If you don’t have a thermometer, cut into the chicken. The meat should be white, with no pink inside. Juices should run clear, not red. Absolutely! Fresh herbs can bring a bright taste. Use three times more fresh herbs than dried. If a recipe calls for one teaspoon of dried oregano, use three teaspoons of fresh oregano. Chop the fresh herbs finely before adding them to the dish. We explored the key ingredients needed for a tasty Mediterranean one-pan chicken. The step-by-step guide ensures you cook juicy chicken and vibrant veggies. I shared tips to enhance flavor and adjust cooking times. You can also try fun variations like different veggies or cuts of chicken. Don't forget storage tips for leftovers and reheating methods. With these insights, you can create a meal that is simple and satisfying. Enjoy cooking and sharing this flavorful dish!

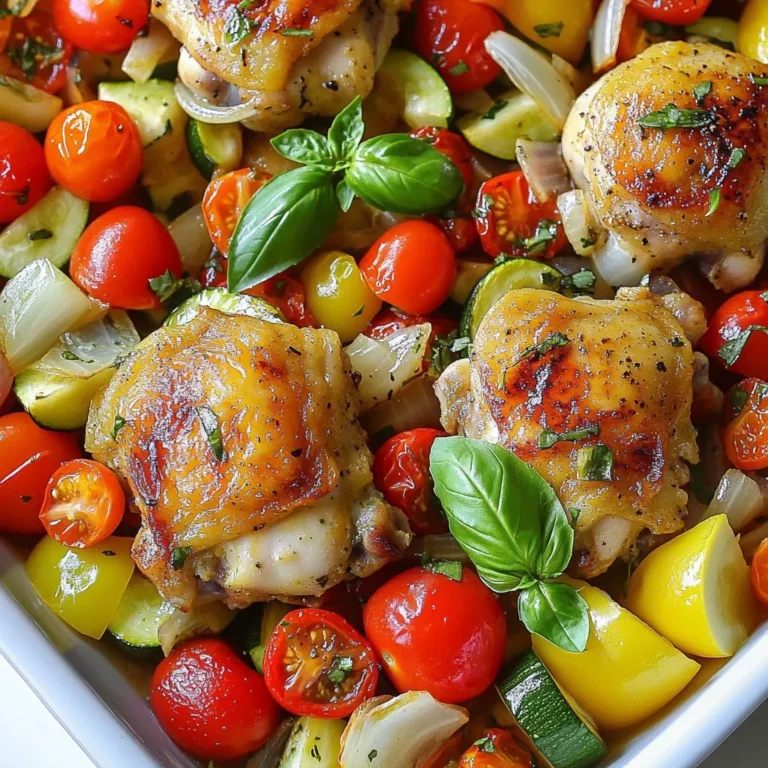
Mediterranean One-Pan Chicken Flavorful and Easy Meal

PREV 1 … 51 52 53 … 57 NEXT
quick dish kitchen

explore

DessertsDinnerAppetizersDrinks

Our Policies

  • Cookie Policy
  • Copyright Policy
  • Disclaimer
  • GDPR Policy
  • Terms Of Use
Back to Top
  • About
  • Contact Us
  • Privacy Policy
© 2025 quick dish kitchen