FREE DINNER EBOOK! Get your copy!
  • Cookie Policy
  • GDPR Policy
  • Disclaimer
  • Terms Of Use
  • Visit my other site: Fun Cookie Recipes
quick dish kitchen
  • Home
  • Dinner
  • Desserts
  • Drinks
  • Appetizers
  • Contact
  • About
  • Privacy Policy
  • Home
  • Dinner
  • Desserts
  • Drinks
  • Appetizers
  • Contact
  • About
  • Privacy Policy
  • Cookie Policy
  • GDPR Policy
  • Disclaimer
  • Terms Of Use
Visit my other site: Fun Cookie Recipes

HOME / CATEGORIES /

Latest

- 4 large bell peppers (any color) - 1 pound ground turkey or beef - 1 small onion, diced - 2 cloves garlic, minced - 1 can (15 oz) black beans, rinsed and drained - 1 cup corn kernels (fresh, frozen, or canned) - 1 packet taco seasoning (about 1 oz) - 1 cup cream cheese, softened - 1 cup shredded cheddar cheese, plus more for topping - 1/2 cup sour cream - 1/4 cup fresh cilantro, chopped (for garnish) - Salt and pepper, to taste When making creamy taco stuffed peppers, these ingredients shine. Start with bell peppers. They hold the filling well and add color. Ground turkey or beef brings protein. Onion and garlic add flavor, making the dish savory. Black beans and corn offer texture and sweetness. Cream cheese and sour cream create that creamy goodness everyone loves. Cheddar cheese on top melts beautifully, giving that perfect finish. Fresh cilantro adds a nice touch to the final dish. - Additional toppings - Varieties of cheese - Spices for extra flavor You can customize your peppers. Add more toppings like avocado or sour cream. Try different cheeses like pepper jack for a kick. Spices like cumin or chili powder can enhance the flavor. Each choice can make your dish unique and exciting. {{ingredient_image_1}} - Preheat your oven to 375°F (190°C). This step helps cook the peppers evenly. - Slice the tops off the bell peppers. Remove the seeds and membranes. Place them upright in a greased baking dish. This makes stuffing them easier later. - In a large skillet, add diced onion and minced garlic. Sauté these over medium heat for about 3-4 minutes. The onion should look translucent and smell great. - Add 1 pound of ground turkey or beef to the skillet. Cook this until it is browned and fully cooked. Break the meat apart with a spatula. Drain excess fat if needed. - Stir in 1 can of rinsed black beans, 1 cup of corn, and a packet of taco seasoning. Mix well and cook for another 2-3 minutes. This makes the filling flavorful and hearty. - Remove the skillet from heat. Let it cool slightly. Then, mix in 1 cup of softened cream cheese and 1/2 cup of sour cream until creamy. Season with salt and pepper to taste. - Generously stuff each bell pepper with the creamy taco mixture. Press it down to fit as much as possible. - Top each pepper with 1 cup of shredded cheddar cheese. You can sprinkle any extra cheese over the dish for a cheesy delight. - Cover the baking dish with aluminum foil. This helps keep the peppers moist as they bake. - Bake for 25 minutes. Then, remove the foil and bake for another 10-15 minutes. The cheese should be melted and bubbly. - Remove the stuffed peppers from the oven. Let them cool for a few minutes before serving. Garnish with fresh chopped cilantro for a burst of color and flavor. - Choosing the right pepper: I love using large bell peppers. They hold the filling well. Any color works. Green, red, yellow, or orange all add flavor and fun. - Browning meat properly: Cook the ground turkey or beef until brown. This step adds depth. Use medium heat and break it apart. This way, it cooks evenly and gets that nice caramelized taste. - Suggestions for spices: Try adding cumin or paprika to your taco seasoning. A dash of chili powder can spice things up! You can also add a pinch of cayenne for heat. - Variations of toppings: Top your peppers with diced tomatoes, sliced jalapeños, or avocado. A dollop of guacamole or salsa adds a fresh twist. - Garnishing options: Sprinkle fresh cilantro on top before serving. It adds color and flavor. You can also use sliced green onions for a nice crunch. - Serving suggestions: Place stuffed peppers on a colorful plate. Serve with a side of rice or a simple salad. This makes your meal look extra appealing! Pro Tips Choose Colorful Peppers: Using a mix of bell pepper colors not only makes the dish visually appealing but also adds a slight variation in flavor. Customize the Filling: Feel free to add your favorite ingredients such as diced tomatoes, jalapeños, or different types of cheese to make the filling your own. Make Ahead: Prepare the stuffed peppers in advance, cover them tightly, and store in the fridge for up to 24 hours before baking. This is great for meal prep! Experiment with Toppings: Besides cilantro, try adding avocado, lime wedges, or even hot sauce for an extra kick when serving. {{image_2}} You can easily switch up the protein in your creamy taco stuffed peppers. If you want a meatless option, try using lentils or quinoa. They add great texture and flavor. You might also choose shredded chicken or pork for a new twist. For those who love beef, lean ground beef works too. Just keep in mind that different proteins may change the cooking time slightly. Want to spice things up? Add diced jalapeños or a sprinkle of cayenne pepper to the filling. This will give your dish an extra kick. If you prefer a milder taste, skip the heat and go for sweet bell peppers. You can also mix different cheese types. Try pepper jack for a creamy, spicy taste or mozzarella for a more mellow flavor. This way, you can customize each pepper to suit your family’s taste buds. Using seasonal vegetables can elevate your stuffed peppers. In summer, add zucchini or fresh tomatoes to the filling. In the fall, consider using butternut squash or spinach. These swaps can enhance the dish’s flavor and freshness. If you want to change the beans, try using chickpeas or pinto beans. These options give you different textures and tastes that can surprise your family. To keep your creamy taco stuffed peppers fresh, let them cool first. Once they reach room temperature, pack them in an airtight container. This helps prevent moisture loss. Store in the fridge for up to four days. When you are ready to eat, just reheat them in the microwave or oven. You can freeze these stuffed peppers for up to three months. To freeze, wrap each pepper in plastic wrap and then place them in a freezer-safe bag. This keeps them safe from freezer burn. When you're ready to enjoy them, take the peppers out of the freezer. Let them thaw in the fridge overnight. For reheating, place them in a baking dish and cover with foil. Bake at 375°F (190°C) for about 25 minutes until heated through. Enjoy your tasty meal! You can make vegetarian creamy taco stuffed peppers by swapping the meat. Use 1 can of black beans or 1 cup of cooked lentils instead of ground turkey or beef. You can also add more veggies, like diced zucchini or mushrooms, for added texture and flavor. Using a mix of spices, such as cumin and paprika, will enhance the taste too. This way, you keep the creamy texture and delicious flavors while enjoying a meat-free meal. Yes, you can prepare these peppers in advance. Here are some meal prep tips: - Stuff the bell peppers and store them in the fridge. - Cover them tightly with plastic wrap or foil. - You can also freeze them before baking. - If frozen, let them thaw in the fridge overnight before baking. This makes it easy to enjoy a quick family meal on busy nights. Creamy taco stuffed peppers pair well with various side dishes. Consider these options: - A fresh green salad with a light vinaigrette. - Cilantro lime rice for a zesty touch. - Cornbread or tortilla chips to add crunch. - Guacamole or salsa for dipping. These sides will complement the flavors and make your meal even more enjoyable. In this post, we covered how to make creamy taco stuffed peppers. We discussed the key ingredients, including bell peppers, ground turkey, and beans. You learned how to prepare, cook, and bake them to get a delicious meal. I shared tips for texture and flavor enhancements, along with storage methods for leftovers. Remember, experimenting with different proteins and flavors keeps this dish exciting. Enjoy your cooking journey and make those peppers your own!

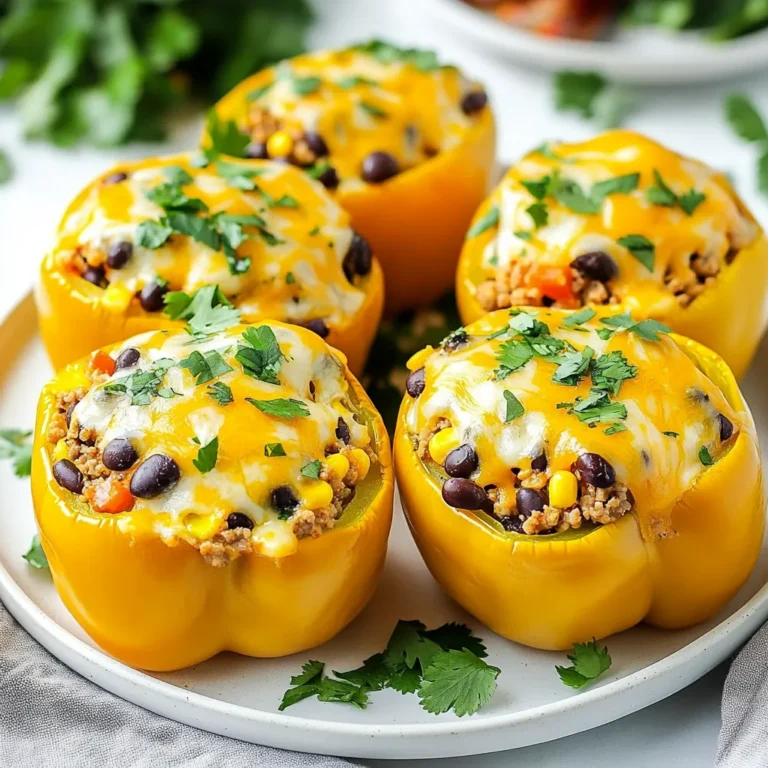
Creamy Taco Stuffed Peppers Flavorful Family Meal

- 2 cups all-purpose flour - 1/2 cup granulated sugar - 1 tablespoon baking powder - 1/2 teaspoon salt When making blueberry lemon scones, start with your dry ingredients. First, measure 2 cups of all-purpose flour. This gives the scones their structure. Next, add 1/2 cup of granulated sugar for sweetness. Then, include 1 tablespoon of baking powder. This helps the scones rise. Finally, add 1/2 teaspoon of salt to enhance the flavors. Be sure to whisk these together well. - 1/2 cup unsalted butter, cold and cubed - 1/4 cup heavy cream - 1 large egg - 1 teaspoon vanilla extract - 1 tablespoon lemon juice Now, let’s gather the wet ingredients. Use 1/2 cup of cold, cubed unsalted butter. Cold butter keeps the scones flaky. Next, measure out 1/4 cup of heavy cream. This adds richness. Crack in 1 large egg for binding. Add 1 teaspoon of vanilla extract for flavor. Lastly, squeeze in 1 tablespoon of fresh lemon juice. This gives the scones their bright taste. - 1 cup fresh blueberries - Zest of 1 lemon For the best flavor, use fresh blueberries. You’ll need 1 cup. These juicy berries burst with flavor in every bite. Also, don’t forget the zest of 1 lemon. It adds a lovely citrus note. When you mix these in, they brighten the whole scone. {{ingredient_image_1}} - Preheat your oven to 400°F (200°C). - Line a baking sheet with parchment paper. - In a large bowl, whisk together: - 2 cups all-purpose flour - 1/2 cup granulated sugar - 1 tablespoon baking powder - 1/2 teaspoon salt This mix is the base for your scones. Make sure it’s well combined. - Add 1/2 cup of cold, cubed unsalted butter into the dry mix. - Use a pastry cutter or your hands to blend it. Aim for a crumbly texture. In a separate bowl, whisk together: - 1/4 cup heavy cream - 1 large egg - 1 teaspoon vanilla extract - 1 tablespoon lemon juice Pour this mixture into the dry ingredients. Stir gently until just combined. - Carefully fold in: - 1 cup fresh blueberries - Zest of 1 lemon Be gentle to keep the blueberries intact. - Turn the dough onto a floured surface. Knead it a few times. Don’t overwork it. - Pat the dough into a circle about 1 inch thick. Cut it into 8 wedges. - Place your scones on the prepared baking sheet. - Bake them for 15-20 minutes. Check for doneness when they turn lightly golden. - A toothpick inserted should come out clean. Once done, take them out and cool them on a wire rack. Enjoy your fresh blueberry lemon scones! For light and fluffy scones, start with cold butter. Cold butter creates steam in the oven, making your scones rise beautifully. Cut the butter into small cubes and mix it into the dry ingredients. Work quickly to keep the butter cold. Avoid overmixing the dough. Mix just until the ingredients combine. Overmixing makes the scones tough. Use a gentle folding motion when adding the blueberries and lemon zest. Choose the best blueberries for your scones. Fresh blueberries burst with flavor and add a juicy texture. If fresh berries are not available, frozen blueberries can work too. Just remember to add them straight from the freezer, so they don’t turn the dough blue. Using fresh ingredients is key. Fresh lemon zest adds a bright taste. It also enhances the blueberry flavor. For the best results, use organic lemons if possible. For an easy lemon glaze, mix powdered sugar with lemon juice. Adjust the sugar and juice to get your desired consistency. Drizzle the glaze over warm scones for a tasty finish. Presentation matters! Serve the scones warm. Drizzle with glaze, and sprinkle more lemon zest on top. Add a few fresh blueberries for a pop of color. This makes for an eye-catching and tasty treat! Pro Tips Use Cold Ingredients: Ensure that your butter and cream are cold to create flaky scones. This helps to maintain the structure and gives you that desired rise. Don't Overmix: When combining the wet and dry ingredients, mix just until incorporated. Overmixing can lead to tough scones instead of light and fluffy ones. Fresh vs. Frozen Blueberries: If using frozen blueberries, do not thaw them before adding to the dough. This prevents them from bleeding into the batter and turning the scones blue. Check for Doneness: Use a toothpick to test the scones. They should be lightly golden and a toothpick inserted into the center should come out clean for perfect scones. {{image_2}} You can easily switch to whole wheat flour. This adds a nutty taste and more fiber. The scones will still be soft and tasty. You might need a bit more liquid if you do this. For dairy-free options, try using plant-based butter. You can also use almond or coconut milk instead of heavy cream. These swaps keep the scones rich and moist. Adding nuts or seeds can give your scones a nice crunch. Chopped walnuts or sliced almonds work well. They add both texture and flavor. You can also mix in other fruits. Try raspberries or diced strawberries for a twist. They pair nicely with blueberries and lemon. You can make these scones in an air fryer! Preheat it to 350°F (175°C) and cook for about 12 minutes. This method gives you a crispy outside and fluffy inside. If you want to save some for later, freeze them before baking. Shape the scones, then place them in the freezer. Once frozen, store them in a bag. Bake them straight from the freezer, adding a few extra minutes to the cooking time. To keep your leftover scones fresh, store them in an airtight container. This helps to prevent them from drying out. If you plan to eat them within a day, they can sit at room temperature. For longer storage, put them in the fridge. Wrap them well to avoid any moisture. When you are ready to enjoy your scones again, reheating them is simple. Preheat your oven to 350°F (175°C). Place the scones on a baking sheet and warm them for about 5 to 10 minutes. This method keeps them soft and delicious. If you prefer, you can use a microwave for a quicker option. Heat them for about 15-20 seconds, but be careful not to make them soggy. Freezing scones is a great way to save them for later. Start by letting the scones cool completely after baking. Then, wrap each scone tightly in plastic wrap. Place the wrapped scones in a freezer-safe bag or container. They can stay frozen for up to three months. When you want to enjoy them, take them out and let them thaw in the fridge overnight. You can reheat them in the oven afterward for the best taste. You can tell your scones are done when they turn lightly golden. A toothpick should come out clean when inserted into the center. If the edges look firm and the top is slightly raised, they are likely ready. Keep an eye on them during the last few minutes of baking. Yes, you can use frozen blueberries! Just make sure to fold them in gently. Frozen blueberries can be a bit softer than fresh ones. They might release more juice, which can add color but also make the dough wetter. You may need to adjust the baking time slightly if using frozen fruit. Blueberry lemon scones pair well with many items. Try serving them with clotted cream or butter. A drizzle of honey adds sweetness, while lemon curd brings a zesty touch. For drinks, enjoy them with tea, coffee, or even a light lemonade for a refreshing combo. You’ve learned how to make delicious blueberry lemon scones. We covered key ingredients and the step-by-step process. Remember, using cold butter and fresh fruit makes all the difference. Don't hesitate to try different flavors too! Store your leftovers properly so they stay fresh. Baking these scones is a fun and rewarding experience. Enjoy sharing them with family and friends. Each bite brings joy and a taste of home. Happy baking!

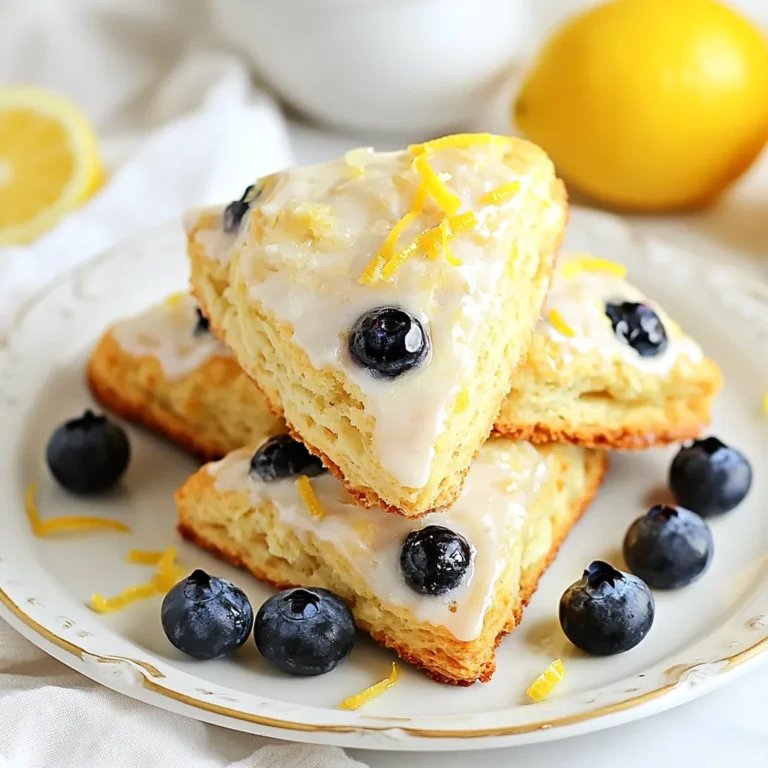
Blueberry Lemon Scones Fresh and Flavorful Recipe

- 4 salmon fillets (6 oz each) - 1/4 cup pure maple syrup - 2 tablespoons Dijon mustard - 1 tablespoon soy sauce (or tamari) - 1 tablespoon olive oil - 2 cloves garlic, minced - 1 teaspoon fresh ginger, grated - Salt and pepper to taste - Fresh chives or parsley for garnish To make maple glazed salmon, you need fresh ingredients. Start with salmon fillets. Choose fillets that are bright in color. Fresh salmon offers great taste and texture. Next, grab pure maple syrup. This adds sweetness and depth to the dish. Dijon mustard gives a nice tang. It balances the sweetness of the syrup. Soy sauce or tamari adds umami. It brings a savory note to your glaze. Olive oil keeps the salmon moist while cooking. Minced garlic and grated ginger add warm flavors. They enhance the overall taste. Don't forget salt and pepper to season the salmon. Finally, fresh chives or parsley make a lovely garnish. They add a pop of color and fresh flavor. With these ingredients, you set the stage for a delicious meal. Each item plays a key role. Their harmony creates a tasty experience. {{ingredient_image_1}} To make the glaze, you start by whisking together these key ingredients: - 1/4 cup pure maple syrup - 2 tablespoons Dijon mustard - 1 tablespoon soy sauce (or tamari) - 1 tablespoon olive oil - 2 cloves garlic, minced - 1 teaspoon fresh ginger, grated Whisk these in a small bowl until smooth. Combining these flavors is important. The sweet maple syrup pairs well with the tangy mustard. The garlic and ginger add depth and warmth to the glaze. This blend creates a rich and tasty topping for the salmon. Now, let’s prep the salmon. First, preheat your oven to 400°F (200°C). This step ensures even cooking. Next, grab a baking sheet and line it with parchment paper. This makes cleanup easy and helps prevent sticking. Place your salmon fillets, skin-side down, on the prepared baking sheet. Season each fillet with salt and pepper. This simple step enhances the salmon’s flavor and complements the glaze. Now it's time to bake! Use a brush to apply a generous amount of the maple glaze on top of each fillet. Save some glaze for later. Bake the salmon for about 12-15 minutes. Check for doneness by using a fork. If it flakes easily, it’s done! Halfway through, brush the fillets again with the reserved glaze. This adds more flavor and keeps the salmon moist. For a caramelized finish, you can broil the salmon for 1-2 minutes at the end. Watch it closely to avoid burning. After baking, let the salmon rest for a few minutes. Garnish with chopped chives or parsley before serving. Enjoy the burst of flavors! To check if your salmon is perfectly cooked, look for flakiness. When you gently press a fork into the salmon, it should flake apart easily. If it does not, it needs more time in the oven. To avoid overcooking, keep an eye on the time. Bake for 12-15 minutes. If your fillets are thicker, check them closer to the 15-minute mark. Remember, you can always put it back in the oven. You can add more flavor to your salmon with extra seasonings. Try adding herbs like dill or thyme for a fresh kick. A sprinkle of lemon juice can also brighten the dish. Let your salmon rest for a few minutes after baking. This resting time helps the flavors settle and makes each bite more delicious. For garnishing, sprinkle fresh chives or parsley on top. This adds a pop of color and freshness. Serve your maple glazed salmon with sides like steamed broccoli or fluffy rice. These sides complement the sweet glaze well and make your plate look beautiful. Pro Tips Use Fresh Ingredients: Always opt for fresh salmon and high-quality maple syrup for the best flavor and texture. Check for Doneness: Salmon is perfectly cooked when it flakes easily with a fork, but for a more precise measurement, aim for an internal temperature of 145°F (63°C). Experiment with Flavors: Feel free to add other herbs or spices to the glaze, like thyme or red pepper flakes, for a unique twist. Let it Rest: Allow the salmon to rest for a few minutes after baking. This helps the juices redistribute, making for a more flavorful bite. {{image_2}} You can mix things up with different glazes for your salmon. One great option is a honey mustard glaze. Just swap the maple syrup for honey. Mix it with Dijon mustard and a touch of soy sauce. This adds a sweet and tangy flavor to your fish. Another fun twist is to add some heat. You can make a spicy maple glaze by mixing in chili flakes or sriracha. This adds a nice kick to the meal. Just remember to adjust the amount based on your heat preference. Now, let's talk about how to cook your salmon. You can grill or bake it. Grilling gives a nice smoky flavor. Preheat your grill to medium-high. Cook the salmon for about 6-8 minutes on each side. Brush it with your glaze for extra flavor. If you prefer baking, preheat your oven to 400°F. Place your salmon on a lined baking sheet and bake for 12-15 minutes. It should flake easily when done. For extra caramelization, broil it for 1-2 minutes at the end. Pair your maple glazed salmon with great side dishes. Roasted vegetables like asparagus or Brussels sprouts work well. A fresh salad with lemon vinaigrette can also brighten the meal. When it comes to drinks, a nice white wine pairs perfectly. Try a Sauvignon Blanc or a Chardonnay. The crispness of the wine goes well with the sweetness of the glaze. Enjoy your meal! To keep your maple glazed salmon fresh, store it in an airtight container. Place it in the fridge as soon as it cools. This helps preserve its flavor and texture. The salmon stays fresh for about 3 to 4 days. If you want to enjoy it longer, consider freezing it. When reheating salmon, I recommend using the oven or a skillet. Both methods keep the flavor and texture intact. To reheat in the oven, preheat it to 350°F (175°C). Place the salmon in a baking dish and cover it with foil. Heat for about 10 minutes or until warmed through. If using a skillet, heat on low. Add a splash of water or broth to keep it moist. Cover with a lid until warm. To freeze maple glazed salmon, wrap each fillet tightly in plastic wrap, then place them in a freezer bag. Be sure to remove as much air as possible. This helps prevent freezer burn. The salmon can be frozen for up to 3 months. To thaw, place it in the fridge overnight. For a quicker method, submerge the sealed bag in cold water for about an hour. Avoid using hot water, as this can cook the fish. I recommend baking salmon at 400°F (200°C). This temperature cooks the fish evenly and keeps it moist. It gives you a nice, flaky texture. Make sure your oven is preheated before placing the salmon inside. Yes, you can use frozen salmon. Just make sure to thaw it first. You can thaw it overnight in the fridge or place it in cold water for about an hour. Pat it dry before cooking. This helps the glaze stick better. You can check if salmon is done by looking for flakiness. Use a fork to gently poke the fish. If it flakes easily, it’s ready. The internal temperature should also reach 145°F (63°C). This ensures it is safe to eat. You can make the glaze ahead of time. Store it in the fridge in an airtight container. It will stay fresh for about a week. Just give it a good stir before using it again. This helps mix the flavors back together. We covered how to make a delicious maple glaze for salmon. You learned about essential ingredients and the step-by-step process for prepping and cooking. I shared tips for getting the perfect cook and ideas for garnishing. You also explored variations, storage, and reheating instructions. Keep these points in mind for a tasty meal. Enjoy trying new flavors and cooking methods! Happy cooking!

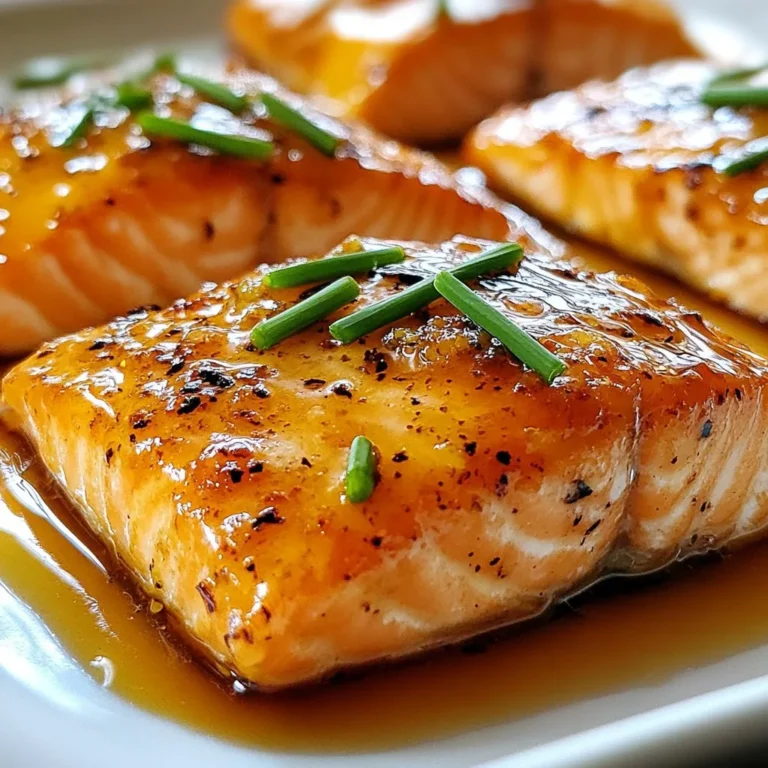
Maple Glazed Salmon Flavorful and Easy Recipe Guide

To make your cinnamon roll mug cake, you need these simple ingredients: - 4 tablespoons all-purpose flour - 2 tablespoons granulated sugar - 1/4 teaspoon baking powder - 1/4 teaspoon ground cinnamon - Pinch of salt - 3 tablespoons milk - 1 tablespoon vegetable oil - 1/4 teaspoon vanilla extract - 1 tablespoon brown sugar - 1/2 teaspoon ground cinnamon (for swirl) To make your mug cake even better, you can add: - Cream cheese frosting This topping adds a sweet and creamy touch. You can also use whipped cream or a drizzle of caramel if you want to mix things up! If you need to convert measurements, here are some quick tips: - 1 tablespoon equals 3 teaspoons. - 1/4 teaspoon is about 1.25 milliliters. - 4 tablespoons equal 1/4 cup. These conversions help if you use different measuring tools. Always measure carefully for the best results! {{ingredient_image_1}} Start by grabbing a microwave-safe mug. In the mug, add 4 tablespoons of all-purpose flour. Next, put in 2 tablespoons of granulated sugar. Then, add 1/4 teaspoon of baking powder. This is key for helping your cake rise. Now, sprinkle in 1/4 teaspoon of ground cinnamon and a pinch of salt. Use a fork or spoon to mix everything well. Make sure the dry ingredients blend evenly. This step sets a great base for your mug cake. Now it’s time for the wet ingredients! Pour in 3 tablespoons of milk. Add 1 tablespoon of vegetable oil for moisture. Finally, include 1/4 teaspoon of vanilla extract for flavor. Stir the mixture until you see a smooth batter. You want to ensure there are no lumps. A smooth batter helps the cake cook evenly. For a sweet swirl, mix 1 tablespoon of brown sugar with 1/2 teaspoon of ground cinnamon in a small bowl. Take half of your batter and spoon it into the mug. Then, sprinkle half of the cinnamon-sugar mix on top. Next, add the rest of the batter. Do not worry if it looks uneven. Use a toothpick or a knife to gently swirl the cinnamon-sugar mix into the batter. This will create a lovely swirl pattern. Now, microwave the mug cake for about 1 minute and 30 seconds. Keep an eye on it. Cooking times can change based on your microwave. Once it rises and looks fully cooked, let it cool for a minute. If you like, add a dollop of cream cheese frosting on top. Now you're ready to enjoy your quick, warm treat! To get that lovely swirl, mix the brown sugar and cinnamon well. After you layer the batter, sprinkle half of this mix on the first layer. Then, add the rest of the batter and top it again with the cinnamon sugar. Use a toothpick or knife to create a gentle swirl. Don't overdo it; you want to see the pretty pattern. This adds a beautiful touch and boosts the flavor too. Microwaves can be different. Some cook faster than others. Start with 1 minute and 30 seconds. Check the mug cake after this time. It should rise and look firm. If it’s not done, add 10-second bursts until it’s cooked. Be careful not to overcook it. This can make the cake dry. Each microwave is unique, so keep an eye on it. Choose a microwave-safe mug for best results. A mug that holds 12 ounces is ideal. This size gives enough space for the cake to rise. Look for a mug that has straight sides. These help the cake cook evenly. Avoid using small or narrow mugs, as they may overflow. Choose a fun design to make your treat even more special! Pro Tips Use Fresh Ingredients: Ensure your baking powder and spices are fresh for the best flavor and texture. Microwave Power Variation: Cooking times may vary based on microwave wattage, so start with less time and add more as needed. Swirl Technique: When swirling the cinnamon mixture, be gentle to avoid overmixing, which can affect the cake's texture. Customize Your Topping: Experiment with different toppings like whipped cream, chocolate sauce, or nuts for a unique twist. {{image_2}} You can mix up your cinnamon roll mug cake by adding flavors. Try almond extract for a nutty twist. A dash of maple syrup gives it a sweet touch. You can even add a bit of cocoa powder for a chocolatey flavor. Just remember, keep the total flour the same. Nuts and chocolate chips can make your mug cake even better. Chopped walnuts or pecans add crunch. They pair well with cinnamon. You can also toss in some chocolate chips for a sweet surprise. Just fold them into the batter before you swirl in the cinnamon sugar. If you need a gluten-free mug cake, swap the all-purpose flour for gluten-free flour. Many brands work great in this recipe. Make sure your baking powder is gluten-free too. This way, you can enjoy a tasty treat without any worries. You might not finish the whole mug cake in one sitting. That’s okay! To keep leftovers fresh, cover the mug with plastic wrap or a small plate. Store it in the fridge for up to two days. This helps keep it moist and tasty. When you want to enjoy your leftover mug cake, reheating is easy. Simply place the mug in the microwave. Heat it for about 15 to 20 seconds. Check if it's warm enough; if not, add a few more seconds. This way, you keep the soft texture and the delicious smell. Yes, you can prepare the batter ahead of time. Mix the dry ingredients and store them in a sealed bag. When you are ready to bake, just add the wet ingredients and microwave. This makes it quick and easy for busy days or when you crave something sweet! Yes, you can! Use an oven instead. Preheat your oven to 350°F (175°C). Pour the batter into a small oven-safe dish. Bake for about 12-15 minutes, or until it rises and is cooked through. Keep an eye on it, as baking times may vary. To make this cake vegan, swap out the milk with almond milk or soy milk. Use a plant-based oil instead of vegetable oil. For the egg, you can use 1 tablespoon of applesauce. This keeps the cake moist and tasty. If you want to skip cream cheese frosting, try using a simple glaze. Mix powdered sugar with a little milk or water. You can also use coconut whipped cream for a light topping. Nut butter or chocolate spread works well too! This blog post covered everything you need to make a tasty mug cake. We discussed the key ingredients, step-by-step instructions, and helpful tips. You learned about fun variations and how to store leftovers. In conclusion, making a mug cake is easy and fun. You can try different flavors and toppings to suit your taste. With a few simple steps, you’ll enjoy a delicious treat anytime. Enjoy your baking adventure!

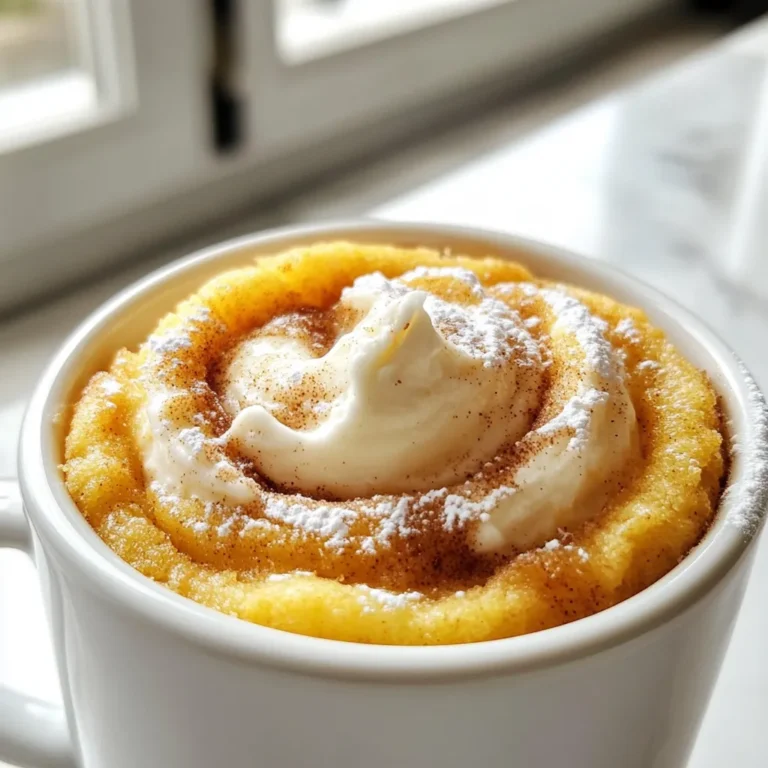
Cinnamon Roll Mug Cake Simple and Tasty Delight

To make a tasty creamy mushroom stroganoff, you need a few simple ingredients. Here’s the list: - 12 oz wide egg noodles - 2 tablespoons olive oil - 1 medium onion - 4 garlic cloves - 16 oz mixed mushrooms (cremini, shiitake, button) - 1 tablespoon soy sauce - 1 teaspoon dried thyme - 1 cup vegetable broth - 1 cup sour cream (or non-dairy alternative) - 2 tablespoons all-purpose flour - Salt and pepper - Fresh parsley for garnish These ingredients create a rich and cozy dish. The wide egg noodles provide a perfect base. The mix of mushrooms adds great flavor and texture. Use fresh ingredients for the best taste. Make sure to have everything before you start cooking. This will help things move smoothly in the kitchen. {{ingredient_image_1}} To cook the egg noodles, fill a large pot with salted water. Bring it to a rolling boil. Add the noodles and cook according to the package instructions. Stir them often. This helps prevent sticking. You want the noodles to be al dente, firm but not hard. They should have a slight bite when you taste them. Once they are done, drain the noodles and set them aside. In a large skillet, heat two tablespoons of olive oil over medium heat. Add the finely chopped onion. Sauté for about three to four minutes until it turns soft and translucent. This step brings out the sweet flavors of the onion. Next, add the minced garlic and cook for one minute. You want the garlic to become fragrant but not brown. Now, add the sliced mushrooms to the skillet. Use a mix of cremini, shiitake, and button mushrooms for great flavor. Cook the mushrooms for five to seven minutes. They should release their moisture and turn a lovely golden brown. This caramelization adds depth to the dish. To check if they are done, look for a soft texture and a rich color. In a separate bowl, mix one cup of vegetable broth with two tablespoons of flour. Whisk until smooth. Slowly pour this mixture into the skillet, stirring constantly. This helps prevent lumps in your sauce. Bring the sauce to a simmer and let it cook for four to five minutes. It should thicken nicely. Once thickened, reduce the heat to low and stir in one cup of sour cream. This adds creaminess and richness to the sauce. Taste and adjust the seasoning with salt and pepper as needed. This step is key for enhancing the flavors of your stroganoff. Add the cooked egg noodles to the skillet, gently tossing them in the creamy mushroom sauce. Make sure all the noodles are well-coated. For a beautiful presentation, serve the stroganoff in shallow bowls. Top each dish with fresh parsley and a sprinkle of cracked black pepper for color and flavor. Enjoy this warm, cozy meal! - To avoid sticky noodles, cook them al dente. Drain them right away. - For sautéing mushrooms, use medium heat. This helps them brown nicely. Stir often to cook them evenly. - Add spices like paprika or cayenne for extra warmth. A dash of nutmeg can deepen the flavor too. - Fresh herbs, like parsley or thyme, provide bright flavor. Dried herbs work but may lack some freshness. - To streamline the cooking process, prep all ingredients first. Chop and measure them before starting. - You can prepare the onion, garlic, and mushrooms ahead of time. This saves you time when cooking. Pro Tips Use Fresh Mushrooms: Opt for a mix of fresh mushrooms for a deeper flavor profile and a variety of textures in your stroganoff. Thickening the Sauce: For a creamier sauce, allow the mixture to simmer longer after adding the flour and vegetable broth, stirring often to prevent sticking. Non-Dairy Alternatives: If using a non-dairy sour cream, make sure it's unsweetened to maintain the savory essence of the dish. Herb Variations: Experiment with fresh herbs like dill or chives for a burst of freshness and added complexity to the flavors. {{image_2}} You can easily add meat to your stroganoff. Chicken or beef works great. To add chicken, use diced pieces. Cook them in the skillet before adding the onions. If you choose beef, slice it thinly and cook until browned. This helps keep the meat tender. Adjust the cooking time based on the meat you use. Chicken will take about 10 minutes, while beef may need 5-7 minutes. Ensure it reaches a safe temperature before serving. Want a vegan twist? Swap the sour cream for a non-dairy version. Coconut cream or cashew cream makes a great substitute. You can also use vegan noodles. For gluten-free options, choose rice noodles or gluten-free pasta. Look for brands that offer a similar texture. This way, everyone can enjoy a tasty bowl of stroganoff. Using seasonal veggies can enhance your dish. Try adding spinach or kale for added color and nutrients. Chopped bell peppers can also bring a fresh crunch. When it comes to mushrooms, mix it up! Use seasonal types like oyster or portobello. These can add unique flavors. Experimenting with different ingredients keeps your stroganoff exciting and fresh. To keep your creamy mushroom stroganoff fresh, store it in an airtight container. This helps to lock in the flavors. Let it cool down first to avoid steam buildup. The stroganoff stays good for about three to four days in the fridge. Be careful not to let it sit out too long. Use glass or BPA-free plastic containers. These are safe and easy to clean. They also help you see the food inside. If you have smaller portions, use smaller containers to save space. To reheat your stroganoff, the stove is best. Use a pan on low heat. Stir often, so it heats evenly. This method keeps the texture creamy. If it looks dry, add a splash of vegetable broth or water. This will help bring back the creaminess. Avoid the microwave if you can, as it may change the texture. Yes, you can freeze creamy mushroom stroganoff! It holds up well in the freezer. Use a freezer-safe container, leaving some space at the top. The sauce can expand when it freezes. Label the container with the date, so you know when to use it. It stays good for up to two months. To thicken your stroganoff, use a few simple methods. First, add all-purpose flour to the vegetable broth before mixing it in. This will help create a thicker sauce. You can also let the sauce simmer longer. This will allow some liquid to cook off, making it thicker. If you want a creamier texture, add more sour cream at the end. Always remember to stir well to combine. For creamy mushroom stroganoff, I love using a mix of mushrooms. Cremini mushrooms add a rich flavor. Shiitake mushrooms bring a nice depth, while button mushrooms offer a classic taste. Mixing these types gives the dish a great texture and taste. You can try other mushrooms too, like portobello for a meatier feel. Yes, you can! While this recipe uses wide egg noodles, feel free to switch it up. You can use pasta like fettuccine, penne, or even gluten-free options. Just remember to adjust the cooking time based on the type of noodles you choose. Cook them until they are al dente for the best results. Creamy mushroom stroganoff can be made healthier with some easy swaps. Use whole wheat noodles for added fiber. You can also replace sour cream with a non-dairy yogurt for fewer calories. Adding more vegetables, like spinach or bell peppers, boosts nutrition. Always check portion sizes to keep it balanced. This creamy mushroom stroganoff recipe stands out with its rich flavors and simple steps. We covered each ingredient and provided easy-to-follow instructions. You can make it your own by adding meats or choosing vegan options. Don’t forget about the storage tips to enjoy leftovers later. This dish is versatile and satisfying, perfect for any meal. Dive in and start cooking, and enjoy every bite of your delicious creation!

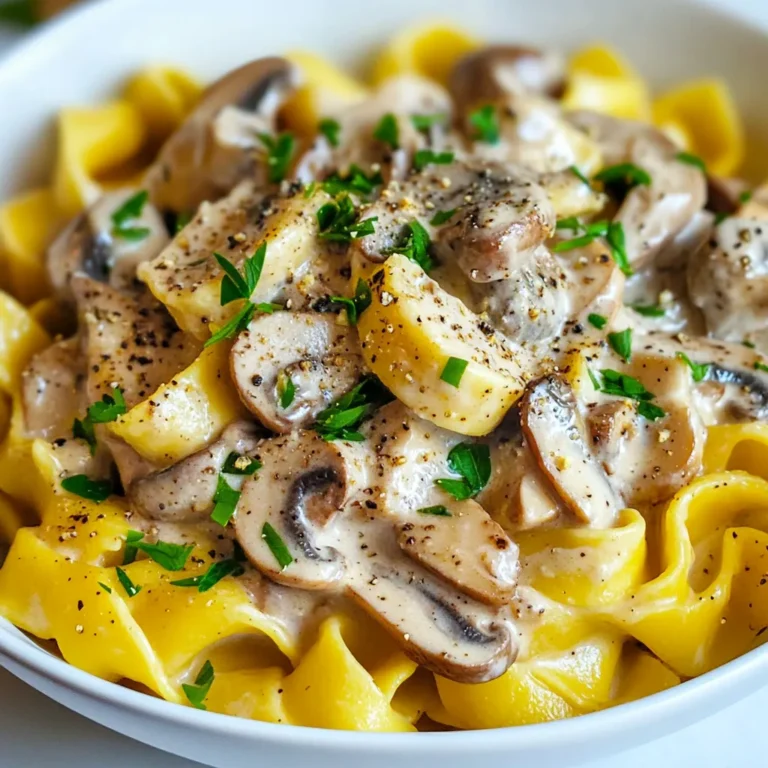
Creamy Mushroom Stroganoff Tasty and Cozy Dish

- 1 lb ground chicken - 1 head of butter or iceberg lettuce - Fresh vegetables (3 cloves garlic, 1 tablespoon ginger, 1 red bell pepper, 2 carrots) Ground chicken is the star of this dish. It cooks quickly and absorbs flavors well. For the vegetables, I use garlic and ginger for a fragrant base. The red bell pepper adds crunch, while the grated carrots bring sweetness. Lettuce leaves serve as a perfect wrap, providing a fresh bite. - 1 tablespoon soy sauce - 2 tablespoons peanut butter - 1 tablespoon lime juice - 1 teaspoon brown sugar The sauce is key to the flavor. Soy sauce gives umami, while peanut butter adds richness. Lime juice brightens the dish, balancing the flavors. Brown sugar rounds it out with a hint of sweetness. - 1/4 cup crushed peanuts - 1/4 cup fresh herbs (cilantro, green onions) Garnishes add texture and color. Crushed peanuts provide a satisfying crunch. Fresh herbs like cilantro and green onions enhance the dish with freshness. They also make the wraps look beautiful when served. {{ingredient_image_1}} 1. Cooking garlic and ginger: First, heat one tablespoon of vegetable oil in a large skillet over medium heat. Add three minced garlic cloves and one tablespoon of minced ginger. Sauté them for about 30 seconds until they smell great. You want the garlic golden, not brown. 2. Browning the chicken: Next, add one pound of ground chicken to the skillet. Use a spatula to break it apart. Cook it for about 5 to 7 minutes. The chicken should be browned and no longer pink. This step gives your filling its base flavor. 1. Incorporating bell pepper and carrots: Once the chicken is cooked, it’s time to add color and crunch. Add one finely diced red bell pepper and two grated carrots to the chicken. This mix will brighten the dish and add nutrients. 2. Timing for best texture: Cook the vegetables for an additional 2 to 3 minutes. You want them to soften just a bit, but still have some crunch. This ensures your wraps have the right texture. 1. Combining sauce ingredients: In a small bowl, whisk together 1 tablespoon of soy sauce, 2 tablespoons of peanut butter, 1 tablespoon of lime juice, and 1 teaspoon of brown sugar. Mix until it’s smooth and creamy. This sauce will bring all the flavors together. 2. Mixing with the chicken: Pour this tasty sauce over the chicken and veggies. Stir well to combine all the flavors. Add salt and pepper to taste. Then, remove the skillet from heat. Fold in 1/4 cup of chopped cilantro and 1/4 cup of chopped green onions for freshness. To make the best Thai peanut chicken lettuce wraps, choose the right lettuce. I recommend butter or iceberg lettuce. These types add crispness and a nice crunch. They hold your filling well without tearing. Next, consider how you fold the wraps. Use a simple method for stability. Lay the filling in the center of the leaf. Fold the sides over the filling, then roll from the bottom up. This method keeps everything secure and makes for easy eating. If you want to switch up the protein, try ground turkey or tofu. Both options work well with the same spices and sauce. For a vegetarian twist, use tempeh. It absorbs flavors nicely and adds protein. Adjust the heat to your liking. If you prefer mild flavors, reduce the soy sauce. You can add a bit of honey or sugar to balance the taste. For extra spice, toss in some chili flakes or sriracha. Just a little goes a long way! Pair your wraps with side dishes for a complete meal. Rice or quinoa complements the wraps nicely. You can also serve them with a fresh salad for a lighter option. For presentation, arrange the wraps on a platter. Garnish with extra herbs and crushed peanuts. This adds color and texture. Serve with lime wedges on the side for a zesty touch. The bright flavor of lime enhances the dish. Pro Tips Use Fresh Ingredients: Fresh garlic and ginger will enhance the flavor of your dish significantly. Always opt for fresh over pre-minced or powdered versions. Customize Your Veggies: Feel free to add other vegetables like zucchini or mushrooms based on your preference. This adds more color and nutrition to your wraps. Adjust the Spice Level: If you like it spicy, consider adding some red pepper flakes or a dash of sriracha to the sauce for an extra kick. Chill the Lettuce: For a crispier texture, refrigerate the lettuce leaves for about 30 minutes before serving. This adds a refreshing crunch to your wraps. {{image_2}} You can easily make this dish vegetarian. Try using tofu or tempeh instead of chicken. Tofu is soft and absorbs flavors well. Tempeh has a firmer texture and a nutty taste. Both options work great. When making the sauce, adjust the flavors. Add a bit more soy sauce for salt. You might want to double the lime juice for a zesty kick. This way, you keep the bold taste in every bite. You can switch up the sauce to change the flavor. Try a sesame dressing for a nutty twist. A sweet chili sauce adds heat and sweetness. Don’t forget about hoisin sauce; it brings depth and richness. For spice lovers, add chili paste or sriracha to your sauce. These will give your wraps a nice kick. Experiment with different spices too. A sprinkle of cumin or coriander can add warmth and earthiness. Using seasonal veggies can enhance your wraps. In summer, add fresh cucumbers or bell peppers. In fall, try shredded squash or carrots for sweetness. Seasonal produce can change the taste and feel of your meal. Adjust your recipe with what’s fresh at the market. It keeps your wraps exciting all year. Fresh ingredients not only taste better but also support local farmers. Enjoy the variety that nature offers! To keep your Thai peanut chicken lettuce wraps fresh, store them in an airtight container. Place the filling in one container and the lettuce in another. This way, the lettuce stays crisp. You can refrigerate them for about 3 days. After that, the flavors may fade, and the lettuce will wilt. If you want to make these wraps ahead of time, freezing is a great option. Freeze the chicken filling in a freezer-safe bag or container. It stays good for about 3 months. When you are ready to eat, thaw it in the fridge overnight. Reheat it in a skillet over medium heat until hot. Serve with fresh lettuce for the best taste. To save time, prepare the filling in advance. Cook it on the weekend and store it in the fridge. Portion the filling into small containers. This makes it easy to grab and assemble a wrap quickly. You can also chop the lettuce ahead and keep it in a separate container. This way, you always have a quick meal ready to go. Yes, you can swap ground chicken for several other proteins. Ground turkey works well if you want a lean option. You could also use ground beef for a richer flavor. If you prefer seafood, shrimp is a tasty choice. For a plant-based option, try crumbled tofu or tempeh. Just remember to adjust the cooking time based on the protein you choose. Each option will still taste great with the peanut sauce. To make your wraps gluten-free, choose gluten-free soy sauce or tamari. These options taste similar to regular soy sauce. Also, check the peanut butter label to ensure it doesn't contain gluten. Fresh vegetables and lettuce are naturally gluten-free, so you’re already off to a great start. You can also serve these wraps with gluten-free dipping sauces to keep everything safe for gluten-sensitive friends. These wraps pair nicely with many side dishes. Here are some great options: - Jasmine rice: Fluffy and fragrant, it complements the flavors. - Cucumber salad: A refreshing crunch balances the meal. - Spring rolls: Light and filled with veggies for added texture. - Thai mango salad: Sweet and tangy, it adds depth to your meal. Serve any of these sides for a complete and delightful dining experience. This recipe for Thai Peanut Chicken Lettuce Wraps covers everything you need for a great meal. You learned the main ingredients, sauce, and optional garnishes that make these wraps delicious. I shared easy steps for cooking and serving. Remember to try variations, like going vegetarian or changing the sauce. With tips on storing and meal prep, you can enjoy this dish anytime. Get creative, and make it your own!

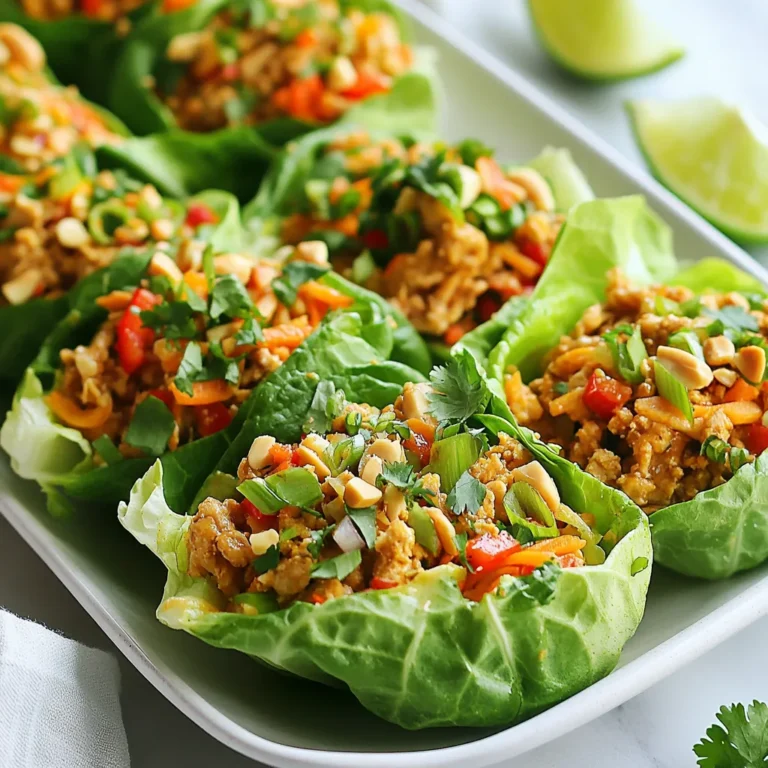
Thai Peanut Chicken Lettuce Wraps Flavorful Delight

- 1 large head of cauliflower, cut into bite-sized florets - 1/2 cup all-purpose flour (or gluten-free flour) - 1/2 cup water - 1 teaspoon garlic powder - 1/2 teaspoon salt - 1/4 teaspoon black pepper - 1/4 cup sweet chili sauce - 2 tablespoons soy sauce - 2 cloves of garlic, minced - 1 tablespoon sesame oil - 1 tablespoon chopped green onions (for garnish) - Sesame seeds (for garnish) You can easily swap ingredients to fit your needs. Use gluten-free flour in place of regular flour. For a nut-free option, make sure your soy sauce is free from allergens. If you're vegan, swap out the honey in sweet chili sauce with maple syrup. This keeps the bites tasty without meat or dairy. When picking cauliflower, look for firm heads. The florets should be tightly packed and bright white. Avoid any with brown spots or soft spots. Fresh leaves should still be green and crisp. This ensures your bites will have a great texture and taste. {{ingredient_image_1}} Start by preheating your oven to 425°F (220°C). This high heat helps make the bites crispy. Next, line a baking sheet with parchment paper. This keeps the bites from sticking. It also makes clean-up easy. In a mixing bowl, add 1/2 cup of all-purpose flour. You can use gluten-free flour if needed. Next, mix in 1 teaspoon of garlic powder, 1/2 teaspoon of salt, and 1/4 teaspoon of black pepper. These add flavor to your batter. Gradually add 1/2 cup of water. Whisk until the batter is smooth and thick. It should coat the cauliflower well. Take your large head of cauliflower and cut it into bite-sized florets. Dip each floret into the batter. Make sure each piece is fully coated. Place them in a single layer on your baking sheet. Bake the cauliflower bites for 20-25 minutes. Flip them halfway through for even cooking. When golden brown and crispy, they are ready. While they bake, make the sauce. In a small saucepan, mix 1/4 cup of sweet chili sauce, 2 tablespoons of soy sauce, 2 minced garlic cloves, and 1 tablespoon of sesame oil. Heat this over medium heat until warm. Once the cauliflower bites are done, toss them in the sauce. Coat them well. Return the bites to the oven for another 5-7 minutes. This allows the sauce to caramelize slightly. Once finished, let them cool for a few minutes before serving. To make your cauliflower bites crispy, follow these tips: - Use a large head of cauliflower. This gives plenty of florets. - Make a thick batter. Combine flour, garlic powder, salt, and pepper with water. - Coat each floret well. This helps create a crunchy texture. - Bake at 425°F (220°C). This high heat cooks them well. - Flip halfway through. This ensures even cooking and crispiness. Adding flavor boosts your bites. Here are some ideas: - Mix in spices. Try paprika or cayenne for heat. - Use fresh herbs. Chopped cilantro or parsley add freshness. - Drizzle extra sauce. A bit more sweet chili sauce gives a punch. - Toss with lime juice. This adds a nice tangy taste. - Sprinkle with sesame seeds. They add crunch and nutty flavor. Avoid these errors for great cauliflower bites: - Skipping the batter. It helps hold flavors and gives texture. - Overcrowding the baking sheet. This can cause steaming instead of crisping. - Not flipping the bites. This leads to uneven browning. - Baking without sauce. Tossing in sauce before the final bake is key. - Forgetting to garnish. Green onions and sesame seeds make them look great. Pro Tips Choose the Right Cauliflower: Select a fresh head of cauliflower with tightly packed florets and vibrant green leaves for the best flavor and texture. Make it Gluten-Free: Substitute all-purpose flour with almond flour or a gluten-free flour blend to accommodate dietary preferences without sacrificing taste. Add Spice: For an extra kick, mix in some cayenne pepper or red pepper flakes to the batter before coating the cauliflower. Store Leftovers Properly: Keep any leftover cauliflower bites in an airtight container in the fridge, and reheat in the oven to maintain crispiness. {{image_2}} To spice things up, you can add a few ingredients. Try mixing in some red pepper flakes. You can also use a hot chili sauce instead of sweet chili sauce. If you like extra heat, add jalapeños or sriracha to your sauce mix. Just a little can give your bites a kick. Adjust the amount to fit your taste. You can switch up the sauce for different flavors. A teriyaki sauce adds a sweet and savory twist. For a tangy taste, use barbecue sauce. If you want a creamy option, try ranch dressing after baking. Each sauce gives the bites a new vibe. Don’t be afraid to mix and match until you find your favorite. Cauliflower is great, but you can use other veggies too. Broccoli florets work well and stay crisp. You can try using Brussels sprouts or even zucchini. Just be sure to cut them into bite-sized pieces. Each veggie brings its own flavor and texture. This way, you can keep things fresh and fun in the kitchen. To keep your Sweet Chili Garlic Cauliflower Bites fresh, store them in an airtight container. Let them cool to room temperature before sealing. This helps keep them crispy. Place parchment paper between layers if you stack them. This avoids sogginess. When you’re ready to enjoy leftovers, preheat your oven to 350°F (175°C). Spread the cauliflower bites on a baking sheet. Heat them for about 10-15 minutes. This restores their crispiness. You can also use an air fryer at 350°F for about 5-7 minutes for a quick reheat. If you want to save some bites for later, freezing is a great option. First, let the cauliflower bites cool completely. Then, place them in a single layer on a baking sheet and freeze for 1-2 hours. Once frozen, transfer them to a freezer-safe bag or container. They will keep for up to three months. To reheat, bake from frozen at 400°F (200°C) for about 20-25 minutes. Yes, you can easily make these bites gluten-free. Just replace all-purpose flour with gluten-free flour. This swap keeps the texture light and crispy. Many gluten-free flours work well, but almond or rice flour are great choices. I often use a gluten-free blend for the best results. These cauliflower bites are perfect as a snack or appetizer. Serve them with a side of sweet chili sauce for dipping. They pair well with fresh veggies or a light salad. You can also enjoy them with rice or noodles for a more filling meal. Try serving them alongside a tangy dipping sauce for extra flavor! Leftovers will stay fresh for 3 to 4 days when stored properly. Keep them in an airtight container in the fridge. For the best taste, reheat in the oven to regain that crispy texture. Avoid using the microwave, as it can make them soggy. Enjoy your flavorful bites again! In this blog post, we covered how to make Sweet Chili Garlic Cauliflower Bites. We explored the key ingredients, including substitutions for different diets. I provided tips on selecting fresh cauliflower and detailed the step-by-step instructions for preparation, baking, and achieving the perfect crispiness. Remember, enhancing flavors and avoiding common mistakes will improve your dish. Don’t hesitate to try variations and proper storage techniques for leftovers. Enjoy your cooking journey!

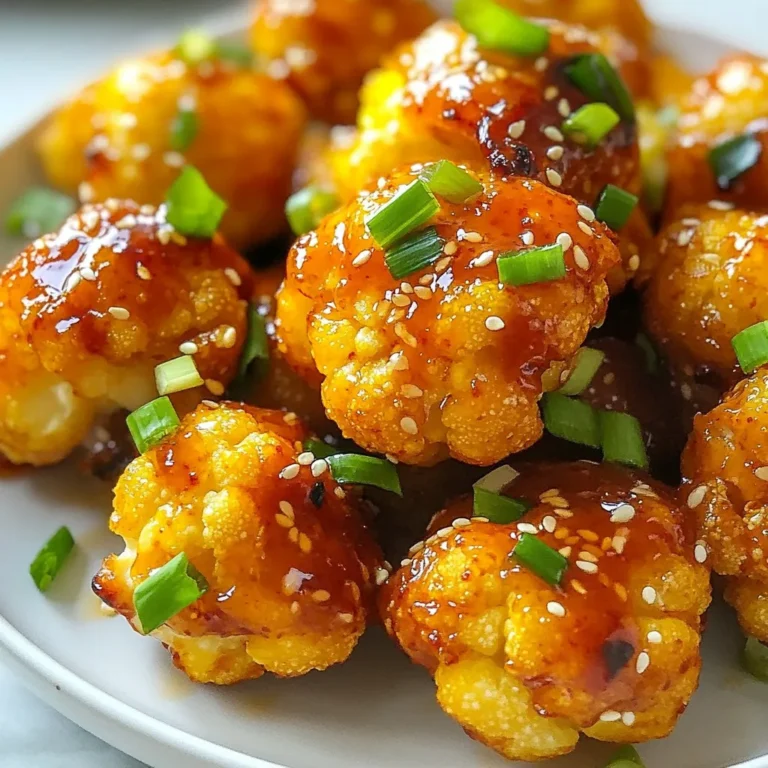
Sweet Chili Garlic Cauliflower Bites Flavor Boost

To make creamy jalapeño chicken flautas, you will need these ingredients: - 2 cups cooked shredded chicken - 1 cup cream cheese, softened - 1/2 cup jalapeños, diced (fresh or pickled) - 1/2 cup cheddar cheese, shredded - 1 teaspoon garlic powder - 1 teaspoon onion powder - 1 teaspoon cumin - Salt and pepper to taste - 8-10 corn tortillas - 1 cup vegetable oil (for frying) - Fresh cilantro, chopped (for garnish) - Sour cream and salsa (for serving) If you need to swap some items, here are a few ideas: - Use rotisserie chicken for quick prep. - Swap cream cheese with Greek yogurt for a lighter option. - Try pepper jack cheese instead of cheddar for extra spice. - You can replace corn tortillas with flour tortillas if you prefer. Gather these tools to make cooking easier: - Mixing bowl for combining ingredients - Skillet for heating tortillas - Deep skillet or frying pan for frying - Tongs to turn flautas while frying - Paper towels for draining excess oil - Toothpicks to secure flautas, if needed {{ingredient_image_1}} Start by gathering your ingredients. In a big bowl, mix the cooked shredded chicken, softened cream cheese, diced jalapeños, and shredded cheddar cheese. Add the garlic powder, onion powder, cumin, salt, and pepper. Use a fork or spatula to mix well. Make sure each ingredient blends nicely. The mix should be creamy and full of flavor. Next, take your corn tortillas. Heat them in a dry skillet over medium heat for about 30 seconds. Flip them over and heat the other side for another 30 seconds. This step makes the tortillas soft and easy to roll. Don’t skip this part; it helps keep your flautas from cracking. Now it’s time to roll! Take one heated tortilla and spoon about 2-3 tablespoons of the chicken mixture on one side. Roll it tightly from that side. If the flautas feel loose, use a toothpick to hold them together. Repeat this with the rest of the tortillas and filling. You should end up with about 8-10 neat flautas, ready for frying. In a deep skillet or frying pan, heat the vegetable oil over medium-high heat. You want the oil hot, around 350°F. Carefully place the flautas seam-side down in the skillet. Fry them for about 3-4 minutes on each side, until they turn golden brown and crispy. Use tongs to flip them gently. Once done, take them out and let them drain on paper towels. This step keeps them crispy and less greasy. To achieve that perfect crunch, follow these steps. First, make sure your oil is hot enough, about 350°F. If it's not hot, the flautas will soak up too much oil and become soggy. Fry them in small batches. This keeps the oil temperature steady. Also, use fresh corn tortillas. They roll better and fry crispier than older ones. Lastly, let the cooked flautas drain on paper towels. This helps remove excess oil, keeping them crispy for longer. You can easily change the flavor of your flautas. Try adding black beans for a hearty touch. If you love heat, add more jalapeños or switch to a spicier cheese. You can also use different cheeses, like pepper jack or queso fresco. For a twist, mix in some corn or diced bell peppers. These small changes can make your flautas unique and exciting. Flautas pair well with many sides. Serve them with fresh guacamole or pico de gallo for extra zest. A side of refried beans adds protein and makes the meal more filling. Sour cream and salsa are must-haves for dipping. If you want to add greens, a simple salad with lime dressing works great. For drinks, try a cold Mexican beer or a refreshing agua fresca. Enjoy your meal with friends or family for the best experience! Pro Tips Use Fresh Ingredients: Always use fresh jalapeños and high-quality chicken for the best flavor and texture in your flautas. Don’t Overfill: Be careful not to overfill the tortillas, as this can make them difficult to roll and fry without spilling. Maintain Oil Temperature: Keep the oil at the right temperature (around 350°F or 175°C) to ensure that the flautas fry evenly and become crispy. Experiment with Cheeses: Try using different types of cheese, like pepper jack or mozzarella, for a unique twist on the classic flavor. {{image_2}} You can enjoy flautas without meat. Replace the chicken with cooked black beans or refried beans. Add in some sautéed mushrooms or zucchini for extra flavor. Cream cheese still works well as the base. It gives a rich, creamy texture that you will love. You can also mix in diced bell peppers for more crunch and taste. If you want it hot, add more jalapeños to the filling. You can use fresh jalapeños for more heat. For a milder dish, you can reduce the jalapeños. Try using roasted red peppers or mild green chiles instead. Adjusting the spices like cumin and garlic powder can help too. Just add a pinch or two to find your perfect balance. Frying gives flautas their classic crunchy texture, but baking is a healthier option. To bake, preheat your oven to 425°F. Arrange the flautas on a baking sheet with some oil spray. Bake for about 20 minutes, flipping halfway through. They will turn crispy and golden without the extra oil. This way, you can enjoy a lighter version of this tasty dish! Store leftover flautas in an airtight container. Make sure they cool down first. Place a paper towel in the container to absorb moisture. This keeps them crispier. They can last in the fridge for up to three days. To reheat, preheat your oven to 375°F (190°C). Place the flautas on a baking sheet. Bake them for about 10-12 minutes. This helps regain that crispy texture. You can also use a skillet over medium heat. Cook each side for about 3-4 minutes until hot. If you want to freeze flautas, first let them cool completely. Then, wrap each flauta in plastic wrap. Place them in a freezer bag or a container. They can stay good for up to three months. When ready to eat, thaw them in the fridge overnight. Reheat as mentioned above. The best tortillas for flautas are corn tortillas. They are thin, which helps them crisp up nicely when fried. I prefer using fresh tortillas, as they have a great flavor. If fresh ones are not available, look for high-quality store-bought corn tortillas. Avoid flour tortillas, as they do not hold up well when frying. Yes, you can make flautas ahead of time. Prepare the chicken mixture and fill the tortillas, then store them in the fridge. Just make sure to keep them covered to prevent drying out. When ready to eat, fry them in hot oil for a quick and tasty meal. They taste best fresh, so try to fry them close to serving time. To adjust the spiciness, you can change the amount of jalapeños. If you want it mild, use fewer jalapeños or opt for pickled ones, which tend to be less spicy. For more heat, you can include some of the seeds from the jalapeños. You can also add hot sauce to the chicken mixture for an extra kick. You learned how to make delicious flautas from start to finish. We covered the needed ingredients, variations, and even how to store leftovers. I hope you feel prepared to try this tasty dish. Flautas are fun, easy, and perfect for any meal. With these tips, you can add your own twist. Enjoy making this dish, and share it with friends and family!

Creamy Jalapeño Chicken Flautas Fast and Flavorful Dish

- 2 flatbreads (store-bought or homemade) - 2 cups shredded cooked chicken - 1 cup BBQ sauce (your favorite brand) - 1 cup shredded mozzarella cheese - 1/2 cup red onion, thinly sliced - 1/2 cup corn kernels (fresh, frozen, or canned) - 1/4 cup fresh cilantro, chopped - 1 tablespoon olive oil - Salt and pepper to taste For this BBQ chicken flatbread, I focus on simple yet tasty ingredients. Flatbreads serve as the base. You can grab them from the store or make your own. Using shredded chicken makes this dish quick. I love using leftover chicken or a rotisserie chicken. BBQ sauce is key. Pick a brand you love for the best flavor. I enjoy a sweet and tangy sauce. The shredded mozzarella adds that melty goodness we all crave. For optional toppings, red onion adds a nice crunch. Corn kernels bring a sweet burst. Fresh cilantro gives a pop of color and flavor. Don't forget to season your flatbread. A little olive oil helps the flatbread crisp up. Salt and pepper enhance all the flavors. Keep it simple, and you’ll get a delicious meal ready fast! {{ingredient_image_1}} 1. First, preheat your oven to 400°F (200°C). This step gets your oven ready for baking. 2. In a bowl, combine the shredded chicken with the BBQ sauce. Make sure to mix well. You want every piece of chicken coated in that tasty sauce. 1. Place the flatbreads on a baking sheet. Use parchment paper for easy cleanup. 2. Brush the top of each flatbread with olive oil. This adds flavor and helps the edges crisp. 3. Spread the BBQ chicken mixture evenly over each flatbread. Leave a small edge for the crust. 4. Sprinkle shredded mozzarella cheese generously over the chicken. Cheese makes everything better! 5. Add sliced red onion and corn on top of the cheese. This gives nice flavor and color. 6. Season with a little salt and pepper. Just a pinch is enough to enhance the taste. 1. Bake your flatbreads in the preheated oven for about 12-15 minutes. Look for melted cheese and golden edges. 2. Once done, remove them from the oven. Let them cool for a couple of minutes before slicing. 3. Top with fresh cilantro for a pop of color and flavor. Serve hot and enjoy! To make your BBQ chicken flatbread shine, choose your BBQ sauce wisely. A sweet sauce gives a nice contrast to the savory chicken. If you want heat, go for a spicy BBQ sauce. You can also mix sauces to find your perfect blend. Cheese is another key factor. I love using mozzarella for its meltiness. However, mixing in some sharp cheddar adds a nice zing. Experiment with a blend to find your favorite flavor. Crispy edges make a flatbread more enjoyable. Brush the flatbreads with olive oil before baking. This step helps them crisp up nicely. You can also bake them on a pizza stone for extra crunch. Bake at 400°F (200°C) for 12 to 15 minutes. Keep an eye on the edges. When they turn golden, it’s time to take them out! Presentation matters. Cut the flatbreads into wedges for easy serving. A wooden board looks rustic and inviting. Add a small bowl of extra BBQ sauce for dipping. Pair your flatbread with a fresh salad or some crunchy veggies. A cold drink, like lemonade or iced tea, complements the meal well. Enjoy your BBQ chicken flatbread with friends or family for a fun meal! Pro Tips Use Rotisserie Chicken: For an even quicker preparation, use store-bought rotisserie chicken. It saves time and adds a delicious flavor. Customize Your Toppings: Feel free to add other toppings like jalapeños, bell peppers, or even pineapple for a unique twist on flavor. Keep an Eye on the Oven: Ovens can vary, so keep a close watch on the flatbreads as they bake to ensure they don’t overcook. Serve with Dips: Enhance your flatbreads by offering a variety of dips such as ranch dressing or a spicy aioli alongside the BBQ sauce. {{image_2}} You can change the protein in this dish. Instead of chicken, try tofu or beef. Tofu absorbs flavors well and is a great vegetarian option. For beef, ground meat works nicely. Both substitutes offer tasty results. Want to change the flavor? Use different BBQ sauces for a twist. Try spicy or sweet sauces to suit your taste. You can also add jalapeños or sweet peppers. These give your flatbread a fun kick and extra crunch. If you need gluten-free options, use gluten-free flatbreads. They taste great and hold up well. For lower calories, swap regular cheese for low-fat cheese. You can even use less BBQ sauce for fewer calories. These swaps help you enjoy the dish without worry. To keep your BBQ chicken flatbread fresh, store it in an airtight container. You can also wrap it tightly in plastic wrap. This protects it from drying out. The flatbread should stay good for about 3 days in the fridge. If you plan to eat it later, make sure to let it cool before storing. When it’s time to enjoy leftovers, you have two great options: the oven or the microwave. The oven gives you a crispier flatbread. Preheat it to 350°F (175°C). Place the flatbread on a baking sheet and heat for about 10 minutes. For the microwave, heat it for 30 seconds at a time until warm. This method is quick but may make the flatbread a bit soft. To keep the flavor, add a drizzle of extra BBQ sauce before reheating. You can freeze assembled flatbreads for later. Wrap each one in plastic wrap and then in aluminum foil. This helps prevent freezer burn. They will last for about 2 months in the freezer. To thaw, place the flatbread in the fridge overnight. Once thawed, bake it at 400°F (200°C) for about 12-15 minutes. This will bring back the yummy texture and flavor. BBQ Chicken Flatbread is a tasty meal made with flatbreads and BBQ chicken. The main parts are: - Flatbreads, either store-bought or homemade - Shredded cooked chicken mixed with BBQ sauce - Shredded mozzarella cheese for melting - Fresh veggies like red onion and corn - A sprinkle of cilantro for freshness This dish brings a fun twist to pizza. You can enjoy it as a meal or snack. It’s easy to make and always a crowd-pleaser. Yes, you can prepare BBQ Chicken Flatbread ahead. Here’s how: 1. Mix the shredded chicken with BBQ sauce. Store it in a sealed container in the fridge. 2. Prepare your flatbreads by brushing them with olive oil. You can also add cheese and toppings. 3. Cover the flatbreads and keep them in the fridge until ready to bake. When you’re ready, bake them as directed. This method saves time and makes meal prep easier. If you want some heat, here are a few ideas: - Add jalapeños: Slice fresh jalapeños and add them on top of the cheese. - Use spicy BBQ sauce: Swap your favorite sauce for a spicy version. - Sprinkle red pepper flakes: Add these on top before baking for an extra kick. These simple changes can turn your BBQ Chicken Flatbread into a spicy delight. Enjoy experimenting with flavors! BBQ Chicken Flatbread is a simple, tasty dish with endless options. You can customize it with your favorite toppings and sauces. Remember to choose good ingredients for the best taste. Whether you bake it now or freeze it for later, this dish is always a hit. So, gather your friends and family. Enjoy your creation together. Happy cooking!

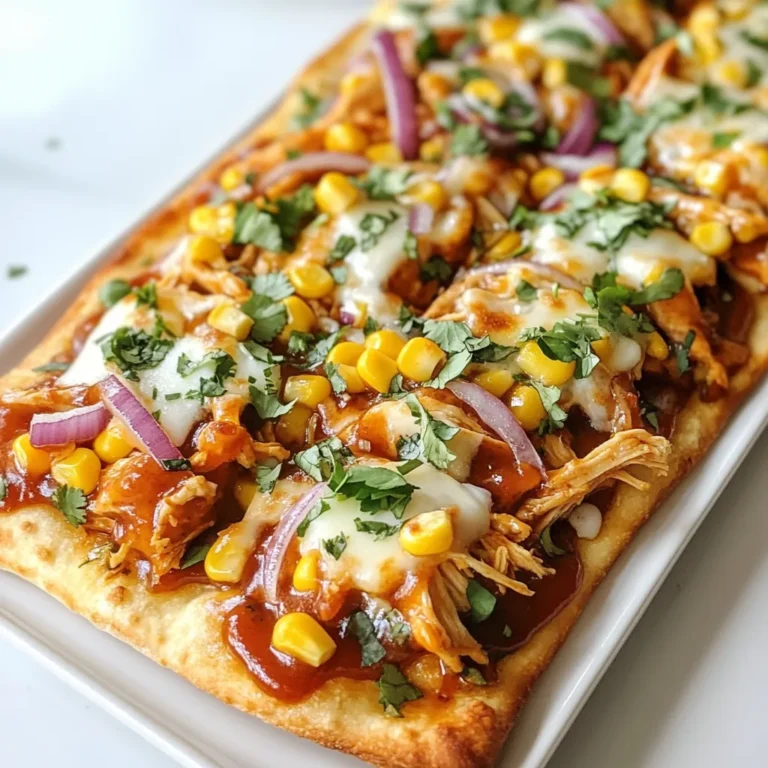
BBQ Chicken Flatbread Delight for Easy Meals

- 4 cups fresh baby spinach - 1 cup fresh strawberries - 1/4 red onion - 1/2 cup crumbled feta cheese - 1/4 cup sliced almonds - 2 tablespoons honey - 1 tablespoon balsamic vinegar - 3 tablespoons olive oil - Salt and pepper to taste To make a bright and tasty Strawberry Spinach Salad, start with fresh produce. You need four cups of baby spinach. This greens base gives your salad a nice crunch and a vibrant color. Next, slice up one cup of fresh strawberries. They add sweetness and a pop of red. Finally, add a quarter of a red onion, thinly sliced. This onion adds a sharp flavor that balances the sweet strawberries. Now let’s move on to the dairy and nuts. You will want half a cup of crumbled feta cheese. It adds creaminess and a salty bite. Toast a quarter cup of sliced almonds for the best flavor and crunch. The nuts bring a satisfying texture that pairs well with the soft cheese. For the dressing, whisk together two tablespoons of honey with one tablespoon of balsamic vinegar. This mix brings a sweet-tart taste. Add three tablespoons of olive oil for richness. Season with salt and pepper to your liking. This dressing ties all the ingredients together and enhances their flavors. Gather all these ingredients, and you are ready to create a fresh and vibrant Strawberry Spinach Salad! {{ingredient_image_1}} To make the dressing, gather a small bowl. Add two tablespoons of honey. Next, pour in one tablespoon of balsamic vinegar. Then, add three tablespoons of olive oil. Sprinkle in a bit of salt and pepper to taste. Now, whisk all these ingredients together. You want a smooth blend that tastes sweet and tangy. Once done, set the dressing aside. Grab a large salad bowl. First, add four cups of fresh baby spinach. This will be the base of your salad. Next, layer one cup of sliced strawberries on top of the spinach. Their bright red color will make the salad pop. Now, sprinkle a half cup of crumbled feta cheese over the strawberries. This adds a nice creaminess. Then, toss in a quarter cup of toasted sliced almonds for a crunchy texture. Finally, add a quarter of a thinly sliced red onion. This gives your salad a nice bite. Before serving, drizzle the dressing you made over the salad. Be sure to coat everything well. Now, gently toss the salad. You want to mix all the flavors without breaking the spinach. Serve the salad right away for the best taste. Enjoy the fresh and vibrant flavors in each bite! - To choose ripe strawberries, look for bright red color. The berries should feel firm but not hard. Check for a sweet scent; this means they are ripe and ready to eat. Avoid any that have green or white spots. - For fresh spinach, choose bright green leaves. They should be crisp and free from wilting. If spinach feels slimy, it is not fresh. Always wash and dry it well to keep it crisp. - Keep your salad ingredients fresh by storing them separately. Place spinach in a sealed bag with a paper towel to absorb moisture. Store strawberries in a container with holes for airflow. This helps prevent spoilage. - For leftovers, store the salad in an airtight container. Keep the dressing separate until you are ready to eat. This will help the salad stay fresh and crunchy. - Add fresh herbs like basil or mint for a pop of flavor. You can also try a sprinkle of black pepper or a dash of chili flakes for some heat. These small changes can elevate your salad and make it more exciting! Pro Tips Fresh Ingredients: Always use fresh, ripe strawberries for the best flavor and sweetness in your salad. Toast the Almonds: Toasting the almonds enhances their flavor and adds a delightful crunch to the salad. Make It Ahead: You can prepare the dressing in advance and store it in the refrigerator. Just shake well before drizzling over the salad. Season to Taste: Adjust the salt and pepper according to your preference, as the feta cheese can add a salty flavor on its own. {{image_2}} You can switch fruits based on what is in season. In summer, use peaches or blueberries. In fall, try apples or pears. Each fruit brings a new taste. This keeps your salad fresh and exciting. You can always mix and match. Enjoy the bright colors and flavors of the season! If you need vegan options, skip the feta. Use avocado for creaminess instead. You can also swap honey for agave syrup. This makes it vegan-friendly. For a gluten-free choice, ensure your balsamic vinegar has no additives. Most balsamic vinegar is gluten-free, but check the label. This way, everyone can enjoy the salad! Adding protein makes the salad heartier. Grilled chicken works well. It adds a nice smoky flavor. You can also use chickpeas for a plant-based option. They add great texture and protein. Just toss them in with the other ingredients. Both options will make your salad filling and satisfying! Spinach is a superfood packed with vitamins. It has vitamin A, C, and K. These vitamins boost your immune system and improve your skin. Spinach also has iron, which helps your blood stay healthy. Strawberries are full of fiber and antioxidants. They help with digestion and can lower your risk of heart disease. Eating strawberries may also improve your mood. Feta cheese adds flavor and creaminess to the salad. It contains calcium, which is good for bones. Feta may also be easier to digest than other cheeses. However, feta has some fat and sodium. Use it wisely to keep your meal healthy. To make a balanced meal, serve the salad with grilled chicken or quinoa. These proteins help you feel full and satisfied. You can also enjoy it with a slice of whole-grain bread for added fiber. For drinks, pair the salad with iced tea or sparkling water. These drinks refresh your palate without adding too many calories. If you prefer something sweeter, a light lemonade works well too. Each serving of this salad has about 200 calories. The breakdown is as follows: - Fat: 15g - Carbohydrates: 15g - Protein: 5g This salad is low in calories, making it a great choice for a healthy meal. Enjoy the flavors without the guilt! Yes, you can make the salad ahead of time. To prep in advance, follow these tips: - Prepare the Dressing: You can make the dressing a day early. Just whisk the honey, balsamic vinegar, olive oil, salt, and pepper. Store it in a jar in the fridge. - Wash and Dry Spinach: Wash and dry the spinach a few hours ahead. Keep it in a sealed bag or container. - Slice Strawberries: You can slice the strawberries a few hours before serving. Store them in the fridge to keep them fresh. - Combine Just Before Serving: Mix all the ingredients right before serving. This keeps the salad crisp and bright. The prepared salad is best eaten immediately. However, if you have leftovers, here are storage guidelines: - Refrigerate Promptly: Store the salad in an airtight container and put it in the fridge right away. - Use Within Two Days: The salad will stay fresh for up to two days. After that, it may lose its crunch. - Keep Dressing Separate: If you have leftovers, keep the dressing separate. This helps prevent sogginess. If you prefer not to use feta cheese, there are great substitutes: - Goat Cheese: This has a creamy texture and tangy flavor. - Vegan Cheese: Look for plant-based feta or crumbled cheese options. - Cottage Cheese: This is a mild alternative that adds protein. - Parmesan Cheese: Grated Parmesan can add a nutty flavor. These options let you customize the salad to suit your taste! This salad combines fresh spinach, strawberries, and feta for a tasty dish. You learned how to make the dressing and assemble the salad step-by-step. Keeping your ingredients fresh will enhance the flavors. You can also modify the recipe to fit your diet. Remember, this salad offers great health benefits. Enjoy it as a light meal or a side. Try different variations to keep it exciting. With these tips, you will impress everyone with your salad-making skills. Happy cooking!

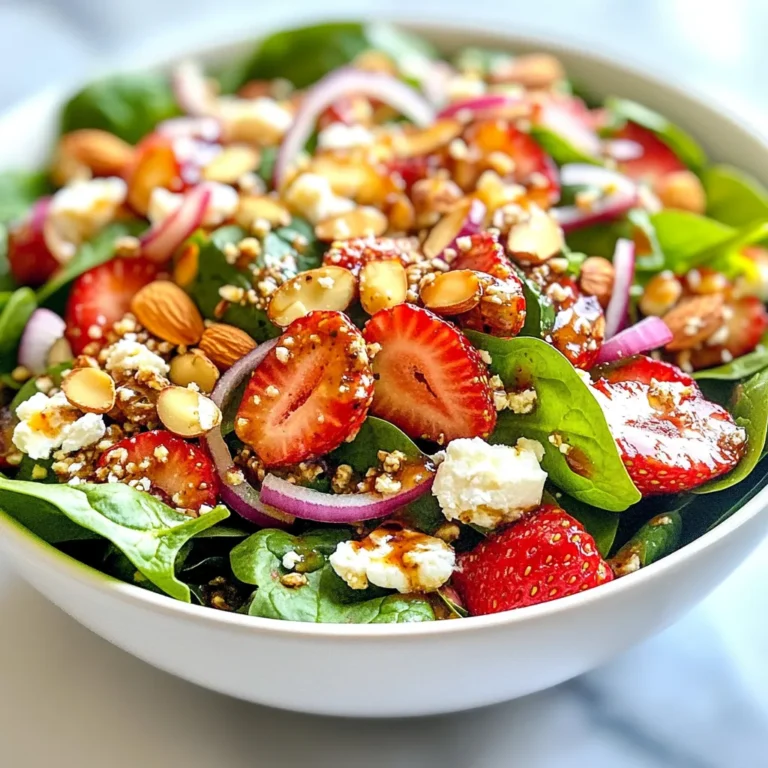
Strawberry Spinach Salad Fresh and Vibrant Delight

PREV 1 … 50 51 52 … 57 NEXT
quick dish kitchen

explore

DessertsDinnerAppetizersDrinks

Our Policies

  • Cookie Policy
  • Copyright Policy
  • Disclaimer
  • GDPR Policy
  • Terms Of Use
Back to Top
  • About
  • Contact Us
  • Privacy Policy
© 2025 quick dish kitchen