FREE DINNER EBOOK! Get your copy!
  • Cookie Policy
  • GDPR Policy
  • Disclaimer
  • Terms Of Use
  • Visit my other site: Fun Cookie Recipes
quick dish kitchen
  • Home
  • Dinner
  • Desserts
  • Drinks
  • Appetizers
  • Contact
  • About
  • Privacy Policy
  • Home
  • Dinner
  • Desserts
  • Drinks
  • Appetizers
  • Contact
  • About
  • Privacy Policy
  • Cookie Policy
  • GDPR Policy
  • Disclaimer
  • Terms Of Use
Visit my other site: Fun Cookie Recipes

HOME / CATEGORIES /

Latest

To make garlic butter steak bites, you need fresh and tasty ingredients: - 1 lb sirloin steak, cut into bite-sized pieces - 4 tablespoons unsalted butter - 4 cloves garlic, minced - 1 tablespoon fresh parsley, chopped (plus more for garnish) - 1 teaspoon dried rosemary - 1 teaspoon onion powder - Salt and pepper, to taste - 1 tablespoon olive oil - 1 teaspoon lemon juice (optional) These ingredients create a rich flavor. The sirloin steak gives a nice chew and taste. Garlic and butter blend well for a savory sauce. If you don’t have some ingredients, here are some good swaps: - Steak: Try ribeye or tenderloin for a richer flavor. - Garlic: Use garlic powder if you don’t have fresh garlic. - Butter: Swap with ghee for a dairy-free option. - Parsley: Chives or cilantro can add a fresh touch. - Rosemary: Thyme or oregano work well too. These swaps keep the essence of the dish while adding new flavors. Choosing the right steak makes a big difference. Here are some key tips: - Look for marbling: More fat means more flavor and tenderness. - Choose fresh cuts: Fresh meat has better texture and taste. - Ask your butcher: They can suggest the best cuts for your meal. - Consider your cooking method: Tender cuts work best for quick cooking. By following these tips, you can select a steak that makes your garlic butter bites even better. {{ingredient_image_1}} Start by cutting your sirloin steak into small, bite-sized pieces. This helps them cook evenly. Next, season the steak bites with salt, pepper, and onion powder. Mix it well so every piece is coated. Let the seasoned steak sit at room temperature for about 15 minutes. This step improves the flavor and helps with cooking. Now, grab a large skillet and heat the olive oil over medium-high heat. Wait until the oil is hot but not smoking. Carefully add the steak bites in a single layer. Avoid crowding the pan; you might need to cook them in batches. Sear each side for 2 to 3 minutes. Look for a nice brown color, but don’t overcook them. Once done, take the steak bites out and set them aside. In the same skillet, reduce the heat to medium. Add the unsalted butter and let it melt. Next, toss in the minced garlic, dried rosemary, and chopped parsley. Sauté this mixture for about 1 minute. Keep an eye on it; you don’t want the garlic to burn. The smell will be amazing! Now, it’s time to bring everything together. Return the steak bites to the skillet. Toss them well in the garlic butter sauce to coat every piece. If you like a bit of zing, drizzle some lemon juice over the steak. Cook for another minute to let the flavors meld. Finally, transfer the garlic butter steak bites to a serving platter. Garnish with extra chopped parsley for a fresh touch. Serve them with toothpicks for easy snacking or alongside a crisp salad to make it a full meal. Enjoy your tasty creation! To get the best sear on your steak bites, follow these steps: - Start with Room Temperature Meat: Let the steak sit out for about 15 minutes. - Preheat the Pan: Use medium-high heat and add olive oil until hot. - Avoid Overcrowding: Cook in batches if needed. This helps each piece brown well. - Watch the Time: Sear for 2-3 minutes on each side. This keeps the inside juicy. Seasoning can make or break your dish. Here’s how to adjust it: - Taste as You Go: Start with salt, pepper, and onion powder. - Add Fresh Herbs: Try more parsley or rosemary for extra flavor. - Use Lemon Juice: A teaspoon adds brightness that balances the richness. - Experiment: Feel free to switch herbs or spices to match your taste. Different cuts of steak need different cooking methods. Here’s a quick guide: - Sirloin: Quick sear works great; it’s tender and flavorful. - Ribeye: This cut has more fat. Sear it well for a richer taste. - Filet Mignon: Cook it gently to keep it very tender. - Flank or Skirt: Slice against the grain after cooking for tenderness. Choose the right cut for your dish to maximize flavor and texture! Pro Tips Rest the Meat: Allow the seasoned steak bites to sit at room temperature for 15 minutes before cooking. This helps them cook more evenly. Don’t Overcrowd the Pan: Cook the steak bites in batches if necessary. Overcrowding will lead to steaming rather than searing, preventing that delicious crust. Use Fresh Ingredients: Fresh garlic and herbs will provide the best flavor. Dried herbs can be used in a pinch, but fresh is always better. Perfectly Cooked Steak: For best results, use a meat thermometer to check for doneness. Aim for 130°F for medium-rare and 140°F for medium. {{image_2}} You can easily add veggies to your garlic butter steak bites. Think about bell peppers, mushrooms, or asparagus. These add color and taste. To do this, chop your veggies into small pieces. Sauté them in the same pan before adding the steak. This way, they soak up that tasty garlic butter too. You can also serve steak bites with sides like garlic bread or a fresh salad. They make a great match! You can change the flavor of your sauce by using different herbs. Try thyme or oregano instead of rosemary. These herbs bring a unique taste to the dish. You can also mix in some fresh basil or cilantro for a twist. If you love spice, add red pepper flakes. This will make your garlic butter sauce a bit spicy and fun! Steak bites are not the only option. You can use chicken or tofu for a different taste. If using chicken, cut it into bite-sized pieces like the steak. Cook it the same way, and it will soak up the garlic butter just as well. For a plant-based choice, use firm tofu. Press it to remove water, then cut it into cubes. Sear the tofu until golden for a tasty dish. Both options are delicious and perfect for anyone! To store your garlic butter steak bites, let them cool first. Place them in an airtight container. This keeps out air and moisture. You can store them in the fridge for up to three days. Make sure to label the container with the date. This helps you remember when you made them. If you have a lot left, consider portioning them out. This makes it easy to grab a quick meal later. When reheating, keep it simple. Use a skillet for the best results. Heat it over medium heat. Add a small amount of butter or olive oil. This adds moisture back into the steak. Place the steak bites in the skillet. Cook for about five minutes, stirring often. This helps keep them juicy and flavorful. Avoid the microwave if you can. It tends to dry out the meat. If you want to freeze garlic butter steak bites, you can do this too! Allow the steak to cool completely. Then, place them in a freezer-safe bag. Remove as much air as you can. This prevents freezer burn. You can freeze them for up to three months. When you’re ready to eat, thaw them in the fridge overnight. Reheat them in a skillet as mentioned before to keep that great taste. Yes, you can pick different cuts of steak. Strip steak, ribeye, or tenderloin work well. They all give great taste and tenderness. Just remember, each cut may cook a bit differently. Adjust your cooking time as needed. To add some heat, use red pepper flakes or cayenne pepper. Mix these into your seasonings before cooking. You can also use a spicy sauce like sriracha in the garlic butter. This will give your dish a warm kick! Many sides go well with garlic butter steak bites. Here are some great options: - Fresh salad with greens and tomatoes - Roasted vegetables like broccoli or carrots - Creamy mashed potatoes or garlic bread - Rice or quinoa for a filling meal These sides balance the rich flavors of the steak, making a tasty plate! Garlic butter steak bites are simple to make and delicious. We covered key ingredients, cooking steps, and tips for great results. You can tweak the recipe with different meats, veggies, and sauces. Don’t forget to store leftovers properly for next time. Experiment with seasonings to find your favorite flavor! Enjoying this dish can lead to new family meals and exciting flavors. Now, grab your ingredients and start cooking to impress yourself and others.

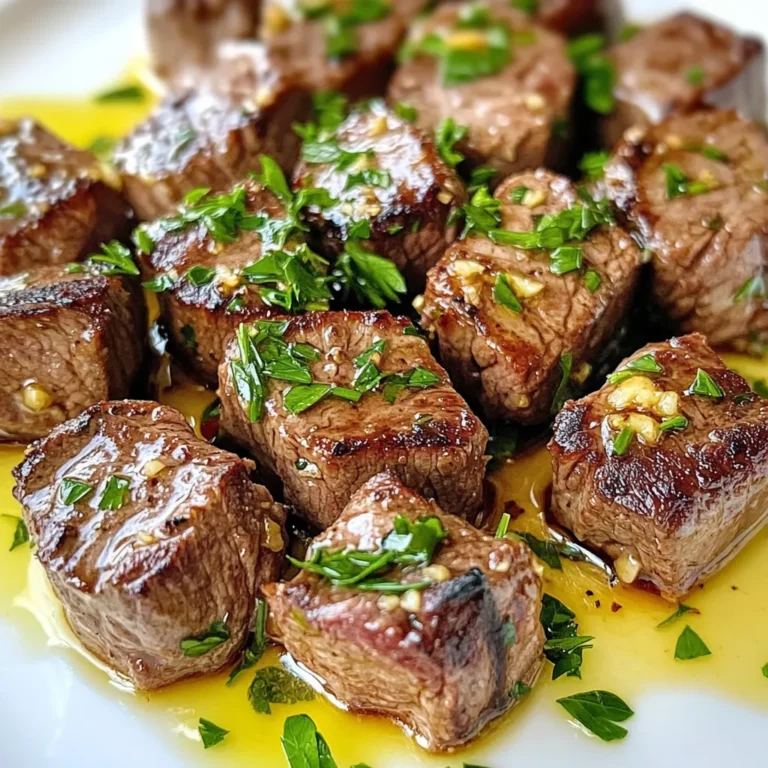
Garlic Butter Steak Bites Flavorful and Simple Recipe

- 4 salmon fillets (6 ounces each) - 4 tablespoons unsalted butter - 4 cloves garlic, minced - 1 tablespoon fresh parsley, chopped - 1 tablespoon fresh dill, chopped - 1 teaspoon lemon zest - 2 tablespoons lemon juice - Salt and pepper to taste Gather these fresh ingredients before you start cooking. The salmon fillets are the star of the dish. They need to be fresh for the best flavor. Unsalted butter adds richness and helps the garlic infuse its aroma. Minced garlic gives this dish its bold taste. Fresh parsley and dill add a nice herbal touch. They brighten the dish and enhance the salmon's flavor. Lemon zest and lemon juice bring a refreshing tang. They balance the richness of the butter and salmon. Do not forget the salt and pepper. They are key to bringing out all the flavors in your dish. Having all these items ready will make cooking easier and more enjoyable. Happy cooking! {{ingredient_image_1}} 1. Preheat your oven to 375°F (190°C). This step gets your oven ready for baking. 2. Take your salmon fillets and pat them dry with paper towels. This helps the seasoning stick better. 3. Season both sides of the salmon with salt and pepper. This adds flavor to the fish. 1. In a medium skillet, melt 4 tablespoons of unsalted butter over medium heat. Watch it closely so it doesn’t burn. 2. Add 4 cloves of minced garlic to the skillet. Sauté it for about 1 minute until it smells great but is not browned. 3. Stir in 1 tablespoon of fresh parsley, 1 tablespoon of fresh dill, 2 tablespoons of lemon juice, and 1 teaspoon of lemon zest. Mix well to combine all the fresh flavors. 4. Place the salmon fillets skin side down in a baking dish. 5. Pour the garlic butter herb mixture evenly over the salmon fillets. This will soak into the fish as it cooks. 6. Bake in the preheated oven for 15-20 minutes. The salmon is done when it flakes easily with a fork. 1. For a crispy top, turn on the broiler. Broil the salmon for 2-3 minutes. Keep an eye on it to prevent burning. 2. Remove the salmon from the oven. Garnish it with lemon slices and any extra herbs if you want. This adds a nice touch and bright flavor. Knowing when salmon is done: Salmon is ready when it flakes easily with a fork. You can use a fork to test the thickest part. The inside should be a light pink color. If it is still dark or raw in the middle, it needs more time. Avoiding overcooking: Overcooked salmon will become dry. To avoid this, set a timer for 15 minutes. Check the salmon after this time. The salmon should be firm but not hard. If it feels too soft, give it a few more minutes. Adjusting herbs and spices: You can change the taste by adding your favorite herbs. For a bolder flavor, try adding thyme or basil. If you like a bit of heat, add some red pepper flakes. Using flavored butter options: Flavored butter can add a special touch. Try mixing in some lemon or chili powder with the butter. You can also use herb-infused oils for a different taste. Plating tips for visual appeal: A nice plate makes the meal look even better. Use a large white plate to show off the salmon. Drizzle some of the garlic butter sauce around the salmon. This adds color and depth. Suggested side dishes: Pair your salmon with steamed veggies like broccoli or green beans. A fresh salad is also a great choice. You can serve it with rice or quinoa for a filling meal. Pro Tips Fresh Ingredients: Always use fresh herbs and quality salmon for the best flavor and texture. Fresh ingredients make a significant difference in taste. Don’t Overcook: Keep an eye on your salmon while baking. It should be cooked until it flakes easily with a fork but still moist. Overcooking can lead to dry fish. Variations: Feel free to experiment with different herbs such as thyme or basil, or add a pinch of red pepper flakes for a bit of heat. Resting Time: Let the salmon rest for a few minutes after baking. This helps the juices redistribute and enhances the overall flavor. {{image_2}} You can switch up the fish in this dish. Try using trout or tilapia. Both options have unique flavors and cook well with garlic butter. You can also add seasonal vegetables to your meal. Think about using asparagus, zucchini, or cherry tomatoes. These veggies roast nicely and add color to your plate. You can grill or bake your salmon. Grilling gives it a smoky taste and nice grill marks. Baking is simple and keeps the fish moist. If you want a crispy skin, try pan-searing the salmon first. Sear it in a hot skillet for a few minutes before finishing it in the oven. Want to spice things up? Add some red pepper flakes or a splash of hot sauce to the garlic butter. It brings a nice kick to the dish. You can also experiment with herbs. Try thyme, basil, or cilantro for a different taste. Each herb changes the flavor and makes the dish unique. After enjoying your garlic butter herb salmon, save the leftovers. Store them in airtight containers. This keeps the salmon fresh and tasty. Make sure to let the salmon cool before sealing the container. It can last up to three days in the fridge. Always check for any off smells before eating. Freezing salmon is a great way to keep it fresh. Wrap each salmon fillet tightly in plastic wrap. Then, place the wrapped fillets in a freezer bag. Remove as much air as possible before sealing. Properly frozen, the salmon can last up to three months. When you’re ready to cook, thaw it in the fridge overnight. To reheat your salmon, avoid the microwave if you can. Instead, use the oven or a skillet. For the oven, preheat to 300°F (150°C). Place the salmon on a baking sheet and cover it with foil. This keeps it moist. Heat for about 10-15 minutes or until warmed through. If using a skillet, cook on low heat with a splash of water. This also helps keep the salmon juicy. Bake salmon at 375°F for 15-20 minutes. The fish should be flaky and opaque. Use a fork to check. If it flakes easily, it is done. Always check the thickest part of the fillet. This ensures that it cooks evenly. Yes, you can use frozen salmon. Just make sure to thaw it first. Place the fillets in the fridge overnight to defrost. If you're short on time, you can run the sealed fillets under cold water. This will speed up the process. Once thawed, pat them dry and season as usual. Garlic butter herb salmon pairs well with many sides. Here are some great options: - Steamed vegetables like broccoli or green beans - A fresh garden salad with a light vinaigrette - Mashed potatoes or rice for a hearty touch - Quinoa for a healthy grain option Feel free to mix and match sides to suit your taste! You now have a simple guide for making garlic butter herb salmon. We covered the main ingredients, preparation steps, and cooking tips. I shared ways to enhance flavor and present your dish. You can play with variations, like different fish or cooking methods. Remember to store leftovers properly for later meals. Enjoy this dish, and feel free to experiment. Cooking can be fun, and it's great to share with others. Trust your taste, and make this recipe your own!

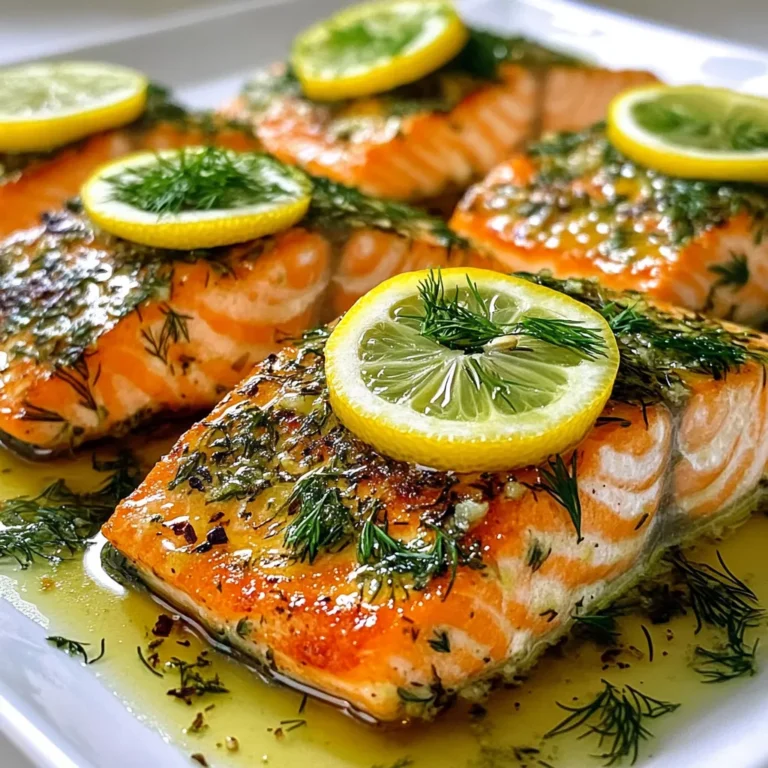
Garlic Butter Herb Salmon Tasty and Simple Dish

- 3 cups shredded unsweetened coconut - 1 cup semi-sweet chocolate chips - 1/2 cup sweetened condensed milk - 1/4 cup cocoa powder - 1 teaspoon vanilla extract - 1/4 teaspoon salt - Optional: 1/2 cup chopped nuts (e.g., almonds or walnuts) To make chocolate coconut macaroons, gather the main ingredients first. Shredded unsweetened coconut gives these treats their chewy texture. The semi-sweet chocolate chips add rich flavor. Sweetened condensed milk helps bind the mixture and adds sweetness. Cocoa powder deepens the chocolate taste. Vanilla extract brings warmth to the flavor. A pinch of salt balances everything out. If you want a crunch, consider adding chopped nuts. Almonds or walnuts work well. These nuts not only add texture but also enhance the overall taste. Each ingredient plays a key role in creating that perfect macaroon. Make sure to measure your ingredients accurately. This ensures the best flavor and texture. Enjoy mixing and tasting as you go along! {{ingredient_image_1}} - Preheat your oven to 325°F (163°C). - Line a baking sheet with parchment paper. This helps the macaroons not stick. - In a large bowl, mix shredded coconut, sweetened condensed milk, cocoa powder, vanilla extract, and salt. - If you want a crunch, add in chopped nuts. Mix until everything is well combined. - To melt the chocolate chips, place them in a microwave-safe bowl. - Heat in 30-second bursts, stirring after each time, until smooth. - Pour half of the melted chocolate into the coconut mix. Stir it in well. Save the rest for drizzling later. - Use a small cookie scoop or two spoons to drop mounds of the mixture on the baking sheet. - Space them about 2 inches apart. - Bake for 15 to 20 minutes until the tops turn golden brown. Watch closely to avoid them burning. - After baking, let the macaroons cool on the baking sheet for a few minutes. - Then, move them to a wire rack to cool completely. - Drizzle the reserved melted chocolate over each macaroon once they cool. - Avoiding over-baking: Keep a close watch on your macaroons. They bake quickly. Remove them from the oven when the tops are golden brown. If you bake them too long, they lose their soft texture. - Importance of cooling before drizzling: Let the macaroons cool on a wire rack. This step helps the chocolate drizzle stay on top instead of melting away. Cooling also sets the shape and keeps them firm. - Arranging macaroons attractively: Place your macaroons on a nice plate. Use a decorative platter for a special touch. You can try stacking them or lining them up in rows. - Enhancements like flaked coconut or nuts: Sprinkle some flaked coconut or chopped nuts around the macaroons. This not only looks great but adds a nice crunch. You can also top each macaroon with a few nuts for added flair. - Adjusting sweetness and chocolate intensity: If you like it sweeter, add a bit more condensed milk. For a richer chocolate flavor, try using dark chocolate chips instead of semi-sweet. Adjusting these can change your whole treat. - Experimenting with nut types: You can add different nuts to the mix. Almonds and walnuts are great choices. Try other nuts, too, like pecans or cashews, to see what flavors you enjoy best. Pro Tips Use Fresh Coconut: For an even more authentic flavor, consider using fresh coconut instead of shredded coconut. It will add moisture and enhance the overall texture. Chocolate Melting Tips: When melting chocolate, be sure to do it slowly to avoid burning. Stir frequently and only microwave in short intervals. Experiment with Flavors: You can add additional flavors like almond extract or orange zest to the mixture for a unique twist on the classic macaroon. Storage Suggestions: Store leftover macaroons in an airtight container at room temperature to maintain their freshness, or refrigerate for longer shelf life. {{image_2}} You can easily switch up the flavor of your macaroons. Adding extracts is a great way to do this. For example, try adding a teaspoon of almond extract for a nutty taste. If you love fresh flavors, add mint extract for a cool twist. You can also use various types of chocolate. Instead of semi-sweet chocolate chips, try dark chocolate for a richer flavor. White chocolate gives a lovely sweetness and creaminess. Each choice brings something special to your macaroons. If you need gluten-free options, no worries! These macaroons are naturally gluten-free, as they use coconut and no flour. Just be sure to check your ingredients to confirm they are gluten-free. For vegan-friendly swaps, replace the sweetened condensed milk with coconut cream or a plant-based milk option. Also, use dairy-free chocolate chips instead. These changes make the recipe perfect for everyone! Nuts can take your macaroons to the next level! Almonds and walnuts work great. Chopped nuts add a nice crunch and flavor. You can mix nuts into the coconut mixture or sprinkle them on top. Another fun idea is to combine flavors. Coconut and macadamia nuts are a classic mix. They pair well together and create a tropical vibe. Experiment with different nuts to find your favorite blend! To keep your chocolate coconut macaroons fresh, you need the right containers. I recommend using an airtight container. This helps to lock in moisture and flavor. Glass or plastic containers both work well. Avoid using containers that let air in. You can store macaroons at room temperature or in the fridge. Room temperature is best for short-term storage. The fridge can keep them fresh for longer. When stored properly, chocolate coconut macaroons last about a week at room temperature. In the fridge, they can last up to two weeks. Check for signs of spoilage. If they smell off or look dry and hard, it’s time to toss them. Fresh macaroons should be soft and chewy, not stale. Freezing your macaroons is a great option for longer storage. To freeze, place them on a baking sheet in a single layer first. Freeze them for about an hour. Then, move them to an airtight container or freezer bag. Make sure to remove as much air as possible. To thaw, take them out and leave them at room temperature for about 30 minutes. This helps maintain their soft texture. Never refreeze thawed macaroons, as it can ruin their taste and texture. To make chewy macaroons, use the right ingredient ratios. Stick to 3 cups of coconut and 1/2 cup of sweetened condensed milk. Bake them for around 15-20 minutes. Keep an eye on them. You want the tops to be golden but not too dark. Yes, you can use sweetened coconut. This will make your macaroons taste sweeter. If you use sweetened coconut, consider cutting back on the condensed milk. This will balance the sweetness so the flavor stays rich and not overpowering. To melt chocolate smoothly, use a microwave-safe bowl. Heat the chocolate chips in 30-second bursts. Stir between each interval to prevent burning. This method helps you get a nice, smooth melt. You can also use a double boiler for more control. Yes, macaroons and macarons are different desserts. Macaroons are coconut-based and chewy, while macarons are meringue cookies filled with cream. Macarons are delicate and colorful, while macaroons are dense and rustic. To make nut-free macaroons, simply leave out the nuts. The recipe will still be delicious with just coconut and chocolate. You can add extras like dried fruits or seeds for texture. This way, you keep the flavor and enjoy a nut-free treat. In this post, we explored making delicious macaroons. You learned about key ingredients and step-by-step instructions. We also shared baking tips, variations, and storage techniques. Remember, you can customize flavors and use different chocolate types. Each batch can be a new adventure in your kitchen. Enjoy experimenting with textures and tastes. With practice, you'll perfect your macaroons in no time. Happy baking!

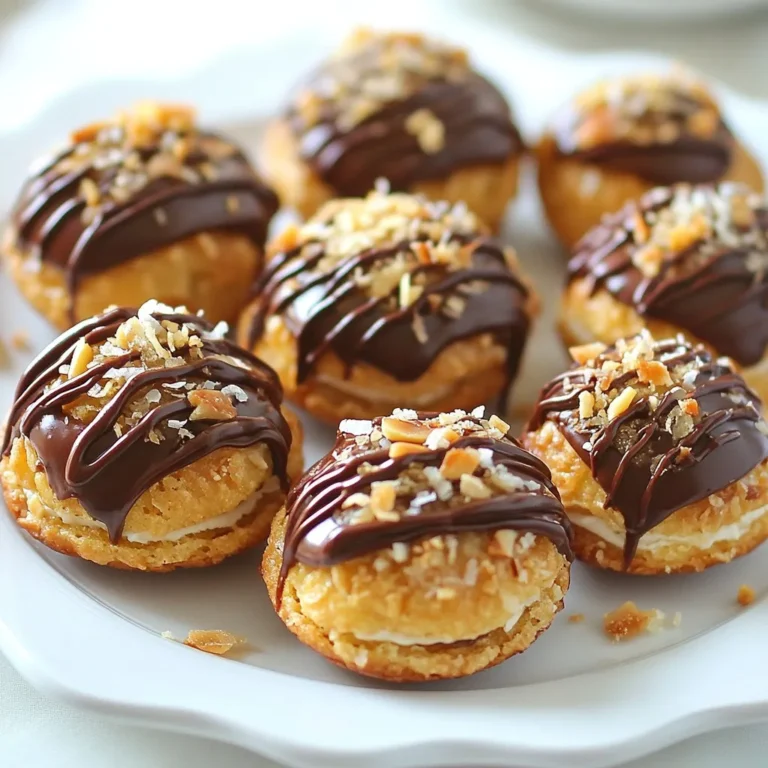
Chocolate Coconut Macaroons Irresistible Sweet Treat

- 1 lb boneless, skinless chicken thighs, cut into bite-sized pieces - 1 cup bell peppers (red, yellow, green), sliced - 1 medium onion, sliced - 2 cups broccoli florets - 4 cloves garlic, minced - 1 tablespoon ginger, minced - 1/4 cup sweet chili sauce - 2 tablespoons soy sauce - 1 tablespoon cornstarch - 2 tablespoons vegetable oil - Salt and pepper to taste - Sesame seeds for garnish - Fresh cilantro for garnish This dish shines with fresh, vibrant ingredients. First, the chicken is the star. I prefer using thighs since they stay juicy and tender. Next, the colorful bell peppers add crunch and sweetness. The onion and broccoli offer a mix of flavors and textures. For the sauce, sweet chili sauce brings a delightful kick. Soy sauce adds depth, while cornstarch thickens the dish. The garlic and ginger give it a warm, cozy aroma. Finally, sesame seeds and cilantro elevate the look and taste. Each ingredient plays a role in making this stir fry both tasty and appealing. {{ingredient_image_1}} Start with 1 lb of boneless, skinless chicken thighs. Cut them into bite-sized pieces. This helps the chicken cook evenly. In a medium bowl, mix 1/4 cup sweet chili sauce, 2 tablespoons soy sauce, and 1 tablespoon cornstarch. This mix will thicken the sauce later. Set the bowl aside for now. Heat 1 tablespoon of vegetable oil in a large skillet or wok. Use medium-high heat. Once hot, add the chicken pieces. Season them with salt and pepper. Stir-fry for 5-7 minutes. You want the chicken to be golden and fully cooked. Remove the chicken and set it aside. In the same skillet, add another tablespoon of oil. Then add sliced onion, bell peppers, and 2 cups of broccoli florets. Stir-fry these for 3-4 minutes. You want them tender but still crisp. Now, add 4 minced garlic cloves and 1 tablespoon of minced ginger. Stir-fry for about 1 minute until you smell their aroma. Return the chicken to the skillet. Pour the sweet chili sauce mix over the chicken and veggies. Stir everything well to coat. Cook for an additional 2-3 minutes. This will let the sauce thicken slightly. Once done, remove from heat. Garnish with sesame seeds and fresh cilantro for a nice touch. Enjoy your colorful and tasty Sweet Chili Chicken Stir Fry! To cook your stir fry well, keep the heat high. This helps the food cook fast and stay crisp. Use a large skillet or wok for even cooking. Cut all your chicken and veggies into small pieces. This way, they cook evenly. Start with the chicken, then add veggies. Stir often to keep everything moving. Sweet chili sauce gives your dish a great taste. Mix it with soy sauce and cornstarch for a nice glaze. Add salt and pepper to the chicken and veggies while cooking. You can also try adding a splash of lime juice for extra brightness. Ginger and garlic are key for depth. They should go in right after your veggies. Make your dish look great! Serve it over fluffy jasmine rice or quinoa. This adds color and texture. Sprinkle sesame seeds on top for crunch. Fresh cilantro adds a pop of green and freshness. Use a nice plate to showcase your colorful stir fry. A good presentation makes the meal feel special. Pro Tips Prep Ingredients Ahead: Having all your ingredients prepped and ready to go will make the cooking process smoother and faster, allowing you to focus on stir-frying. Use High Heat: Stir-frying requires high heat to achieve that perfect char and sear on the chicken and vegetables. Ensure your pan or wok is hot before adding the ingredients. Don’t Overcrowd the Pan: If you add too many ingredients at once, it will lower the pan's temperature and steam your food instead of stir-frying it. Cook in batches if necessary. Customize Your Veggies: Feel free to mix in your favorite vegetables or whatever you have on hand, such as snap peas, carrots, or zucchini, for added flavor and nutrition. {{image_2}} You can swap out chicken for other meats. Try shrimp, beef, or pork. Each protein brings its own taste. Shrimp cooks fast and adds a sweet flavor. Beef gives a hearty bite, while pork adds richness. Just adjust cooking times for each meat. Feel free to change the veggies in this stir fry. Use snap peas, carrots, or zucchini. Each veggie changes the dish’s color and taste. You can also mix in mushrooms or baby corn. Choose what you love and what you have on hand. To make this dish vegetarian or vegan, skip the chicken. Use tofu or tempeh as a protein. Press and cube the tofu to get rid of extra moisture. Cook it until golden for a nice texture. You can also add chickpeas for extra protein. Use vegetable broth instead of sauces with animal products. This keeps all the flavors while meeting your diet needs. You can store sweet chili chicken stir fry in the fridge. Place it in an airtight container. It will stay fresh for up to three days. Before storing, let it cool to room temperature. This helps keep it tasty and safe to eat. If you want to keep it longer, you can freeze the stir fry. Use a freezer-safe container or bag. Remove as much air as possible to prevent freezer burn. It can last for up to three months in the freezer. To thaw, move it to the fridge overnight. When you are ready to eat, reheat the stir fry. You can use a microwave or a skillet. If using a microwave, heat for one to two minutes. Stir halfway to ensure even warming. If using a skillet, add a splash of water and heat over medium heat. This keeps the dish moist and delicious. You can serve this stir fry with rice or noodles. I love jasmine rice for its light flavor. You can also use brown rice for a healthier option. Quinoa works well too! If you want something crunchy, try serving it with crispy spring rolls. These pair nicely with the sweet flavors of the dish. Yes, you can use frozen vegetables! They make cooking fast and easy. Just add them to the skillet after cooking the chicken. Cook them a bit longer until they are hot. Frozen veggies can taste great, but fresh ones add more flavor. To adjust the spice level, you can add more or less sweet chili sauce. If you want it spicier, add some red pepper flakes or chili sauce. For a milder taste, use less of the sweet chili sauce. You can also serve it with chili sauce on the side for those who want a kick. The best type of chicken for stir-frying is boneless, skinless chicken thighs. They stay juicy and tender when cooked. You can also use chicken breast, but it may dry out faster. Cut the chicken into small pieces for even cooking and better flavor. In this blog post, we explored making a tasty Sweet Chili Chicken Stir Fry. We covered the key ingredients, step-by-step cooking, and helpful tips. You can change the recipe with different proteins or veggies. Proper storage keeps your food fresh. Finally, answering common questions helps you enjoy this dish even more. I hope you feel ready to cook a delicious stir fry that fits your taste. Enjoy your meal!

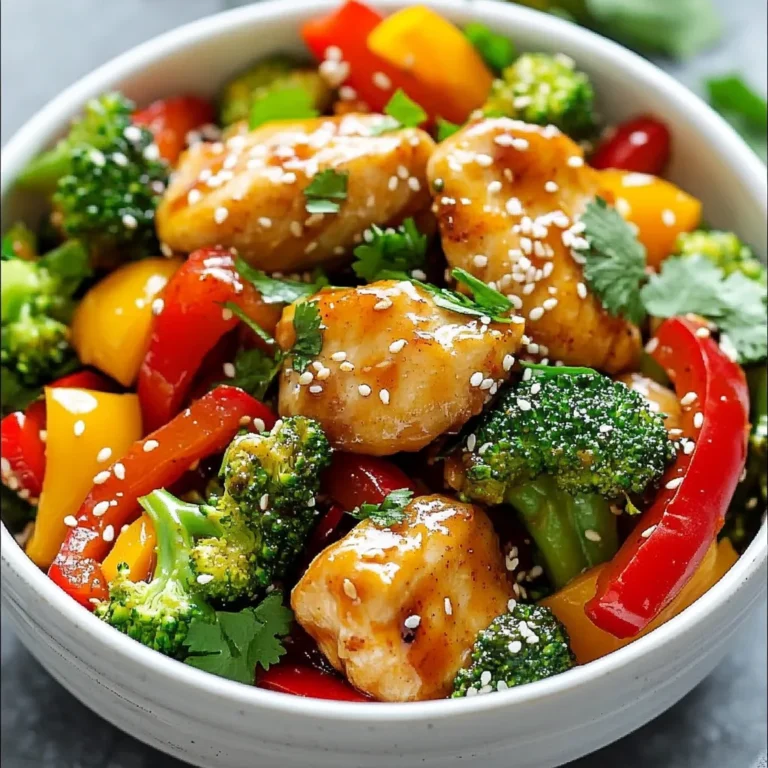
Sweet Chili Chicken Stir Fry Quick and Flavorful Meal

- 1 cup cooked chickpeas (canned or boiled) - 1/4 cup tahini - 4 cloves roasted garlic - 2 tablespoons olive oil - 2 tablespoons lemon juice - 1/2 teaspoon ground cumin - 1/4 teaspoon smoked paprika - Salt to taste - Water (as needed for consistency) For an extra kick, you can add: - Red pepper flakes for spice - Fresh herbs like parsley or cilantro for freshness - A dash of lemon zest for brightness If you don’t have an ingredient, here are some swaps: - Use peanut butter instead of tahini for a nutty flavor. - Swap lemon juice for lime juice for a different tang. - Use garlic powder if you can’t roast garlic. Just use 1 teaspoon instead of roasted garlic. - If you want a creamier hummus, try adding Greek yogurt. These choices help you customize your hummus to fit what you have on hand! {{ingredient_image_1}} Roasting garlic makes it sweet and soft. First, preheat your oven to 400°F (200°C). Take a whole bulb of garlic and cut the top off. Drizzle it with olive oil to coat. Wrap the bulb in aluminum foil to keep it moist. Roast it for about 30 to 35 minutes. You will know it's done when it feels soft. Let it cool for a bit, then squeeze out the cloves. They should pop out easily! Now, let's make the hummus. In a food processor, add these ingredients: - 1 cup cooked chickpeas - 1/4 cup tahini - 4 cloves roasted garlic - 2 tablespoons olive oil - 2 tablespoons lemon juice - 1/2 teaspoon ground cumin - 1/4 teaspoon smoked paprika - Salt to taste Blend these together until smooth. If you notice some lumps, don't worry. Just scrape down the sides of the bowl and blend again. Hummus should be creamy, not too thick. If it feels too thick, add water one tablespoon at a time. Blend again after each addition. Keep going until you reach your desired smoothness. After blending, taste your hummus. You can add more salt or lemon juice if needed. This will help balance the flavors. When it's perfect, transfer it to a bowl. Enjoy your creamy roasted garlic hummus! To make your hummus pop, try these tips: - Use fresh lemon juice. It adds brightness. - Add a pinch of cayenne for heat. - Mix in fresh herbs like parsley or basil. - Swap smoked paprika for regular. It changes the taste. - Drizzle extra olive oil on top for richness. These small changes can bring big rewards. Experimenting keeps your hummus exciting. Here are some common errors to watch for: - Using raw garlic. It can taste too strong. Always roast it first. - Not blending long enough. Smoothness is key for great texture. - Forgetting to taste. Adjust seasoning to make it perfect. - Adding too much water at once. Add gradually for the right consistency. Avoid these pitfalls to enjoy the best hummus. Serve your creamy roasted garlic hummus in fun ways: - Pair it with pita chips or fresh veggies. Crunchy dips are always a hit. - Spread it on sandwiches or wraps for extra flavor. - Use it as a topping for grilled meats or fish. It adds moisture. - Serve it with olives or pickles for a Mediterranean touch. These ideas make your hummus a star at any meal. Pro Tips Use Fresh Ingredients: Always opt for fresh lemon juice and high-quality tahini to enhance the flavor of your hummus. Adjust Consistency: If you prefer a creamier texture, blend in more olive oil or a bit of reserved chickpea liquid instead of water. Experiment with Flavors: Don't hesitate to add spices like cayenne pepper or herbs like basil for a unique twist on traditional hummus. Perfect Roasting: Ensure your garlic is wrapped tightly in foil while roasting to keep all the flavors concentrated and prevent burning. {{image_2}} You can make your hummus even more exciting with fun add-ins! Try adding: - Fresh herbs like basil or cilantro for a green twist. - Spices such as chili powder for heat or curry powder for warmth. - Veggies like roasted red peppers or sun-dried tomatoes for a sweet touch. These add-ins can change the flavor and add color. Mix and match to find your favorite! Chickpeas are great, but you can switch them up. Here are some tasty choices: - Black beans give a rich, earthy taste. - White beans, like cannellini, create a creamy texture. - Edamame adds a fresh and bright flavor. Each bean brings its unique taste. Feel free to experiment and find what you love! This hummus is already vegan and gluten-free! To keep it that way, check your ingredients. Here are some tips: - Use gluten-free tahini, which is made from sesame seeds. - Pair your hummus with fresh veggies or gluten-free crackers. This recipe is easy to adapt for everyone. Enjoy your creamy roasted garlic hummus without worry! To keep your hummus fresh, store it in an airtight container. This helps to keep moisture out and prevents it from drying out. I recommend using a glass container, as it is easy to clean. Before sealing, drizzle a thin layer of olive oil on top. This adds flavor and helps to keep it fresh. Place the container in the fridge. It will stay good for about a week. You can freeze hummus if you want to save some for later. Use a freezer-safe container or a zip-top bag. Leave some space at the top, as hummus expands when frozen. When you want to eat it, move it to the fridge to thaw overnight. For faster thawing, you can use the microwave. Just heat it in short bursts. Stir well to keep the texture smooth. Homemade roasted garlic hummus lasts about a week in the fridge. Store-bought hummus can last longer, so check the label. If it smells sour or looks off, it's best to toss it. If you freeze hummus, it can last up to three months. Just make sure to label it with the date. This way, you won't forget when you made it. The best way to serve hummus is in a bowl. You can drizzle olive oil on top. Adding a sprinkle of smoked paprika or fresh herbs makes it look nice. Serve it with pita bread, veggie sticks, or crackers. This dip pairs well with almost anything. Yes, you can make hummus in advance. It stays fresh in the fridge for about five days. Just store it in an airtight container. If you make it ahead, add a little extra olive oil before serving. This will keep it smooth and tasty. If your hummus tastes bitter, you can fix it easily. Add a little more lemon juice or salt to balance the flavors. You can also mix in a bit of tahini. Blend everything again until smooth. Taste and adjust as needed. This post covered all you need to make great hummus. We discussed ingredients, step-by-step guides, and helpful tips. You learned how to roast garlic and blend ingredients for the best texture. Remember to experiment with flavors and storage methods. Hummus is easy to make at home! Enjoy it as a snack or meal. With these tips, you'll impress everyone with your tasty hummus.

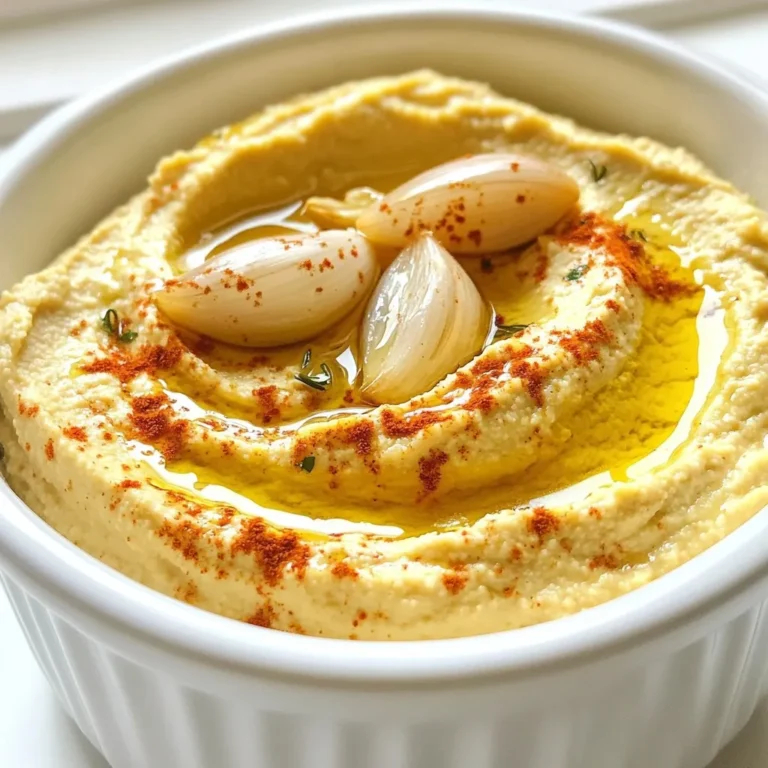
Creamy Roasted Garlic Hummus Flavorful Dip Recipe

To create a great Moroccan Chicken Couscous, you need some key ingredients: - 1 lb (450g) chicken thighs, boneless and skinless - 1 cup couscous - 2 cups chicken broth - 1 medium onion, diced - 2 cloves garlic, minced - 1 carrot, diced - 1 zucchini, diced - 1 cup canned chickpeas, drained and rinsed - 1 teaspoon ground cumin - 1 teaspoon ground cinnamon - 1 teaspoon ground coriander - 1/2 teaspoon turmeric - 1/4 teaspoon cayenne pepper (optional, for heat) - 2 tablespoons olive oil - Salt and pepper to taste - Fresh cilantro, chopped, for garnish - Lemon wedges, for serving These ingredients work together to make a flavorful dish. Chicken thighs provide rich taste, while the spices add warmth and depth. The vegetables bring color and nutrition. You can boost the taste with these optional items: - Raisins or dried apricots for sweetness - Almonds or pine nuts for crunch - Fresh herbs like parsley or mint for freshness These extras add complexity and make your dish even more exciting. You can mix and match based on what you enjoy. This dish is not only tasty but also healthy. Here are some benefits: - Chicken: Great source of protein. It helps build and repair tissues. - Couscous: A whole grain that provides energy and fiber. - Chickpeas: Packed with protein and fiber, they support digestion. - Vegetables: Carrots and zucchini offer vitamins and minerals. Eating this meal gives you a balanced mix of nutrients. It’s filling and satisfying, perfect for a family dinner. {{ingredient_image_1}} Start by heating 2 tablespoons of olive oil in a large pot over medium heat. Add 1 medium diced onion and 2 minced garlic cloves. Sauté until the onion turns soft and clear, about 3-4 minutes. Next, add 1 pound of boneless, skinless chicken thighs. Season the chicken with salt, pepper, 1 teaspoon of ground cumin, 1 teaspoon of ground coriander, 1 teaspoon of ground cinnamon, 1/2 teaspoon of turmeric, and a pinch of cayenne pepper if you like heat. Brown the chicken on all sides for about 5-7 minutes. This step creates great flavor. Now, stir in 1 diced carrot, 1 diced zucchini, and 1 cup of drained chickpeas. Pour in 2 cups of chicken broth and bring everything to a boil. Once boiling, lower the heat and cover the pot. Let it simmer for 20-25 minutes until the chicken is tender and fully cooked. This slow cooking allows the spices to meld together. While the chicken simmers, it's time to cook the couscous. Boil 1 cup of water in a separate bowl. Once boiling, pour the hot water over 1 cup of couscous in a bowl. Cover it and let it sit for 5 minutes. After that, fluff the couscous with a fork to separate the grains. It should be light and fluffy, perfect for soaking up the chicken and vegetable mix. When the chicken is done, take it out of the pot and shred it using two forks. Return the shredded chicken to the pot and mix it well with the veggies and broth. To serve, place a generous amount of couscous on each plate. Top it with the chicken and vegetable mixture. For a fresh touch, sprinkle chopped cilantro over the top. Serve with lemon wedges on the side for that extra zing. Enjoy your Moroccan Chicken Couscous! To cook chicken thighs well, start with good heat. Use medium heat in a large pot. Add olive oil and let it warm. When the oil is hot, add diced onion and garlic. Cook them until the onion is clear. This takes about 3 to 4 minutes. Next, add the chicken thighs. Season them with salt, pepper, and spices. Brown the chicken on all sides. This should take about 5 to 7 minutes. Fluffing couscous is easy and fun. First, boil 1 cup of water. Pour the boiling water over the couscous in a bowl. Cover the bowl and let it sit for 5 minutes. After 5 minutes, take a fork and fluff it gently. This will make it light and airy. Do not stir too hard, or it will clump. To enhance flavor, use fresh spices. Ground cumin, coriander, and cinnamon are key. Always taste as you cook. If you want more heat, add cayenne pepper. A little goes a long way. Also, don’t forget to use salt and pepper. They help balance the flavors. Lastly, garnish with fresh cilantro. It adds a nice touch and bright flavor. Pro Tips Marinate for Flavor: Consider marinating the chicken thighs in the spices and olive oil for a few hours or overnight. This enhances the flavors and tenderizes the meat. Choose Your Veggies: Feel free to customize the vegetables based on your preference or seasonal availability. Bell peppers and eggplant are great additions! Fluff Your Couscous: Make sure to fluff the couscous with a fork after it has rested. This helps to separate the grains and prevents clumping. Garnish with Freshness: Adding fresh herbs like mint or parsley along with cilantro can elevate the dish's freshness and add vibrant flavor. {{image_2}} You can easily make this dish vegetarian. Swap chicken for firm tofu. Start by pressing the tofu to remove extra moisture. Cut it into cubes and sauté it until golden. Add the tofu in place of chicken when you cook the spices. This gives you a tasty vegetarian meal. Couscous isn't the only grain you can use. Try quinoa, bulgur, or even orzo pasta. Each grain brings its own flavor and texture. Just remember to adjust the cooking time and liquid needed based on the grain you choose. This makes the dish fun and fresh! Dried fruits and nuts add a delightful crunch. Consider using raisins, apricots, or almonds. Add these during the cooking stage to infuse their sweetness. This mix of flavors will elevate your Moroccan chicken couscous. It's a simple way to enhance your meal's taste and texture. To store your Moroccan chicken couscous, let it cool first. Place it in an airtight container. Keep it in the fridge for up to three days. If you want to keep it longer, freezing is a good option. When you reheat couscous, add a splash of water. This helps to keep it moist. Use a microwave or stovetop for reheating. If using a microwave, cover it and heat in short bursts. Stir it often for even heating. If using the stovetop, warm it slowly over low heat. To freeze couscous, allow it to cool completely. Portion it into freezer-safe bags or containers. Remove as much air as possible to prevent freezer burn. Label the bags with the date. You can freeze it for up to three months. When you're ready to eat, thaw it overnight in the fridge before reheating. Moroccan Chicken Couscous has deep roots in North African culture. Couscous is a staple food in Morocco. It symbolizes family and tradition. Families often gather to share this dish, especially during celebrations. The blend of spices and flavors reflects the region's diverse history. It combines Berber, Arab, and Mediterranean influences. This dish showcases the art of Moroccan cooking, emphasizing fresh ingredients and bold flavors. Yes, you can prepare Moroccan Chicken Couscous ahead of time. This dish tastes even better the next day. The flavors meld and become richer. Cook the chicken and vegetables, then store them in the fridge. Just reheat them when you’re ready to serve. Prepare the couscous fresh, so it stays fluffy. This way, you’ll enjoy a delicious meal without the last-minute rush. Moroccan Chicken Couscous pairs well with various side dishes. Here are some great options: - Green salad: A light salad adds freshness. - Roasted vegetables: Carrots, peppers, and eggplants complement the dish. - Flatbread: Serve with Moroccan bread for a fun touch. - Yogurt sauce: A cool yogurt sauce balances the spices. These sides enhance the meal and add variety to your table. To make Moroccan Chicken Couscous milder, you can adjust the spices. Start by reducing the cayenne pepper or leaving it out. Use less cumin and coriander if you prefer. You can also add more vegetables, like zucchini or carrots. They bring natural sweetness and balance the heat. Lastly, serve with a side of yogurt. It cools the dish and makes it more enjoyable for everyone. This guide covered how to make Moroccan Chicken Couscous from start to finish. You learned about key ingredients, cooking methods, and tasty variations. I shared tips to help you cook chicken and fluff couscous perfectly. Remember, you can store leftovers and enjoy them later. Cooking this dish not only fills your belly but also connects you with a rich culture. I hope you feel inspired to try it at home!

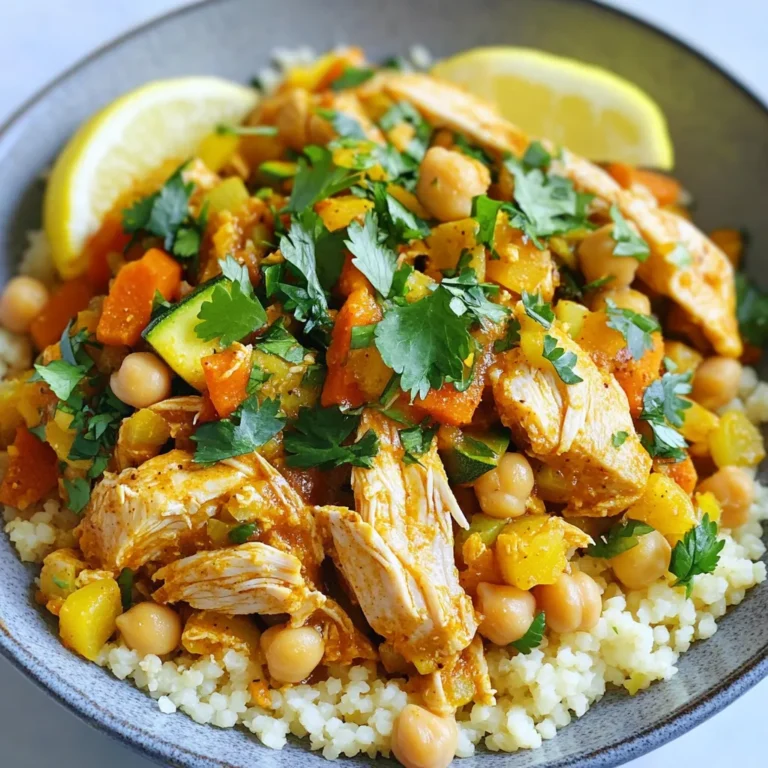
Mouthwatering Moroccan Chicken Couscous Recipe

- 2 packs of instant ramen noodles (discard seasoning packets) - 2 tablespoons sesame oil - 4 cloves garlic, minced - 1-inch piece ginger, grated - 1 red bell pepper, sliced - 1 cup broccoli florets - 1 small carrot, julienned - 1 cup snap peas - 3 green onions, chopped - 2 tablespoons soy sauce - 1 tablespoon sriracha (adjust to taste) - 1 teaspoon rice vinegar - 1 tablespoon sesame seeds (for garnish) - Fresh cilantro (for garnish, optional) To make this spicy garlic ramen stir fry, gather these ingredients first. Start with instant ramen noodles. They cook quickly and work best for this dish. Next, choose fresh vegetables. I love a mix of red bell pepper, broccoli, carrot, and snap peas for crunch and color. Aromatics are key for flavor. Use garlic and ginger to create warmth and spice. Don’t forget the sauces! Soy sauce adds depth, while sriracha gives heat. Rice vinegar brings a nice balance. Finally, sesame seeds and cilantro make great toppings. They add a fresh twist to the dish. This simple list will set you up for a tasty meal in no time! {{ingredient_image_1}} To cook the ramen noodles, start by bringing a pot of water to a boil. Add the two packs of instant ramen noodles. Cook them for about 3-4 minutes, or until they are soft. Once done, drain the noodles in a colander. Rinse them briefly under cold water to stop cooking. This step helps avoid soggy noodles that can ruin your stir fry. Set the noodles aside while you prep the other ingredients. Next, grab a large skillet or wok. Heat two tablespoons of sesame oil over medium-high heat. Add four cloves of minced garlic and a one-inch piece of grated ginger. Sauté them for about 30 seconds, stirring constantly until fragrant. This quick step boosts the flavor of your dish. Now, increase the heat to high. Toss in a sliced red bell pepper, one cup of broccoli florets, one small julienned carrot, and one cup of snap peas. Stir-fry these vibrant veggies for about 3-4 minutes. You want them to be tender-crisp, not mushy. Now it’s time to combine the noodles and sauce. Add the cooked ramen noodles to the skillet with the vegetables. In a small bowl, whisk together two tablespoons of soy sauce, one tablespoon of sriracha, and one teaspoon of rice vinegar. Pour this sauce over the noodles and veggies. Toss everything together for 2-3 minutes, ensuring the noodles get an even coating of flavor. Finally, fold in three chopped green onions right before serving. This adds a fresh crunch to your dish. Enjoy your spicy garlic ramen stir fry, garnished with sesame seeds and fresh cilantro if you like! To make your vegetables crisp-tender, use high heat while stir-frying. This helps keep their shape and color bright. Cut your veggies evenly for even cooking. Start with the harder ones like carrots and broccoli, adding softer ones like snap peas later. This way, they all cook perfectly together. When it comes to spice, sriracha is your best friend. Start with one tablespoon, then taste. If you want more heat, add a little more. Mix it well with soy sauce and rice vinegar for a balanced flavor. It’s all about adjusting to your taste! For the best presentation, serve your spicy garlic ramen stir fry in deep bowls. This keeps everything warm and makes it look great. Top with extra green onions and a drizzle of sriracha for a pop of color and taste. To enhance flavor and texture, consider adding sesame seeds on top. Fresh cilantro can brighten the dish, too. These little touches make your meal look fancy and inviting, perfect for sharing or enjoying yourself. Pro Tips Use Fresh Ingredients: Fresh vegetables will enhance the flavor and texture of your stir fry, making it more vibrant and appealing. Adjust Spice Level: Feel free to modify the amount of sriracha according to your heat preference. Start with less and add more if you like it spicier. Don't Overcook the Veggies: Stir fry the vegetables until they are tender-crisp to retain their nutrients, color, and crunch. Garnish for Presentation: A sprinkle of sesame seeds and fresh cilantro not only adds flavor but also makes the dish visually appealing. {{image_2}} You can easily change the veggies in the spicy garlic ramen stir fry. Here are some great options: - Zucchini: Slice it thin and toss it in. - Mushrooms: Add sliced shiitake or button mushrooms for a meaty bite. - Bell Peppers: Use any color you like for a sweet crunch. For those needing vegan or gluten-free options, make simple swaps: - Soy Sauce: Use tamari for gluten-free. - Sriracha: Check for vegan versions if needed. - Noodles: Opt for rice noodles or gluten-free ramen. To amp up the flavor, try adding these spices or sauces: - Chili flakes: For extra heat. - Oyster sauce: For a richer taste. - Lime juice: A splash adds fresh brightness. You can also add proteins to make the dish heartier. Here are some ideas: - Chicken: Slice it thin, sauté it before the veggies. - Tofu: Firm tofu works well. Cube it and stir-fry until golden. These variations keep the dish fun and exciting! To keep your spicy garlic ramen stir fry fresh, follow these tips: - Cool it down: Let the stir fry cool to room temperature first. - Use airtight containers: Store leftovers in airtight containers to keep them safe. - Refrigerate: Place the containers in the fridge. They stay good for about 3-4 days. To keep noodles from sticking together, try these tips: - Separate noodles: Toss them with a bit of sesame oil before storing. - Layer correctly: Place noodles in one layer in the container. This helps them stay apart. Reheating your ramen stir fry is easy. Here’s how: - Stovetop method: Heat a skillet over medium heat. Add the stir fry and a splash of water. Stir until heated through. - Microwave method: Place the stir fry in a microwave-safe bowl. Cover it loosely and heat in 30-second bursts. Stir after each burst. To avoid overcooked noodles, keep these tips in mind: - Watch the time: Heat just until warm. Don’t overdo it! - Add moisture: Use a little water or broth. This helps keep noodles tender. Yes, you can use many types of noodles. Options include udon, soba, or even rice noodles. Each type has a unique taste and texture. Udon noodles are thick and chewy. Soba noodles are thin and nutty. Rice noodles are light and gluten-free. Choose what you like best. Just make sure to cook them according to the package instructions. Drain and add them to the stir fry like you would with ramen. Absolutely! This recipe is great for meal prep. You can cook the noodles and vegetables ahead of time. Store them in airtight containers in the fridge. Keep the sauce separate until you are ready to eat. This way, the noodles stay fresh. Reheat everything together in a pan. Add the sauce for extra flavor. You can also portion out the stir fry for easy lunches. If you want more heat, try adding chili flakes. You can also use fresh chopped chilies. For an extra kick, add a few drops of chili oil. Another option is to use spicy soy sauce. This will boost the flavor and heat. Adjust the amount of sriracha too. Start with a little and add more until it’s just right for you. In this blog post, we explored how to make a delicious ramen stir fry. We started with the key ingredients like instant noodles, fresh veggies, and tasty sauces. You learned step-by-step instructions for cooking noodles and stir-frying vegetables. We shared tips on perfecting your dish and ways to serve it beautifully. You also discovered variations, storage tips, and answers to common questions. Now you can create a flavorful ramen stir fry that suits your taste. Have fun experimenting with spices and veggies! Enjoy your cooking adventure!

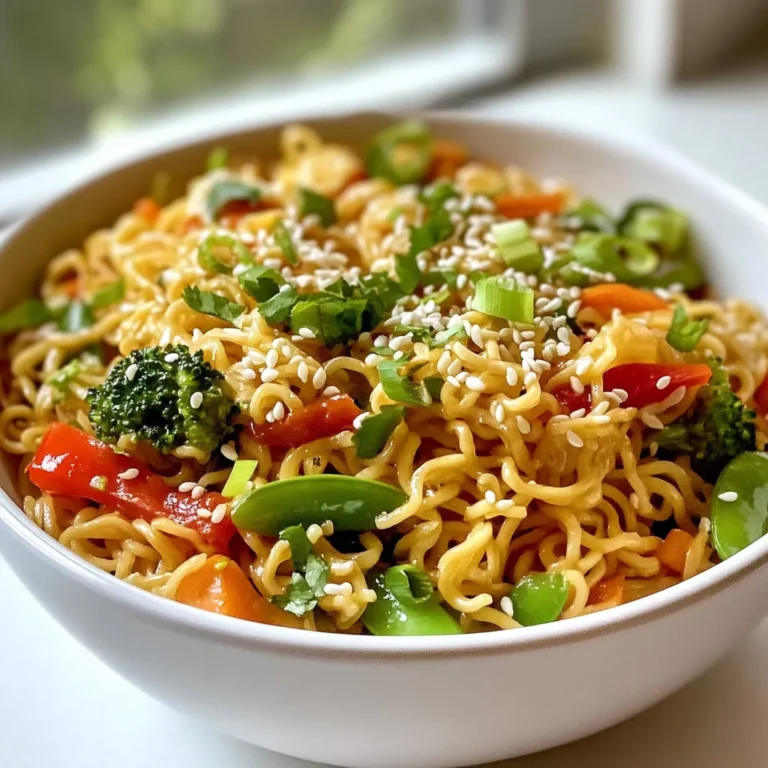
Spicy Garlic Ramen Stir Fry Quick and Tasty Meal

To make stuffed pepper soup, you need key ingredients that create rich flavors. Here’s what you will need: - 4 large bell peppers (any color), chopped - 1 medium onion, diced - 3 cloves garlic, minced - 1 pound ground turkey or chicken - 1 can (14.5 oz) diced tomatoes, undrained - 4 cups low-sodium chicken broth - 1 cup cooked brown rice - 1 tablespoon Italian seasoning - 1 teaspoon paprika - 1 teaspoon cumin - Salt and pepper to taste - 1 cup shredded cheese (cheddar or mozzarella) for topping - Fresh parsley for garnish You can easily adjust this soup to match your taste. Here are some optional ingredients to try: - Other types of meat like beef or sausage - Quinoa instead of brown rice for a different grain - Extra vegetables such as zucchini or corn - Spicy peppers for heat - Different cheese varieties like pepper jack or feta Choosing the right produce makes a big difference. Here are some tips for picking fresh ingredients: - For bell peppers, look for firm skin and bright color. - Choose onions that feel heavy and have dry, papery skin. - Garlic should be tight and not sprouting. - When buying canned tomatoes, check for no dents or bulges in the can. - Fresh herbs like parsley should be vibrant and not wilted. By using fresh produce, you ensure that your soup tastes great and looks colorful. {{ingredient_image_1}} Start by heating a drizzle of olive oil in a large pot or Dutch oven over medium heat. I like to add the diced onion first. Sauté it for about 3-4 minutes until it turns translucent. This step builds a great flavor base. Next, add minced garlic. It adds a lovely aroma. Sauté for about 1 minute. Now, it's time for the meat. Add 1 pound of ground turkey or chicken to the pot. Cook until the meat is no longer pink, about 5-7 minutes. Break it apart with a spoon as it cooks. This helps it mix well with the onions and garlic. Once the meat is cooked, add the chopped bell peppers. Cook for another 3-5 minutes until they begin to soften. After the veggies are soft, it's time to combine everything. Add the can of diced tomatoes (with juice), 4 cups of low-sodium chicken broth, and 1 cup of cooked brown rice. Sprinkle in 1 tablespoon of Italian seasoning, 1 teaspoon of paprika, and 1 teaspoon of cumin. Stir everything well to mix the flavors. Bring the soup to a gentle boil. Then, reduce the heat and let it simmer for 20-25 minutes. This allows the flavors to meld together nicely. Before serving, season with salt and pepper to taste. To boost the taste, use fresh herbs. Fresh parsley adds brightness. You can also use basil or oregano. Adding a splash of lemon juice lifts flavors, too. If you want heat, try red pepper flakes. For depth, add a tablespoon of soy sauce or Worcestershire sauce. Mix well before serving to blend these flavors. One mistake is overcooking the vegetables. They should stay a bit crisp. Avoid using too much salt early on. You can always add more later. Another common error is not letting the soup simmer. This step helps the flavors meld. Lastly, don’t skip the cheese topping. It adds creaminess and richness. Always serve the soup hot. This keeps the flavors vibrant. Use thick bowls to hold the heat. Top each bowl with a generous amount of shredded cheese. The cheese will melt nicely into the warm soup. Garnish with fresh parsley right before serving. This adds color and freshness. Pair your soup with crusty bread for a hearty meal. Pro Tips Choose Your Peppers: For a more colorful and flavor-packed soup, mix different colored bell peppers. Each color brings a unique sweetness. Meal Prep Friendly: This soup freezes well! Make a double batch and store leftovers in airtight containers for up to 3 months. Spice It Up: For a kick of heat, add diced jalapeños or crushed red pepper flakes to the soup while it simmers. Garnish for Flavor: Enhance presentation and flavor by adding a dollop of sour cream or Greek yogurt alongside the shredded cheese when serving. {{image_2}} If you want a vegetarian twist, skip the meat. Use more beans and lentils instead. Black beans, kidney beans, or chickpeas add great protein. You can also add extra veggies like zucchini or corn. These add texture and flavor. Use vegetable broth instead of chicken broth. This keeps the soup hearty and filling. You can switch up the protein easily. Ground beef, pork, or even tofu work well. For grains, try quinoa or farro. These grains add a nice nutty flavor and increase fiber. Just remember to cook the grains first if they need longer cooking times. This makes sure everything blends well. Adjusting the spice level is simple. Add red pepper flakes for heat. If you prefer a milder soup, skip the heat. You can also add fresh herbs like basil or cilantro. These add flavor without heat. Taste as you go and find what works best for you. This way, you create a soup everyone can enjoy. To keep your soup fresh, let it cool first. Then, pour the soup into an airtight container. Seal it well and store it in the fridge. It will stay good for about 3 to 4 days. Label your container with the date, so you know when to eat it! If you want to save some for later, freezing works great. Use freezer-safe bags or containers. Make sure to leave some space at the top, as liquids expand when frozen. Your soup can last for up to 3 months in the freezer. When you are ready to eat, just move it to the fridge to thaw overnight. Reheating is easy! For the best taste, warm your soup on the stove over medium heat. Stir it often to help it heat evenly. If you use a microwave, place it in a microwave-safe bowl. Heat it in short bursts, stirring in between. Add a little water or broth if it seems too thick. Enjoy your warm, hearty soup! You can use ground beef or pork instead of turkey or chicken. You can also try plant-based meat for a vegetarian option. Lentils or beans can work well, too. They add protein and flavor. Just make sure to adjust the cooking time based on what you choose. Each option brings a unique taste to your soup. Yes, you can easily make this soup in a slow cooker. Start by browning the meat in a pan. Then, add it to the slow cooker with all other ingredients. Set your slow cooker on low for 6-8 hours or high for 3-4 hours. This method lets the flavors blend well. Stuffed pepper soup will last up to 4 days in the fridge. Make sure to store it in an airtight container. If you want to keep it longer, freeze it. It can last for 3 months in the freezer. Just thaw it overnight in the fridge before reheating. Enjoy your soup warm for the best taste! In this blog post, we explored how to make delicious stuffed pepper soup. We covered essential and optional ingredients, cooking tips, and step-by-step instructions. Enhancing flavor and avoiding common mistakes is key. We also looked at variations for different diets and how to store leftovers effectively. In closing, enjoy making this soup your own. Experiment with flavors and share it warm with others. You’ll love the results. Happy cooking!

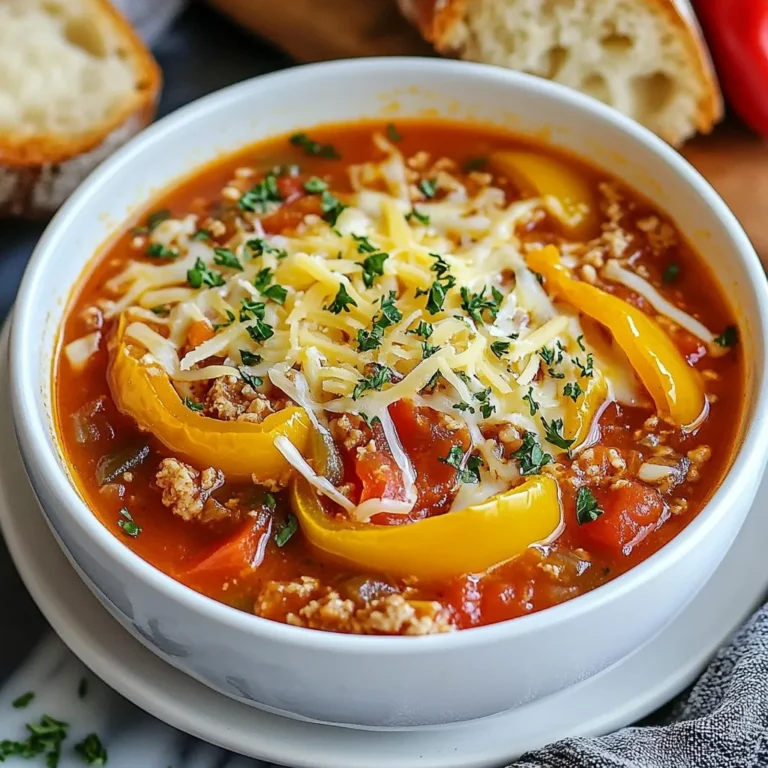
Stuffed Pepper Soup Flavorful and Hearty Delight

- 2 boneless, skinless chicken breasts - 1 cup cornstarch - 2 eggs, beaten - 1 cup panko breadcrumbs - 1 teaspoon garlic powder - 1 teaspoon onion powder - Salt and pepper to taste - Vegetable oil for frying - 2 cups cooked jasmine rice - 1 cup shredded carrots - 1 cup sliced cucumbers - 1 avocado, sliced - ¼ cup green onions, chopped - Sesame seeds for garnish To make Bang Bang Chicken Bowls, chicken is the star. Use boneless, skinless breasts for best results. You can slice these into strips. This helps them cook evenly. The breading adds crunch and flavor. Cornstarch helps the egg and breadcrumbs stick well. Panko breadcrumbs give a nice crispy texture. Adding fresh veggies makes the dish bright and colorful. Shredded carrots and cucumbers provide crunch. Sliced avocado adds creaminess. Green onions and sesame seeds on top make it look fancy. - ½ cup mayonnaise - 3 tablespoons sweet chili sauce - 1 teaspoon sriracha (adjust for spice level) The Bang Bang sauce is key to this dish. It combines mayonnaise, sweet chili sauce, and sriracha. This sauce brings heat and sweetness. Adjust the sriracha if you want more or less spice. - Alternative proteins: Use tofu or shrimp if you prefer. - Gluten-free options: Replace panko with gluten-free breadcrumbs. If you want a different protein, try shrimp or tofu instead of chicken. Both work well and taste great. For gluten-free needs, swap panko for gluten-free breadcrumbs. This keeps the meal tasty while fitting your diet. {{ingredient_image_1}} Slice each chicken breast into strips about 1 inch wide. I like to use a sharp knife for clean cuts. Season the strips with salt and pepper to enhance their flavor. Make sure to coat all sides evenly. Set up your breading station with three bowls. The first bowl holds cornstarch. The second bowl contains beaten eggs. The last bowl has panko breadcrumbs mixed with garlic powder, onion powder, salt, and pepper. This setup makes the breading easy and fun. Heat about ½ inch of vegetable oil in a skillet over medium-high heat. Once the oil is hot, carefully place the breaded chicken strips in the skillet. Do this in batches if needed. Fry each side for 4-5 minutes until golden brown. The chicken should be fully cooked. Remove the strips and drain them on paper towels. In a small bowl, whisk together the mayonnaise, sweet chili sauce, and sriracha. You can adjust the sriracha to control the spice level. Mix until smooth. This sauce adds a creamy and spicy kick to your bowls. Start with a base of warm jasmine rice in each bowl. Add the fried chicken strips on top. Then, layer shredded carrots, sliced cucumbers, and avocado. Drizzle the bang bang sauce generously over everything. Finally, sprinkle chopped green onions and sesame seeds for a nice finish. To ensure crispy chicken, follow these steps: - Use cornstarch as the first coating. This helps create a crunch. - Heat the oil to medium-high, around 350°F (175°C). Hot oil cooks the chicken fast. - Do not overcrowd the pan. Fry in batches for even cooking. - Fry each side for 4-5 minutes until golden and crispy. - Drain on paper towels to remove excess oil. This keeps the chicken crispy. You can adjust the spice level of your bang bang sauce easily: - Start with 1 teaspoon of sriracha. This adds a mild kick. - Taste the sauce and add more sriracha if you like heat. - Mix sweet chili sauce and mayonnaise first. This balances the flavors. - For a sweeter sauce, add more sweet chili sauce. - For a spicier sauce, increase the sriracha gradually. Preparing ingredients ahead of time makes cooking easier: - Slice the chicken and store it in the fridge. This saves time. - Prepare the veggies, like carrots and cucumbers, and keep them fresh. - You can mix the bang bang sauce a day in advance. - Cook the rice and store it in the fridge. Reheat it when ready to serve. - Keep everything organized for quick assembly when you’re hungry. Pro Tips Tip Title: Use a Meat Thermometer: Ensure your chicken is cooked thoroughly by checking that the internal temperature reaches 165°F (75°C) for optimal safety and juiciness. Tip Title: Perfectly Crispy Coating: For an extra crispy coating, double-dip your chicken strips by repeating the egg and breadcrumb process before frying. Tip Title: Spice Adjustment: If you prefer a milder sauce, start with less sriracha and gradually add more until you reach your desired heat level. Tip Title: Fresh Ingredients: Use fresh vegetables and ripe avocado for the best flavor and texture in your Bang Bang Chicken Bowls. {{image_2}} You can make Bang Bang Chicken Bowls vegetarian by using plant-based proteins. Tofu is a great choice. Press it to remove extra water, then cut it into strips. Coat the tofu in the same cornstarch, egg, and panko mix. Fry it until golden and crispy. You can also try tempeh or seitan for a different texture. These options keep the meal fun and flavorful. If you want a twist, try different sauces. A peanut sauce adds a nutty flavor. Simply mix peanut butter, soy sauce, and a bit of lime juice. For a zesty kick, use a lemon-garlic sauce. Combine lemon juice, olive oil, and minced garlic. You can also make it spicy with a spicy mayo. Just mix mayonnaise with hot sauce for a creamy heat. Bang Bang Chicken Bowls are great on their own, but you can enhance them. Serve with a fresh salad on the side. A simple cucumber and tomato salad complements the meal well. You can also add a side of steamed broccoli or snap peas for extra crunch. For a fun twist, try serving with crispy wonton chips for added texture. To store leftovers, let the chicken cool. Place it in an airtight container. Add the rice and veggies in separate containers. This helps keep everything fresh. Store in the fridge for up to three days. When reheating, I recommend using an oven. Preheat the oven to 375°F. Place the chicken on a baking sheet. Heat for about 10-15 minutes. This keeps the chicken crispy. You can also microwave, but it may get soggy. You can freeze the chicken and rice. For freezing, wrap the chicken in plastic wrap. Place the wrapped chicken in a freezer bag. Store for up to three months. Cooked rice can also freeze well. Just place it in a freezer bag and remove as much air as you can. Bang Bang Chicken is a fun dish with crispy chicken strips and a creamy sauce. The name comes from the mix of textures and flavors. It combines fried chicken with a spicy-sweet sauce, making it a favorite for many. This dish is often served in bowls with rice and veggies. It’s quick to make and filled with flavor, perfect for any meal. Yes, you can make Bang Bang Chicken gluten-free. Use gluten-free breadcrumbs instead of panko. For the sauce, ensure your sweet chili sauce is gluten-free. You can also swap cornstarch for a gluten-free flour blend to bread the chicken. These simple changes keep the dish tasty without gluten. You can easily adjust the spice level to fit your taste. Start with less sriracha in the sauce. If you want more heat, add a little extra sriracha. You can also add fresh chili slices on top for extra kick. Taste the sauce before using it to find your perfect heat. Many veggies work well with Bang Bang Chicken Bowls. Here are some great options: - Shredded carrots add crunch. - Sliced cucumbers provide freshness. - Avocado gives a creamy texture. - Bell peppers bring sweetness. - Broccoli offers a nice bite. Feel free to mix and match based on what's in season or what you love! In this blog post, we explored Bang Bang Chicken Bowls, starting with key ingredients like chicken, fresh veggies, and the flavorful Bang Bang sauce. I shared step-by-step instructions for making the dish, including tips for frying and customizing your spice level. You can even prepare vegetarian options or try different sauces. Remember, storage and reheating tips help keep your meal fresh. Now, it's time to gather your ingredients, get cooking, and enjoy this tasty dish. Your kitchen adventure awaits!

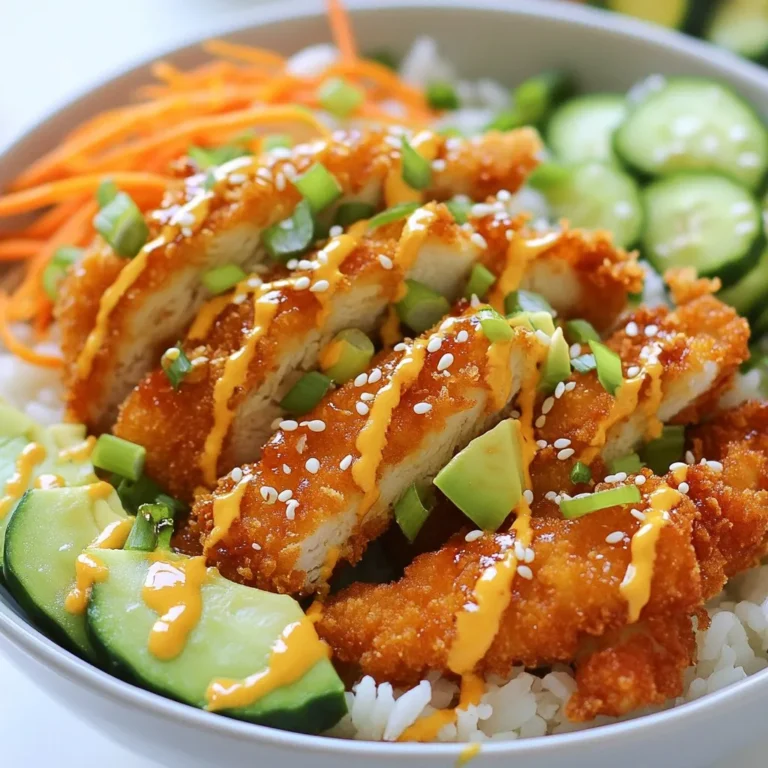
Bang Bang Chicken Bowls Flavorful and Fun Meal Idea

- 1 store-bought or homemade flatbread (like naan or pita) - 1 cup fresh basil pesto - 1 cup ricotta cheese - 1 cup shredded mozzarella cheese - 1 cup halved cherry tomatoes - 1/4 cup toasted pine nuts - 2 tablespoons olive oil - Fresh basil leaves for garnish - Salt and pepper to taste These ingredients come together to create a tasty flatbread pizza. The fresh basil pesto adds a burst of flavor. Ricotta cheese gives it creaminess. Shredded mozzarella melts beautifully on top. The cherry tomatoes add a sweet touch, while pine nuts bring a nice crunch. - Balsamic glaze for drizzling - Arugula for a peppery bite - Red pepper flakes for heat - Sliced olives for a briny flavor Adding these extras can elevate your pizza. Balsamic glaze adds sweetness, while arugula provides freshness. Red pepper flakes kick up the spice level. Sliced olives introduce a unique taste that pairs well with the other ingredients. - Use hummus instead of ricotta for a different flavor. - Swap mozzarella for goat cheese for a tangy twist. - Replace pine nuts with walnuts or sunflower seeds if needed. - Use store-bought pesto if you are short on time. These substitutes can help you customize your flatbread pizza. Hummus keeps it light and creamy. Goat cheese adds a sharp flavor. Feel free to get creative with what you have on hand! {{ingredient_image_1}} 1. Preheat your oven to 425°F (220°C). This heat makes the cheese melt perfectly. 2. Grab your flatbread, either store-bought or homemade, and place it on a baking sheet. A flat surface helps it bake evenly. 3. Drizzle olive oil on the flatbread. This step adds flavor and keeps it from sticking. 4. Spread the fresh basil pesto over the flatbread. Leave a small border around the edges for a crispy crust. 5. In a bowl, mix the ricotta cheese with a pinch of salt and pepper. Stir until it’s smooth and creamy. 6. Add dollops of the ricotta mixture on top of the pesto. Make sure to spread it evenly. 7. Scatter shredded mozzarella cheese over the ricotta. The more, the better for melty goodness! 8. Add halved cherry tomatoes on top. They bring a fresh burst of flavor. 9. Finally, sprinkle the toasted pine nuts. They add a nice crunch and a bit of richness. 1. Place the baking sheet in the preheated oven. Bake for about 12-15 minutes. 2. Keep an eye on it. The cheese should be bubbly and slightly golden when done. 3. Once it’s ready, remove the flatbread pizza from the oven. Let it cool for a minute. - Use a baking sheet instead of a pan for better airflow. - If you prefer a crunchier base, pre-bake the flatbread for 5 minutes before adding toppings. - Check the pizza at the 10-minute mark. Ovens vary, so keep an eye on it. - Allowing the pizza to cool for a minute helps the toppings set. To make the ricotta mixture smooth, start with fresh ricotta. Add a pinch of salt and pepper. Mix it well with a fork or a whisk. You want it creamy and easy to spread. This makes your pizza taste great. For extra flavor, you can add herbs like thyme or oregano. Just mix them in before spreading. When you have leftovers, store them in an airtight container. Let the pizza cool completely before sealing. This helps keep it fresh. You can keep it in the fridge for up to three days. If you want to keep it longer, freeze it. Wrap the slices tightly in plastic wrap first. Then place them in a freezer bag. It can last for up to two months in the freezer. Pair your pesto ricotta flatbread pizza with a fresh salad. A simple green salad works well. You can use mixed greens, cherry tomatoes, and a light vinaigrette. Another great side is roasted veggies. Roasted zucchini or bell peppers add color and flavor. For a fun twist, serve it with garlic bread. The warm, buttery taste complements the pizza nicely. Pro Tips Use Fresh Ingredients: Fresh basil and ripe cherry tomatoes can elevate the flavor of your flatbread pizza significantly. Look for the best quality produce for the best results. Customize Your Cheese: Feel free to mix different types of cheese, such as goat cheese or parmesan, for a unique flavor profile. This can add complexity to your dish. Pre-bake the Flatbread: For an extra crispy base, pre-bake the flatbread for a few minutes before adding the toppings. This can help prevent it from becoming soggy. Experiment with Toppings: Don’t hesitate to add other toppings like arugula, olives, or grilled vegetables. Get creative and make it your own! {{image_2}} For a tasty vegetarian twist, try adding more veggies. You can use spinach, zucchini, or bell peppers. Sauté them lightly for extra flavor. Fresh arugula adds a peppery kick. You can also add olives for a salty bite. These choices keep it fresh and flavorful. To make this pizza vegan, swap out the ricotta and mozzarella. Use dairy-free cheese for a similar taste. You can also make a creamy cashew cheese. Blend soaked cashews with lemon juice and nutritional yeast. This gives a rich, cheesy flavor without dairy. Use vegan pesto, made without cheese, to keep it plant-based. Change your toppings with the seasons. In summer, use ripe heirloom tomatoes for sweetness. In fall, add roasted butternut squash for a cozy twist. Fresh herbs like oregano or thyme can add freshness. These swaps keep your flatbread pizza exciting all year. To store leftover pesto ricotta flatbread pizza, let it cool first. Wrap the pizza tightly in plastic wrap or foil. You can also place it in an airtight container. This helps keep the flavors fresh and prevents drying. Store it in the fridge for up to three days. If you want to freeze the pizza, follow these steps. Let the pizza cool completely. Wrap each slice in plastic wrap, then place them in a freezer bag. Be sure to remove as much air as possible. You can freeze it for up to three months. When ready to eat, just thaw it in the fridge overnight. Reheat your pizza for the best taste. Preheat your oven to 375°F (190°C). Place the slices on a baking sheet. Heat for about 10 to 15 minutes, until the cheese is bubbly. You can also use a skillet. Heat it over medium heat for about five minutes. Cover the skillet to help melt the cheese evenly. Enjoy your pizza as if it were fresh out of the oven! Pesto Ricotta Flatbread Pizza is a tasty dish that combines flatbread with rich toppings. You start with a flatbread base, like naan or pita. Then, you spread fresh basil pesto over it. Next, you add creamy ricotta cheese, melty mozzarella, and juicy cherry tomatoes. Finally, sprinkle toasted pine nuts for crunch. It’s a quick and flavorful meal that’s perfect for lunch or dinner. Yes, you can prepare parts of this pizza ahead of time. Make the pesto and mix the ricotta cheese in advance. Store them in the fridge for a few days. When you’re ready to eat, just assemble the pizza and bake it. This saves time and lets you enjoy a fresh meal without much fuss. Flatbread pizza is fun because you can customize it easily. Some popular toppings include: - Sliced olives - Roasted bell peppers - Fresh spinach - Grilled chicken - Feta cheese - Arugula Feel free to mix and match based on your tastes. This makes each pizza unique and delicious! In this blog post, I covered the key ingredients and steps for making pesto ricotta flatbread pizza. You learned how to mix flavors and use substitutes when needed. I shared tips to perfect your bake and how to store leftovers. Also, I explored tasty variations and answered common questions about the dish. In closing, this pizza is a great choice for any meal. Enjoy your cooking and share your delicious results!

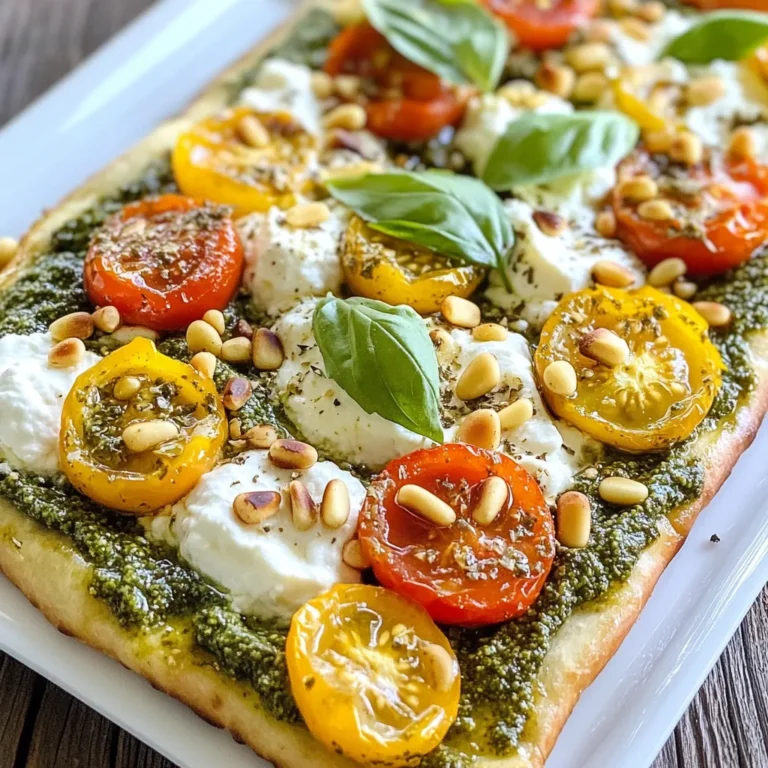
Pesto Ricotta Flatbread Pizza Simple Flavorful Meal

PREV 1 … 48 49 50 … 57 NEXT
quick dish kitchen

explore

DessertsDinnerAppetizersDrinks

Our Policies

  • Cookie Policy
  • Copyright Policy
  • Disclaimer
  • GDPR Policy
  • Terms Of Use
Back to Top
  • About
  • Contact Us
  • Privacy Policy
© 2025 quick dish kitchen