FREE DINNER EBOOK! Get your copy!
  • Cookie Policy
  • GDPR Policy
  • Disclaimer
  • Terms Of Use
  • Visit my other site: Fun Cookie Recipes
quick dish kitchen
  • Home
  • Dinner
  • Desserts
  • Drinks
  • Appetizers
  • Contact
  • About
  • Privacy Policy
  • Home
  • Dinner
  • Desserts
  • Drinks
  • Appetizers
  • Contact
  • About
  • Privacy Policy
  • Cookie Policy
  • GDPR Policy
  • Disclaimer
  • Terms Of Use
Visit my other site: Fun Cookie Recipes

HOME / CATEGORIES /

Latest

For a vibrant Mediterranean chickpea salad, gather these key ingredients: - 1 can (15 oz) chickpeas, drained and rinsed - 1 cup cherry tomatoes, halved - 1 cucumber, diced - 1 red bell pepper, diced - ½ red onion, finely chopped - ¼ cup black olives, sliced - ¼ cup feta cheese, crumbled - 2 tablespoons fresh parsley, chopped - 3 tablespoons olive oil - 2 tablespoons lemon juice - 1 teaspoon dried oregano - Salt and pepper, to taste These ingredients give the salad its fresh and colorful look. The chickpeas add protein while the veggies offer crunch. You can make this salad your own with a few extra touches. Try adding: - Avocado for creaminess - Spinach or kale for added greens - Quinoa for more texture and protein - Artichoke hearts for a unique flavor - Nuts like almonds for crunch These options let you play with flavors and textures. Feel free to mix and match based on what you like! This salad is not only tasty but also healthy. Here’s a quick look at its benefits: - High in protein and fiber from chickpeas - Rich in vitamins from fresh veggies - Healthy fats from olive oil and olives - Low in calories, making it a great light meal Each serving is packed with nutrients. Enjoy this tasty salad as a meal or a side dish, knowing it fuels your body well! {{ingredient_image_1}} To make this Mediterranean chickpea salad, start by gathering your ingredients. You need: - 1 can (15 oz) chickpeas, drained and rinsed - 1 cup cherry tomatoes, halved - 1 cucumber, diced - 1 red bell pepper, diced - ½ red onion, finely chopped - ¼ cup black olives, sliced - ¼ cup feta cheese, crumbled - 2 tablespoons fresh parsley, chopped In a large mixing bowl, combine the chickpeas, cherry tomatoes, cucumber, red bell pepper, red onion, and black olives. Make sure to mix them well but gently, so you don’t squish the tomatoes. To ensure even mixing, use a large bowl. This gives you space to toss the ingredients. Start with the lighter ingredients first, like the chickpeas and tomatoes. Add the denser items, like cucumber and bell pepper, last. This helps keep everything intact. Toss everything gently with a spoon, or use your hands. Just be careful not to mash the ingredients. Now, let’s make the dressing. In a smaller bowl, whisk together: - 3 tablespoons olive oil - 2 tablespoons lemon juice - 1 teaspoon dried oregano - Salt and pepper, to taste Whisk until smooth and well mixed. Pour this dressing over your salad mixture. Toss gently until all ingredients are coated with the dressing. This adds flavor to every bite. Finally, sprinkle the feta cheese and parsley on top. Give it one last gentle toss before serving. Use fresh ingredients for the best taste. Look for firm tomatoes and crisp cucumbers. Choose bright red bell peppers and fresh parsley. Always rinse and drain canned chickpeas well. This step removes extra sodium and improves flavor. Add a pinch of cayenne pepper for heat. Try fresh basil or mint for a twist. You can also use balsamic vinegar instead of lemon juice. A dash of garlic powder adds depth, too. Mix in some artichoke hearts for more texture. Serve the salad in a large, shallow bowl. This makes it easy to scoop. Garnish with extra olives and parsley leaves. For fun, use mason jars for individual servings. It looks great and is easy to take on the go! Pro Tips Fresh Ingredients: Always use fresh vegetables for the best flavor and texture in your Mediterranean Chickpea Salad. Chill Before Serving: Allow the salad to chill in the refrigerator for at least 30 minutes before serving to let the flavors meld beautifully. Customizable Add-Ins: Feel free to add other ingredients like avocado, artichokes, or even grilled chicken to suit your taste preferences. Meal Prep Friendly: This salad keeps well in the fridge, making it a great option for meal prep. Just store the dressing separately until ready to eat. {{image_2}} To make this salad vegan, simply skip the feta cheese. You can add in avocado for creaminess. Nutritional yeast is a great way to add cheesy flavor without dairy. You might also try marinated tofu or tempeh cubes for extra protein. If you want to switch cheeses, try goat cheese or vegan cheese. Ricotta works well too, adding a nice texture. Each cheese gives a different taste, so feel free to experiment. A sprinkle of Parmesan can also add a salty kick. You can change the salad based on the season. In spring, add fresh peas or asparagus. In summer, throw in diced bell peppers or zucchini. Fall is perfect for adding roasted butternut squash. Winter calls for crispy radishes or hearty kale. Each season brings new flavors to enjoy! Store your Mediterranean chickpea salad in an airtight container. This keeps it fresh and tasty. Make sure it cools to room temperature before sealing it. If you have extra dressing, store it separately. This helps avoid soggy salad. Your chickpea salad lasts about 3 to 5 days in the fridge. After that, the veggies may lose their crunch. Always check for any strange smells or colors before eating. If it looks or smells off, throw it away. Freezing this salad isn’t the best option. The texture of the veggies changes after freezing. If you must freeze it, only freeze the chickpeas. Pack them in a freezer-safe bag. They last up to 3 months in the freezer. When ready, thaw them in the fridge overnight. Then mix with fresh veggies and dressing. Yes, you can use dried chickpeas! First, soak them overnight in water. This softens them. After soaking, boil the chickpeas until they are soft. This may take about one to two hours. Rinse them well before adding to your salad. Using dried chickpeas gives a great texture and flavor. If you want to skip feta cheese, try using goat cheese or ricotta. These cheeses add creaminess and taste. You can also use a vegan cheese if you prefer a plant-based option. Tofu works too, especially when crumbled. Each choice will change the flavor slightly but will still be tasty. To spice up your salad, add some chopped jalapeños or red pepper flakes. These will bring heat and flavor. You can also mix in a dash of hot sauce when you make the dressing. If you like it really hot, try adding diced habanero peppers. Just be careful; a little goes a long way! In this post, we covered the key ingredients and steps for a delicious chickpea salad. You learned how to mix flavors and customize your dish. We also shared tips for fresh ingredients, storage, and variations. With these insights, you can make a salad that suits your taste and needs. You now have simple ways to enjoy this meal all week. Use these ideas to create your perfect salad. Dive in and enjoy every bite!

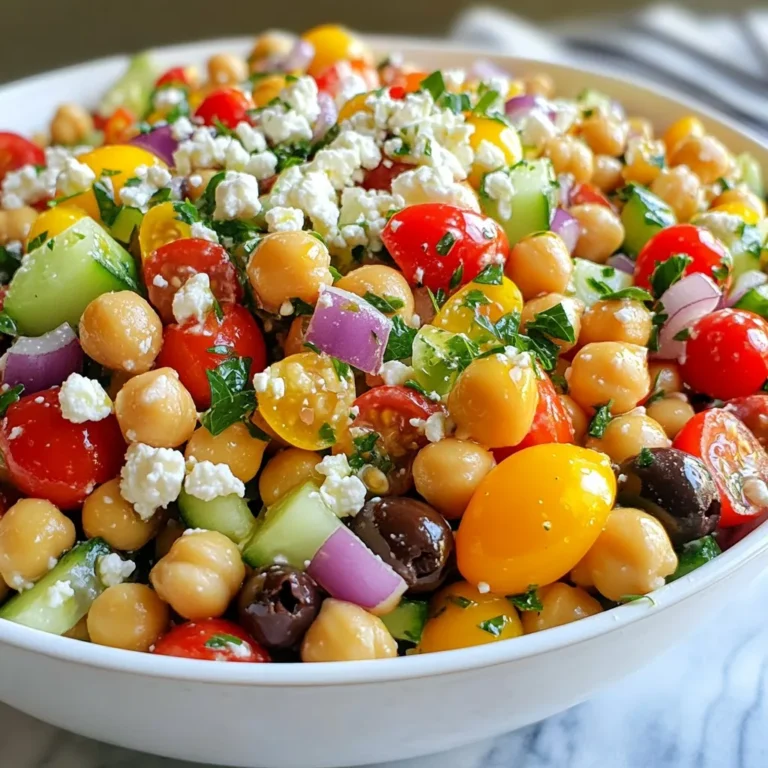
Mediterranean Chickpea Salad Fresh and Healthy Dish

- 1 lb boneless, skinless chicken thighs, sliced into thin strips - 2 tablespoons soy sauce - 2 tablespoons honey - 1 tablespoon rice vinegar - 1 tablespoon sesame oil - 1 red bell pepper, sliced - 1 yellow bell pepper, sliced - 1 cup sugar snap peas - 1 small broccoli head, cut into florets - 2 cloves garlic, minced - 1 tablespoon freshly grated ginger - Cooked jasmine rice (for serving) For the teriyaki chicken stir fry, the main ingredients focus on fresh and vibrant flavors. The chicken thighs offer rich taste and tenderness. The mix of colorful vegetables adds crunch and nutrients. The teriyaki sauce blends sweet and savory notes. This creates a perfect balance in every bite. - 2 green onions, sliced (for garnish) - Sesame seeds (for garnish) Garnishing your dish makes it look appealing. Green onions add a fresh crunch. Sesame seeds bring a nutty flavor. Both make your stir fry pop with color and taste. - Chicken Alternatives: You can use chicken breasts or firm tofu for a vegetarian option. - Vegetable Variations: Feel free to swap in carrots, bell peppers, or any seasonal veggies. If you want to switch things up, consider using different proteins. Tofu is a great meatless option. You can also mix in any vegetables you have on hand. This flexibility lets you enjoy teriyaki chicken stir fry in many ways! {{ingredient_image_1}} Mixing Ingredients in a Bowl To make the teriyaki sauce, grab a small bowl. Add 2 tablespoons of soy sauce, 2 tablespoons of honey, 1 tablespoon of rice vinegar, and 1 tablespoon of sesame oil. Stir these ingredients well until they blend into a smooth sauce. Setting Aside the Sauce After mixing, set the sauce aside. This allows the flavors to meld. You will add it to the chicken and veggies later. Sautéing Techniques Heat a large skillet or wok over medium-high heat. Add a splash of oil to the pan. Once hot, add the sliced chicken thighs. Cook them for about 5-7 minutes. Stir often to ensure they brown evenly. Timing for Perfectly Cooked Chicken Check that the chicken is golden brown and cooked through. Use a meat thermometer if you have one. The chicken should reach 165°F. This step ensures safe and tasty meat. Stir-Frying Techniques Once the chicken is ready, add 2 cloves of minced garlic and 1 tablespoon of grated ginger. Stir for 1-2 minutes until fragrant. Next, toss in the sliced red and yellow bell peppers, sugar snap peas, and broccoli florets. Ensuring Tender-Crisp Texture Stir-fry the vegetables with the chicken for about 3-4 minutes. You want them to be bright and tender-crisp. Watch them closely to keep that perfect texture. Now you are ready to add the teriyaki sauce and finish this delicious dish! Heat Control Tips Start with a hot skillet or wok. Preheat it for a few minutes. This helps the chicken cook quickly and evenly. Use medium-high heat for best results. If the heat is too low, the chicken will steam instead of brown. This can affect the flavor and texture. Cooking Order for Best Results Cook the chicken first. It needs the most time to cook through. After the chicken is done, add garlic and ginger. They only need a minute to release their flavor. Then, add your veggies. Start with harder ones like broccoli. Follow with softer ones like bell peppers. This way, all ingredients stay crisp and fresh. Adjusting Sweetness and Saltiness The teriyaki sauce has sweet and salty flavors. If you want it sweeter, add more honey. If it’s too sweet, add a splash of soy sauce. Taste the sauce as you go. This helps you find a balance that you love. Adding Spice for Heat Want some heat? Add red pepper flakes or sriracha. Start with a small amount and taste. You can always add more if needed. This gives your dish an exciting kick! Best Foods to Pair with Teriyaki Chicken Serve your teriyaki chicken over fluffy jasmine rice. The rice soaks up the sauce well. You can also add a side of steamed vegetables. This keeps your meal healthy and colorful. Plate Presentation Tips Make your plate look fun! Use a white plate to make the colors pop. Arrange the chicken on one side and rice on the other. Sprinkle green onions and sesame seeds on top. This makes your dish look fancy and inviting! Pro Tips Marinate for More Flavor: Allow the chicken to marinate in the teriyaki sauce for at least 30 minutes before cooking to enhance its flavor. Use Fresh Vegetables: Opt for fresh, seasonal vegetables to ensure maximum flavor and nutrients in your stir fry. High Heat for Quick Cooking: Stir-frying on high heat helps to sear the chicken and vegetables quickly, keeping them tender and juicy. Garnish for Presentation: Don’t skip the garnishes like green onions and sesame seeds; they add a burst of flavor and make your dish visually appealing. {{image_2}} Making it Vegetarian If you want to make a vegetarian version, use tofu. Tofu absorbs flavors well. Press it to remove water, then cut it into cubes. Sauté it just like you would chicken. This gives you a tasty and filling meal. Using Different Meats You can swap chicken for beef, pork, or shrimp. For beef, use flank steak, sliced thin. For pork, try tenderloin or shoulder. If you prefer shrimp, use large shrimp and sauté them until they turn pink. Seasonal Vegetable Ideas Feel free to add seasonal vegetables. In spring, try asparagus or snap peas. In summer, zucchini and bell peppers work great. In fall, add carrots or mushrooms. In winter, use kale or Brussels sprouts. Each season brings fresh tastes. Using Frozen Vegetables Frozen vegetables are handy. They are quick to use and often just as tasty as fresh. Use a mix of frozen stir-fry vegetables. They cook fast and add color and crunch to your dish. Adding Nuts or Seeds For extra crunch, add nuts or seeds. Cashews or almonds work well. Just toss them in at the end. They add a nice texture and flavor to the dish. Experimenting with Different Sauces Try different sauces for new tastes. You can mix teriyaki with hoisin or sweet chili sauce. This gives your stir fry a unique twist. Don't be afraid to adjust flavors to your liking. For storing leftovers, choose airtight containers. Glass or plastic works well. These keep your teriyaki chicken fresh. Always let the dish cool before sealing. This helps prevent moisture buildup. Keep your leftovers in the fridge. They stay good for about 3 to 4 days. If you want to enjoy them later, consider freezing. To reheat your stir fry, use a skillet. Heat it on medium. Add a splash of water or broth. This keeps the chicken juicy and tender. Stir often, so everything heats evenly. You can also use the microwave. Place the stir fry in a bowl, cover it, and heat in short bursts. Stir in between to maintain texture and flavor. To freeze teriyaki chicken stir fry, let it cool completely. Then, divide it into portions. Use freezer-safe containers or bags. Squeeze out excess air to prevent freezer burn. When ready to enjoy, thaw the stir fry overnight in the fridge. For a quick option, use the microwave. Just make sure to reheat it thoroughly before serving. Making teriyaki sauce is easy and fun. Here’s a simple recipe: - 2 tablespoons soy sauce - 2 tablespoons honey - 1 tablespoon rice vinegar - 1 tablespoon sesame oil 1. In a small bowl, mix all the ingredients. 2. Stir until the honey dissolves. 3. Set aside while you cook. This sauce is sweet and salty. It adds great flavor to your stir fry. Yes! You can use different cuts of chicken. Here are some options: - Boneless, skinless chicken breasts - Chicken tenders - Thighs with skin (for extra flavor) Each cut offers a unique taste. Thighs are juicy and tender. Breasts are lean and cook quickly. Choose what you like best! Teriyaki chicken stir fry can be healthy. Here’s why: - Chicken provides protein for muscle growth. - Veggies add fiber, vitamins, and minerals. - Using honey gives a natural sweetness. Portion control is key. Serve it over jasmine rice for carbs. This meal is balanced and delicious! In this blog post, we explored how to create a delicious teriyaki chicken stir fry. We covered key ingredients, from the chicken to vegetables and sauce. I shared step-by-step cooking instructions, tips for perfecting your stir fry, and ways to adjust flavors. We also discussed variations like protein substitutes and vegetable combinations, plus storage and reheating tips. Embrace the creativity in your cooking. This recipe is adaptable, so don't hesitate to make it your own!

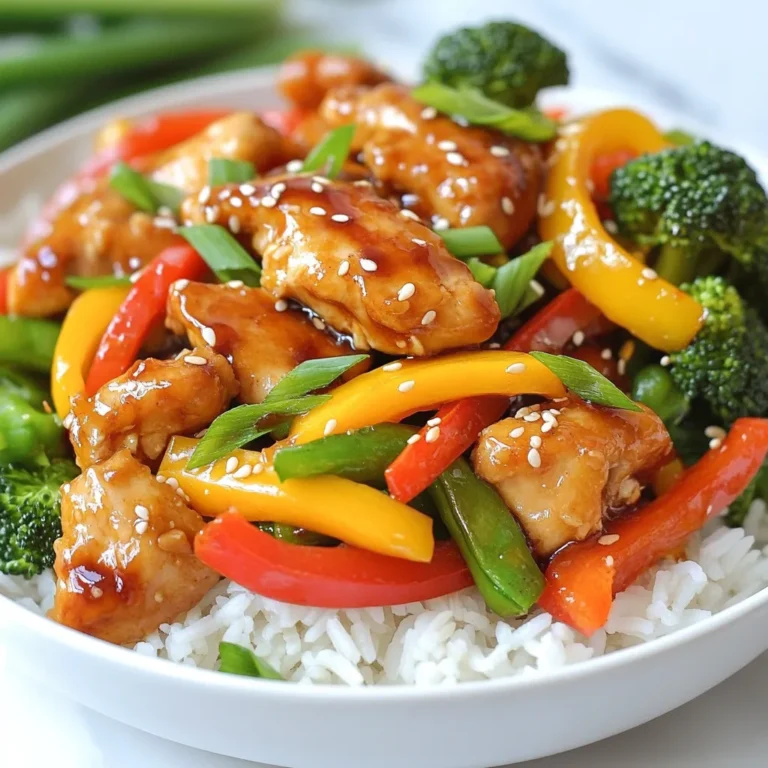
Teriyaki Chicken Stir Fry Quick and Tasty Recipe

To make Creamy Mushroom Spinach Orzo, gather these simple ingredients: - 1 cup orzo pasta - 2 tablespoons olive oil - 1 medium onion, finely chopped - 3 cloves garlic, minced - 8 ounces mushrooms, sliced (cremini or button) - 4 cups fresh spinach, roughly chopped - 1 cup vegetable broth - 1 cup heavy cream (or coconut cream for a dairy-free option) - ½ cup grated Parmesan cheese (or nutritional yeast for a vegan option) - 1 teaspoon dried thyme - Salt and pepper to taste - Fresh parsley, chopped (for garnish) You can easily adapt this dish for different diets. Here are some swaps: - Use whole wheat or gluten-free orzo for gluten-free options. - Replace heavy cream with coconut cream for a dairy-free meal. - Substitute Parmesan cheese with nutritional yeast to keep it vegan. - Swap olive oil for avocado oil if you prefer. Using fresh herbs brings a bright taste to your dish. Fresh parsley adds color and flavor. For dried herbs, thyme works well in this recipe. Dried herbs are more concentrated, so use less. Aim for about one-third the amount of dried herbs compared to fresh. This way, you keep the flavor balance just right. {{ingredient_image_1}} First, fill a large pot with water and add a pinch of salt. Bring the water to a boil. Once boiling, pour in 1 cup of orzo pasta. Cook the orzo according to the package directions, which usually takes about 8-10 minutes. You want it to be al dente, which means it should still have a little bite. After cooking, drain the orzo and set it aside. In the same pot, add 2 tablespoons of olive oil and heat it over medium. Once the oil is warm, add 1 finely chopped onion. Cook it for about 3-4 minutes until it becomes translucent. Then, add 3 minced garlic cloves. Stir for about a minute until you smell that lovely garlic scent. Next, add 8 ounces of sliced mushrooms to the pot. Cook these for 5-7 minutes. You want them to brown and release their moisture. After that, stir in 4 cups of roughly chopped spinach. Cook for another 2-3 minutes until the spinach wilts down. Now, pour in 1 cup of vegetable broth and bring it to a gentle simmer. Add 1 cup of heavy cream and stir well. Let the mix simmer for 3-4 minutes until it thickens slightly. Now, return the cooked orzo to the pot. Stir in ½ cup of grated Parmesan cheese (or nutritional yeast if you prefer). Add 1 teaspoon of dried thyme and season with salt and pepper to taste. Mix everything well until heated through. Your creamy mushroom spinach orzo is now ready to serve! To get that smooth and creamy feel, start with heavy cream. If you need a dairy-free option, use coconut cream. As you stir in the cream, let it heat gently. Avoid boiling, as this can break the cream. Let it simmer for a few minutes. This helps thicken the dish without losing flavor. The starch from the orzo also adds to the creaminess. So, don’t rush it; let everything meld together. When cooking mushrooms, always start with a hot pan. This helps them brown nicely. Use olive oil for flavor. Once they hit the pan, leave them alone for a few minutes. This way, they can release their moisture and brown well. Stirring too often can prevent this. Cook them until they turn golden brown. This deep flavor enhances your dish a lot. Remember, fresh mushrooms give the best taste. For a flavor boost, add fresh herbs like parsley right before serving. Dried thyme works well, too, but fresh herbs pack a punch. Consider adding a splash of lemon juice. It brightens up the dish and adds a nice zing. Don’t forget salt and pepper; taste as you go. Adjust to your liking. A pinch of red pepper flakes can also add warmth without overpowering the dish. Each of these tips helps bring out the best in your creamy mushroom spinach orzo. Pro Tips Use Fresh Spinach: Fresh spinach wilts beautifully and offers a vibrant flavor. If using frozen spinach, make sure to thoroughly drain and squeeze out excess moisture before adding it to the dish. Customize Your Mushrooms: Experiment with different types of mushrooms like shiitake or portobello for varied flavors and textures. Mixing varieties can also enhance the dish. Make it Vegan: Substitute heavy cream with coconut cream and use nutritional yeast instead of Parmesan for a delicious vegan version that doesn’t compromise on creaminess. Perfectly Cooked Orzo: To avoid mushy orzo, be sure to cook it al dente according to the package instructions, as it will continue to cook slightly when combined with the sauce. {{image_2}} You can add protein to make this dish heartier. Grilled chicken works well. Simply slice it and mix it in at the end. Tofu is a great choice for a plant-based option. Use firm tofu, cube it, and sauté it with the mushrooms. This adds texture and flavor. To keep it vegan, replace heavy cream with coconut cream. It gives a rich taste without dairy. Use nutritional yeast instead of Parmesan cheese for a cheesy flavor. Both swaps keep the meal creamy and delicious. Make sure your vegetable broth is vegan too. You can change the veggies with the seasons. Try adding asparagus in spring. In summer, use zucchini or tomatoes. Fall brings squash or kale, while winter is perfect for root veggies. These variations not only add flavor but also boost nutrition. Plus, it keeps the dish fresh and exciting. To keep your leftover creamy mushroom spinach orzo fresh, place it in an airtight container. Let it cool to room temperature first. Then, seal it tightly and store it in the fridge. It should last for about 3 to 4 days. To keep flavors bright, try to consume it within this time frame. You can freeze creamy mushroom spinach orzo for later. Use a freezer-safe container or bag. Make sure to leave some space for expansion. Label it with the date. It will stay good for up to 2 months. When you are ready to enjoy it, thaw it overnight in the fridge. Reheating creamy mushroom spinach orzo is easy. If you stored it in the fridge, pour it into a pot. Heat on low to medium heat, stirring often. If it seems dry, add a splash of vegetable broth or cream. For frozen orzo, thaw it first. Then, reheat it in the pot or microwave until hot. Enjoy your cozy meal! Yes, you can make Creamy Mushroom Spinach Orzo ahead of time. It stores well in the fridge. Prepare it, then let it cool. Place it in an airtight container. It stays fresh for 3 to 4 days. When you're ready to eat, reheat it on the stove or in the microwave. Add a splash of broth or cream to keep it creamy. To make Creamy Mushroom Spinach Orzo gluten-free, simply swap the orzo pasta. Use gluten-free orzo or your favorite gluten-free pasta. Check the package for cooking times. The rest of the recipe stays the same. Your meal will still be rich and creamy. Enjoy the same great taste without gluten. Creamy Mushroom Spinach Orzo is great on its own. You can add a side salad for freshness. A slice of crusty bread pairs well too. For protein, add grilled chicken or shrimp. You can also sprinkle extra cheese on top before serving. Fresh herbs like basil or parsley add color and flavor. Enjoy your meal! In this article, we explored the key ingredients for Creamy Mushroom Spinach Orzo. You learned about substitutions for different diets and how to choose fresh or dried herbs. We covered step-by-step cooking methods, tips for the perfect texture, and ways to enhance flavors. You also discovered variations to customize the dish and storage tips for leftovers. This dish is versatile and easy to make ahead. With these tips, you can enjoy both a delicious meal and your personal touch. Happy cooking!

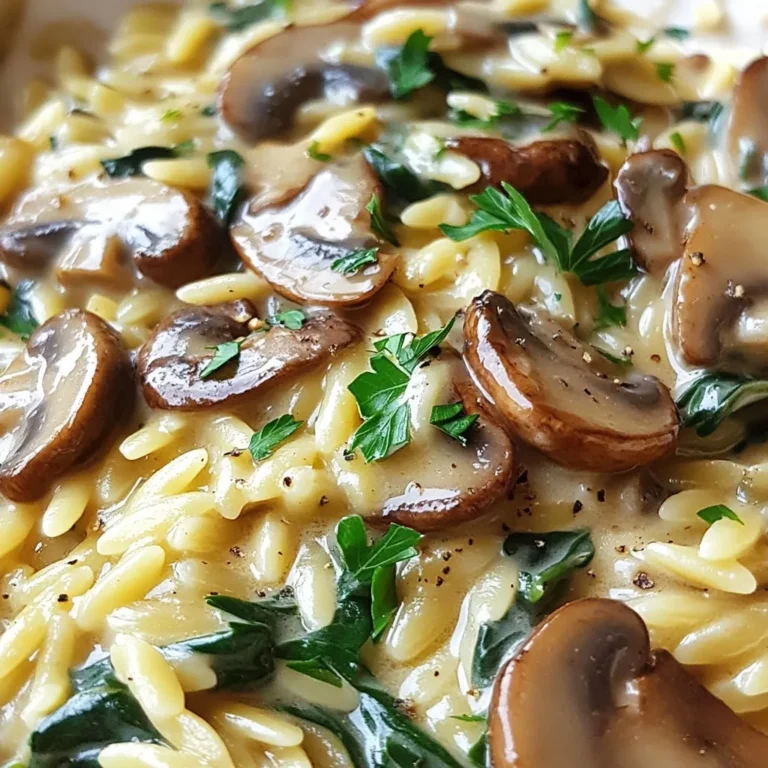
Creamy Mushroom Spinach Orzo Savory Comfort Meal

To create the tasty Caprese Stuffed Avocados, you need some fresh and simple ingredients. Here’s what you will need: - 2 ripe avocados - 1 cup cherry tomatoes, halved - 1 cup fresh mozzarella balls (bocconcini), halved - 1/4 cup fresh basil leaves, chopped - 2 tablespoons balsamic glaze - 1 tablespoon extra-virgin olive oil - Salt and pepper to taste Using ripe avocados is key. They should feel soft when you gently squeeze them. The cherry tomatoes add a sweet burst of flavor. Fresh mozzarella brings a creamy texture. Basil leaves give it a fragrant touch. Balsamic glaze offers a nice sweetness. Extra-virgin olive oil adds richness. Lastly, salt and pepper will bring everything together. These ingredients create a fresh and vibrant dish. Each bite is a mix of creamy, sweet, and tangy flavors. You can find these items at any grocery store. This recipe is quick and perfect for a light lunch or appetizer. {{ingredient_image_1}} To start, take your ripe avocados. Cut each one in half carefully. Remove the pit gently. Now, scoop out a bit of the flesh. This gives you more space for the filling. Keep the scooped-out flesh aside; you can mix it in later if you want. In a medium bowl, add the halved cherry tomatoes and mozzarella balls. Next, chop some fresh basil leaves and toss them in. Drizzle in the extra-virgin olive oil and balsamic glaze. Sprinkle with salt and pepper to taste. Gently toss everything together. You want all the flavors to mix well without mashing anything. Now comes the fun part! Take your avocado halves and fill them with the Caprese mixture. Spoon it in generously, filling each half to the top. For extra flair, drizzle a little more balsamic glaze over the stuffed avocados. If you like, garnish with more basil leaves for a pretty touch. Serve these fresh for the best taste! To make the best Caprese stuffed avocados, you need ripe avocados. Look for avocados that feel slightly soft when you squeeze them. They should not be too mushy. You can also check the color. Dark green or almost black avocados are often ripe. If you press gently on the skin, it should leave a small dent. If you see any large dark spots, skip those avocados. Caprese stuffed avocados shine on their own but pair well with many dishes. Consider serving them with a side of garlic bread or a fresh green salad. A light pasta dish or grilled chicken can complement the flavors too. For a refreshing drink, try lemonade or iced tea to balance the meal. You can add more flavor to your Caprese stuffed avocados. Try adding a sprinkle of crushed red pepper for heat. A dash of garlic powder can also give depth to the dish. If you like a tangy twist, mix in some chopped sun-dried tomatoes. Fresh lemon juice can brighten the flavors. These small changes make the dish even more exciting! Pro Tips Choose Ripe Avocados: Make sure your avocados are perfectly ripe for the best flavor and creaminess. They should yield slightly to gentle pressure. Fresh Ingredients Matter: Use the freshest mozzarella and basil for a vibrant taste. Fresh ingredients elevate the dish significantly. Customize Your Fillings: Feel free to add other ingredients like olives or a sprinkle of red pepper flakes for an extra kick! Serve Immediately: For optimal flavor and texture, serve the stuffed avocados right after preparing them to prevent browning. {{image_2}} You can switch up your cheese in Caprese stuffed avocados. Try feta or goat cheese for a tangy twist. These cheeses add a creamy texture and bold flavor. Fresh mozzarella gives a mild taste, but other cheeses can enhance your dish. You can also use vegan cheese for a plant-based option. Herbs can change the flavor too. Basil is classic, but you might enjoy fresh oregano or thyme. These herbs can bring new life to your dish, making it more exciting. Use what you love or what you have on hand for a personal touch. Making a Caprese salad bowl is simple. Just chop the avocados instead of halving them. Mix the avocados with tomatoes, cheese, and herbs in a large bowl. Drizzle with olive oil and balsamic glaze. This creates a colorful, fresh salad you can serve at any gathering. It's a fun way to enjoy the same flavors in a new form. You can adjust the ingredients based on the seasons. In summer, add fresh corn or diced cucumber for crunch. In fall, consider roasted butternut squash for a warm touch. Winter can bring pomegranate seeds for a pop of color and sweetness. Using seasonal ingredients not only adds flavor but also keeps your meals fresh and interesting. To store your Caprese stuffed avocados, place them in an airtight container. Cover the dish with plastic wrap to keep moisture out. This helps prevent browning. Store the container in the fridge. Use it within a day for the best taste. Reheating stuffed avocados is tricky. I recommend not using the microwave. Instead, place them in a warm oven at 350°F (175°C) for about 5-10 minutes. This keeps the avocado creamy without cooking it too much. Serve them warm for a tasty treat. These stuffed avocados stay fresh in the fridge for one day. After that, the avocado might brown and lose its flavor. If you want to keep the filling, store it separately. You can use the filling for salads or other dishes later. Yes, you can prep some parts ahead of time. Cut and pit the avocados just before serving. If you prep the filling, keep it in the fridge. The filling stays fresh for a day. Just mix in the balsamic glaze right before you eat. This keeps everything bright and tasty. These stuffed avocados pair well with many sides. Try serving them with a light salad. A fresh arugula salad adds a nice touch. You can also serve them with crusty bread. A slice of garlic bread works great too. For a fun twist, add some grilled shrimp or chicken for protein. To check if avocados are ripe, gently squeeze them. They should feel soft but not mushy. Look for a darker skin color; this often means they are ripe. You can also press near the stem. If it gives a little, it's ready to eat. If it's hard, give it a few days to ripen. This blog shows you how to make Caprese Stuffed Avocados with simple steps. We began with a list of tasty ingredients like ripe avocados, fresh mozzarella, and cherry tomatoes. Then, I guided you through preparing, filling, and serving your dish. We discussed tips for choosing the best avocados and various ways to reinvent this recipe. Lastly, I shared storage methods and answered common questions about the dish. By following these tips, you can enjoy a fresh, flavorful meal that impresses anyone at your table.

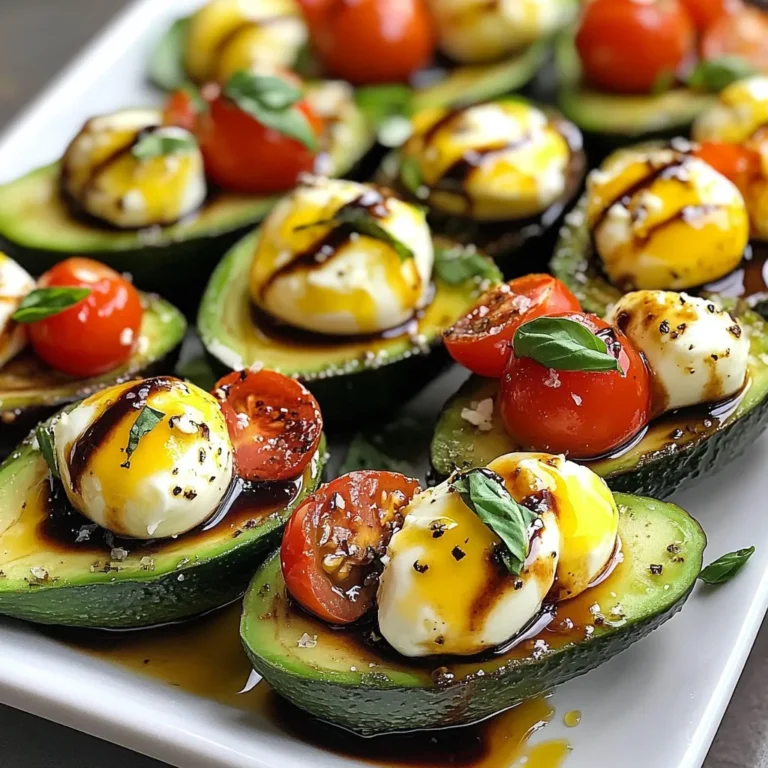
Caprese Stuffed Avocados Flavorful and Fresh Dish

- 4 bell peppers (any color) - 1 cup quinoa, rinsed - 2 cups vegetable broth - 1 can (15 oz) black beans, rinsed and drained - 1 cup corn (fresh or frozen) - 1 small red onion, diced - 2 garlic cloves, minced - 1 teaspoon ground cumin - 1 teaspoon chili powder - 1 teaspoon smoked paprika - Salt and pepper, to taste - 1 cup cherry tomatoes, halved - ½ cup fresh cilantro, chopped - 1 cup shredded cheese (optional for topping) - 1 avocado, sliced (for garnish) You can mix and match some ingredients. If you don't have bell peppers, zucchini works well too. Use brown rice instead of quinoa for a different grain. Canned chickpeas can replace black beans. For a fresh twist, add diced jalapeños for heat. You can skip the cheese if you want a lighter dish. Fresh herbs like parsley can replace cilantro for a new flavor. These stuffed peppers are packed with nutrients. Each serving is rich in fiber from quinoa and beans. The peppers give you vitamin C and antioxidants. This dish is also low in fat, especially if you skip the cheese. It's a balanced meal that fits well in various diets. Each pepper provides about 300 calories, making it a hearty option without being heavy. {{ingredient_image_1}} Start by preheating your oven to 375°F (190°C). Next, cut the tops off the bell peppers. Remove all seeds and membranes. Lightly season the insides with salt and pepper. Place them upright in a baking dish. In a medium saucepan, combine 1 cup of rinsed quinoa and 2 cups of vegetable broth. Bring this mix to a boil. Then, reduce the heat to low and cover the pot. Let it simmer for about 15 minutes until the quinoa is fluffy and absorbs the broth. While the quinoa cooks, heat a drizzle of olive oil in a large skillet over medium heat. Add 1 small diced red onion and sauté for 3-4 minutes until it softens. Then, add 2 minced garlic cloves, 1 teaspoon ground cumin, 1 teaspoon chili powder, and 1 teaspoon smoked paprika. Cook this mixture for another minute until it smells great. In a large bowl, mix the cooked quinoa, sautéed onion, 1 can of black beans (rinsed), 1 cup of corn, halved cherry tomatoes, and chopped cilantro. Stir everything together until well combined. Taste it and adjust seasoning with salt and pepper if needed. Now, spoon the quinoa mix into each prepared bell pepper. Pack it in gently. If you like cheese, sprinkle it on top of each stuffed pepper. Cover the baking dish with foil and bake the peppers for 25 minutes. Then, take off the foil and bake for another 10 minutes. This step helps the peppers get tender and the cheese to bubble. Once done, remove the dish from the oven and let it cool for a few minutes. Garnish with sliced avocado and extra cilantro before serving. When choosing bell peppers, look for ones that are firm and shiny. Avoid peppers with soft spots or wrinkled skin. Color matters, too. Red, yellow, and orange peppers are sweeter. Green peppers are more bitter. Pick the colors you like best for your fiesta. To make this dish easier, gather these tools: - Baking dish - Medium saucepan - Large skillet - Mixing bowl - Knife and cutting board - Measuring cups and spoons These tools help you work quickly and keep things neat. These stuffed peppers shine as a main dish. Serve them with a side salad for freshness. You can also add tortilla chips for crunch. For a kick, offer hot sauce on the side. Garnish with sliced avocado and extra cilantro for color and flavor. Pro Tips Choose Your Peppers Wisely: Opt for firm, vibrant bell peppers to ensure they hold their shape during baking and provide the best flavor. Rinse Quinoa Thoroughly: Rinsing quinoa before cooking removes its natural coating, called saponin, which can impart a bitter taste. Customize Your Filling: Feel free to add other vegetables or proteins such as zucchini, mushrooms, or shredded chicken to make the dish your own. Serve with a Fresh Salsa: A side of fresh salsa or pico de gallo can enhance the flavors and add a fresh crunch to the stuffed peppers. {{image_2}} Fiesta Quinoa Stuffed Peppers work great for everyone! The recipe is vegetarian by nature. It includes quinoa, beans, and veggies. You can easily make it vegan by skipping the cheese. Just leave it out, and you still get a yummy meal. If you want a creamy touch, try adding avocado. Want some heat? You can make these peppers spicy! Add diced jalapeños or crushed red pepper flakes to the quinoa mix. You could also use a spicy salsa instead of tomatoes. This will kick up the flavor levels. If you love smoky flavors, try adding more smoked paprika. It gives a warm taste that many enjoy. Feel free to change up the filling! Instead of black beans, use pinto or kidney beans. You can also swap corn for diced zucchini or mushrooms. For a fresh twist, add chopped spinach or kale. This keeps the meal vibrant and full of nutrients. If you want extra protein, mix in cooked ground turkey or beef. The options are endless, so get creative! After your meal, let the stuffed peppers cool. Place them in an airtight container. You can keep them in the fridge for up to four days. Make sure to separate layers with parchment paper. This helps prevent sticking. If you have extra filling, store it in a separate container. To reheat, preheat your oven to 350°F (175°C). Place the peppers in a baking dish. Cover them with foil to keep moisture in. Heat for about 20 minutes. You can also use a microwave. Heat on medium power for about 2-3 minutes. Check to make sure they are hot all the way through. If you want to freeze, prepare the peppers but do not bake them. Wrap each pepper in plastic wrap. Then place them in a freezer bag. They can last for up to three months. When ready to eat, thaw them in the fridge overnight. Bake them at 375°F (190°C) for 30-35 minutes. Enjoy your meal whenever you want! Yes, you can make these stuffed peppers ahead of time. Prepare the filling and stuff the peppers. Store them in the fridge for up to 24 hours before baking. This way, the flavors can blend nicely. When ready to bake, just pop them in the oven. You might need to add a few extra minutes to the baking time. Stuffed peppers are great on their own, but you can add side dishes for a full meal. Here are some tasty ideas: - A fresh green salad - Cilantro lime rice - Guacamole and tortilla chips - A bowl of salsa These sides add color and flavor to your meal. Plus, they make it extra fun! To check if the peppers are done cooking, look for a few signs. The peppers should be tender and slightly wrinkled. You can poke them gently with a fork or knife. If it goes in easily, they are ready. If you used cheese, it should be bubbly and golden. Enjoy the smell; it’s a sign they are cooked perfectly! This blog post covered everything you need for flavorful Fiesta Quinoa Stuffed Peppers. We explored the key ingredients, detailed steps for cooking, and shared useful tips. You learned about delicious variations and how to store leftovers properly. Remember, making this dish can be fun and easy. You can mix in your favorite flavors or make it ahead of time. Enjoy serving these tasty stuffed peppers at your next meal. Dive into this recipe and let your creativity shine!

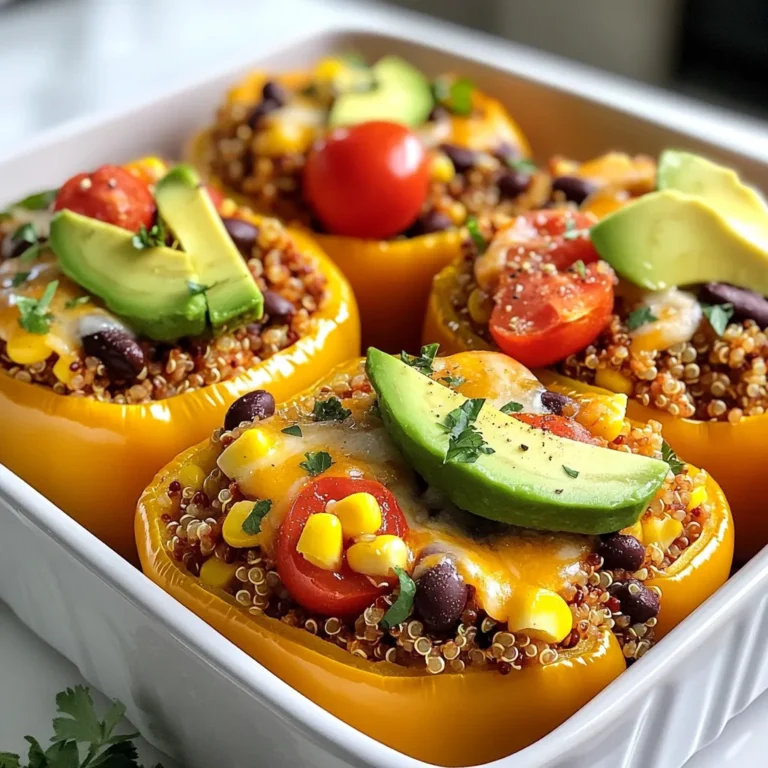
Fiesta Quinoa Stuffed Peppers Flavorful and Easy Meal

To make your Southwest Chicken Pasta Salad, gather these ingredients: - 2 cups pasta (rotini or penne) - 1 cup cooked chicken breast, shredded or diced - 1 cup cherry tomatoes, halved - 1 cup black beans, drained and rinsed - 1 cup corn (canned or frozen) - 1 red bell pepper, diced - ½ cup red onion, finely chopped - ½ cup fresh cilantro, roughly chopped - ½ cup cheddar cheese, shredded - ½ cup Greek yogurt - 2 tablespoons lime juice - 1 tablespoon olive oil - 1 teaspoon chili powder - 1 teaspoon cumin - Salt and pepper to taste Each serving of this salad has about: - Calories: 350 - Protein: 25g - Carbohydrates: 45g - Fat: 10g - Fiber: 10g This dish packs protein, fiber, and healthy fats. It gives you energy and keeps you full. When shopping, look for fresh and colorful veggies. Choose ripe cherry tomatoes and firm bell peppers. For chicken, use cooked breast for the best flavor and texture. If using canned corn or beans, check the labels for added sodium. Fresh cilantro adds a nice touch, so find bright green leaves. When picking cheese, go for sharp cheddar for more flavor. Always choose high-quality yogurt for creaminess. {{ingredient_image_1}} Start by boiling water in a large pot. Add the pasta and cook it until it is al dente. This usually takes about 8 to 10 minutes. Once done, drain the pasta and rinse it under cold water. This stops the cooking and cools it down. Set the pasta aside. Next, take a big mixing bowl. Add the shredded chicken, cherry tomatoes, black beans, corn, diced red bell pepper, and red onion. Mix these ingredients well. In a smaller bowl, whisk together Greek yogurt, lime juice, olive oil, chili powder, cumin, salt, and pepper. Make sure it’s smooth and creamy. Add the cooled pasta to the big bowl with the chicken and veggies. Now, pour the dressing over everything. Toss gently to coat all the ingredients well. Finally, fold in the fresh cilantro and cheddar cheese. Taste the salad and adjust salt and pepper as needed. Cover the bowl and chill it in the fridge for at least 30 minutes. This lets the flavors mix nicely. Before serving, stir the salad again. To get perfect pasta, always use plenty of water. This helps prevent sticking. Stir the pasta a few times while cooking. This keeps it moving and helps it cook evenly. Make sure to cook the pasta just until al dente. This means it should still have a little bite. Rinsing it under cold water after cooking stops the cooking process. This keeps the pasta from getting mushy. Preparing the dressing is simple. In a small bowl, combine Greek yogurt, lime juice, olive oil, chili powder, cumin, salt, and pepper. Whisk it until smooth. When mixing the dressing with the pasta, pour it over the ingredients. Toss everything well so each piece is coated. This ensures every bite has great flavor. Adding cilantro and cheese at the end gives a fresh taste and nice texture. To make your Southwest Chicken Pasta Salad pop, focus on fresh ingredients. Use ripe cherry tomatoes for a sweet bite. Fresh cilantro adds a bright taste. For more depth, toast your spices lightly before mixing them in. This helps release their full flavor. Lime juice brightens the dish and adds a zing. Adjust the lime juice to suit your taste. If you like it spicier, add more chili powder. Always taste as you go to find your perfect balance. One common mistake is overcooking the pasta. Cook it until it is al dente. This keeps the pasta firm and prevents it from getting mushy. Another mistake is skipping the chilling step. Chilling allows the flavors to blend well. Make sure to cover the salad tightly while it chills. This keeps it fresh and prevents it from drying out. Lastly, don’t forget to season your salad before serving. A pinch of salt and pepper can make a big difference. Garnishing your salad makes it visually appealing and adds extra flavor. Try topping it with extra cilantro for a fresh touch. A lime wedge on the side adds color and a hint of zest. You can also sprinkle more cheese on top for richness. If you like crunch, add crushed tortilla chips right before serving. This gives a nice texture contrast. Remember, the way you present your dish can make it even more enjoyable! Pro Tips Use Fresh Ingredients: Opt for fresh vegetables and herbs to enhance the flavor and nutritional value of your pasta salad. Customize Your Protein: Feel free to substitute the chicken with grilled shrimp or tofu for a different protein option. Make it Ahead: Prepare the salad a few hours in advance to allow the flavors to develop further; it tastes even better the next day! Serve Cold: Ensure the salad is well-chilled before serving to make it refreshing, especially on warm days. {{image_2}} You can easily swap ingredients in this salad. If you want a gluten-free dish, use gluten-free pasta. For dairy-free options, replace Greek yogurt with a dairy-free yogurt or avocado. If you prefer leaner protein, use turkey instead of chicken. You can also add more veggies like zucchini or carrots for extra crunch and nutrition. To spice things up, add diced jalapeños. Start with one jalapeño and taste as you go. You can always add more heat! Mix the jalapeños into the chicken and veggies. They add a nice kick and a fresh flavor. For a milder option, use pickled jalapeños. They bring a tangy taste without too much heat. To make a vegetarian Southwest pasta salad, skip the chicken. Instead, add more black beans and corn. You can use chickpeas for extra protein. Toss in some diced avocado for creaminess. You can also add grilled veggies like bell peppers and zucchini for a smoky flavor. This keeps the salad hearty and satisfying without meat. To keep your Southwest Chicken Pasta Salad fresh, store it in an airtight container. Ensure the lid seals tightly. If you have leftovers, divide the salad into smaller portions. This way, you can grab a quick meal later. You don’t need to heat this salad. Serve it cold for the best taste. If you prefer it warm, gently heat in a pan over low heat. Stir often to avoid sticking. Your pasta salad lasts for about three to five days in the fridge. Always check for any signs of spoilage before eating. If it smells off or looks strange, it’s best to toss it out. Enjoy your flavorful salad while it's fresh! I recommend using rotini or penne pasta. Both types hold dressing well. Their shapes let the sauce and flavors cling to each bite. This makes every forkful tasty and satisfying. Yes, you can use leftover chicken. Shredded or diced chicken works great. It saves time and adds flavor. Just make sure the chicken is cooked and safe to eat. You can store leftover pasta salad in the fridge for up to three days. Use an airtight container to keep it fresh. After three days, the taste and texture may change. Absolutely! Making this salad ahead is a great idea. It allows the flavors to blend well. Just cover it and chill in the fridge for at least 30 minutes before serving. This blog post covered everything you need for Southwest Chicken Pasta Salad. We discussed the right ingredients, cooking methods, and useful tips for great flavor. I shared storage tips and answered common questions, making preparation easy for you. Remember, whether you want a spicy kick or a vegetarian twist, you can adapt this dish to your taste. Enjoy your cooking, and don’t be afraid to experiment with flavors! Happy eating!

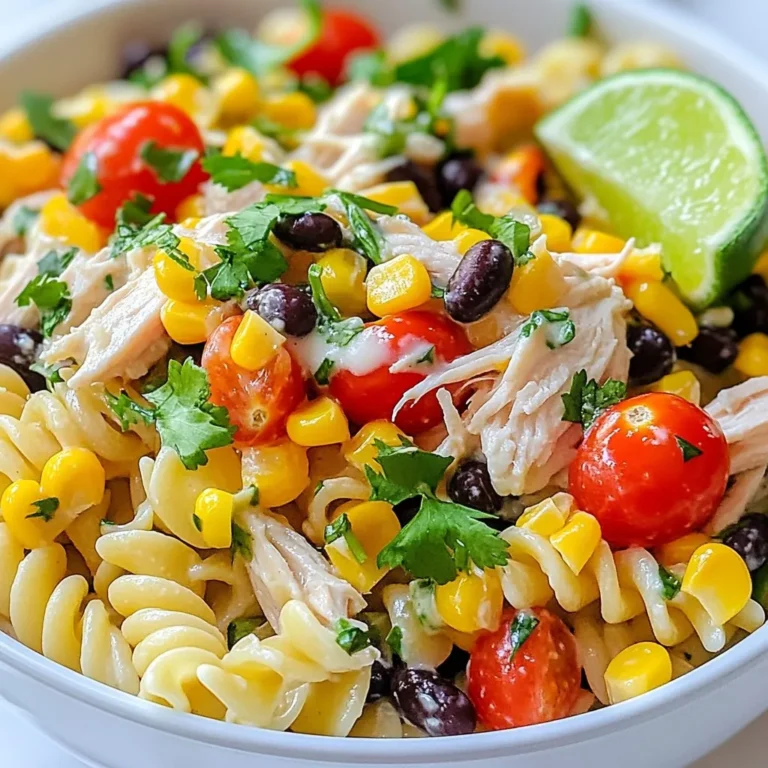
Savory Southwest Chicken Pasta Salad Recipe

- 1 cup quinoa, rinsed and drained - 2 cups vegetable broth - 1 tablespoon olive oil - 1 small onion, diced - 3 cloves garlic, minced - 1 red bell pepper, diced - 1 can (15 oz) black beans, rinsed and drained - 1 can (15 oz) corn, drained Quinoa is the star of this dish. It is a tasty grain full of protein. I always rinse it first to remove any bitter taste. The vegetable broth brings great flavor. I love using a low-sodium version for a balanced taste. Olive oil adds richness and helps sauté the veggies. - 1 tablespoon ground cumin - 1 tablespoon chili powder - ½ teaspoon smoked paprika - 1 teaspoon salt - ½ teaspoon black pepper Spices make this quinoa bowl special. Cumin adds a warm, earthy flavor. Chili powder gives it a nice kick. Smoked paprika adds depth with its smoky taste. Salt and black pepper enhance all the flavors. - 1 avocado, diced - 1 lime, juiced - Fresh cilantro, chopped (for garnish) - Jalapeño slices (optional, for extra heat) Fresh ingredients brighten the bowl. Diced avocado adds creaminess and balances the spice. Lime juice gives a zesty touch. Fresh cilantro adds a burst of flavor. If you like heat, jalapeño slices are a fun addition. {{ingredient_image_1}} 1. Rinsing and draining the quinoa Start by rinsing the quinoa under cold water. This removes the bitter coating. Drain it well. 2. Cooking quinoa in vegetable broth In a medium saucepan, combine the rinsed quinoa and vegetable broth. Bring it to a boil over medium-high heat. Then, reduce the heat to low. Cover the pot and let it simmer for about 15 minutes. The quinoa will absorb the broth. 3. Fluffing the quinoa after cooking Once the liquid is absorbed, remove the pot from heat. Let it sit covered for 5 minutes. Use a fork to fluff the quinoa before serving. 1. Heating olive oil and sautéing onion In a large skillet, heat 1 tablespoon of olive oil over medium heat. Add the diced onion. Sauté for about 3-4 minutes until it becomes soft. 2. Adding garlic and red bell pepper Next, add 3 cloves of minced garlic and 1 diced red bell pepper to the skillet. Cook for another 3-4 minutes until they soften. 3. Mixing in black beans and corn Stir in 1 can of black beans and 1 can of corn. Add the ground cumin, chili powder, smoked paprika, salt, and black pepper. Cook this mixture for 5-7 minutes until heated through. 1. Mixing cooked quinoa with sautéed vegetables Combine the cooked quinoa with the sautéed vegetable mixture. Stir well to ensure even mixing. 2. Adding lime juice for flavor Squeeze the juice of one lime over the mixture. Stir again to blend the flavors together. Now your Spicy Mexican Quinoa Bowl is ready to serve! You can add diced avocado and fresh cilantro on top for a burst of flavor. Enjoy! To get perfect quinoa, rinse it well. This removes the bitter coating. Use two cups of vegetable broth for one cup of quinoa. Bring it to a boil, then lower the heat. Cover it and let it simmer for about 15 minutes. After that, let it rest for five minutes. Fluff it with a fork to make it light and airy. For sautéing vegetables, start with medium heat. Heat your olive oil in a large skillet. Add diced onion first and cook for three to four minutes. It should soften but not brown. Then, add minced garlic and red bell pepper. Sauté for another three to four minutes. This builds great flavor in your dish. If you want more heat, try adding cayenne pepper or extra chili powder. You can also use fresh jalapeños for a spicy kick. For more depth, consider adding smoked paprika or even chipotle powder. For toppings, think beyond avocado and cilantro. You can add crumbled feta cheese or fresh lime wedges. Sliced radishes can add a nice crunch. You could also sprinkle some pumpkin seeds for texture. To serve the quinoa bowl attractively, use deep, colorful bowls. Layer the quinoa first, then add your sautéed veggies. Top with diced avocado and a sprinkle of cilantro. Drizzle some lime juice on top for a fresh touch. Consider using rustic dishes like wooden bowls or colorful ceramics. These enhance the visual appeal of your meal. You can also serve it on a large platter, letting everyone scoop their own portions. Pro Tips Rinse Quinoa: Always rinse quinoa before cooking to remove its natural coating, called saponin, which can make it taste bitter. Flavorful Broth: Using vegetable broth instead of water adds depth and richness to the quinoa, enhancing the overall flavor of the dish. Customize Veggies: Feel free to add or substitute any of your favorite vegetables, such as zucchini or spinach, for added nutrition and flavor. Serving Suggestions: This quinoa bowl is versatile; serve it warm or cold, and it pairs well with grilled chicken or shrimp for added protein. {{image_2}} You can switch up the grains in your Spicy Mexican Quinoa Bowl. Brown rice or farro works well. Both add a nutty flavor and different textures. You can also use millet or couscous for a fun twist. For beans, black beans are great, but feel free to use pinto or kidney beans. They add their own taste and texture. You can also mix in chickpeas for extra protein. When it comes to veggies, the choices are endless! Try corn, diced zucchini, or even roasted sweet potatoes for added sweetness. If you're looking to make this bowl vegan, you're in luck! The recipe is already plant-based. Just ensure your vegetable broth is vegan. For a gluten-free option, check your broth and spices to ensure they are free of gluten. Want a low-carb meal? Swap quinoa for cauliflower rice. It cooks quickly and absorbs flavors well. You can also cut down on the beans or corn for fewer carbs. Herbs and spices can change the whole dish. Try adding fresh cilantro or parsley for a bright taste. You can also use dried oregano or thyme for a different flavor. To adjust heat, use different peppers. For a milder taste, try bell peppers or poblano peppers. If you love spice, add serrano or habanero peppers. Just remember to taste as you go to find your perfect level of heat! To store your Spicy Mexican Quinoa Bowl, let it cool first. Place leftovers in airtight containers. Use glass or BPA-free plastic containers to keep it fresh. This bowl stays good in the fridge for up to four days. Always label your containers with the date to track freshness. To freeze the quinoa bowl, use freezer-safe containers. Portion out servings for easy use later. Make sure to leave some space at the top, as the quinoa expands when frozen. For best results, eat it within three months. Thaw the bowl in the fridge overnight before reheating. You can also use the microwave for quick thawing. Reheat until it's hot all the way through. The Spicy Mexican Quinoa Bowl lasts four days in the fridge. If frozen, it maintains quality for about three months. Always check for any off smells or changes in color before consuming. Keeping it stored properly helps ensure you enjoy every bite! To make quinoa less sticky, rinse it well before cooking. Use a fine mesh strainer. This removes the natural coating called saponin. Rinse until the water runs clear. For cooking, use a 2:1 ratio of broth to quinoa. This helps it cook evenly. After cooking, let it sit for five minutes. Then, fluff it gently with a fork. This keeps the grains separate. Yes, you can prepare this dish ahead of time. Cook the quinoa and sauté the veggies in advance. Store them in separate containers in the fridge. This keeps flavors fresh. When ready to serve, mix them together and heat as needed. You can also pack the bowl for lunch. Just add the avocado and lime juice just before eating. You can serve many sides with a Spicy Mexican Quinoa Bowl. Here are some ideas: - Fresh salsa or pico de gallo - Guacamole or spicy avocado dip - Tortilla chips for crunch - A side salad with lime dressing - Grilled corn on the cob - Jicama sticks with chili powder These sides add flavor and make the meal more fun! This blog post shared a delicious Spicy Mexican Quinoa Bowl recipe. We explored its main ingredients like quinoa, black beans, and fresh veggies. I provided step-by-step instructions, cooking tips, and storage info. Variations allow you to customize the bowl to fit your taste and dietary needs. Enjoy making this hearty meal! It’s full of flavor, healthy, and easy to organize. Try it out, and have fun with the variations! Your dinner plans just got a tasty upgrade.

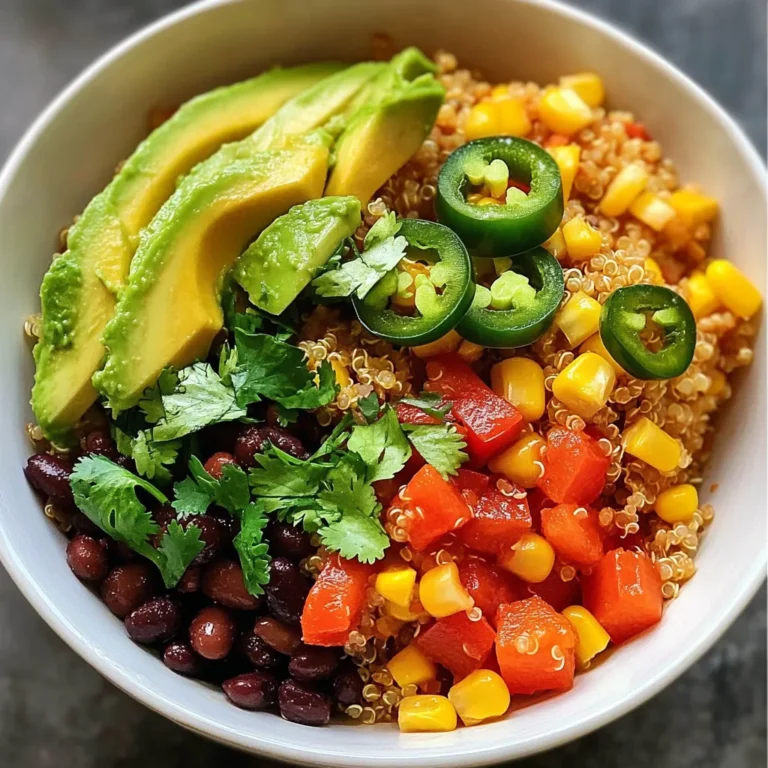
Spicy Mexican Quinoa Bowl Flavorful and Satisfying Meal

- 1 cup cream cheese, softened - 1/2 cup sour cream - 1/2 cup powdered sugar - 1 teaspoon vanilla extract - 1/4 cup rainbow sprinkles (plus extra for garnish) - 1/2 cup mini chocolate chips (optional) - Dipping options: graham crackers, fruit, or pretzels To make Funfetti Birthday Cake Dip, gather the ingredients listed above. Each ingredient plays a key role in creating this tasty treat. The cream cheese gives the dip its creamy base. It adds a smooth texture that is rich and delicious. Sour cream adds a slight tang, balancing the sweetness of the dip. The powdered sugar sweetens the mixture. It also helps to create that classic cake flavor. Don’t forget the vanilla extract! It adds a warm, sweet aroma that ties everything together. Rainbow sprinkles are the star of this dip. They add color and fun. Plus, they make it look festive for any celebration. If you love chocolate, toss in some mini chocolate chips for extra sweetness and texture. Finally, prepare your dippers. Graham crackers, fresh fruit, or pretzels work great. Each option brings a unique flavor and crunch to the dip. With these ingredients, you can create a delightful party treat that everyone will enjoy! {{ingredient_image_1}} 1. Start by taking a mixing bowl. Add 1 cup of softened cream cheese and 1/2 cup of sour cream. 2. Use a hand mixer or a spoon to mix them together. Make sure it becomes smooth and creamy. 3. Next, slowly add 1/2 cup of powdered sugar. Blend it well so there are no lumps left. 4. Then, mix in 1 teaspoon of vanilla extract. Stir until it is fully combined. 5. Now, gently fold in 1/4 cup of rainbow sprinkles. If you like, add 1/2 cup of mini chocolate chips for extra fun. 6. Transfer this colorful dip to a serving bowl. Top it off with extra rainbow sprinkles for a festive touch. - For a great presentation, use a colorful bowl. This makes the dip pop and look fun. - Serve with dippers like graham crackers, fresh fruit slices, or pretzels. Each option adds a nice crunch and flavor. - You can even set up a dipping station. Let guests choose their favorite dippers for a fun experience. You can swap ingredients easily to meet dietary needs. If you want a lighter dip, use Greek yogurt instead of sour cream. For a dairy-free option, try coconut cream. You can also use a sugar substitute if you want less sugar. Feel free to vary the sprinkles too. You can use holiday-themed sprinkles for festive occasions. Try adding crushed cookies or nuts for a new texture. If you love chocolate, mix in some chocolate sprinkles. Serve this dip in a fun bowl to make it pop. Add extra sprinkles on top for a nice touch. Put out a variety of dippers like graham crackers, fruit slices, and pretzels. This way, everyone can choose their favorite! Store any leftover dip in an airtight container. Keep it in the fridge for up to three days. If you want to save it longer, you can freeze it. Just thaw it in the fridge before serving again. Pro Tips Use Room Temperature Ingredients: Allow your cream cheese and sour cream to sit at room temperature for about 30 minutes before mixing. This helps create a smoother dip with no lumps. Customize Your Sprinkles: Feel free to use themed sprinkles to match any occasion! From holiday colors to specific party themes, the right sprinkles can make your dip even more festive. Make It Ahead: You can prepare this dip a day in advance. Just store it in an airtight container in the fridge. Give it a good stir before serving to refresh its texture! Experiment with Dippers: While graham crackers are classic, don't hesitate to try different dippers! Fruit like strawberries and apples or even pretzels can add a delightful twist to your dip experience. {{image_2}} You can switch up your Funfetti Birthday Cake Dip in fun ways. One tasty option is the chocolate Funfetti dip. Simply add 1/4 cup of cocoa powder to the original recipe. This gives you a rich, chocolatey twist that pairs well with the sweet sprinkles. You get both chocolate and funfetti in every bite. Another idea is to try different dips inspired by Funfetti. You can make a cookie dough dip by mixing brown sugar, flour, and mini chocolate chips. Or, whip up a peanut butter dip with creamy peanut butter and some honey. Both options keep the playful spirit of Funfetti alive. You can also dress up your dip for different seasons. For Halloween, try orange and black sprinkles. For Christmas, use red and green sprinkles. You could even add peppermint extract for a festive flavor. For birthdays, you can use sprinkles that match the party theme. These small touches make your dip even more special and fun for any event. To keep your Funfetti Birthday Cake Dip fresh, use an airtight container. This will help avoid any odors from your fridge mixing with your dip. Store it in the refrigerator right after you finish serving. Make sure the lid fits tightly to keep out air and moisture. In the refrigerator, this dip lasts about 3 to 5 days. Keep an eye on the texture and smell. If it starts to look or smell off, it’s best to toss it. You can freeze this dip, but it may not have the same creamy texture when thawed. If you choose to freeze, place it in a freezer-safe container. It should last up to a month in the freezer. When you’re ready to enjoy it again, let it thaw in the fridge overnight before serving. Yes, you can make this dip ahead. Just prepare it and store it in the fridge. Cover it tightly with plastic wrap or a lid. It will stay fresh for up to three days. This makes it great for parties! You can use Greek yogurt instead of sour cream. It adds a nice tang. You can also use plain yogurt if you want a lighter option. Just make sure it's unsweetened for the best taste. To reduce the sweetness, cut back on the powdered sugar. Start with 1/3 cup instead of 1/2 cup. You can also add a pinch of salt to balance the flavor. This little trick helps make the dip less sugary. Using whipped cream instead of cream cheese changes the texture. The dip will be lighter and airier. If you choose this option, consider adding a bit of milk to help it blend smoothly. This blog post covered how to make Funfetti Birthday Cake Dip. We listed the key ingredients, shared easy steps, and offered tips for serving. You can even customize flavors or swap ingredients to fit your needs. In the end, this dip is a fun treat for any occasion. Enjoy making it and impress your friends with your skills! Keep it handy for parties and snacks.

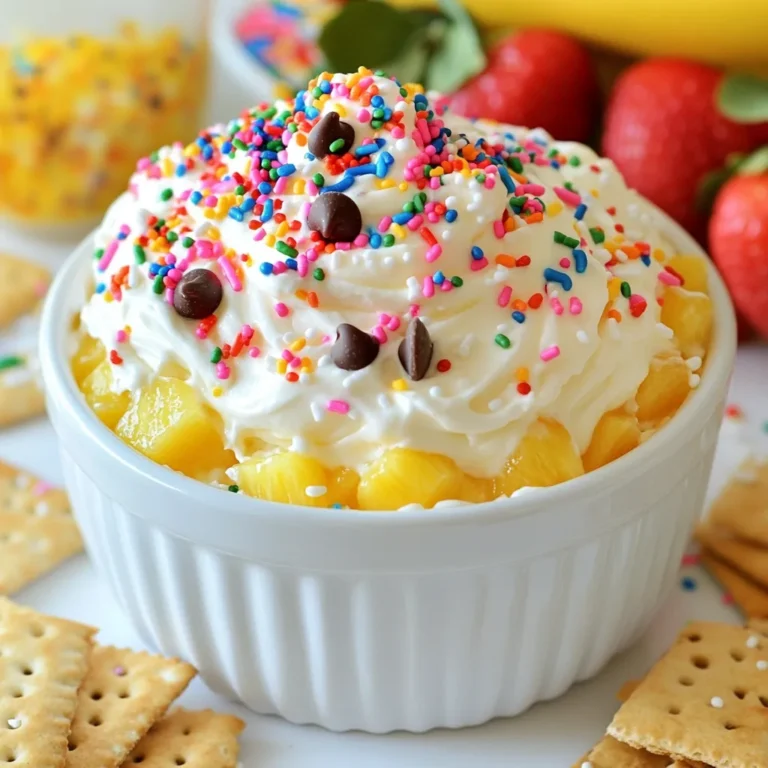
Funfetti Birthday Cake Dip Delightful Party Treat

- 4 medium sweet potatoes - 2 cups cooked shredded chicken - 1 cup BBQ sauce (your favorite) - 1 cup corn (fresh or canned) - 1/2 cup black beans, drained and rinsed - 1/2 cup red onion, finely chopped - 1 cup shredded cheese (cheddar or pepper jack) - 1/4 cup fresh cilantro, chopped - Salt and pepper to taste - Olive oil for drizzling You can swap sweet potatoes for regular potatoes if you prefer. Use any cooked chicken like rotisserie chicken for ease. If you don’t have BBQ sauce, a mix of ketchup and Worcestershire sauce can work well. For the beans, feel free to use pinto or kidney beans. If you want to skip dairy, use vegan cheese or leave it out. To ensure great results, use a kitchen scale for the chicken if you have one. A cup of shredded chicken should be light and fluffy. For the corn, you can use a measuring cup for fresh or canned corn. When chopping onions, a sharp knife helps you measure accurately. A heaping cup of cheese means filling the cup more than level. Adjust salt and pepper to your taste, but start small. {{ingredient_image_1}} Start by preheating your oven to 400°F (200°C). This step is key for a good bake. Wash the sweet potatoes well to remove dirt. Pat them dry with a kitchen towel. Use a fork to prick each potato several times. This helps steam escape while they bake. Drizzle a little olive oil over each potato. This adds flavor and helps the skin crisp up. Place the sweet potatoes on a baking sheet. Bake them for about 45 to 60 minutes. They are ready when you can easily pierce them with a fork. While the sweet potatoes bake, it’s time to make the filling. In a large bowl, mix your cooked shredded chicken with BBQ sauce. You can adjust how much sauce you use based on your taste. If you like it saucy, add more! In another bowl, combine corn, black beans, and finely chopped red onion. Season this mix with salt and pepper to taste. This adds great flavor and texture to your filling. After the sweet potatoes are done, take them out of the oven. Let them cool for a few minutes. Cut each potato in half lengthwise. Be careful! Use a spoon to scoop out a bit of the inside. This makes space for your tasty filling. Now, layer the BBQ chicken mix into each potato half. Next, add the corn and black bean mix on top. Finally, sprinkle a generous amount of shredded cheese over each half. Place the stuffed sweet potatoes back in the oven for another 10 to 15 minutes. You want the cheese to melt and get bubbly. When they are done, take them out and sprinkle fresh cilantro on top. Let them cool slightly before serving. Enjoy your delicious BBQ chicken stuffed sweet potatoes! To make sweet potatoes shine, choose medium ones. They cook evenly and hold the filling well. Wash them thoroughly to remove any dirt. Use a fork to prick each potato several times. This helps steam escape while baking. Drizzle with olive oil for a crisp skin. Bake at 400°F for 45 to 60 minutes. They are done when soft to touch. Let them cool for a few minutes before cutting. This keeps them from falling apart. The BBQ sauce makes or breaks this dish. Choose a sauce that matches your taste. A sweet sauce adds a nice balance to the savory chicken. A smoky sauce gives it depth. For a kick, try a spicy sauce. Feel free to mix different sauces for a unique flavor. I suggest using about one cup to coat the chicken. Taste as you go and adjust to your liking. Cheese adds creaminess and richness to your sweet potatoes. Cheddar is a classic choice and melts well. Pepper jack adds a spicy twist if you like heat. You can also try gouda for a smoky flavor. Crumbled feta offers a tangy note that pairs nicely. Use about one cup of cheese per potato half. Sprinkle it generously on top for a bubbly, golden finish. Pro Tips Choose the Right Sweet Potatoes: Look for firm, unblemished sweet potatoes. The smaller ones tend to be sweeter and more flavorful. Customize Your BBQ Sauce: Feel free to experiment with different BBQ sauces or even mix a few together for a unique flavor profile. Add Extra Toppings: Consider adding avocado, jalapeños, or sour cream on top for an extra layer of flavor and texture. Meal Prep Friendly: These stuffed sweet potatoes can be made ahead of time and stored in the fridge for a quick and healthy meal throughout the week. {{image_2}} You can switch up the protein in your BBQ chicken stuffed sweet potatoes. Ground turkey works well and adds a light touch. You can cook it with BBQ sauce just like chicken. If you want a plant-based option, try using tofu. Press and cube the tofu, then sauté it until golden. Mix it with BBQ sauce for a tasty filling. Making a vegetarian version is easy. Skip the chicken and load up on veggies. Use the corn and black beans from the recipe. Add in spinach, bell peppers, or mushrooms for more flavor. You can also mix in some cooked quinoa for added protein. Top it all with cheese or a vegan cheese option for a creamy finish. You can change the flavor of your stuffed sweet potatoes, too. If you like heat, add some diced jalapeños to the BBQ chicken mixture. For a smoky taste, use smoked paprika or chipotle sauce in your BBQ mix. You can even add bacon bits or smoked cheese on top for extra depth. The options are endless, and they can make your meal exciting! After you enjoy your BBQ chicken stuffed sweet potatoes, store the leftovers right. First, let them cool to room temp. Then, place them in an airtight container. Keep them in the fridge for up to three days. If you want them to last longer, consider freezing them. Reheating stuffed sweet potatoes is easy. For the best results, use an oven. Preheat it to 350°F (175°C). Place the stuffed potatoes on a baking sheet. Heat them for about 15-20 minutes, or until warm. You can also use a microwave. Just cover them with a damp paper towel and heat for 2-3 minutes. Freezing your stuffed sweet potatoes is a great way to save them. Wrap each potato tightly in plastic wrap. Then, place them in a freezer-safe bag. They can last up to three months in the freezer. When you’re ready to eat, thaw them in the fridge overnight before reheating. You can check if sweet potatoes are done by piercing them with a fork. If the fork slides in easily, they are ready. Baking usually takes about 45-60 minutes at 400°F (200°C). I like to check them around the 45-minute mark to avoid overcooking. The sweet potatoes should feel soft and tender. Yes, you can prep BBQ chicken stuffed sweet potatoes ahead of time. You can bake the sweet potatoes and prepare the fillings in advance. Store the baked potatoes in the fridge for up to three days. When you’re ready to eat, just fill them and bake again. This saves time on busy days and makes dinner easier. You can serve many sides with BBQ chicken stuffed sweet potatoes. Here are some ideas: - A fresh green salad for crunch - Coleslaw for a tangy taste - Grilled veggies for a colorful plate - Cornbread for a comforting touch These sides balance the flavors and make your meal even better. This article covered how to make BBQ chicken stuffed sweet potatoes. We explored the key ingredients, alternative options, and measuring tips. The step-by-step guide made preparation easy, showing how to cook, assemble, and bake. Tips helped perfect your dish, while variations offered fun changes. Finally, we shared storage methods for leftovers and answered common questions. With these insights, you can create delicious meals tailored to your taste. Enjoy your cooking journey with these tasty stuffed sweet potatoes!

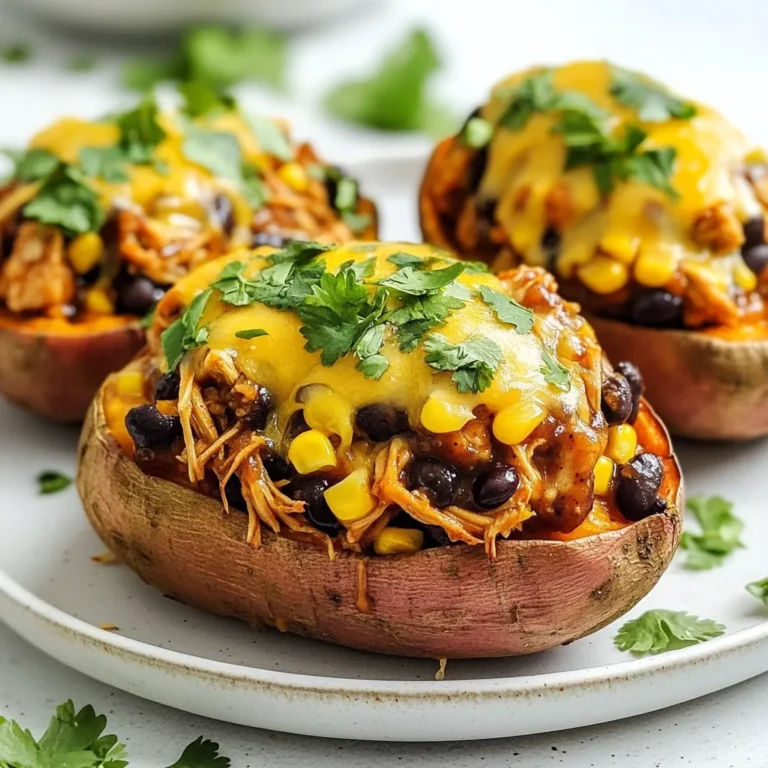
BBQ Chicken Stuffed Sweet Potatoes Comforting Meal

To make these blondies, you need a few key ingredients: - 1 cup unsalted butter, melted - 1 ½ cups packed brown sugar - 2 large eggs - 1 teaspoon vanilla extract - 2 cups all-purpose flour - 1 teaspoon baking powder - ½ teaspoon salt - 1 cup white chocolate chips - 1 cup fresh raspberries (or frozen, thawed) These ingredients create a soft and chewy dessert with a sweet and fruity flavor. The butter adds richness, while the brown sugar gives depth. White chocolate chips provide creamy sweetness, and raspberries add a nice tart contrast. If you don’t have certain ingredients, you can make a few swaps: - Use salted butter instead of unsalted. Just skip the added salt. - Replace brown sugar with white sugar, but the flavor will change. - If you lack eggs, try using unsweetened applesauce or mashed banana. Use ¼ cup for each egg. - For the flour, you can use a gluten-free blend if needed. These substitutes still work well to create tasty blondies while keeping the recipe simple. When you pick raspberries, look for these signs: - Choose berries that are plump and firm. - Check for bright color; dark berries may be overripe. - Avoid any that are mushy or have mold. Fresh raspberries add the best flavor and texture. If you can’t find fresh ones, frozen raspberries work too. Just make sure to thaw and drain them before mixing. {{ingredient_image_1}} Start by preheating your oven to 350°F (175°C). This step helps your blondies bake evenly. Next, take a 9x13 inch baking pan. You can grease it with butter or use parchment paper. Parchment paper makes it easy to lift the blondies out later. In a large mixing bowl, pour in the melted butter. Add the packed brown sugar. Use a whisk to mix them well until smooth. Next, crack in the eggs, one at a time. Mix well after each egg. Add the vanilla extract and stir until it's blended in. In another bowl, whisk together the flour, baking powder, and salt. Gradually add this dry mix to your wet mix. Stir gently, but don’t overmix. Finally, fold in the white chocolate chips and the fresh raspberries. Be careful not to squish the berries. Now, pour the batter into your prepared pan. Spread it evenly with a spatula. Place the pan in your preheated oven. Bake for 25 to 30 minutes. Check for doneness by inserting a toothpick into the center. It should come out clean, with just a few crumbs. Once baked, take the pan out and let it cool for about 15 minutes. After that, transfer the blondies to a wire rack. Let them cool completely before cutting them into squares or rectangles. Enjoy! When you mix your batter, do it gently. Overmixing can make the blondies tough. You want a light and fluffy texture. Mix until just combined. This means you can still see a few flour streaks. It helps keep your blondies soft and delicious. To melt white chocolate, use a microwave or a double boiler. If using a microwave, heat in short bursts. Stir often to avoid burning. If it gets too hot, it will clump. Smooth melted chocolate mixes well into the batter. It adds creaminess and sweetness to your blondies. To keep your blondies fresh, store them in an airtight container. You can leave them at room temperature for a few days. If you want to keep them longer, place them in the fridge. For even longer storage, freeze them. Wrap each blondie in plastic wrap before freezing. This way, they stay moist and tasty when you are ready to enjoy them. Pro Tips Use Room Temperature Eggs: Allow your eggs to sit at room temperature for about 30 minutes before using them. This helps them incorporate better into the batter, resulting in a lighter texture. Don't Overmix the Batter: Mix just until the dry ingredients are incorporated. Overmixing can lead to dense blondies, so be gentle when folding in the chocolate and raspberries. Check for Doneness: Use a toothpick to check if your blondies are done. If it comes out with a few moist crumbs, they’re perfect! Overbaking can dry them out. Cool Completely Before Cutting: Let the blondies cool in the pan for at least 15 minutes, then transfer to a wire rack. This ensures they set properly and makes slicing easier. {{image_2}} You can make your blondies even better by adding nuts. I love using chopped walnuts or pecans. They add a nice crunch and rich flavor. Just stir in about 1 cup of your favorite nuts when you fold in the white chocolate chips. This gives a fun texture and enhances the overall taste. While white chocolate is the star, you can switch it up. Dark or milk chocolate chips work great too. Each type gives a unique taste. If you prefer a more intense flavor, use dark chocolate. For a sweeter taste, try milk chocolate. Mix it up and find your favorite! Raspberries are delicious, but you can use other berries. Blueberries, strawberries, or blackberries can work well. Just make sure to keep the amount the same: about 1 cup. Each berry brings its own flavor, making your blondies special. Experiment with different berries to find the perfect match for you! To keep your white chocolate raspberry blondies fresh, store them in an airtight container. This helps retain their moist texture. You can keep them at room temperature for up to three days. If you want to store them longer, the fridge works well too. Just remember to seal them tightly. Freezing blondies is a great option for long-term storage. After they cool completely, cut them into squares. Wrap each piece in plastic wrap and place them in a freezer bag. Remove as much air as possible before sealing. You can freeze them for up to three months. When you’re ready to enjoy them, just thaw overnight in the fridge. To reheat your blondies, preheat your oven to 350°F (175°C). Place the blondies on a baking sheet. Cover them with foil to keep them moist. Heat for about 10 minutes or until warmed through. You can also use a microwave. Heat each square for 15-20 seconds for a soft treat. Enjoy them warm, and the white chocolate will melt just right! Yes, you can use frozen raspberries in your blondies. Just thaw them first. Pat them dry to remove excess moisture. This prevents the batter from getting too wet. The flavor remains sweet and fruity, just like fresh raspberries. To check if the blondies are done, look for golden edges. Insert a toothpick into the center. If it comes out clean or with a few crumbs, they are ready. The tops should be set but slightly soft. Remember, they will continue to cook a bit as they cool. Blondies and brownies differ in flavor and ingredients. Blondies use brown sugar and vanilla, while brownies use cocoa powder. This gives blondies a sweet, buttery taste. Brownies have a rich, chocolate flavor. Both are delicious, but they offer different treats! In this post, we explored how to make delicious white chocolate raspberry blondies. I covered key ingredients, tips for mixing, and smart storage ideas. You can customize these blondies with nuts or other berries for fun twists. Remember to avoid overmixing for the best texture. Keep these tips in mind for baking success. With the right ingredients and care, your blondies will be a hit! Enjoy baking and savoring every bite.

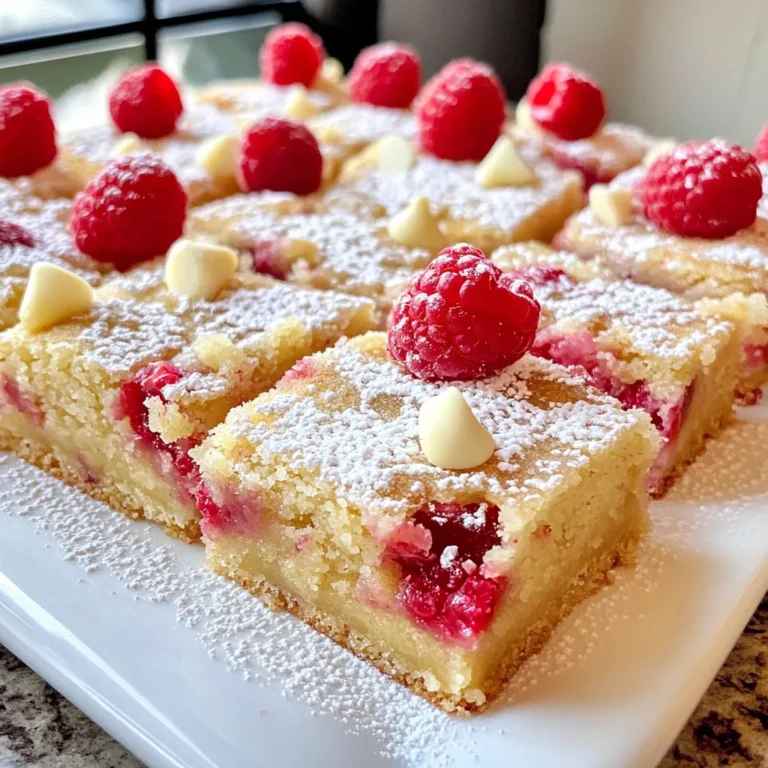
White Chocolate Raspberry Blondies Delightful Dessert

PREV 1 … 45 46 47 … 57 NEXT
quick dish kitchen

explore

DessertsDinnerAppetizersDrinks

Our Policies

  • Cookie Policy
  • Copyright Policy
  • Disclaimer
  • GDPR Policy
  • Terms Of Use
Back to Top
  • About
  • Contact Us
  • Privacy Policy
© 2025 quick dish kitchen