FREE DINNER EBOOK! Get your copy!
  • Cookie Policy
  • GDPR Policy
  • Disclaimer
  • Terms Of Use
  • Visit my other site: Fun Cookie Recipes
quick dish kitchen
  • Home
  • Dinner
  • Desserts
  • Drinks
  • Appetizers
  • Contact
  • About
  • Privacy Policy
  • Home
  • Dinner
  • Desserts
  • Drinks
  • Appetizers
  • Contact
  • About
  • Privacy Policy
  • Cookie Policy
  • GDPR Policy
  • Disclaimer
  • Terms Of Use
Visit my other site: Fun Cookie Recipes

HOME / CATEGORIES /

Latest

To make No Bake Lemon Cheesecake Cups, you need fresh and simple ingredients. Here’s what you will use: - 8 oz cream cheese, softened - 1 cup powdered sugar - 1/2 cup sour cream - 1/4 cup fresh lemon juice - Zest of 1 lemon - 1 teaspoon vanilla extract - 1 cup heavy whipping cream - 1 cup graham cracker crumbs - 4 tablespoons melted butter - Fresh berries (for garnish) Each ingredient plays a key role. The cream cheese gives your cups a rich and creamy texture. Powdered sugar adds sweetness without graininess. Sour cream adds a nice tang, balancing the lemon's zest. Fresh lemon juice and zest bring bright flavor. Vanilla extract adds warmth. Heavy cream makes the dessert light and fluffy. Graham cracker crumbs mixed with melted butter create the perfect crust. Finally, fresh berries add a pop of color and taste. Using high-quality ingredients makes all the difference. Fresh lemons yield the best flavor. Choose full-fat cream cheese for a richer taste. With these ingredients, you can create a delightful treat that is sure to impress. {{ingredient_image_1}} Start by mixing 8 oz of softened cream cheese with 1 cup of powdered sugar. Use a hand mixer for a smooth blend. Next, add 1/2 cup of sour cream, 1/4 cup of fresh lemon juice, the zest of 1 lemon, and 1 teaspoon of vanilla extract. Blend everything together until it is smooth and creamy. In a separate bowl, pour 1 cup of heavy whipping cream. Use a mixer to whip it until you see stiff peaks. This means the cream holds its shape well. Next, gently fold the whipped cream into the lemon mixture. Be careful not to deflate the whipped cream; you want to keep it light and airy. In a new bowl, mix 1 cup of graham cracker crumbs with 4 tablespoons of melted butter. Stir until the crumbs are well coated. Now, take your serving cups or small jars. Layer the graham cracker mix at the bottom, then add a layer of your lemon cheesecake filling. Repeat the layers until you fill the cups. Finish with a layer of cheesecake on top. Chill the cups in the refrigerator for at least 2 hours to let them set. Before you serve, add fresh berries and a bit of lemon zest on top for a bright finish. To avoid lumps in the cream cheese mixture, make sure your cream cheese is soft. I leave it out at room temperature for about 30 minutes. Then, mix the cream cheese and powdered sugar well. Use a hand mixer for a creamy texture. When folding in whipped cream, use a spatula. Start by adding a small amount to the lemon mixture. Gently stir until combined. Then, add the rest of the whipped cream. This keeps the air in the cream, making your cheesecake light and fluffy. Fresh lemon juice and zest are key to a bright flavor. They give your cheesecake a zesty kick. I always choose organic lemons for the best taste. The zest adds a nice texture, too. For the best results, use quality cream cheese. Brands with high fat content yield creamier results. Avoid low-fat options as they can change the texture. Garnish your cheesecake cups with fresh berries. Strawberries, blueberries, or raspberries work well. A sprinkle of lemon zest on top makes them look even better. These cheesecake cups pair nicely with tea or coffee. The tartness of the lemon balances well with a hot drink. Enjoy them as a light dessert after dinner! Pro Tips Use Room Temperature Cream Cheese: This helps create a smoother filling without lumps and makes it easier to mix with other ingredients. Fresh Lemon Juice is Key: Using fresh lemon juice instead of bottled enhances the flavor and brightness of the cheesecake. Chill for Best Texture: Allowing the cheesecake cups to chill for at least 2 hours ensures they set properly and develop a creamy consistency. Experiment with Garnishes: Fresh berries are great, but consider using mint leaves or edible flowers for a beautiful presentation! {{image_2}} You can switch up the flavors in these cheesecake cups. Instead of lemon, try using lime juice. This gives a nice tart twist that many love. You can also use orange or grapefruit juice for a different flavor. These fruits add freshness and zing. If you want to add a sweet touch, consider chocolate or berry swirls. For chocolate, melt some dark chocolate and swirl it in the cheesecake mix before layering. For berry swirls, mash fresh berries and fold them into the mix. This adds color and flavor to your cups. If you need gluten-free options, you can make simple swaps. Use gluten-free graham crackers for the crust. They taste great and will keep the same texture. For dairy-free alternatives, use vegan cream cheese and coconut cream. These options will still give you a creamy texture. You may also want to use maple syrup instead of powdered sugar for sweetness. This will keep your cheesecake cups light and tasty. To keep your no-bake lemon cheesecake cups fresh, store them in the fridge. Place the cups in an airtight container. This helps prevent them from drying out and losing flavor. The cheesecake cups can last up to 3 days in the refrigerator. Just remember to cover them well. This keeps the taste bright and zesty. If you want to freeze your cheesecake cups, it's easy! First, let them chill in the refrigerator for 2 hours as usual. Once set, cover each cup with plastic wrap. Then, place them in a freezer-safe container. They can stay in the freezer for up to 2 months. When you are ready to enjoy, do not rush the thawing. Move the cups to the fridge for about 4 hours. This helps keep the texture nice and creamy. Enjoy delicious cheesecake treats anytime! Yes, you can use light cream cheese. However, it may change the texture. The cheesecake might be a bit less rich and creamy. Light cream cheese has less fat. This can make the filling thinner. If you want a firmer texture, stick to full-fat cream cheese. These cheesecake cups should not sit out for long. Keep them at room temperature for no more than two hours. After that, bacteria can grow. To stay safe, always serve them cold. If it's a hot day, keep them in a cooler or fridge. Yes! You can make these cups a day ahead. Store them in the fridge until ready to serve. Just cover them well with plastic wrap. This keeps them fresh. If you want to make them even earlier, you can freeze them. Just thaw them in the fridge before serving. Making no-bake cheesecake cups is simple and fun. You learned about the key ingredients, like cream cheese and fresh lemon, to create a tangy filling. I walked you through mixing and whipping, ensuring a light texture. You gained some helpful tips on flavor, presentation, and storage. In the end, these cheesecake cups are perfect for any occasion. Try different flavors and enjoy this easy dessert with friends and family. You'll impress everyone with your tasty treats!

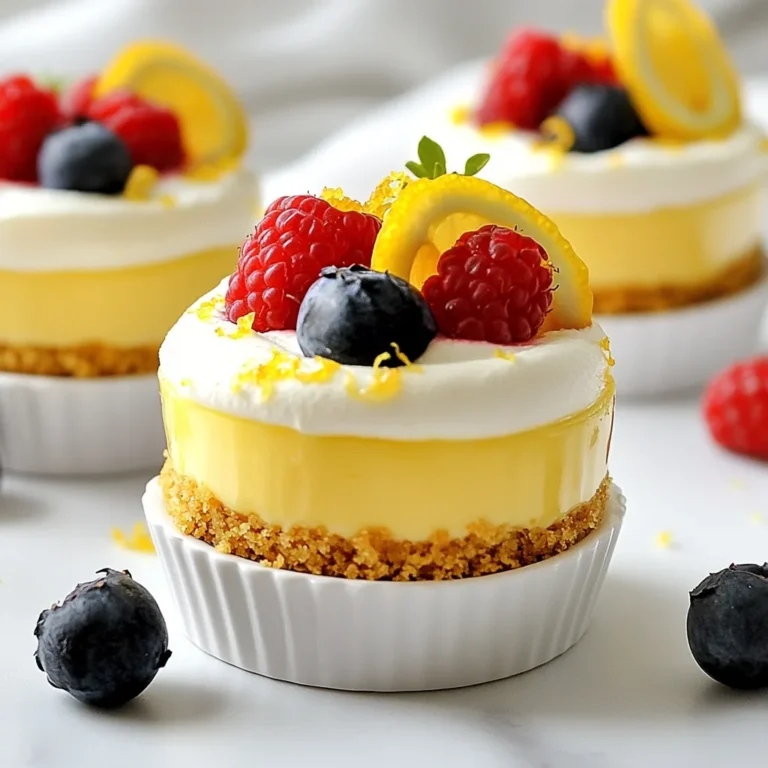
No Bake Lemon Cheesecake Cups Simple and Tasty Treat

- 2 cups rolled oats - 1 cup nuts (walnuts or pecans), chopped - 1/2 cup pumpkin seeds (pepitas) - 1/2 cup unsweetened shredded coconut - 1/2 cup maple syrup - 1/4 cup coconut oil, melted - 1 teaspoon vanilla extract - 1 tablespoon pumpkin pie spice - 1/2 teaspoon salt - 1/2 cup dried cranberries or raisins Gather these ingredients to make your pumpkin spice granola. Each one adds a special touch. Rolled oats form the base and give a hearty texture. Nuts bring crunch and healthy fats. Pumpkin seeds add protein and a nutty flavor. Unsweetened shredded coconut gives a sweet note without extra sugar. Maple syrup acts as a natural sweetener and binds the mix. Coconut oil, melted, helps with crispiness. Vanilla extract adds warmth to the flavor. Pumpkin pie spice brings that cozy taste of fall. A bit of salt balances the sweetness. Finally, dried cranberries or raisins add chewy bites and extra flavor. With these ingredients, you can create a snack that is not only tasty but also healthy. Enjoy knowing you have all you need to make this delightful treat! {{ingredient_image_1}} First, set your oven to 300°F (150°C). This temperature helps the granola bake evenly. Next, grab a baking sheet and line it with parchment paper. The paper keeps the granola from sticking. It also makes cleanup a breeze. In a large bowl, add 2 cups of rolled oats. Then, chop your choice of nuts, either walnuts or pecans, and add 1 cup to the bowl. Next, toss in 1/2 cup of pumpkin seeds and 1/2 cup of unsweetened shredded coconut. For flavor, include 1 tablespoon of pumpkin pie spice and 1/2 teaspoon of salt. Mix these dry ingredients well. Make sure everything is evenly combined. The mix should smell amazing! In another bowl, combine 1/4 cup of melted coconut oil, 1/2 cup of maple syrup, and 1 teaspoon of vanilla extract. Whisk these until smooth. This wet mix will bring flavors together. Pour it over your dry ingredients and stir well. Ensure every piece is coated. This is key for tasty granola. Once mixed, spread the granola on the baking sheet. Press it down slightly to make it compact. This helps it clump up nicely while baking. To get your granola nice and crisp, spread it evenly on the baking sheet. Press it down gently for a compact layer. This helps it bake evenly. Stir the granola halfway through baking to help it brown all over. Keep an eye on it during the last few minutes. You want it golden brown, not burnt. Let it cool completely on the sheet. It will become crisp as it cools. You can easily swap out nuts in this recipe. Try almonds or hazelnuts if you like. For the seeds, sunflower seeds work well too. If you don’t have coconut oil, use olive oil or butter instead. You can also replace maple syrup with honey or agave syrup. For a different taste, use cinnamon instead of pumpkin pie spice. Dried fruits like apricots or figs are great if you want something new. To keep your granola fresh, store it in an airtight container. A glass jar or a zip-top bag works well. Keep it in a cool, dry place. This will help it stay crunchy. For longer storage, you can freeze it. Just be sure to label it with the date. It can last up to two weeks at room temperature and up to three months in the freezer. Pro Tips Use Fresh Spices: For the best flavor, use freshly ground pumpkin pie spice or toast whole spices before grinding them. Experiment with Nuts: Feel free to swap in different nuts or seeds based on your preference, such as almonds or sunflower seeds. Watch the Baking Time: Keep an eye on the granola as it bakes; it can go from golden to burnt quickly. Stir halfway for even toasting. Customize Your Sweetness: Adjust the amount of maple syrup to suit your taste, or substitute with honey or agave nectar for a different flavor profile. {{image_2}} You can change up your pumpkin spice granola with seasonal flavors. Try adding dried apples or pears in the fall. In winter, consider mixing in some dark chocolate chunks. Fresh berries work well in spring and summer. You can also boost the flavor with spices like cinnamon or nutmeg. These small changes keep your granola fun and fresh. To make this granola gluten-free, use certified gluten-free oats. For a nut-free version, just skip the nuts. You can replace them with sunflower seeds or extra pumpkin seeds. This way, everyone can enjoy your healthy snack without worry. Enjoy your pumpkin spice granola in many ways. Serve it with yogurt for breakfast. You can also sprinkle it on oatmeal or smoothie bowls. For a sweet treat, mix it with milk or a dairy-free alternative. Pairing it with fresh fruit adds color and flavor. This granola is also great on its own as a quick snack. Pumpkin spice granola is more than just tasty; it offers health perks too. The oats provide fiber, which is great for digestion. Nuts add protein and healthy fats, helping you feel full. Pumpkin seeds are packed with magnesium and zinc, which support your immune system. Dried fruits like cranberries add antioxidants, which are good for your body. Overall, this granola is a smart choice for a snack or breakfast. Each serving of pumpkin spice granola is around 200 calories. This includes the following breakdown: - Rolled oats: 150 calories - Nuts: 100 calories - Pumpkin seeds: 70 calories - Coconut: 50 calories - Maple syrup: 50 calories - Coconut oil: 120 calories - Cranberries: 30 calories This granola offers a mix of energy and nutrients. It’s filling without being too heavy. Homemade pumpkin spice granola beats store-bought options in many ways. First, you control the ingredients. You can avoid added sugars and unhealthy fats. Homemade granola is fresher and tastes better too. Store-bought versions often have preservatives. Plus, making your own is fun and simple. You can customize flavors to fit your taste. Overall, homemade is healthier and tastier! Yes, you can swap out pumpkin pie spice. Try cinnamon, nutmeg, or ginger. Each spice brings its own flavor. Using a mix of spices can create a unique taste. Experiment with what you have at home! Store your granola in an airtight container. This keeps it fresh and crunchy. A cool, dry place works best. It can last up to two weeks. If you want it to last longer, try freezing it. If your granola is soggy, you can re-bake it. Spread it on a baking sheet. Bake at 300°F (150°C) for about 10 minutes. This should help restore crispness. Keep an eye on it to avoid burning. Yes, pumpkin spice granola is great for both! Enjoy it with yogurt or milk for breakfast. You can also snack on it plain or with fruit. Its flavor suits any time of day! This blog post explored making tasty pumpkin spice granola. We listed all the key ingredients and provided clear steps to prepare it. Tips and tricks helped you achieve the right crunch and freshness. I shared fun variations to keep the recipe exciting. Lastly, we discussed the health benefits and answered common questions. Now you can enjoy this great snack. It's easy to make and full of flavor. Try it out and enjoy your homemade granola!

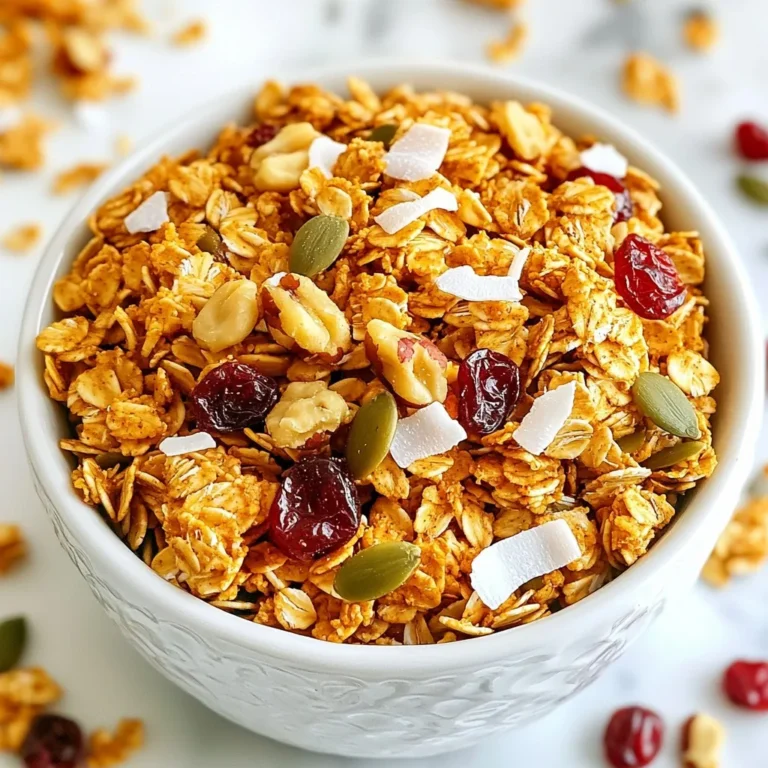
Pumpkin Spice Granola Quick and Healthy Snack Recipe

- 1 lb boneless, skinless chicken thighs - 1 can coconut milk - 3 cups chicken broth The heart of Thai Coconut Chicken Soup lies in its main ingredients. You need tender chicken thighs, which add protein and flavor. I prefer boneless, skinless thighs for a smooth texture. The coconut milk brings a rich creaminess. It gives the soup its signature taste. Chicken broth helps deepen the flavor. Together, these ingredients create a comforting base. - Lemongrass - Kaffir lime leaves - Galangal or ginger These flavor enhancers make the soup special. Lemongrass adds a fresh, citrusy note. Its unique taste brightens the dish. Kaffir lime leaves infuse a lovely aroma. They give the soup a distinct Thai flavor. Use fresh galangal for its spicy and earthy tones. If galangal is hard to find, ginger works well too. Just slice it thinly to release its flavor. - Mushrooms - Red bell pepper - Fresh cilantro and additional toppings Don’t forget the vegetables! Mushrooms bring a nice texture and umami flavor. I like using shiitake or cremini. Red bell pepper adds sweetness and color. For garnishing, fresh cilantro gives a burst of freshness. You can also add slices of chili and lime wedges for extra zing. These toppings make your bowl look vibrant and inviting. {{ingredient_image_1}} Start by making the broth. In a large pot, mix together the chicken broth, smashed lemongrass, kaffir lime leaves, galangal, and whole chilies. This combination gives the soup its bright and fresh taste. Heat it over medium heat until it gently simmers. You want it to be warm but not boiling hard. This simmering allows the flavors to blend well. Once your broth is ready, it’s time to add the chicken. Toss in the bite-sized chicken pieces. Let it simmer for about 10 minutes. You’ll know it’s done when the chicken is fully cooked and tender. This step is simple but key to a hearty soup. Next, stir in the coconut milk, sliced mushrooms, and red bell pepper. Keep simmering for another 5 to 7 minutes. This step adds creaminess and depth to the soup. After this, season the soup with fish sauce, lime juice, salt, and pepper. Taste it to see if you need to tweak any flavors. Feel free to adjust the spice or saltiness to your liking. Finally, remove the lemongrass, kaffir leaves, and galangal slices before serving. Serve hot, garnished with fresh cilantro and extra chili slices or lime wedges for a zesty kick. To make your Thai coconut chicken soup shine, adjust the spice with chilies. Start with two to three Thai bird's eye chilies. If you like more heat, add one more. You can also cut the chilies for extra spice. This gives a nice kick to the soup. Next, balance sweetness and saltiness. The coconut milk adds sweetness. Use fish sauce for saltiness. Taste your soup before serving. If it needs more salt, add more fish sauce. If it’s too salty, add a splash of lime juice. To keep your chicken tender, use boneless, skinless thighs. They stay juicy and flavorful. When adding the chicken, simmer gently. High heat can make chicken tough. Let it cook for about ten minutes. Check that it’s fully cooked before serving. For best simmering, keep the pot covered. This keeps steam inside, which helps flavors blend. Stir it occasionally to prevent sticking. After adding the coconut milk and veggies, simmer for another five to seven minutes. Garnishing adds visual appeal to your soup. Add fresh cilantro on top for a pop of color. You can also sprinkle extra slices of chili for flair. This makes the dish look lively and inviting. Serve your soup with lime wedges on the side. A squeeze of lime adds a bright, fresh taste. It makes each bowl unique. Enjoy your flavorful and comforting bowl of Thai coconut chicken soup! Pro Tips Use Fresh Ingredients: Fresh herbs and spices significantly enhance the flavor profile of your soup, making it more aromatic and vibrant. Adjust Spice Level: Thai bird’s eye chilies can be very spicy; adjust the quantity according to your heat preference and always taste while cooking. Garnish Generously: Fresh cilantro and lime wedges not only add visual appeal but also elevate the taste, providing a refreshing contrast to the rich coconut milk. Let It Simmer: Allowing the soup to simmer for a few extra minutes after adding the coconut milk helps the flavors meld beautifully, creating a more harmonious dish. {{image_2}} You can swap chicken for many other options. Tofu works well for a vegan dish. Shrimp adds a nice touch too. If you want a lighter soup, use fish. For a creamy taste without dairy, try coconut cream. It's rich and works great in soups. Different mushrooms can change the soup's taste. Shiitake mushrooms add a deep flavor. Cremini mushrooms are a bit milder but still tasty. You can also add greens like spinach or bok choy. These not only boost nutrition but also add color. Try bell peppers or carrots for extra crunch! Thai cooking varies by region. In the north, you might find more herbs added. In the south, coconut is often used more. Some regions add spices like turmeric or cumin for a twist. Don't hesitate to make it your own! Add spices that you love for a personal touch. To keep your Thai coconut chicken soup fresh, refrigerate it within two hours of cooking. Use airtight containers to prevent spills and absorb odors. Glass or BPA-free plastic containers work best. This way, your soup stays tasty and safe to eat. If you want to save some soup for later, freezing is a great option. Pour the cooled soup into freezer-safe bags or containers. Leave some space for expansion. When you’re ready to eat, thaw the soup in the fridge overnight. Reheat it gently on the stove or in the microwave. In the fridge, the soup lasts about 3 to 4 days. Always check for signs of spoilage. If it smells off or has mold, it’s best to throw it away. Trust your senses to keep your meals safe and delicious. To add more heat, you can use extra Thai bird’s eye chilies. Slice them for more spice. You can also add chili flakes or a splash of hot sauce. If you like it really spicy, try using fresh chili paste. Start with a little, then taste and add more if needed. Yes, you can use other proteins! Shrimp cooks quickly; add it for the last 3-4 minutes. Tofu is a great option too. Use firm tofu and add it with the coconut milk. If you want beef or pork, cut it thin. Cook it for about 8-10 minutes until done. Yes, this recipe can be gluten-free! Just check your fish sauce and make sure it’s gluten-free. Also, use fresh ingredients that are not processed. All the main ingredients are free from gluten, so you’re safe to enjoy this amazing soup! This blog post outlines how to create a delicious Thai coconut chicken soup. We discussed key ingredients like chicken thighs and flavorful enhancers such as lemongrass. You learned step-by-step instructions to simmer the broth and cook the chicken. Tips for added flavor and presentation ensured your dish stands out. Variations and storage tips will help you make this recipe your own. With these insights, you'll master this comforting dish. Enjoy making your Thai coconut chicken soup!

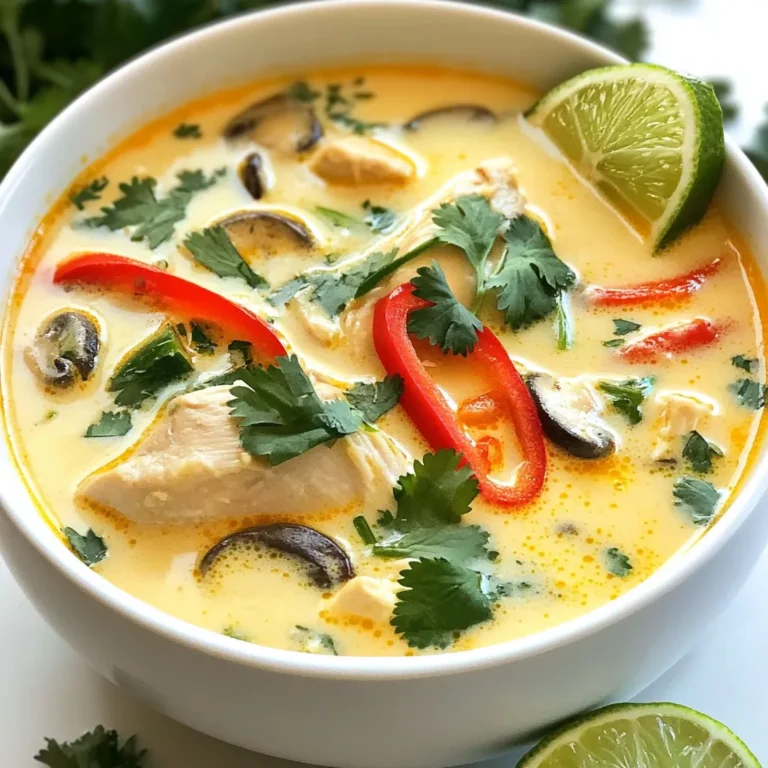
Thai Coconut Chicken Soup Flavorful and Comforting Bowl

For this tasty dish, you will need: - 1 medium spaghetti squash - 1 cup cooked chicken, shredded - 1/2 cup basil pesto - 1/2 cup cherry tomatoes, halved - 1/4 cup mozzarella cheese, shredded - 1/4 cup Parmesan cheese, grated - 2 tablespoons olive oil - Salt and pepper to taste - Fresh basil leaves for garnish You can swap some ingredients for different flavors or needs. Use turkey instead of chicken for a leaner option. If you want a vegetarian dish, try using cooked lentils or chickpeas. For a dairy-free option, pick vegan cheese or skip the cheese. You can also use spinach or arugula instead of cherry tomatoes for a fresh twist. Each serving of Pesto Chicken Stuffed Spaghetti Squash has about: - Calories: 350 - Protein: 25g - Carbohydrates: 15g - Fat: 20g - Fiber: 4g This dish is not only tasty but also packed with nutrients! It's a healthy choice for lunch or dinner. {{ingredient_image_1}} First, preheat your oven to 400°F (200°C). This step helps cook the squash evenly. While the oven heats, grab your medium spaghetti squash. Carefully cut it in half lengthwise. Use a spoon to scoop out the seeds. Then, brush the cut sides with olive oil. Sprinkle some salt and pepper on top for flavor. Place the squash halves cut side down on a lined baking sheet. Roast them in the oven for 30 to 40 minutes. Check for fork-tenderness as they cook. While the squash roasts, take a mixing bowl and add your cooked chicken. Shred it if you haven't already. Next, pour in the basil pesto. Add the halved cherry tomatoes, mozzarella cheese, and Parmesan cheese. Use a spoon to mix everything well. Make sure each piece of chicken is coated in pesto. This mixture is packed with flavor and will make your dish shine. Once the squash is done, remove it from the oven. Let it cool for a few minutes. Use a fork to gently scrape the insides, making spaghetti-like strands. In a large bowl, combine the scraped squash strands with your chicken and pesto mix. Toss until everything is well mixed. Now, spoon this tasty mixture back into the squash halves. If you have extra cheese, sprinkle it on top. Put the stuffed squash back in the oven for another 10 to 15 minutes. You want the cheese to melt and become golden. After baking, let it cool slightly. Finish by garnishing with fresh basil leaves. Enjoy your delightful dish! Cutting spaghetti squash can be tricky. First, use a sharp knife. This helps you cut through the tough skin. Place the squash on a cutting board. Hold it steady with one hand. Cut it in half lengthwise. Remove the seeds with a spoon. Brush the inside with olive oil. Add salt and pepper for flavor. Place the halves cut side down on a baking sheet. Roast at 400°F for 30-40 minutes. Check for fork-tenderness before taking it out. One common mistake is not preheating the oven. Always preheat to ensure even cooking. Another mistake is overcooking the squash. Check it at the 30-minute mark. If you leave it too long, it can become mushy. Also, be sure to mix the filling well. This ensures every bite is flavorful. If you forget to season the squash, it can taste bland. I love to serve this dish warm. You can add a sprinkle of extra cheese on top. Fresh basil leaves make a great garnish. They add color and freshness. Serve with a simple green salad for balance. A drizzle of balsamic glaze can enhance the dish's flavor too. For a crunch, add toasted pine nuts or walnuts. These add texture and richness. Pro Tips Choose Ripe Squash: Make sure to select a spaghetti squash that feels heavy for its size and has a smooth, yellow skin. This indicates ripeness and sweetness. Cook Chicken Ahead: For a quicker preparation, use leftover chicken or a rotisserie chicken, which can save you time and add great flavor. Customize Your Pesto: Feel free to experiment with different types of pesto, such as sun-dried tomato or arugula pesto, to give your dish a unique twist. Garnish for Freshness: Adding fresh herbs like basil or parsley right before serving enhances the flavor and presentation of the dish. {{image_2}} You can easily make this dish vegetarian. Just swap the chicken for roasted vegetables. Use bell peppers, zucchini, and mushrooms. This gives you a tasty filling that is still filling and healthy. You can also add chickpeas for extra protein. They add a great texture and flavor. If you prefer turkey, it works great in this recipe. Just shred cooked turkey instead of chicken. Tofu is another good choice for a plant-based option. Make sure to press the tofu first to remove excess water. Then, cube and sauté it before mixing with the pesto. Both options add a nice twist to the dish. Feel free to experiment with different pestos. Sun-dried tomato pesto or arugula pesto can give your dish a new flavor. You can also change up the cheese. Try goat cheese for a tangy touch or feta for a salty kick. These small changes can make your stuffed squash exciting every time you make it. To keep your pesto chicken stuffed spaghetti squash fresh, place leftovers in an airtight container. Make sure to cool the dish to room temperature first. Store it in the fridge for up to three days. This will help keep the flavors intact and prevent spoilage. When you’re ready to enjoy the leftovers, reheat them in the oven for the best taste. Set the oven to 350°F (175°C) and place the stuffed squash on a baking sheet. Cover it with foil to keep it moist. Heat for about 15-20 minutes. You can also use a microwave for quicker reheating. Just be careful not to overcook it, as this can make the squash mushy. If you want to freeze your pesto chicken stuffed spaghetti squash, it’s best to do it before baking. After you mix the filling, scoop it into the squash halves. Wrap each half tightly in plastic wrap, then in foil. You can freeze them for up to three months. When you're ready to eat, thaw in the fridge overnight and bake as usual. This method keeps the dish tasting fresh and delicious. You can tell spaghetti squash is done when it feels soft. Use a fork to poke it. If the fork goes in easily, it's ready. The skin should have a slight give. A good test is to scrape the strands. They should come out easily and look like spaghetti. Yes, you can use store-bought pesto. It saves time and still tastes great. Just choose a good brand with fresh ingredients. Look for options without added preservatives. You can also customize it by adding extra garlic or nuts if you want. Some great side dishes are: - A simple green salad - Garlic bread - Roasted vegetables - Quinoa with herbs - A light soup These options balance the meal and add more flavors. They also make it more filling. Try different sides to find your favorite pairings! In this article, we've covered how to make Pesto Chicken Stuffed Spaghetti Squash. You learned about the ingredients needed, options for substitutions, and the health benefits. I shared step-by-step instructions to help you prepare, stuff, and bake the squash. Tips for cutting and roasting squash prevented common mistakes. We explored variations for different diets and how to store leftovers. Overall, this dish is balanced, tasty, and easy to make. Enjoy your cooking and the flavors of this meal!

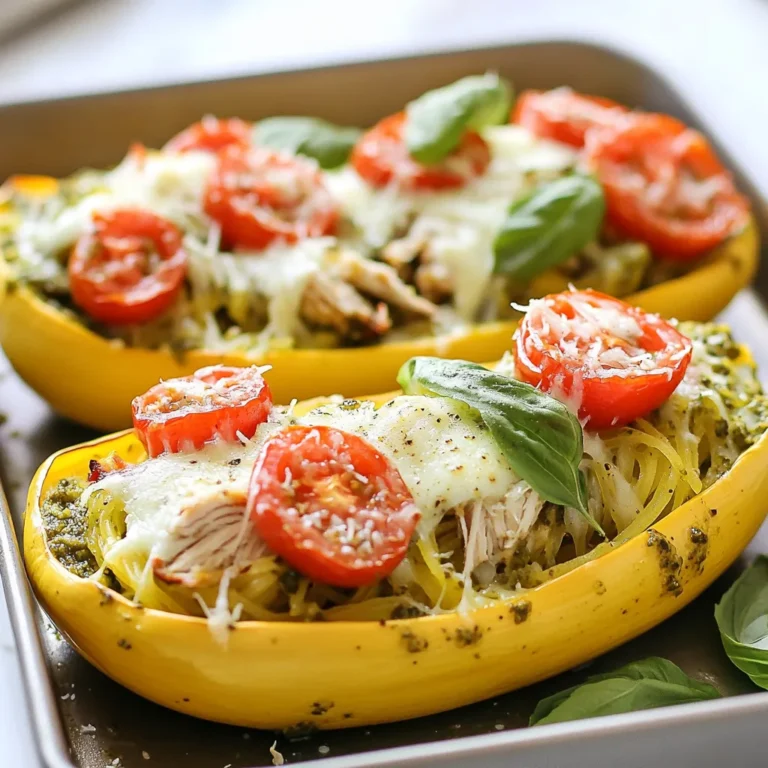
Pesto Chicken Stuffed Spaghetti Squash Delightful Dish

- 1 lb ground turkey - 1 cup fresh spinach, chopped - 1/2 cup feta cheese, crumbled - 1/4 cup breadcrumbs - 1 egg, beaten - 2 cloves garlic, minced These fresh ingredients create a tasty base for your turkey burgers. Ground turkey gives a lean protein option, while fresh spinach adds color and nutrients. Feta cheese brings a creamy, salty flavor that pairs well with the turkey. Breadcrumbs help bind everything together. The beaten egg adds moisture and richness, while minced garlic gives a wonderful aroma. - 1 teaspoon dried oregano - 1 teaspoon salt - 1/2 teaspoon black pepper Seasonings bring your burgers to life. Dried oregano adds a hint of earthiness. Salt enhances all the flavors, making them pop. Black pepper gives a slight kick. Together, these seasonings make each bite flavorful and satisfying. - 1 tablespoon olive oil - Whole wheat burger buns - Optional toppings: sliced tomatoes, red onions, lettuce Olive oil helps cook the patties to a golden brown. Whole wheat burger buns add a healthy touch. You can choose toppings like sliced tomatoes, red onions, or lettuce to add freshness and crunch. These extras make your meal even more enjoyable. {{ingredient_image_1}} - Combining Ingredients Start by taking a large mixing bowl. Add the ground turkey, chopped spinach, crumbled feta cheese, breadcrumbs, beaten egg, minced garlic, dried oregano, salt, and black pepper. Make sure to mix gently until everything is combined. Avoid overworking the mixture. This keeps the burgers tender. - Mixing Technique Use your hands or a spoon to mix the ingredients. If you use your hands, be gentle. Mixing too much can make the burgers tough. Just blend until you see no dry spots. - Portioning Techniques Now it’s time to shape the patties. Divide the mixture into four equal parts. Each part should be about the size of a tennis ball. This helps ensure even cooking. - Patty Thickness Shape each portion into a patty that is about ¾ inch thick. This thickness helps the patties cook evenly. If they are too thick, they may take longer to cook inside. - Skillet Preparation Heat a tablespoon of olive oil in a large skillet over medium heat. Make sure the oil is hot before adding the patties. This helps to get a nice golden brown crust. - Cooking Time and Temperature Place the patties in the skillet. Cook them for about 6 to 7 minutes on each side. Use a meat thermometer to check that the internal temperature reaches 165°F (74°C). This ensures they are safe to eat. Enjoy the delicious smell while they cook! Avoiding Overmixing When making these burgers, mix gently. Overmixing makes the patties tough. You want a nice, tender bite. Just combine the ingredients until they are mixed. Ensuring Moisture Adding fresh spinach and feta helps keep the patties moist. The spinach adds water, while feta brings creaminess. This balance makes your turkey burger juicy. Grilling vs. Pan-Frying You can grill or pan-fry these patties. Grilling gives a smoky flavor and nice grill marks. Pan-frying is easy and keeps the burgers juicy. Choose what you like best! Oven Baking Instructions If you prefer baking, preheat your oven to 375°F. Place the patties on a baking sheet. Bake for about 20 minutes, flipping halfway through. This method is hands-off and still delicious. Ideal Side Dishes Serve your burgers with sweet potato fries or a fresh salad. Both options add color and nutrition. You can also try roasted veggies for a healthy twist. Pairing Condiments For toppings, consider tzatziki, garlic mayo, or a simple yogurt sauce. These add flavor and creaminess. Sliced tomatoes, red onions, and crunchy lettuce can also enhance each bite. Pro Tips Moisture Control: To ensure your turkey burgers stay juicy, do not overmix the ingredients. Gentle handling keeps the patties tender. Flavor Boost: Consider adding fresh herbs, like parsley or dill, to enhance the flavor profile of your burgers. Cooking Temperature: Always check the internal temperature of your turkey burgers using a meat thermometer to ensure they are cooked safely to 165°F (74°C). Bun Selection: Use whole grain or artisan buns for added flavor and nutrition, making your burger even more satisfying. {{image_2}} Gluten-Free Options To make these burgers gluten-free, swap regular breadcrumbs for gluten-free ones. You can also use oats or ground nuts. This keeps the burgers tasty while meeting gluten-free needs. Vegetarian Alternatives For a vegetarian twist, replace ground turkey with mashed chickpeas or black beans. You can also use a plant-based meat substitute. Add extra spinach and feta for flavor. Adding Spices Boost the flavor by adding spices like cumin or paprika. These spices bring warmth and depth to the burgers. You can also try fresh herbs like basil or parsley. Incorporating Different Cheeses Feta is great, but other cheeses work too. Try goat cheese for tanginess or cheddar for a sharp kick. Mixing cheeses can create a unique taste. Lettuce Wraps For a low-carb option, use large lettuce leaves instead of buns. This adds crunch and freshness. It’s a fun way to enjoy your burger without carbs. Other Types of Buns You can experiment with different buns like brioche or whole grain. Each type adds its own flavor and texture. Choose what fits your taste best! To keep your spinach feta turkey burgers fresh, store them in the fridge. Place them in an airtight container. They can last up to three days this way. For longer storage, freeze the cooked patties. Wrap each one in plastic wrap and place in a freezer bag. They will stay good for about three months in the freezer. When reheating burgers, the best method is using a skillet. Heat it over medium-low heat. Add a few drops of water to create steam. This keeps the burgers moist. Cook for about five minutes on each side. You can also use the microwave. Use a microwave-safe plate and cover it with a damp paper towel. Heat for one minute, then check and heat more if needed. How long do spinach feta turkey burgers last? In the fridge, they last about three days. In the freezer, they can last up to three months. Signs of spoilage include a sour smell or change in color. If you see mold, discard the burgers. Always check before eating leftovers to ensure safety. To check if your turkey burgers are cooked, use a meat thermometer. The safe internal temperature for ground turkey is 165°F (74°C). Insert the thermometer into the thickest part of the patty. If it reads 165°F or higher, your burger is safe to eat. Cook the patties for about 6-7 minutes on each side. Look for a nice golden-brown color. Yes, you can make the patties ahead of time. Shape the patties and place them on a plate. Cover them with plastic wrap and store them in the fridge for up to a day. For longer storage, wrap each patty in plastic wrap and place them in a freezer bag. You can freeze them for up to three months. Just remember to thaw them in the fridge before cooking. Spinach feta turkey burgers are a healthy choice. They use lean ground turkey, which is lower in fat than beef. Spinach adds vitamins and minerals, like iron and vitamin K. Feta cheese gives flavor without too many calories. Whole wheat buns add fiber, which is good for digestion. Altogether, this meal is nutritious and satisfying. Enjoy it with fresh veggies for added crunch! In this article, we covered how to make delicious spinach feta turkey burgers. We highlighted fresh ingredients, easy preparation methods, and cooking tips. You can customize your burgers with various toppings and seasonings. Don't forget to consider storage options for leftovers. These tasty burgers not only offer great flavor but also provide nutritional benefits. Enjoy creating different variations to suit your taste. Happy cooking!

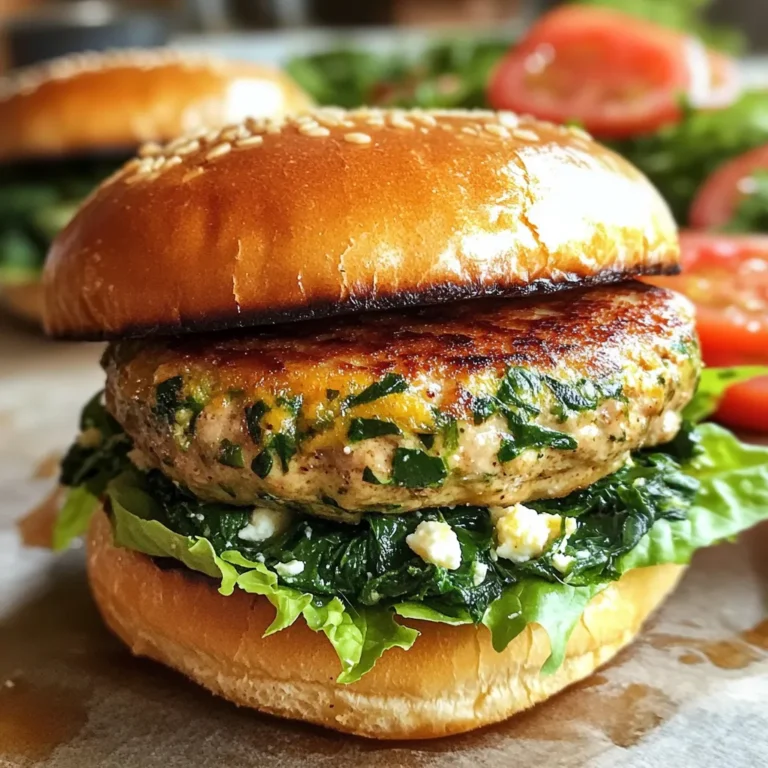
Spinach Feta Turkey Burgers Flavorful and Healthy Meal

To make the best Zesty Lime Chicken Tacos, you'll need a few key ingredients: - 2 boneless, skinless chicken breasts - 1 tablespoon olive oil - Juice and zest of 2 limes - 1 teaspoon ground cumin - 1 teaspoon chili powder - 1 teaspoon garlic powder - Salt and pepper, to taste - 8 small corn tortillas - 1 cup shredded red cabbage - 1 ripe avocado, sliced - Fresh cilantro, for garnish - Lime wedges, for serving These ingredients bring out the bright, zesty flavors that make these tacos special. The lime juice adds freshness, while the spices give it a nice kick. Feel free to get creative with toppings and sides. Here are some ideas: - Diced tomatoes for extra freshness - Sour cream for creaminess - Jalapeños for heat - Pickled onions for tang - Rice or beans as a side dish These additions let you customize your tacos to match your taste. They can enhance the meal and make it even more enjoyable. These tacos are not just tasty; they are also healthy. Each serving of Zesty Lime Chicken Tacos has: - Calories: Approximately 350 - Protein: About 30 grams - Carbs: Around 30 grams - Fat: Roughly 15 grams This meal gives you a good balance of protein and healthy fats. It’s a hearty meal that won't weigh you down. Enjoy each bite knowing you're eating something great for your body! {{ingredient_image_1}} To start, gather your ingredients. In a bowl, mix the olive oil, lime juice, lime zest, cumin, chili powder, garlic powder, salt, and pepper. This mix adds great flavor. Next, add the chicken breasts. Ensure they are coated well in the marinade. Cover the bowl and let it sit for at least 30 minutes. For even more flavor, refrigerate for up to 2 hours. Once your chicken is ready, get your grill or skillet hot over medium-high heat. Remove the chicken from the marinade. Cook it for about 6-7 minutes on each side. You want it to reach an internal temperature of 165°F (75°C). Look for a nice golden brown color. After cooking, let the chicken rest for 5 minutes. This helps keep it juicy. While the chicken rests, warm your corn tortillas. You can do this on the grill or in a skillet until they are soft. Thinly slice the chicken against the grain. Now, it’s time to build your tacos! Place a few slices of chicken in each warm tortilla. Top them with shredded red cabbage and sliced avocado. For the finishing touch, add fresh cilantro on top. Serve with lime wedges on the side for that extra zesty kick. Enjoy! Grilling chicken requires attention to detail. Start with a clean grill. This helps prevent sticking. Preheat your grill to medium-high. This temperature cooks the chicken well without burning. - Use a meat thermometer to check the chicken's doneness. Aim for 165°F. - Let the chicken rest after grilling. This keeps it juicy and tender. Marinades are key to great flavor. For these tacos, lime juice is a star. It adds zest and brightness. Combine lime juice, zest, and spices in a bowl. - Use olive oil to help the marinade stick. - Let the chicken marinate for at least 30 minutes. Longer is better, up to 2 hours. Fresh tortillas make a big difference. Keep them warm so they stay pliable. - Warm tortillas on a grill for a few seconds on each side. - Wrap them in a clean towel to keep the heat in. These steps lead to tasty tacos every time! Pro Tips Marinate Longer for Flavor: For the best flavor, marinate the chicken for at least 2 hours or overnight. This allows the spices and lime to penetrate the meat effectively. Check Doneness with a Thermometer: To ensure your chicken is perfectly cooked, use a meat thermometer. The internal temperature should reach 165°F (75°C). Warm Tortillas Properly: Warm your tortillas until they are pliable but not crispy. You can do this on a hot skillet or directly on the grill for added flavor. Customize Your Toppings: Feel free to get creative with toppings! Consider adding diced tomatoes, jalapeños, or a drizzle of lime crema for extra flavor. {{image_2}} You can swap chicken for shrimp or tofu. Shrimp cooks fast and adds flavor. Just marinate it like chicken. Grill until pink and tender. For tofu, use firm blocks. Press and slice it. Marinate and grill until golden. Both options keep the zest alive. Want some heat? Add fresh jalapeños. Slice them thin and toss them in. You can mix them into the chicken marinade. Grill the jalapeños alongside the chicken. They add a spicy kick to the tacos. Just adjust the amount to your taste. If you need a vegetarian choice, try grilled vegetables. Bell peppers, zucchini, and onions work great. Toss them in olive oil and spices. Grill until soft and charred. Place these veggies in tacos instead of chicken. They bring a hearty and fresh taste. To store leftover chicken, let it cool first. Place it in an airtight container. You can keep it in the fridge for up to three days. Make sure to label it with the date. This way, you won’t forget how long it’s been there. When reheating tacos, keep them crisp. Use an oven to warm them. Preheat the oven to 350°F (175°C) and place tacos on a baking sheet. Heat for about 10 minutes. Check to see if they are warm enough. You can also microwave them for quick meals. Just use a damp paper towel to cover them. This keeps the tortillas from getting too tough. To freeze the components, start with the chicken. Slice it and place it in a freezer bag. Remove as much air as you can before sealing. You can freeze it for up to three months. For the tortillas, stack them and wrap tightly in foil. Store them in the freezer too. When ready to use, thaw in the fridge overnight. Then, warm them before making your tacos. You should marinate the chicken for at least 30 minutes. This gives the chicken time to soak up the flavors. If you have more time, marinating for up to 2 hours will make it even tastier. Use lime juice and zest, along with spices, to create a zesty burst in every bite. Yes, you can use flour tortillas if you prefer. They are softer and easier to fold. However, corn tortillas bring a nice texture and a slightly sweet flavor. Try both to see which one you like best. Each type of tortilla can change the taco experience. You can serve many sides with these tacos. Here are some great options: - Mexican rice - Black beans - Fresh salsa - Guacamole - Chips - A simple green salad These sides add flavor and texture. They also help balance the zesty chicken. Enjoy experimenting with different combinations! Zesty Lime Chicken Tacos are simple and fun to make. We covered the key ingredients, cooking steps, and helpful tips. Don’t forget the tasty variations for different diets. Storing leftovers wisely keeps your tacos fresh for later. Remember, marinating the chicken adds great flavor. Enjoy your cooking adventure and feel free to experiment with toppings. With these ideas, you can create a meal everyone will love. Dive into the joy of taco night!

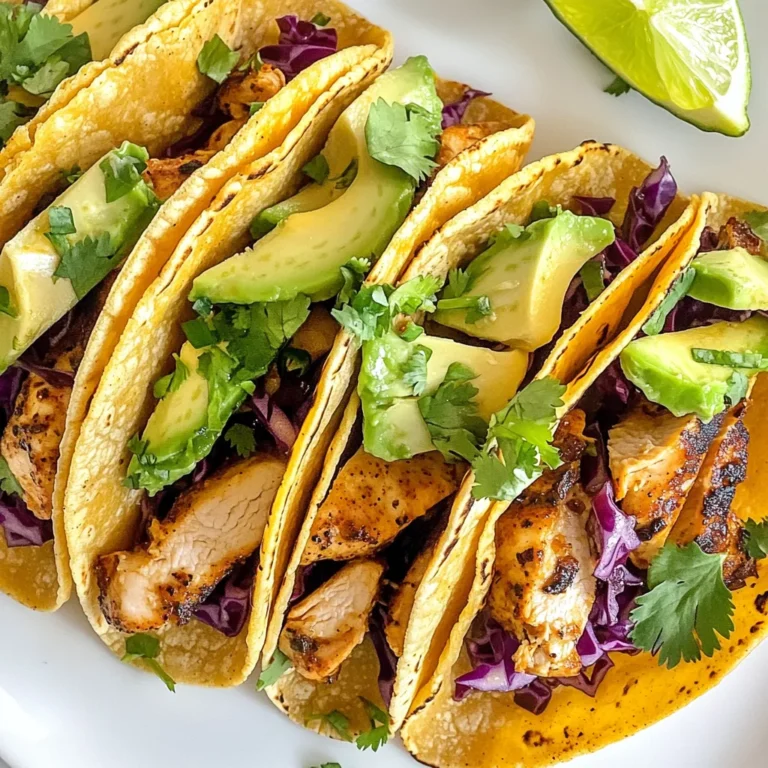
Zesty Lime Chicken Tacos Flavorful and Simple Meal

To make lemon herb grilled shrimp, you need: - 1 pound large shrimp, peeled and deveined - 2 tablespoons olive oil - 2 tablespoons fresh lemon juice - 1 teaspoon lemon zest - 3 cloves garlic, minced These ingredients create a tasty marinade. The shrimp soak up all the flavors, making each bite delicious. You also need fresh herbs and seasonings: - 1 tablespoon fresh parsley, chopped - 1 tablespoon fresh basil, chopped - 1 teaspoon dried oregano - Salt and pepper, to taste The fresh herbs give the shrimp a bright taste. Mixing these with salt and pepper brings out the best flavors. For serving, I suggest using: - Lemon wedges These lemon wedges add a nice touch when you serve the shrimp. Squeezing fresh lemon on top enhances the flavor. Enjoy your meal with a burst of citrus! {{ingredient_image_1}} To start, gather your ingredients. You need olive oil, fresh lemon juice, lemon zest, and garlic. Grab fresh parsley and basil, too. Don't forget the dried oregano, salt, and pepper. In a large bowl, mix the olive oil, lemon juice, lemon zest, minced garlic, chopped parsley, chopped basil, dried oregano, salt, and pepper. Stir well until all the flavors blend together. This marinade is key to making your shrimp tasty. Next, add the shrimp to the marinade. Make sure each shrimp is well coated in the mixture. This step is important for flavor. After coating, cover the bowl with plastic wrap. Place it in the fridge for 30 minutes. This allows the shrimp to soak up all the good flavors. If you have time, you can let them marinate longer for even more taste. Now, it’s time to grill. Preheat your grill to medium-high heat. If you use wooden skewers, soak them in water for 15 minutes. This helps prevent burning. Thread 4 to 5 shrimp onto each skewer. Once the grill is ready, place the skewers on it. Cook for 2 to 3 minutes on each side. You want the shrimp to turn opaque and get nice grill marks. After grilling, let the skewers rest for a minute. This helps keep them juicy. Enjoy your delicious lemon herb grilled shrimp with lemon wedges! To make your shrimp taste great, start with fresh shrimp. Choose large shrimp for the best bite. Make sure they are peeled and deveined. This helps the marinade soak in. Preheat your grill to medium-high heat. This ensures even cooking. Cook the shrimp for about 2-3 minutes on each side. Look for a nice, golden color and grill marks. The shrimp should turn opaque when done. Marinating shrimp is key to great flavor. I recommend at least 30 minutes in the fridge. This allows the shrimp to soak up all the tasty herbs and lemon juice. If you have more time, marinate for up to 2 hours. Just remember, don’t marinate too long. The acid in the lemon juice can make the shrimp mushy. Using the right tools can make grilling easier. A good grill is essential. If you use wooden skewers, soak them in water first. This helps prevent burning. A pair of tongs is useful for flipping the shrimp. A grill basket can also work well if you want to cook more shrimp at once. Make sure your grill is clean before cooking to avoid sticking. Pro Tips Marinate for Flavor: Allow the shrimp to marinate for at least 30 minutes to absorb the flavors of the herbs and lemon for a more vibrant taste. Shrimp Size Matters: Use large shrimp for this recipe to ensure they stay juicy and don't overcook on the grill. Perfect Grill Marks: Ensure your grill is properly preheated to get those nice grill marks and a delicious char on the shrimp. Fresh Herbs Boost: Use freshly chopped herbs instead of dried whenever possible for a brighter and more aromatic dish. {{image_2}} You can change the taste of lemon herb grilled shrimp easily. Try adding chili flakes for heat. You can also swap basil for cilantro for a fresh twist. For a smoky flavor, use smoked paprika in the marinade. If you love spice, add a dash of hot sauce. Experiment with different herbs like dill or thyme. Each change gives a new taste experience. You can grill shrimp, but there are other ways to cook them too. You can bake the shrimp in the oven. Set the oven to 400°F and bake for 8-10 minutes. Another method is to pan-sear them. Heat oil in a pan and cook for 2-3 minutes on each side. You can also use a broiler. Broil for 2-3 minutes until the shrimp are cooked. Each method brings out different flavors and textures. Lemon herb grilled shrimp pairs well with many sides. Serve it on a bed of rice or quinoa. You can also add it to a fresh salad for a light meal. Try it with grilled vegetables for extra flavor. If you want something filling, serve it in tacos with salsa. The options are endless, and you can mix and match to please your taste buds. After enjoying your lemon herb grilled shrimp, store any leftovers in an airtight container. This helps keep the shrimp fresh and tasty. You can keep them in the fridge for up to two days. If you want to keep them longer, consider freezing them instead. To reheat your shrimp, the stove is best. Heat a pan over medium heat. Add a little olive oil and toss in the shrimp. Cook for about 2-3 minutes until they are warm. You can also use a microwave, but be careful. Heat them in short bursts to avoid overcooking. If you want to freeze the shrimp, place them in a freezer bag. Make sure to remove as much air as possible before sealing. This helps prevent freezer burn. You can freeze the shrimp for up to three months. When you’re ready to use them, thaw them in the fridge overnight before cooking. Yes, you can use frozen shrimp. Just thaw them first. Place frozen shrimp in a bowl of cold water. Change the water every 10 minutes until they are thawed. This helps keep the shrimp fresh and tasty. You can serve lemon herb grilled shrimp with many sides. Here are some great options: - Rice or quinoa for a hearty base. - Grilled vegetables like bell peppers and zucchini. - A fresh salad with greens and vinaigrette. - Garlic bread for a crunchy side. These pairings bring out the shrimp's flavor. Shrimp cook quickly. Look for these signs to know they are done: - They turn pink and opaque. - They curl into a C shape. - They reach an internal temperature of 120°F. Cook them for about 2-3 minutes per side on the grill. Overcooking makes them tough, so keep an eye on them! You now have all the tools to make grilled shrimp shine. We covered key ingredients, perfect grilling steps, and smart tips. Remember to pick fresh herbs and get the marinade just right. Try different flavors and serve shrimp with your favorite sides. If you store leftovers well, you can enjoy this dish later. Grilling shrimp is simple and fun, plus it tastes great! Enjoy your cooking, and happy grilling!

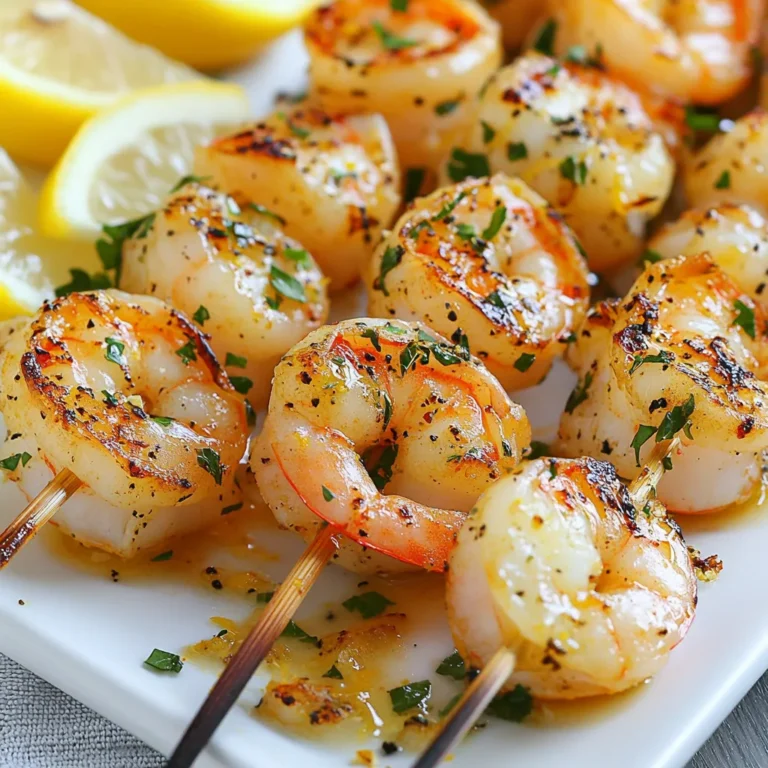
Lemon Herb Grilled Shrimp Savory and Simple Recipe

- 4 boneless, skinless chicken breasts - 1 cup cream cheese, softened - 1 cup shredded cheddar cheese - 1 cup shredded mozzarella cheese - 2-3 jalapeños, diced (seeds removed for less heat) For this recipe, chicken breasts serve as the star. They hold the creamy and spicy filling well. Cream cheese brings richness, while cheddar and mozzarella add flavor and stretch. Jalapeños give a nice kick. If you prefer less heat, remember to remove the seeds. - 1 teaspoon garlic powder - 1 teaspoon onion powder - 1 teaspoon smoked paprika - 1 cup crushed tortilla chips (for topping) Seasonings are key in this dish. Garlic powder and onion powder add depth, while smoked paprika brings a lovely warmth. The crushed tortilla chips on top give a great crunch, balancing the creamy filling. - Fresh cilantro Fresh cilantro can brighten the dish. It adds a pop of color and a fresh taste. If you love herbs, don’t skip this step! It enhances both flavor and presentation. This combination of ingredients makes the Jalapeño Popper Chicken Bake not only easy but packed with flavor. The mixture of cheeses and jalapeños creates a delicious filling. Enjoy the crunch from the tortilla chips as you take a bite! {{ingredient_image_1}} First, preheat your oven to 375°F (190°C). This way, your chicken will cook evenly. Next, take your chicken breasts and place them in a baking dish. Drizzle two tablespoons of olive oil over the chicken. This helps the seasonings stick. Now, sprinkle salt, pepper, garlic powder, onion powder, and smoked paprika on top. Make sure every piece is well coated. In a mixing bowl, add 1 cup of softened cream cheese, 1 cup of shredded cheddar cheese, 1 cup of shredded mozzarella cheese, and 2-3 diced jalapeños. If you want less heat, remove the seeds from the jalapeños. Mix everything together until it forms a smooth filling. You want all the flavors to blend well. Now it’s time to stuff the chicken. Take a generous amount of the cheese mixture and fill each chicken breast. If needed, use toothpicks to keep the filling inside. Next, sprinkle 1 cup of crushed tortilla chips over the chicken. Press them down slightly so they stick. This will give a nice crunch when baked. Cover the dish with aluminum foil and bake for 25 minutes. Then, remove the foil and bake for another 15 to 20 minutes. Your chicken should be cooked through, and the topping should be golden brown and crispy. To keep your chicken juicy, season well. Use salt, pepper, garlic powder, onion powder, and smoked paprika. Make sure to coat the chicken breasts evenly with olive oil. This adds flavor and moisture. Bake your chicken at 375°F (190°C). Cover it with foil for the first 25 minutes. Then, remove the foil for the last 15-20 minutes. This helps the chicken cook through while keeping it moist. For the cheese filling, cream cheese works best. However, you can swap it for Greek yogurt or cottage cheese for a lighter option. This change can reduce calories. Adjust spice levels by adding or removing jalapeños. If you want less heat, remove the seeds. For more kick, keep some seeds in. Mix your cheese and jalapeños until smooth for a rich filling. For the crunchy topping, use your favorite tortilla chips. Choose a thicker chip for more crunch. If you like, add a breadcrumb topping for extra texture. Mix crushed tortilla chips with a little olive oil. This helps them crisp up in the oven. Press the chips down onto the chicken before baking. This creates a tasty, crunchy layer on top. Pro Tips Use Room Temperature Cream Cheese: Allow the cream cheese to sit at room temperature for about 30 minutes before mixing. This will ensure a smoother filling that blends easily with the other ingredients. Customize the Heat Level: If you prefer a milder dish, be sure to remove all the seeds and membranes from the jalapeños. For extra heat, you can leave some seeds in or add a few slices of fresh jalapeño on top before baking. Check Chicken Doneness: Use a meat thermometer to ensure your chicken reaches an internal temperature of 165°F (74°C). This guarantees that the chicken is fully cooked and safe to eat. Make Ahead: You can prepare the stuffed chicken breasts in advance and store them in the refrigerator for up to a day. Just cover the dish tightly with plastic wrap before baking. {{image_2}} You can change the cheese in this recipe to suit your taste. Instead of cheddar or mozzarella, try gouda or pepper jack. These cheeses add a nice twist and extra flavor. If you want a dairy-free option, use vegan cream cheese and dairy-free cheese. Many brands offer great choices that melt well. Want more heat? Add more diced jalapeños to the filling. You can also use spicy cheese varieties like pepper jack. These changes will make the dish even hotter. If you like a milder flavor, remove the seeds from the jalapeños. This cuts the heat without losing taste. You can add veggies to your bake for extra nutrition. Spinach works well and adds a pop of color. Just mix it into the cheese filling. You can also add herbs like cilantro or chives for more flavor. Fresh herbs brighten the dish and make it more appealing. After cooking, let the Jalapeño Popper Chicken Bake cool down. This step helps keep the dish fresh. To cool, leave it at room temperature for about 30 minutes. For storage, I recommend using airtight containers. These help keep the flavors intact. Glass containers work great, but plastic ones can also do the job. Make sure to store the leftovers in the fridge. They will last up to 3-4 days. When it's time to eat your leftovers, reheating is key. The best method is to use the oven. Preheat your oven to 350°F (175°C). Place the chicken in a baking dish and cover it with foil. Heat for about 15-20 minutes. This keeps the chicken moist. You can also use the microwave for a quick reheat. Place the chicken on a microwave-safe plate and cover it with a damp paper towel. Heat in short bursts of 1-2 minutes. This helps avoid drying out the chicken. Avoid reheating on high heat all at once. This can make the chicken tough. Slow and steady wins the race when it comes to reheating! Yes, you can use frozen chicken breasts. Just remember to thaw them first. Thawing helps the chicken cook evenly. It also allows the flavors to soak in better. To thaw, place the chicken in the fridge overnight. If you're in a hurry, you can use the microwave. However, be careful not to start cooking the chicken. To add more heat, you can include more jalapeños. Use extra diced jalapeños in the filling. You can also keep the seeds for added spice. Another option is to add hot sauce to the cheese mixture. If you enjoy spicy cheese, try using pepper jack instead. This will give a nice kick to your dish. Yes, you can prepare this meal ahead of time. Stuff the chicken breasts and store them in the fridge. Just cover them tightly with plastic wrap or foil. You can also make the cheese filling the day before. Simply keep it in an airtight container. When you're ready to cook, just bake as directed. This makes it easy for busy nights! In this blog post, I covered how to make a Jalapeño Popper Chicken Bake. We talked about tasty ingredients like chicken breasts, cream cheese, and jalapeños. I outlined step-by-step instructions for prepping, stuffing, and baking chicken. I shared tips for juicy chicken and crunchy toppings. We explored variations to suit your tastes and provided storage info for leftovers. This dish is fun to make and full of flavor. You can customize it to your liking. Enjoy creating your own version of this recipe!

Jalapeño Popper Chicken Bake Easy and Flavorful Meal

- Essential Ingredients - 1 cup all-purpose flour - 1 cup whole wheat flour - 1 cup canned pumpkin puree - 1/2 cup brown sugar - 1/2 cup granulated sugar - 1/2 cup Greek yogurt - 1/4 cup brewed coffee, cooled - 2 large eggs - 1 teaspoon vanilla extract - 1 teaspoon baking powder - 1 teaspoon baking soda - 1 teaspoon ground cinnamon - 1/2 teaspoon ground nutmeg - 1/2 teaspoon ground ginger - 1/4 teaspoon ground cloves - 1/4 teaspoon salt - Optional Add-ins - 1/2 cup chopped walnuts or pecans - 1/4 cup chocolate chips These ingredients come together to create a delightful muffin. The canned pumpkin adds moisture and flavor. The mix of flours provides a nice texture. The sugars balance the spices and pumpkin. Greek yogurt keeps the muffins soft and adds protein. You can add nuts for crunch or chocolate chips for sweetness. Each option gives a unique twist. Feel free to get creative with your mix-ins! {{ingredient_image_1}} 1. Preheat the oven: Start by setting your oven to 350°F (175°C). This step is key for even baking. Line a muffin tin with paper liners or grease it well. 2. Mixing wet ingredients: In a large bowl, add 1 cup of canned pumpkin puree, 1/2 cup of brown sugar, 1/2 cup of granulated sugar, 1/2 cup of Greek yogurt, 1/4 cup of cooled brewed coffee, 2 large eggs, and 1 teaspoon of vanilla extract. Whisk this mixture until smooth and well combined. 3. Combining dry ingredients: In another bowl, sift together 1 cup of all-purpose flour, 1 cup of whole wheat flour, 1 teaspoon of baking powder, 1 teaspoon of baking soda, 1 teaspoon of ground cinnamon, 1/2 teaspoon of ground nutmeg, 1/2 teaspoon of ground ginger, 1/4 teaspoon of ground cloves, and 1/4 teaspoon of salt. This helps to mix the dry ingredients evenly. 4. Final batter preparation: Gradually add the dry mix to the wet mix. Stir gently until just combined. It’s okay if there are a few lumps; avoid over-mixing. If you want, fold in 1/2 cup of chopped walnuts or pecans and 1/4 cup of chocolate chips for extra sweetness. 5. Filling the muffin tin: Use a spoon or an ice cream scoop to fill each muffin cup about 2/3 full with the batter. This allows space for the muffins to rise while baking. 6. Baking time and tips: Place the muffin tin in the preheated oven. Bake for 20-25 minutes. To check if they are done, insert a toothpick into the center of a muffin. If it comes out clean, they’re ready! 7. Cooling muffins: Once baked, allow the muffins to cool in the tin for 5 minutes. Then, transfer them to a wire rack to cool completely. 8. Presentation suggestions: Serve the muffins warm. You can dust them with powdered sugar or drizzle some maple glaze on top. Pair with a hot cup of coffee for a cozy treat! - Avoiding over-mixing: When you mix your batter, do it gently. Over-mixing makes muffins tough. Mix just until you see no dry flour. A few lumps are okay. They help keep your muffins light and fluffy. - Ensuring even baking: To bake evenly, fill each muffin cup the same way. Use a scoop or spoon to measure the batter. This helps all muffins cook at the same time. Keep an eye on them near the end of baking. Use a toothpick to check if they’re done. - Options for spices: You can adjust the spices to fit your taste. Try adding more cinnamon or a dash of cardamom. These spices add warmth and depth. If you love warmth, double the ginger or nutmeg. - Sweetness adjustments: If you like sweeter muffins, add a bit more sugar. You can also use honey or maple syrup. Just remember, liquid sweeteners may change the batter's texture. Start with small amounts and taste as you mix. - Substitutions for dietary needs: If you're gluten-free, use a gluten-free flour mix. This will change the texture, but it still works. For a dairy-free option, swap Greek yogurt with almond yogurt or applesauce. - Using lower sugar alternatives: To cut down sugar, use less brown and granulated sugar. You can also mash bananas or use unsweetened applesauce. These options keep your muffins tasty while being a bit healthier. Pro Tips Use Fresh Spices: Opt for fresh ground spices to enhance the flavor of your muffins. This will give your Pumpkin Spice Latte Muffins a more vibrant and aromatic taste. Check for Doneness: Always test your muffins with a toothpick before removing them from the oven. If the toothpick comes out clean, they're ready; if not, give them a few more minutes. Cool Before Storing: Let the muffins cool completely before storing them in an airtight container. This helps prevent moisture absorption, keeping them fresher for longer. Add a Twist: For an extra flavor kick, consider adding a splash of maple syrup or a hint of vanilla extract to the batter. It will elevate the taste of your muffins even further. {{image_2}} You can make fun changes to your pumpkin spice latte muffins. One tasty option is chocolate pumpkin spice latte muffins. Just add 1/4 cup of chocolate chips to the batter. The chocolate pairs well with the pumpkin spice. It gives a sweet twist that many love. If you want a nut-free version, skip the walnuts or pecans. Instead, you can add more chocolate chips or even dried fruit. This keeps the muffins soft and tasty. Using fresh pumpkin makes these muffins extra special. You can roast a small pumpkin, then mash it until smooth. This adds a lovely flavor and texture. Fresh pumpkin also gives a burst of color. Incorporating seasonal spices like allspice or cardamom can enhance the flavor too. You can swap ground nutmeg or cloves for these spices. The key is to balance them well. If you need gluten-free muffins, use a gluten-free flour blend. Just ensure it has the right mix of starches and proteins. This keeps the muffins fluffy and moist. For a vegan option, replace eggs with flax eggs. Mix one tablespoon of ground flaxseed with three tablespoons of water. Let it sit for five minutes to thicken. You can also swap Greek yogurt for a plant-based yogurt. This keeps the muffins delicious and fits your diet. To keep your pumpkin spice latte muffins fresh, store them at room temperature. Place them in an airtight container. They last well for up to three days. If you want to keep them longer, use refrigeration. Wrap each muffin in plastic wrap. Then, place them in a zip-top bag. This method keeps them moist and tasty for about a week. Freezing muffins is a great way to save some for later. Start by letting them cool completely. Then, wrap each muffin tightly in plastic wrap. Next, place them in a freezer-safe bag. They can stay frozen for up to three months. When you are ready to eat one, take it out and let it thaw at room temperature. For a quick treat, you can reheat a muffin in the microwave. Heat it for about 15-20 seconds. This gives you a warm, cozy snack that tastes fresh. Can I use fresh pumpkin instead of canned? Yes, you can use fresh pumpkin. First, you need to cook and puree it. This adds fresh flavor and moisture. Make sure to measure out one cup for the recipe. How can I troubleshoot dry muffins? If your muffins are dry, check your oven's temperature. A too-hot oven can dry them out. Also, be careful not to overmix the batter. This can make them tough. Adding a bit more yogurt may also help keep them moist. How long do these muffins last? These muffins stay fresh for about three days at room temperature. If you want them to last longer, store them in the fridge for up to a week. Substituting Greek yogurt You can swap Greek yogurt with sour cream. This change keeps the muffins moist. It also adds a slightly different flavor. You can also use regular yogurt if you prefer. Can I omit the coffee? Yes, you can leave out the coffee. It adds flavor, but the muffins will still taste great without it. You could replace it with an equal amount of milk or water if you want to keep the texture. You now have a complete guide to making pumpkin spice latte muffins. We covered essential and optional ingredients, preparation steps, and tips for baking and serving. I shared ways to enhance flavors and adapt for special diets, plus storage tips to keep your muffins fresh. Experiment with variations to find your perfect take. Enjoy the process and share your creations. Happy baking!

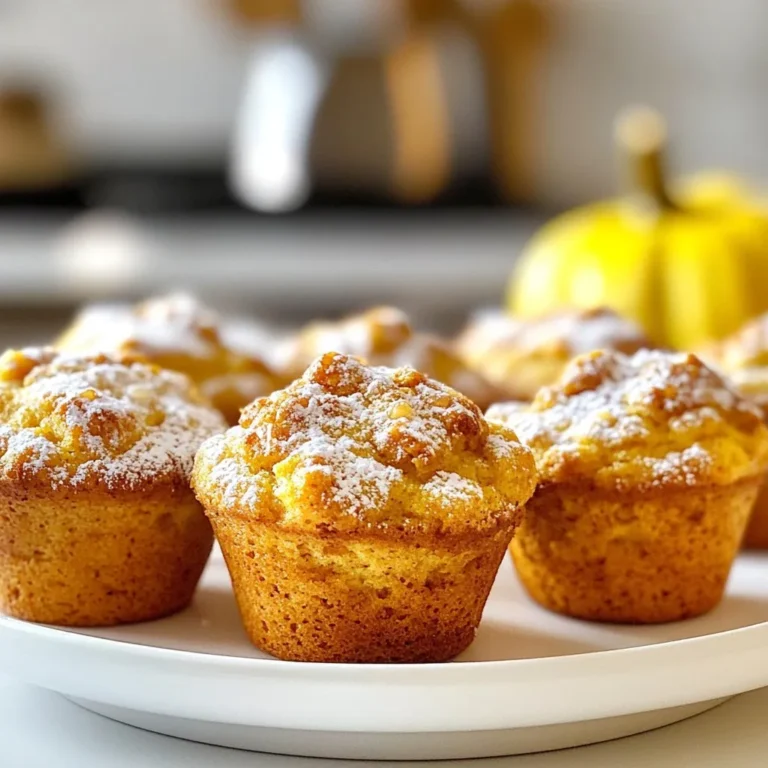
Pumpkin Spice Latte Muffins Irresistible Fall Treat

- 4 chicken thighs (bone-in, skin-on) - 1 cup plain yogurt - 3 tablespoons tandoori masala - 1 red bell pepper, sliced - 1 yellow bell pepper, sliced - 1 red onion, cut into wedges - 2 tablespoons olive oil - Salt, to taste - Essential spices: - 2 tablespoons lemon juice - 1 tablespoon garlic paste - 1 tablespoon ginger paste - 1 teaspoon turmeric powder - 1 teaspoon cumin powder - Fresh cilantro for garnish - Lemon wedges for serving - Optional sides: rice or naan for a complete meal Tandoori chicken needs quality ingredients. The chicken thighs add rich flavor and moisture. The skin helps lock in juices as it cooks. Yogurt and tandoori masala give the chicken its classic taste. They also help tenderize the meat. For vegetables, I love using colorful bell peppers and red onion. They roast well and add sweetness. Olive oil is key to help them cook and brown nicely. Don’t forget salt and your spices. They enhance the dish and bring it to life. Fresh cilantro and lemon wedges add the final touch. They brighten the meal and add freshness. Consider serving with rice or naan to soak up the flavors. This meal is great for any day. It's simple, tasty, and fun to make! {{ingredient_image_1}} To make the marinade, mix these in a bowl: - 1 cup plain yogurt - 3 tablespoons tandoori masala - 2 tablespoons lemon juice - 1 tablespoon garlic paste - 1 tablespoon ginger paste - 1 teaspoon turmeric powder - 1 teaspoon cumin powder - Salt, to taste Stir well until all the spices blend together. Coat the chicken thighs in this mix. Cover the bowl with plastic wrap. Marinate in the fridge for at least 1 hour. For the best taste, marinate overnight. This lets the chicken soak up all the flavors. Preheat your oven to 400°F (200°C). Grab a large sheet pan. Spread the sliced bell peppers and onion evenly across the pan. Use: - 1 red bell pepper, sliced - 1 yellow bell pepper, sliced - 1 red onion, cut into wedges Drizzle 2 tablespoons of olive oil over the veggies. Sprinkle salt and pepper to taste. Now, place the marinated chicken thighs on top of the veggies, skin-side up. Save any extra marinade for later use. Bake the sheet pan meal in the preheated oven for 35-40 minutes. The chicken is done when it reaches 165°F (75°C). Check the skin; it should be golden and crispy. For extra flavor, brush the reserved marinade over the chicken in the last 5-10 minutes of cooking. Take the pan out and let it rest for a few minutes before serving. To boost the taste of your tandoori chicken, try adding a few spices. Consider smoked paprika or coriander for depth. You can also add cayenne for heat. To make chicken more flavorful, use fresh ingredients. Fresh garlic and ginger give a bright taste. You can also add a splash of coconut milk for a creamy twist. Marinating is key to great flavor. For a quick meal, marinate for at least one hour. This allows the chicken to soak up the spices. If you have time, marinate overnight. This gives the chicken a deeper flavor. Longer marinating makes the chicken tender and juicy. You can cook tandoori chicken in many ways. Use an air fryer for a quick option. It cooks the chicken fast while keeping it crispy. If you prefer grilling, that works too! Grill the chicken over medium heat. This adds a smoky flavor that pairs well with the spices. Just watch the cooking time to avoid drying it out. Pro Tips Marinate Longer: For the best flavor, marinate the chicken overnight. This allows the spices to deeply penetrate the meat for a more robust taste. Use Bone-In Thighs: Bone-in chicken thighs stay juicier during cooking compared to boneless cuts, resulting in a more flavorful dish. Veggie Variation: Feel free to add other vegetables like zucchini or cherry tomatoes for added flavor and nutrition. Rest Before Serving: Let the chicken rest for a few minutes after baking. This helps the juices redistribute, ensuring tender and juicy meat. {{image_2}} You can swap in many veggies for this dish. Try zucchini, carrots, or broccoli. Each adds a unique taste. You can also use seasonal veggies. In summer, toss in fresh corn or tomatoes. In fall, root veggies like sweet potatoes work well. This keeps your meal fresh and fun. If you want to skip chicken, use tofu or fish. Tofu absorbs flavors well and is a great vegan option. For fish, flaky white fish like cod or tilapia works nicely. Just remember to adjust cooking times. Fish cooks faster, so check it after 20-25 minutes. Cook tofu until it's golden brown and heated through. Feel free to mix up the marinade. Use different spices like garam masala or smoked paprika. You can also add honey for a sweet touch. Want to try something new? Add fresh herbs like mint or cilantro. This will change the flavor and make it special. Get creative and find a mix you love! To keep your tandoori chicken fresh, follow these tips: - Refrigeration: Place leftovers in the fridge within two hours. - Containers: Use airtight containers or resealable bags for storage. You can reheat your tandoori chicken in these ways: - Oven: Preheat to 350°F (175°C). Place chicken on a baking sheet. Heat for about 15-20 minutes. - Microwave: Use a microwave-safe plate. Heat in short bursts, around 1-2 minutes at a time. To keep moisture and flavor, cover the chicken with a damp paper towel. Freezing your tandoori chicken is easy. Here’s how: - Freezing: Let the chicken cool completely. Wrap each piece in plastic wrap, then place in a freezer bag. - Reheating Frozen Chicken: Thaw in the fridge overnight. Reheat in the oven at 350°F (175°C) for 20-25 minutes until hot. Tandoori chicken comes from Indian cooking. It uses a special clay oven called a tandoor. This oven cooks food at very high heat. The chicken marinates in yogurt and spices. This makes it juicy and full of flavor. Tandoori masala is a spice mix that gives it a unique taste. You can find many recipes for tandoori chicken, but they all focus on this cooking style. Yes, you can use boneless chicken thighs. They cook faster than bone-in thighs. Boneless thighs usually take about 25-30 minutes in the oven. Since they lack bone, they may dry out faster. Keep an eye on the internal temperature. It should still reach 165°F (75°C) for safe eating. The flavor will be great, but the texture will differ a bit. The spice level of this recipe can change. Tandoori masala has heat, but it is not too spicy. You can adjust the heat by adding extra spices or chili powder. For milder flavors, use less tandoori masala or add more yogurt. You can also serve it with a side of yogurt sauce to cool it down. This way, you can enjoy the dish at your preferred spice level. To make this recipe gluten-free, check the tandoori masala. Most brands are gluten-free, but it’s best to read the label. You can use gluten-free yogurt too. Avoid adding bread or other gluten-containing items. This dish is naturally gluten-free, so it’s easy to enjoy without worry. Yes, you can prepare this meal ahead of time. Marinate the chicken the night before for better flavor. Keep it in the fridge until you are ready to cook. You can also chop the veggies ahead of time. Store them in an airtight container in the fridge. When you’re ready, just spread everything on the sheet pan and bake. This blog post covered how to make tasty tandoori chicken. We discussed key ingredients like chicken thighs, yogurt, and tandoori masala. I shared tips on marinating, cooking, and enhancing flavor. You learned about vegetable options, protein swaps, and how to store leftovers. Now, you have the tools to create your version of this dish. Enjoy cooking and experimenting to find what you love most!

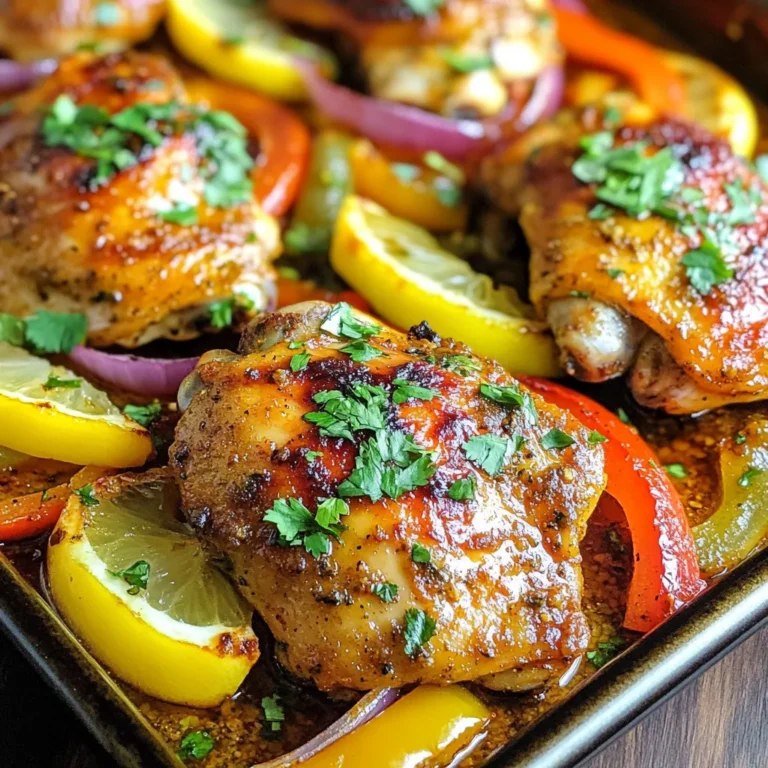
Tandoori Chicken Sheet Pan Meal Easy and Flavorful Dish

PREV 1 … 42 43 44 … 57 NEXT
quick dish kitchen

explore

DessertsDinnerAppetizersDrinks

Our Policies

  • Cookie Policy
  • Copyright Policy
  • Disclaimer
  • GDPR Policy
  • Terms Of Use
Back to Top
  • About
  • Contact Us
  • Privacy Policy
© 2025 quick dish kitchen