FREE DINNER EBOOK! Get your copy!
  • Cookie Policy
  • GDPR Policy
  • Disclaimer
  • Terms Of Use
  • Visit my other site: Fun Cookie Recipes
quick dish kitchen
  • Home
  • Dinner
  • Desserts
  • Drinks
  • Appetizers
  • Contact
  • About
  • Privacy Policy
  • Home
  • Dinner
  • Desserts
  • Drinks
  • Appetizers
  • Contact
  • About
  • Privacy Policy
  • Cookie Policy
  • GDPR Policy
  • Disclaimer
  • Terms Of Use
Visit my other site: Fun Cookie Recipes

HOME / CATEGORIES /

Latest

- 2 cups rolled oats - 1 cup natural peanut butter - 1/2 cup honey or maple syrup - 1/2 cup protein powder (optional) - 1/4 cup chia seeds - 1/4 cup dried cranberries or chocolate chips - 1/4 teaspoon salt - 1 teaspoon vanilla extract These ingredients create a tasty and healthy snack. The oats give a nice chew. Natural peanut butter brings protein and healthy fat. Honey or maple syrup adds sweetness. Protein powder is optional, but it boosts nutrition. Chia seeds offer fiber and omega-3s. Dried cranberries or chocolate chips add a fun touch. Salt balances the sweetness, and vanilla adds flavor depth. - Calories and Macronutrients per Bar Each bar has about 200 calories. It contains 8 grams of protein, 10 grams of fat, and 24 grams of carbs. This makes it a great snack to fuel your day. - Health Benefits of Key Ingredients Peanut butter provides protein and healthy fats. Oats are high in fiber, promoting gut health. Chia seeds add more fiber and help you feel full. Using honey or maple syrup gives natural sweetness without refined sugar. Each ingredient serves a purpose, making these bars a smart snack choice. {{ingredient_image_1}} To start, preheat your oven to 350°F (175°C). This step ensures your bars cook evenly. Next, take an 8x8 inch baking dish and line it with parchment paper. Leave some overhang to help you lift the bars out later. This makes it easier to cut the bars without sticking. In a large mixing bowl, add 1 cup of natural peanut butter, 1/2 cup of honey (or maple syrup if you prefer), and 1 teaspoon of vanilla extract. Mix these together until you get a smooth, creamy consistency. This creamy base helps bind your bars and adds flavor. In a separate bowl, combine 2 cups of rolled oats, 1/2 cup of protein powder (if using), 1/4 cup of chia seeds, 1/4 cup of dried cranberries (or chocolate chips), and 1/4 teaspoon of salt. Stir these ingredients together well. This step ensures the oats and seeds are evenly spread throughout the mixture. Now it's time to combine the wet and dry mixtures. Pour the dry mixture into the wet mixture. Mix thoroughly until every ingredient is well combined. You want a consistent texture to ensure each bite tastes great. Press the mixture down firmly into your prepared baking dish using a spatula or your hands. Place the baking dish in your preheated oven. Bake for 20 to 25 minutes. You want the edges to turn slightly golden. Once done, take the dish out and let it cool for about 10 minutes. Use the parchment paper overhang to lift the bars out. Allow them to cool completely before cutting them into bars. Enjoy your tasty and healthy snack! To get the right texture, mix your wet and dry ingredients well. Start by blending the peanut butter, honey, and vanilla until creamy. Then, stir in the oats, chia seeds, and salt. The mixture should be thick but not dry. When you press it into the pan, use your hands or a spatula to pack it tightly. This helps the bars hold together after baking. You can make these energy bars vegan by swapping honey for maple syrup. For a gluten-free option, choose certified gluten-free oats. This way, everyone can enjoy these tasty snacks without worry. Want to spice things up? Add cinnamon or nutmeg for warmth. You can also toss in chopped nuts, seeds, or dried fruits. Chocolate chips give a sweet twist. These simple changes boost flavor and add fun textures to your energy bars. Pro Tips Use Natural Peanut Butter: Opt for natural peanut butter without added sugars or oils for a healthier option that enhances flavor. Customize Your Mix-Ins: Feel free to swap dried cranberries for other dried fruits, nuts, or seeds, depending on your taste preferences. Press Firmly: Make sure to press the mixture down firmly in the baking dish to ensure the bars hold together when cut. Cool Completely: Allow the bars to cool completely before cutting to prevent them from crumbling and to achieve cleaner edges. {{image_2}} You can change up your peanut butter oatmeal energy bars for more fun. Here are two tasty ideas: - Chocolate Chip Peanut Butter Bars: Swap dried cranberries for chocolate chips. The sweet chocolate mixes well with the creamy peanut butter. You’ll love this treat after a workout! - Cranberry Almond Oat Bars: Mix in chopped almonds instead of chocolate chips. Use dried cranberries for a fruity touch. This combo adds crunch and a burst of flavor. Want to boost your bars with protein? You can add protein powder. Use about 1/2 cup of your favorite kind. This helps make your energy bars filling and great for muscle recovery. Good options include: - Whey protein - Plant-based protein - Collagen powder Mix it with your dry ingredients for even flavor. No time to bake? No problem! You can make no-bake energy bars. Just follow these steps: 1. Combine Ingredients: Mix the rolled oats, peanut butter, honey, and any add-ins in a bowl. 2. Press Mixture: Use a baking dish lined with parchment paper. Press down the mixture firmly. 3. Chill: Place the pan in the fridge for at least 1 hour. This helps the bars set. 4. Cut and Enjoy: After chilling, cut into bars and enjoy! No heat needed, just tasty snacks ready to go. For storing your Peanut Butter Oatmeal Energy Bars, use airtight containers. Glass jars work well. You can also use plastic containers with tight lids. These options keep the bars fresh and tasty. You can keep these energy bars at room temperature for up to one week. If you want them to last longer, store them in the fridge. In the fridge, they stay fresh for about two weeks. Always check for any signs of spoilage before eating. Freezing is a great way to keep your energy bars longer. Wrap each bar in plastic wrap or foil. Then place them in a freezer-safe bag. This method helps keep them fresh for up to three months. To enjoy, just take a bar out and thaw it at room temperature. You can also heat it in the microwave for a warm snack. Yes, you can! Here are some great alternatives: - Almond butter - Cashew butter - Sunflower seed butter - Hazelnut butter These nut butters can change the taste, but they work well in this recipe. Pick one that you love! These energy bars last for about a week at room temperature. For longer storage, keep them in the fridge. You can also freeze them. They stay fresh for up to three months in the freezer. Just thaw them when you're ready to enjoy! Yes, these bars are quite healthy! They have a mix of oats, nut butter, and seeds. Here are some benefits: - Rolled oats provide fiber and energy. - Peanut butter adds protein and healthy fats. - Chia seeds are rich in omega-3s and antioxidants. - Honey or maple syrup gives natural sweetness. These bars are a great snack for anyone looking to stay healthy while enjoying tasty food! In this post, we covered how to make delicious peanut butter oatmeal energy bars. We explored the key ingredients, such as oats, peanut butter, and chia seeds, which provide great nutrition. You learned the detailed steps for mixing, baking, and storing these bars. Remember, you can always customize the flavor with your favorite mix-ins. Making these bars can be fun and rewarding. Enjoy your healthy snack and share it with family and friends!

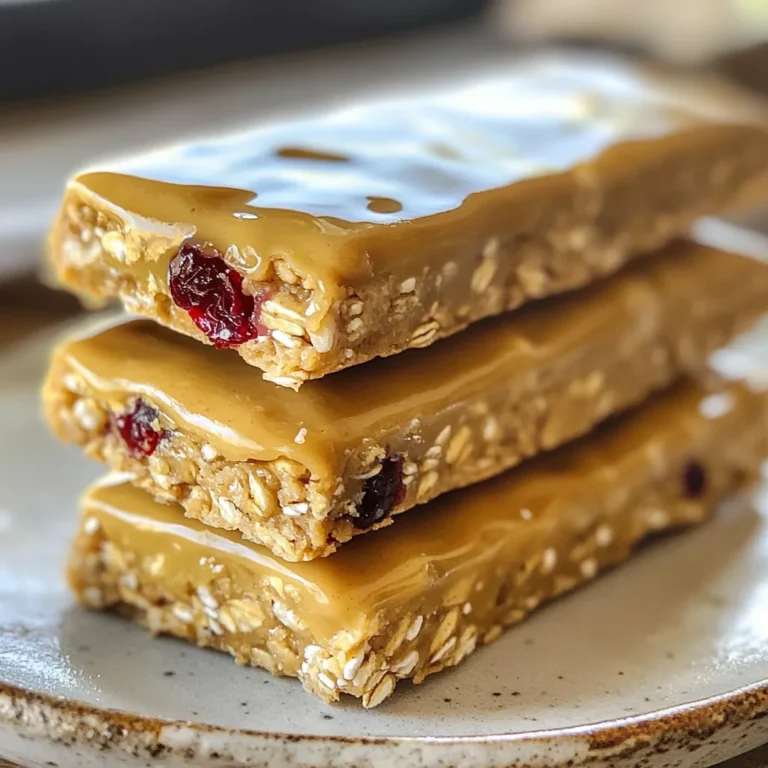
Peanut Butter Oatmeal Energy Bars Healthy and Tasty Snack

- 1 cup all-purpose flour - 2 tablespoons sugar - 1 tablespoon baking powder - 1/2 teaspoon salt - 1 cup milk - 1 large ripe banana, mashed - 1 large egg - 2 tablespoons melted butter (plus extra for cooking) - 1/2 cup chocolate chips - 1/2 teaspoon vanilla extract - Optional toppings: sliced bananas, whipped cream, maple syrup Gathering the right ingredients is key to making delicious chocolate chip banana pancakes. Each item plays a big role in creating that perfect fluffy texture. Start with 1 cup of all-purpose flour. This is the base for your pancakes. Next, add 2 tablespoons of sugar. This gives a little sweetness without being overpowering. Then, include 1 tablespoon of baking powder. This helps the pancakes rise and stay light. Don’t forget 1/2 teaspoon of salt. Salt balances the sweetness and enhances the flavors. You will need 1 cup of milk for moisture. It makes the batter smooth and creamy. Grab 1 large ripe banana and mash it well. This adds natural sweetness and flavor. You also need 1 large egg. The egg binds everything together and adds richness. Melt 2 tablespoons of butter. This adds flavor and keeps the pancakes from sticking. Add in 1/2 cup of chocolate chips. This is where the magic happens; they melt perfectly in the warm pancakes. Finally, don’t skip 1/2 teaspoon of vanilla extract for that lovely aroma and taste. For toppings, you can use sliced bananas, whipped cream, or maple syrup. These add fun flavors and make your pancakes extra special. With all these ingredients, you’re ready to make a breakfast treat that everyone will love! {{ingredient_image_1}} First, grab a large mixing bowl. Add 1 cup of all-purpose flour, 2 tablespoons of sugar, 1 tablespoon of baking powder, and 1/2 teaspoon of salt. Use a whisk to mix these ingredients well. Whisking helps to blend the flour and baking powder evenly. This step is key. It ensures that the pancakes rise well, giving you that light and fluffy texture. In another bowl, combine 1 cup of milk, 1 large ripe banana (mashed), 1 large egg, 2 tablespoons of melted butter, and 1/2 teaspoon of vanilla extract. Mix these until you get a smooth mixture. This is where the banana adds flavor. It blends nicely with the milk and butter, making your pancakes moist and delicious. Now, pour the wet mixture into the bowl with the dry ingredients. Stir gently until just combined. The batter should still look slightly lumpy. Overmixing can lead to tough pancakes. So, take your time and fold the mixture carefully. When you see a few dry spots, you’re ready to add the chocolate chips. Preheat a non-stick skillet over medium heat. Add a small amount of butter to grease the surface. Pour about 1/4 cup of batter for each pancake. Cook until bubbles form on top, about 2-3 minutes. This shows they are ready to flip. Carefully turn them over and cook for another 1-2 minutes until golden brown. Keep an eye on the heat to avoid burning. Repeat this with the remaining batter and enjoy your pancakes warm! To make your pancakes fluffy, use room temperature ingredients. Cold milk and eggs can make the batter dense. Let them sit out for about 30 minutes. Resting the batter for 10 minutes also helps. It allows the flour to absorb the moisture fully. This step makes your pancakes rise better during cooking. Use a non-stick skillet for easy flipping. Preheat it over medium heat. Add a small amount of butter to the skillet before pouring in the batter. If the heat is too high, the pancakes can burn on the outside while staying raw inside. If they cook too fast, lower the heat slightly. Fold in the chocolate chips gently. This keeps the batter light and airy. Avoid stirring too much, as it can lead to dense pancakes. For even chocolate placement, sprinkle some chips on top of the batter once it is in the skillet. This way, you prevent heavy chocolate at the bottom. Pro Tips Perfectly Ripe Bananas: Use bananas that are very ripe, with lots of brown spots, as they provide the best flavor and natural sweetness for your pancakes. Don’t Overmix: When combining wet and dry ingredients, mix just until combined. A few lumps are okay; overmixing can lead to dense pancakes. Even Heat Distribution: Make sure your skillet or griddle is evenly heated to prevent pancakes from burning. Test with a drop of water; it should sizzle and evaporate quickly. Keep Them Warm: If making multiple pancakes, keep cooked ones warm in a low oven (200°F or 93°C) while you finish the batch. {{image_2}} You can make your pancakes healthier with a few swaps. Try using whole wheat flour instead of all-purpose flour. Whole wheat adds fiber and nutrients. Oat flour is another great choice. It gives a nutty flavor and works well. For sweetening, think about using honey or maple syrup. These natural options can replace sugar. They add a different taste and are often less processed. Want to mix it up? Try adding nuts to your batter. Chopped walnuts or pecans bring crunch and flavor. You could also sprinkle in some cinnamon or nutmeg. These spices add warmth and depth. Don’t forget about chocolate! You can use dark chocolate chips or even white chocolate. Each type offers a unique taste. You can even blend different chocolates for a fun twist. If you follow a dairy-free diet, use almond milk or soy milk instead of regular milk. For butter, try coconut oil or a dairy-free spread. These swaps keep the flavor without dairy. If you're vegan, you can skip the egg. Use a flaxseed or chia seed mix instead. Just mix one tablespoon of seeds with three tablespoons of water. Let it sit for five minutes to thicken. This mix binds the pancakes just like an egg would. To keep leftover pancakes fresh, place them in an airtight container. You can stack them with parchment paper between each pancake to avoid sticking. Properly stored, they last about 3 to 4 days in the fridge. When reheating, use a microwave or skillet. For the microwave, place a pancake on a plate and cover it with a damp paper towel. Heat for about 20-30 seconds until warm. If you prefer the skillet, heat it over low heat with a touch of butter. Cook each pancake for about 1-2 minutes on both sides. This method adds a nice crispness. Freezing pancakes is easy and a great way to save time. Start by letting the pancakes cool completely. Then, stack them with parchment paper in between each one to prevent sticking. Wrap the entire stack in plastic wrap or place them in a freezer bag. Squeeze out as much air as possible. They can stay fresh for up to 2 months in the freezer. To thaw frozen pancakes, take them out and leave them in the fridge overnight. If you're in a hurry, you can microwave them directly from the freezer. Heat for about 1 minute, flipping halfway through. For a crispy finish, use a skillet over low heat for a few minutes. Enjoy your pancakes just like fresh! Yes, you can make these pancakes gluten-free. Use gluten-free flour blends available at stores. Look for blends made from rice flour, almond flour, or coconut flour. These blends work well in pancakes. Just replace the all-purpose flour with your choice of flour blend. Adjust the liquid slightly if needed since gluten-free flours can absorb more moisture. If you need an egg substitute, there are many options. You can use 1/4 cup of unsweetened applesauce for each egg. Mashed banana works great too; use 1/4 cup for one egg. You can also use flaxseed meal. Mix 1 tablespoon of flaxseed with 3 tablespoons of water and let it sit for a few minutes. This mixture acts like an egg in pancakes. To boost nutrition, add fruits like blueberries or diced apples into the batter. You can also mix in oats or whole wheat flour for more fiber. Chia seeds or flax seeds add healthy fats and fiber too. These options enhance flavor and make the pancakes healthier without losing their tasty appeal. Pancakes stay fresh in the fridge for about 3 to 4 days. Store them in an airtight container to keep them moist. When you’re ready to eat, just reheat them in the microwave or on the skillet. For longer storage, consider freezing them. They can last up to 2 months in the freezer if wrapped well. In this post, we explored a simple, tasty pancake recipe using easy ingredients. We covered steps to mix and cook the batter for fluffy pancakes. You now know tips for variations and storage options. These pancakes can fit any diet and taste preference. Enjoy making them at home, and share the joy with family or friends. Simple tools and a bit of practice will lead you to perfect pancakes every time. Now, get cooking and treat yourself!

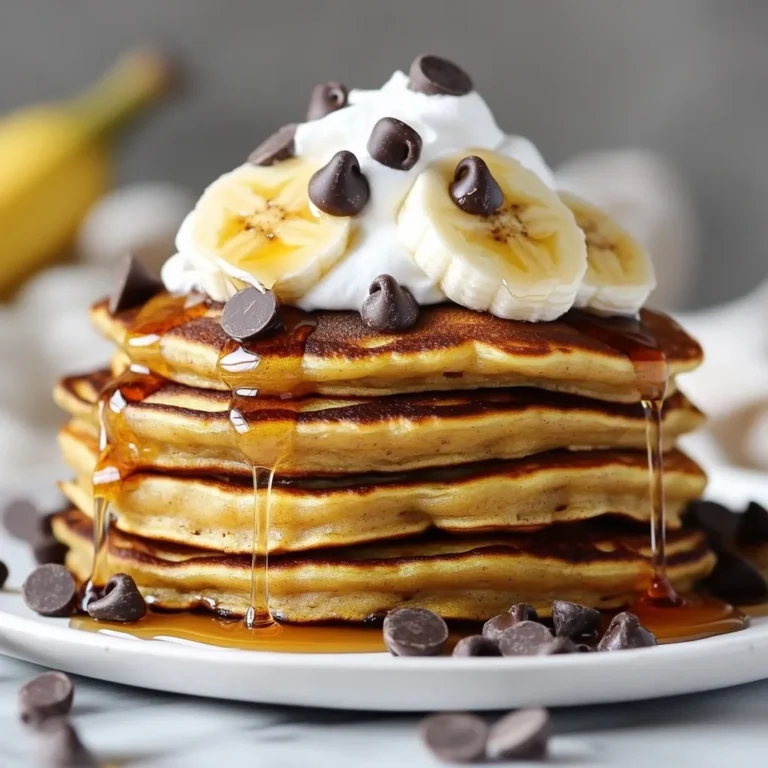
Chocolate Chip Banana Pancakes Irresistible Breakfast Treat

To make these tasty energy bites, gather the following ingredients: - 1 cup rolled oats - 1/2 cup almond butter (or peanut butter) - 1/4 cup honey or maple syrup - Zest of 2 lemons - 2 tablespoons lemon juice - 2 tablespoons poppy seeds - 1/4 teaspoon salt - 1/2 teaspoon vanilla extract - 1/4 cup shredded coconut (unsweetened) These ingredients combine to create a bright and zesty flavor. While the main ingredients shine, you can tweak the recipe. Here are some fun options: - 2 tablespoons chia seeds for extra nutrition - Swap almond butter for peanut butter if you prefer. - Use agave syrup instead of honey or maple syrup for a vegan option. - Add a handful of nuts or seeds for crunch. These add-ins can boost flavor and texture. Each ingredient brings its own health perks: - Rolled oats are great for energy and full of fiber. - Almond butter provides healthy fats and protein. - Honey offers natural sweetness and antioxidants. - Lemon juice adds vitamin C, which supports your immune system. - Poppy seeds give a nice crunch and are rich in minerals. - Chia seeds are packed with omega-3 fatty acids and fiber. These ingredients make the energy bites not just tasty but also a healthy snack choice. {{ingredient_image_1}} To start, gather your ingredients. You will need rolled oats, almond butter, honey, lemon zest, lemon juice, poppy seeds, salt, vanilla extract, and shredded coconut. If you want extra nutrition, add chia seeds. In a large bowl, mix the rolled oats, almond butter, and honey together. Stir until it blends well. Next, add the lemon zest, lemon juice, poppy seeds, salt, and vanilla extract. Mix everything until it’s well combined. If you’re using chia seeds and shredded coconut, fold them in now. Once your mixture is ready, cover the bowl with plastic wrap. Place it in the fridge for about 30 minutes. This chilling helps the mix firm up, making it easier to roll. After chilling, take out the mixture. Scoop out about one tablespoon of the mix. Roll it between your palms to form a bite-sized ball. Repeat until you finish the mixture. Place the rolled bites on a baking sheet with parchment paper. For a fun twist, you can roll the bites in extra shredded coconut or poppy seeds before laying them down. These energy bites are great for snacking any time of day. To serve, put them in a small bowl or on a tiered stand for a nice display. This makes them look inviting. Enjoy these bites as a quick snack or as an energy boost during your day! To keep your energy bites fresh, store them in an airtight container. Place them in the fridge. They stay good for about a week. You can also freeze them for longer storage. Just use a freezer-safe bag or container. Energy bites can last up to three months in the freezer. When you want one, let it thaw in the fridge overnight. Feel free to get creative with flavors. You can swap the almond butter for peanut butter or cashew butter. Try adding different seeds like pumpkin or sunflower seeds. If you love chocolate, mix in dark chocolate chips. For a tropical twist, use dried fruit like mango or pineapple. You can even add spices like cinnamon or nutmeg for warmth and depth. One common mistake is not chilling the mixture long enough. Chilling helps the bites hold their shape. Another mistake is measuring ingredients too loosely. Make sure to measure accurately for the best texture. Don't skip the salt; it enhances all the flavors. Lastly, avoid rolling the bites too large. Aim for about one tablespoon per bite for the right size. Pro Tips Use Fresh Lemons: For the best flavor, use fresh lemons for zest and juice instead of bottled lemon juice. Experiment with Nut Butters: Feel free to swap almond butter with other nut butters like cashew or sunflower seed butter for different flavor profiles. Chill for Firmness: Chilling the mixture before rolling helps the energy bites hold their shape better. Customize Your Add-Ins: Get creative by adding ingredients like dried fruits, nuts, or seeds for added texture and nutrition. {{image_2}} If you want to skip nuts, use sunflower seed butter. This swap keeps the bites creamy and tasty. You can also use soy nut butter for a similar flavor. Both options work well and are safe for nut allergies. Try adding different zests like orange or lime for new flavors. You can mix in spices like cinnamon or ginger for warmth. To make them sweeter, add mini chocolate chips or dried fruit. Each of these changes keeps the bites fun and fresh. Chia seeds add fiber and protein. You can also mix in hemp seeds for extra omega-3s. Another great option is flaxseed, which boosts nutrition without changing the taste. These superfoods make your energy bites even healthier. To keep your lemon poppy seed energy bites fresh, store them in an airtight container. Place parchment paper between layers if you stack them. This keeps them from sticking together. Store the bites in the fridge for up to a week. The cool temperature helps preserve their flavor and texture. If you want to keep these energy bites longer, freezing is a great option. After making the bites, lay them flat on a baking sheet. Freeze them for about 1-2 hours until firm. Once frozen, transfer them to a freezer-safe bag or container. They can last for about 2-3 months in the freezer. Just thaw them in the fridge overnight before eating. Check for signs of spoiling before you eat your energy bites. Look for any changes in color or texture. If they feel slimy or have an off smell, it’s best to throw them away. If there are any visible mold spots, discard them immediately. Always trust your senses to keep snacks safe and tasty! Lemon poppy seed energy bites last about one week in the fridge. Store them in an airtight container. For longer storage, you can freeze them. They will keep well for up to three months in the freezer. Just thaw them in the fridge before enjoying. Yes, you can easily make these bites vegan. Just swap honey for maple syrup. Use almond butter or peanut butter, as both are vegan-friendly. This way, you keep all the great taste without any animal products. If you don’t have almond butter, use peanut butter or sunflower seed butter. Both options work well and give a nice flavor. They will keep the bites creamy and tasty, just like almond butter does. Each energy bite has about 100 calories. This can vary slightly based on the ingredients you use. If you add chia seeds or coconut, it may change the count a bit. Always check your specific brands for exact numbers. Yes, you can omit the poppy seeds if you want. The bites will still be delicious without them. However, poppy seeds add a nice crunch and flavor. You might want to replace them with chopped nuts or seeds for texture. In this post, we explored how to make Lemon Poppy Seed Energy Bites. We covered the key ingredients, their nutrition benefits, and how to prepare and store them. I shared tips for customizing flavors and avoiding common mistakes. You can enjoy different variations to suit your taste. These bites are easy to make and great for snacks. With proper storage, they stay fresh for longer. Enjoy trying them, and feel free to make them your own!

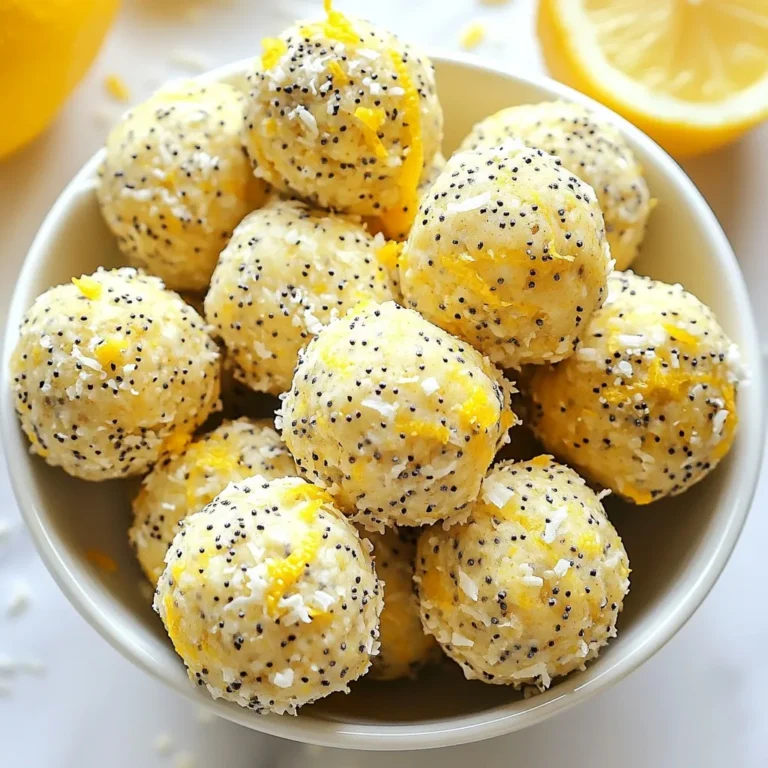
Lemon Poppy Seed Energy Bites Healthy Snack Idea

- 1 cup couscous - 1 1/4 cups vegetable broth - 1 cup cherry tomatoes, halved - 1 cucumber, diced - 1/2 red bell pepper, diced - 1/4 red onion, finely chopped - 1/4 cup fresh parsley, chopped - 1/4 cup fresh mint, chopped - 1/4 cup feta cheese, crumbled Couscous is the star of this dish. It cooks quickly and absorbs flavor well. I love using vegetable broth instead of water for added taste. Fresh veggies like cherry tomatoes, cucumber, and red bell pepper give a crunchy texture. Red onion adds a nice bite. The herbs, parsley and mint, add freshness. Feta cheese brings a creamy finish that ties everything together. - 3 tablespoons olive oil - 2 tablespoons lemon juice - Salt and pepper to taste The dressing is simple yet full of flavor. Olive oil is rich and smooth, while lemon juice gives a bright kick. Salt and pepper enhance all the taste. I like to whisk these together to blend the flavors. Pour this over the salad just before serving for the best effect. - Calories per serving: About 230 - Macronutrients breakdown: - Protein: 6 grams - Carbohydrates: 30 grams - Fat: 10 grams This salad is not just tasty; it is also nutritious. Each serving packs around 230 calories, making it a light meal or side dish. It has a good amount of protein, thanks to couscous and feta. The balance of carbs and fats makes it a well-rounded choice. {{ingredient_image_1}} First, boil 1 1/4 cups of vegetable broth in a medium saucepan. This broth gives couscous great flavor. Once the broth is boiling, remove it from the heat. Add 1 cup of couscous to the broth and stir briefly. Cover the pot and let it sit for 5 minutes. This allows the couscous to soak up the broth. After 5 minutes, fluff the couscous with a fork. Let it cool to room temperature before using it in the salad. In a large mixing bowl, combine the cooled couscous with fresh veggies. Add 1 cup of halved cherry tomatoes, 1 diced cucumber, 1/2 diced red bell pepper, and 1/4 finely chopped red onion. These veggies add color and crunch to your salad. Next, toss in 1/4 cup of chopped parsley and 1/4 cup of chopped mint. Gently mix everything together. This will help all the flavors blend well. In a small bowl, whisk together 3 tablespoons of olive oil and 2 tablespoons of lemon juice. Add salt and pepper to taste. This dressing brings a zesty touch to the salad. Pour the dressing over the couscous salad. Toss everything gently to coat all the ingredients evenly. Finally, sprinkle 1/4 cup of crumbled feta cheese on top. Give it one last gentle toss before serving. Enjoy your fresh and flavorful salad! To make great couscous, start by fluffing it well. After it sits for five minutes, use a fork to gently separate the grains. This step is key. Avoid clumping by being light and careful. Next, let the couscous cool. Spread it out on a baking sheet. This helps it cool faster. Once cool, it will mix better with the veggies. Choosing the right herbs can lift your salad. Fresh parsley and mint work great. They add bright and fresh notes. You can also try dill or basil for a twist. Adding a splash of acidity is important too. Lemon juice brightens the flavors. Spice can add depth. A pinch of red pepper flakes or black pepper can make it lively. Plating your salad can be fun! Serve it in a large bowl for sharing. Or, you can use small bowls for individual servings. Sprinkle some feta on top for a nice touch. Pair this salad with grilled chicken or fish. It also goes well with pita bread or hummus. Enjoy it as a light lunch or a side dish. Pro Tips Use Fresh Herbs: Fresh herbs like parsley and mint can significantly enhance the flavor of your salad. Always opt for fresh instead of dried for the best taste. Chill Before Serving: Allow the salad to chill in the refrigerator for at least 30 minutes after mixing. This helps the flavors meld together beautifully. Customize Your Veggies: Feel free to add or substitute other vegetables based on your preference or seasonal availability, such as bell peppers, zucchini, or even avocado. Feta Cheese Alternatives: If you don't have feta cheese, try using goat cheese or even a dairy-free alternative for a similar creamy texture. {{image_2}} You can easily make this salad vegetarian. One great option is to add beans or legumes. Chickpeas or black beans work well. They boost protein and make the salad heartier. Another idea is to substitute feta cheese. Try using goat cheese or a creamy avocado instead. Both options add richness that complements the salad. For a vegan version, simply omit the dairy. Leave out the feta cheese, and you still have a fresh dish. You can also use alternative dressings. A simple mix of olive oil, lemon juice, and a splash of vinegar brightens the flavors without dairy. Get creative with your salad by adding different vegetables. Try bell peppers in various colors or roasted zucchini. You can also mix in nuts and seeds. Almonds or sunflower seeds add crunch and extra nutrition. These variations can make your salad unique and fun to eat. To keep your Lemon Herb Couscous Salad fresh, store it in an airtight container. This helps to seal in the flavors. Place it in the fridge right after serving. It can stay fresh for up to four days. If you want to freeze it, pack it in a freezer-safe bag. Remove as much air as possible before sealing. This helps prevent freezer burn. You can freeze it for up to three months. In the fridge, the salad lasts about four days. Look for any changes in color or smell. If the salad smells sour or has a slimy texture, it’s best to toss it out. Also, check the feta cheese. If it looks moldy, it’s time to discard it. You can enjoy this salad cold or warm. For a cold dish, just take it straight from the fridge. If you want it warm, use a microwave. Heat it in short bursts, around 30 seconds, stirring in between. This way, you warm it evenly without cooking it too much. Remember, warming the salad can change the texture of the vegetables. So, serve it according to your taste! To make couscous, you need to start with vegetable broth. Heat 1 1/4 cups of broth in a medium saucepan until it boils. Once boiling, add 1 cup of couscous. Stir it gently and cover the pot. Let it sit for 5 minutes. This lets the couscous soak up the broth. After 5 minutes, fluff it with a fork. This helps to separate the grains and keeps it light. Quick tips for beginners: - Always use broth for more flavor. - Cover the pot tightly to trap steam. - Fluff with a fork, not a spoon, for best texture. Yes, you can prepare this salad ahead of time. It tastes even better after the flavors mix. I suggest making it a few hours before serving. Just keep it in the fridge until you're ready to eat. If you make it too far in advance, the veggies might get soggy. Best timing for making ahead: - Make it 2-3 hours before serving. - Store it in an airtight container. If you want a different grain, there are great options. Try quinoa, bulgur, or even farro. These grains have similar textures and can soak up flavors well. Alternative grains and options: - Quinoa: Gluten-free and high in protein. - Bulgur: Quick-cooking and hearty. - Farro: Nutty flavor and chewy texture. This blog post detailed a simple couscous salad recipe. We explored the main ingredients, dressing, and their nutritional value. You learned step-by-step instructions for cooking couscous and preparing the salad. Tips and tricks helped enhance flavors and served as guides for variations. We also covered storage practices for leftovers and answered FAQs about couscous preparation. Embrace these ideas to make a fresh, tasty dish anytime. Enjoy experimenting with your favorite flavors!

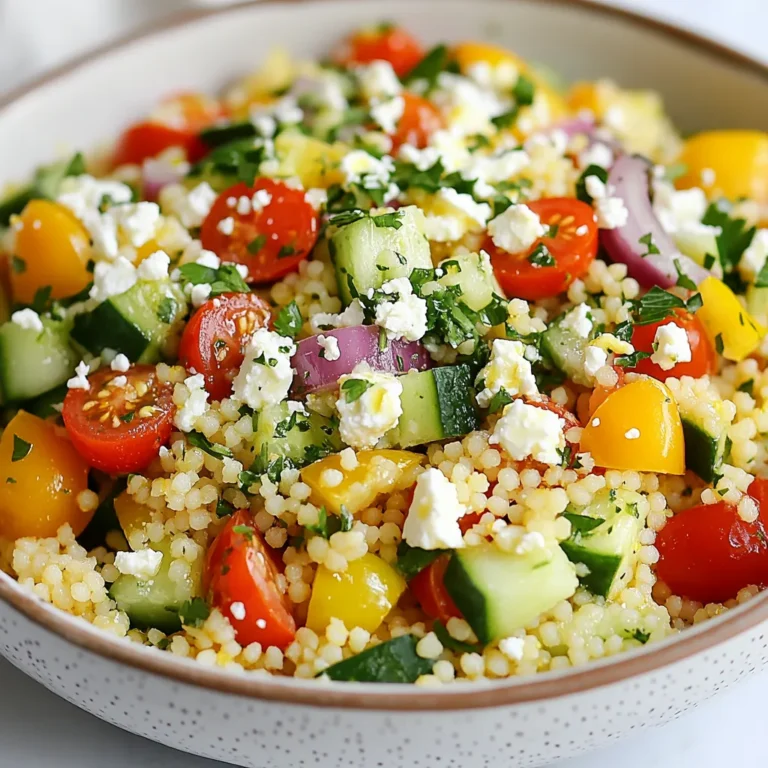
Lemon Herb Couscous Salad Fresh and Flavorful Dish

- 2 cups cooked chicken, shredded - ½ cup Hawaiian BBQ sauce - 1 cup fresh pineapple, diced - 1 red bell pepper, thinly sliced - 1 cup shredded carrots - ½ cup red cabbage, finely shredded - 4 large whole wheat or spinach tortillas - ½ cup cilantro, chopped - 1 avocado, sliced - Salt and pepper to taste - Optional: lime wedges for garnish For Hawaiian BBQ chicken wraps, you need fresh, vibrant ingredients. Start with cooked chicken, which should be shredded. This gives the wrap a great texture. The Hawaiian BBQ sauce adds a sweet and tangy flavor. You can make your own or choose a jarred version. Next, pineapple is key! Fresh pineapple, diced small, brings a juicy burst. It pairs well with the chicken. The red bell pepper adds crunch and a pop of color. Slice it thin for easy wrapping. Shredded carrots give sweetness and more crunch. Red cabbage adds a nice touch too. It’s colorful and crunchy. You need whole wheat or spinach tortillas to hold everything together. They are healthy and tasty. Don’t forget the cilantro! It adds a fresh flavor. Sliced avocado is creamy and rich, making the wrap special. Lastly, season with salt and pepper. If you want a zesty kick, add lime wedges to serve. Gather these ingredients, and you’re ready to make a fun, tasty meal that everyone will love! {{ingredient_image_1}} Start by taking your cooked chicken. Shred it into small pieces. In a large bowl, mix the shredded chicken with Hawaiian BBQ sauce. Stir well so each piece of chicken gets coated in the sauce. This step adds a sweet and tangy flavor to your wraps. Next, grab a red bell pepper. Slice it thinly to create nice strips. Then, take your fresh pineapple and dice it into small chunks. In another bowl, mix the diced pineapple, sliced bell pepper, shredded carrots, and finely shredded red cabbage. Add a pinch of salt and pepper to taste. This mix adds crunch and freshness to the wraps. Now it’s time to build your wraps. Lay a tortilla flat on a clean surface. Spoon about half a cup of the BBQ chicken mixture into the center of the tortilla. Top it with a generous amount of the veggie mix. Add a few slices of avocado and a sprinkle of chopped cilantro for extra flavor. To wrap it, fold the bottom of the tortilla over the filling. Then fold in the sides and roll tightly. Repeat this for all the tortillas and filling. If you want some crispiness, grill the wraps. Heat a skillet over medium heat. Place the wraps on the skillet for 2 to 3 minutes on each side. This gives them a nice crunch. Once grilled, slice each wrap in half diagonally. Serve with lime wedges for a zesty touch. Enjoy your tasty Hawaiian BBQ chicken wraps! To make the best wraps, choose soft, large tortillas. Whole wheat or spinach tortillas work great. They hold the filling well and add flavor. When wrapping, be sure to fold the bottom up first. Then tuck in the sides tightly before rolling. This keeps everything inside. If you want a crispy finish, grill the wraps for a few minutes. They will taste even better! Add more flavor with extra toppings. Try adding sliced jalapeños for heat. You can also include cheese like Monterey Jack or feta. Fresh herbs like basil or mint give a nice twist. A squeeze of lime juice brightens the whole dish. Mix and match your favorites for a fun taste! Prep your ingredients ahead for quick meals. You can shred the chicken and mix it with BBQ sauce the night before. Chop the veggies and store them in a sealed container. This way, you can assemble the wraps in no time. If you plan to grill them, do it just before serving for the best taste. Enjoy the ease of a fast meal when you need it! Pro Tips Use Rotisserie Chicken: For a quicker prep time, consider using store-bought rotisserie chicken instead of cooking your own. This saves time and adds great flavor. Customize Your Veggies: Feel free to add or substitute any vegetables you like. Bell peppers, cucumbers, or even jalapeños can add a nice crunch and flavor. Grilling for Extra Flavor: Grilling the wraps not only warms them up but also adds a delicious smoky flavor. Make sure to brush the outside with a little olive oil before grilling. Make Ahead: You can prepare the chicken and vegetable mixtures ahead of time. Just store them separately in the fridge and assemble the wraps when you're ready to eat. {{image_2}} You can switch out chicken for tofu or shrimp. Tofu absorbs flavors well. Use firm tofu for the best texture. Simply cube and sauté it until golden. Toss it in the Hawaiian BBQ sauce, just like with chicken. Shrimp is another great choice. Cook shrimp until pink, then mix with the sauce. Both options give a tasty twist to your wraps. To make a fully vegetarian version, skip the chicken entirely. Load up your wraps with extra veggies. Try adding black beans for protein. They are rich in flavor and nutrients. You can also add sliced cucumbers or zucchini for crunch. This mix keeps the dish fresh and colorful. Don't forget to add a dash of lime juice for zing! Experiment with different BBQ sauces or spices to change the taste. You can try a spicy mango BBQ sauce for a fruity kick. Or go for a smoky chipotle sauce for some heat. Adding spices like cumin or paprika can also boost flavor. Have fun mixing and matching until you find your favorite! To keep your Hawaiian BBQ chicken wraps fresh, store them in the fridge. Wrap each one tightly in plastic wrap or foil. You can also place them in an airtight container. If you have unassembled wraps, store the chicken and veggies in separate containers. This way, the tortillas stay soft and fresh. When it’s time to enjoy your leftovers, reheat them carefully. The best way is to use a skillet. Heat it over medium heat and add the wrap. Cook for about 2-3 minutes on each side. This method keeps the texture nice and crispy. If you prefer the microwave, heat the wrap for 30 seconds, then check if it's warm enough. You can add more time if needed. Leftover wraps last about 3-4 days in the fridge. After that, the chicken and veggies may spoil. Always check for any off smells or changes in color before eating. If you want to keep them longer, consider freezing the wraps. They can stay in the freezer for up to three months. Just remember to wrap them tightly to avoid freezer burn. Yes, you can use store-bought BBQ sauce. Many brands offer great flavors. Homemade BBQ sauce can add a personal touch. You can adjust the sweetness and spice as you like. If you choose store-bought, look for one with natural ingredients. This can help you avoid extra additives. Always taste the sauce to see if you need to add anything. A splash of lime juice can brighten it up. If you're looking for a tortilla substitute, try lettuce wraps. They are fresh and low-carb. You can also use collard greens or rice paper for a fun twist. For gluten-free options, corn tortillas work well. They add a nice flavor too. If you prefer something with more fiber, try whole grain wraps. They keep the meal healthy and filling. Yes, you can freeze these wraps. Wrap them tightly in plastic wrap or foil. This keeps them fresh. When you want to eat them, thaw in the fridge overnight. Reheat them in a skillet or microwave. This makes the wraps warm and tasty again. However, avoid freezing with fresh toppings like avocado. They do not freeze well and can get mushy. You learned how to make tasty BBQ chicken wraps with fresh ingredients. We covered key steps like preparing the chicken, veggies, and how to assemble the wraps perfectly. I also shared tips for storage and fun variations. These wraps are easy and fun to make. They fit many diets and tastes. Enjoy experimenting with ingredients. You can create your own favorite version. Happy cooking!

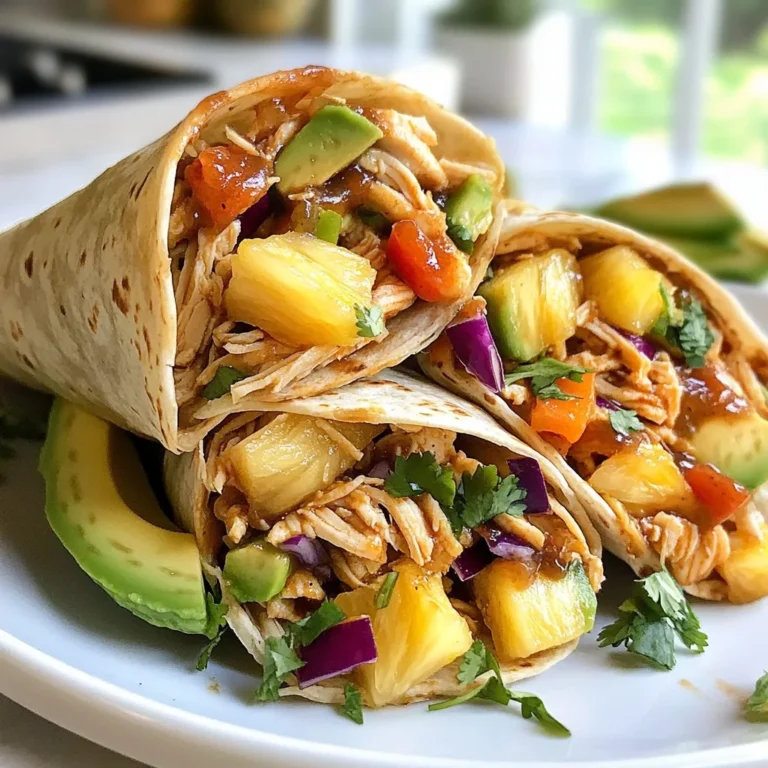
Hawaiian BBQ Chicken Wraps for a Tasty Meal

- 2 medium sweet potatoes, peeled and diced - 1 can (15 oz) black beans, drained and rinsed - 1 can (15 oz) diced tomatoes (with juices) - 1 onion, diced - 3 cloves garlic, minced - 2 cups vegetable broth - 1 red bell pepper, diced - 1 green bell pepper, diced - 2 teaspoons ground cumin - 1 teaspoon smoked paprika - 1 teaspoon chili powder - ½ teaspoon cayenne pepper (optional, for heat) - Salt and pepper, to taste - 2 tablespoons olive oil - Fresh cilantro, for garnish - Avocado slices, for topping (optional) - Lime wedges, for serving Sweet Potato Black Bean Chili is packed with nutrients. Each serving offers: - Calories: About 250 - Protein: 10 grams - Carbohydrates: 45 grams - Fiber: 12 grams - Fat: 5 grams This chili provides vitamins A and C from sweet potatoes and peppers. The black beans add protein and fiber, making it a filling meal. You can adjust this recipe to fit your needs. Some options include: - Use quinoa instead of black beans for a grain boost. - Swap sweet potatoes for butternut squash for a different flavor. - Use low-sodium vegetable broth to reduce salt intake. - For a vegan version, ensure your broth is plant-based. - Replace olive oil with avocado oil for a different taste. Feel free to mix and match these options to make this chili your own! {{ingredient_image_1}} Start by gathering all your ingredients. You'll need: - 2 medium sweet potatoes, peeled and diced - 1 can (15 oz) black beans, drained and rinsed - 1 can (15 oz) diced tomatoes (with juices) - 1 onion, diced - 3 cloves garlic, minced - 2 cups vegetable broth - 1 red bell pepper, diced - 1 green bell pepper, diced - 2 teaspoons ground cumin - 1 teaspoon smoked paprika - 1 teaspoon chili powder - ½ teaspoon cayenne pepper (optional) - Salt and pepper to taste - 2 tablespoons olive oil - Fresh cilantro for garnish - Avocado slices (optional) - Lime wedges for serving Make sure your sweet potatoes are diced evenly. This helps them cook at the same time. Dice the onion and bell peppers small for a nice texture in the chili. 1. In a large pot, heat olive oil over medium heat. 2. Add the diced onion and sauté for about five minutes until it becomes soft and clear. 3. Stir in minced garlic and cook for one to two minutes until you smell it. 4. Add the diced red and green bell peppers, cooking for another three to four minutes until they start to soften. 5. Next, stir in the diced sweet potatoes, ground cumin, smoked paprika, chili powder, and cayenne pepper if you like heat. Cook for two to three minutes to let the spices mix well. 6. Pour in the canned diced tomatoes with juices and vegetable broth. Bring this to a boil, then lower the heat. 7. Cover the pot and let it simmer for 25 to 30 minutes. Check the sweet potatoes to see if they are soft. 8. Once the sweet potatoes are cooked through, stir in the black beans. Cook for another five minutes to warm them up. 9. Season with salt and pepper. If you want more spice, feel free to add more cayenne or chili powder. To check if your sweet potatoes are done, use a fork. It should easily pierce the sweet potatoes. If not, let them cook a bit longer. Remember, the sweet potatoes should be soft but not mushy. You want each bite to have some texture. Enjoy your chili hot, topped with fresh cilantro and avocado slices, with lime wedges on the side for a bright touch. To make your sweet potato black bean chili even better, try these tips. First, use fresh herbs like cilantro. They add a bright taste. Consider adding a splash of lime juice. It gives a nice zing. You can also roast your sweet potatoes before adding them. This brings out their natural sweetness. For a smoky flavor, try adding a bit more smoked paprika. If you love heat, add more cayenne pepper or fresh jalapeños. Storing leftover chili is easy. Let it cool to room temperature. Then, place it in an airtight container. You can keep it in the fridge for up to five days. If you want to store it longer, freeze it. Use freezer-safe bags or containers. Label them with the date. This way, you can enjoy it later. Reheating chili is simple. If it’s in the fridge, use the stove or microwave. For the stove, pour the chili into a pot. Heat it over medium heat and stir often. For the microwave, place it in a microwave-safe bowl. Cover it with a lid or paper towel. Heat it in short bursts, stirring in between. If it’s frozen, let it thaw in the fridge overnight. Then, follow the same reheating steps. Enjoy your warm, comforting chili! Pro Tips Use Fresh Herbs: Fresh cilantro adds a vibrant flavor to the chili. Consider using it as a garnish right before serving for maximum freshness. Adjust the Heat: If you prefer a spicier chili, increase the cayenne pepper or add a dash of hot sauce to taste. Start with a little and add more until you reach your desired heat level. Sweet Potato Alternatives: For a different twist, try using butternut squash or pumpkin in place of sweet potatoes. They will add a unique flavor and texture to the chili. Make it Ahead: This chili tastes even better the next day! Prepare it in advance and store it in the fridge to allow the flavors to meld together. {{image_2}} You can easily boost the protein in your chili. Tofu or tempeh works well. For tofu, use firm or extra firm. Press it to remove extra water. Dice it into small cubes and add it with the sweet potatoes. Tempeh adds a nutty flavor. Crumble it into the pot when you add the beans. Both options make the dish heartier. Sweet potatoes and black beans are great, but feel free to change things up. You can add corn for a sweet crunch. Zucchini or carrots also add nice texture and flavor. Try spinach or kale for a green boost. These veggies cook well and add nutrition. Mix and match to find your favorite combo. You can adjust the spice level to fit your taste. If you like it mild, skip the cayenne pepper. You can also reduce the chili powder to keep it light. For heat lovers, add more cayenne or some chopped jalapeños. You can also toss in a dash of hot sauce at the end. Adjust the spices as you go for the perfect kick. Sweet potato black bean chili pairs well with simple sides. I love serving it with: - Cornbread: This adds a nice, sweet touch. - Rice: White or brown rice soaks up the chili's flavor. - Tortilla Chips: Crunchy chips bring a fun texture. - Green Salad: A fresh salad adds a crisp contrast. These sides make the meal more filling and enjoyable. Toppings can change the whole dish. Here are my favorites: - Avocado slices: Creamy and rich, they balance the spice. - Fresh cilantro: This adds a burst of freshness. - Lime wedges: A squeeze of lime gives a zesty kick. - Sour cream or yogurt: A dollop cools the heat. Feel free to mix and match these options to suit your taste. The right drink can enhance your meal. For sweet potato black bean chili, consider: - Light beer: A crisp lager complements the flavors well. - Sparkling water: This cleanses your palate between bites. - Red wine: A medium-bodied red matches the dish's richness. - Iced tea: Unsweetened tea is refreshing and balances the spice. Choose a drink that you enjoy, and it will elevate your dining experience. Yes, you can freeze this chili. Just let it cool first. Then, pour it into freezer-safe bags or containers. Make sure to leave some space for the chili to expand. You can freeze it for up to three months. When you're ready to eat, thaw it in the fridge overnight. Then, heat it on the stove or in the microwave until hot. You can serve this chili with many sides. Here are some great options: - Cornbread: This pairs well and adds a sweet touch. - Rice: Both white and brown rice work nicely. - Tortilla chips: They add a fun crunch. - Salad: A fresh salad can balance the meal. - Avocado: Slices or guacamole add creaminess. To add heat, you have a few easy options: - Cayenne pepper: You can add more than the recipe calls for. - Hot sauce: Stir in your favorite hot sauce while cooking. - Jalapeños: Fresh or pickled jalapeños boost the spice level. - Chili flakes: These can be sprinkled in for an extra kick. Feel free to mix and match these ideas to find your perfect spice level! This blog post covered key aspects of making Sweet Potato Black Bean Chili. We listed ingredients, shared cooking steps, and offered storage tips. We also explored variations, like proteins and spice levels, and suggested sides and toppings. In closing, enjoy this hearty dish that's flexible and easy to make. Dive into your kitchen and create a bowl of chili that suits your taste!

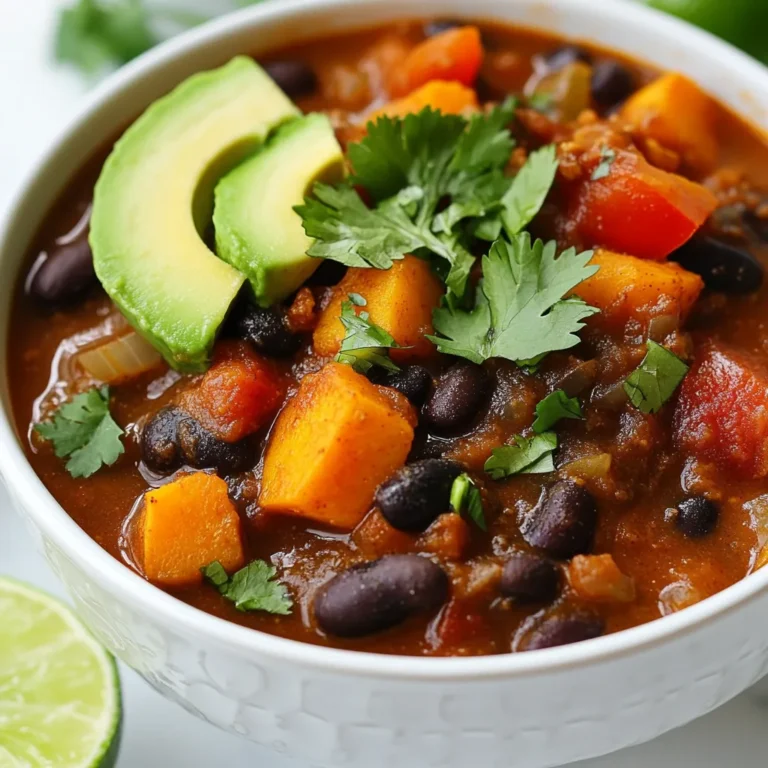
Sweet Potato Black Bean Chili Flavorful Comfort Dish

- 1 pound baby carrots, peeled Using baby carrots makes this dish quick and easy. Their sweet flavor shines through when cooked. You can also slice larger carrots into smaller pieces if you prefer. - 2 tablespoons maple syrup - 1 tablespoon Dijon mustard - 2 tablespoons unsalted butter - 1 tablespoon olive oil - Salt and black pepper to taste - 1 tablespoon fresh thyme leaves (or 1 teaspoon dried thyme) Maple syrup adds sweetness and depth. Dijon mustard brings a tangy kick. Butter and olive oil create the perfect base for the glaze. Seasoning with salt and pepper enhances the flavors. The thyme adds a lovely herbal note. - 1 tablespoon lemon juice (optional) Squeezing in lemon juice gives a fresh zing to the dish. You can skip it if you want. However, I find it brightens the flavors nicely. {{ingredient_image_1}} Start by washing the baby carrots. Peel them to make them smooth. Then, bring salted water to a boil in a medium pot. Once the water is boiling, add the carrots. Cook them for about 4 to 5 minutes. You want them tender but still crisp. After cooking, drain the carrots and set them aside. This step keeps the carrots fresh and bright. Next, take a large skillet and heat it over medium heat. Add the unsalted butter and olive oil together. Stir them as the butter melts. Once the butter is fully melted, mix in the maple syrup and Dijon mustard. Stir until you have a smooth glaze. This blend gives a sweet and tangy flavor, making the dish special. Now, add the drained baby carrots to the skillet. Toss them gently to coat with the glaze. Season with salt, black pepper, and fresh thyme leaves. Cook for another 3 to 5 minutes. Stir often to ensure even coating. If you like a little zing, add lemon juice just before serving. This step brightens the dish. When done, serve the carrots warm for a tasty side. To cook carrots well, choose baby carrots for quick prep. They cook evenly and look nice. Always peel them for a smooth texture. Boil them in salted water for the best taste. Aim to cook them until they are tender but still crisp. This usually takes about 4-5 minutes. Drain the carrots right after cooking to stop the heat. This way, they stay bright and fresh. Getting the glaze just right is easy. Start by melting butter and olive oil together. This mix adds a rich taste. Add maple syrup and Dijon mustard next. Stir them until they blend well. Toss the drained carrots in this glaze. Make sure they are coated evenly. Season with salt, black pepper, and thyme. Cook for a few more minutes. This lets the flavors deepen and stick to the carrots. When serving, arrange the glazed carrots on a nice platter. Garnish with fresh thyme or parsley for extra color. You can also add a squeeze of lemon juice before serving. This gives a bright, tangy taste that contrasts well with the sweet glaze. Pair the carrots with roasted meats or grains for a full meal. They also make a great side for holiday dinners. Pro Tips Use Fresh Carrots: While baby carrots are convenient, using fresh, whole carrots can enhance the flavor and texture of your dish. Cut them into uniform sizes for even cooking. Adjust Sweetness: Depending on your taste preferences, feel free to adjust the amount of maple syrup. You can also substitute honey for a different sweetness profile. Herb Variations: Experiment with different herbs like rosemary or dill instead of thyme for a unique twist on the flavor. Fresh herbs will give the dish a vibrant taste. Serve Immediately: For the best texture and flavor, serve the glazed carrots right after cooking. If they sit too long, they may become soggy. {{image_2}} You can add fresh herbs to enhance the flavor. I love using thyme. It mixes well with the sweet glaze. You can also try rosemary or parsley. Just chop them up and toss them in while cooking. Fresh herbs add a nice touch and a pop of color. If you want to change up the sweetness, try honey or agave syrup. Both work well with the Dijon mustard. You can also use brown sugar for a deeper flavor. Just keep the same amount when you swap sweeteners. This keeps the glaze thick and tasty. Maple Dijon glaze is great on more than just carrots! You can add parsnips or sweet potatoes for variety. Broccoli and Brussels sprouts also taste amazing with this glaze. Just cut them into similar sizes as the carrots. This way, they all cook evenly and soak up the sweet flavor. To keep leftover Maple Dijon glazed carrots fresh, let them cool first. Place them in an airtight container. Store them in the fridge for up to three days. Make sure they are covered well to prevent them from drying out. If you leave them uncovered, they may lose their glaze and flavor. When you're ready to enjoy your carrots again, reheat them gently. You can use a skillet for this. Heat a bit of olive oil over medium heat. Add the carrots and stir them often until they are warm. This method helps to keep the glaze intact. If you prefer the microwave, place them in a bowl, cover it, and heat in short bursts. Stir in between to get even heating. If you want to save your glazed carrots for later, freezing is a great option. First, cool the carrots completely before freezing. Place them in freezer-safe bags, removing as much air as you can. Label the bags with the date to keep track. You can freeze them for up to three months. When you are ready to eat them, thaw in the fridge overnight and then reheat as mentioned above. The best carrots for this recipe are baby carrots. They are sweet and tender. You can also use regular carrots. Just cut them into small pieces. Look for bright orange carrots. They should feel firm and fresh. Avoid any that feel soft or look dull. Freshness matters for flavor. Yes, you can make these carrots ahead of time. Cook them and let them cool. Store in the fridge for up to three days. When you are ready to serve, reheat them in a skillet. Add a bit of water to help steam them back to life. This keeps them moist and tasty. To make Maple Dijon Glazed Carrots vegan, swap out the butter. Use vegan butter or coconut oil instead. This change keeps the glaze rich and creamy. The rest of the ingredients, like maple syrup and Dijon mustard, are naturally vegan. Enjoy this dish without any animal products while keeping it flavorful. Maple Dijon glazed carrots bring great flavor with fresh ingredients, simple steps, and helpful tips. You can add your twist with optional flavors or other veggies. Storage info ensures you can enjoy leftovers, and FAQs answer common questions. Use this guide to make a tasty dish that shines on your table. You’ll impress family and friends with every bite. Enjoy each step and make this recipe your own!

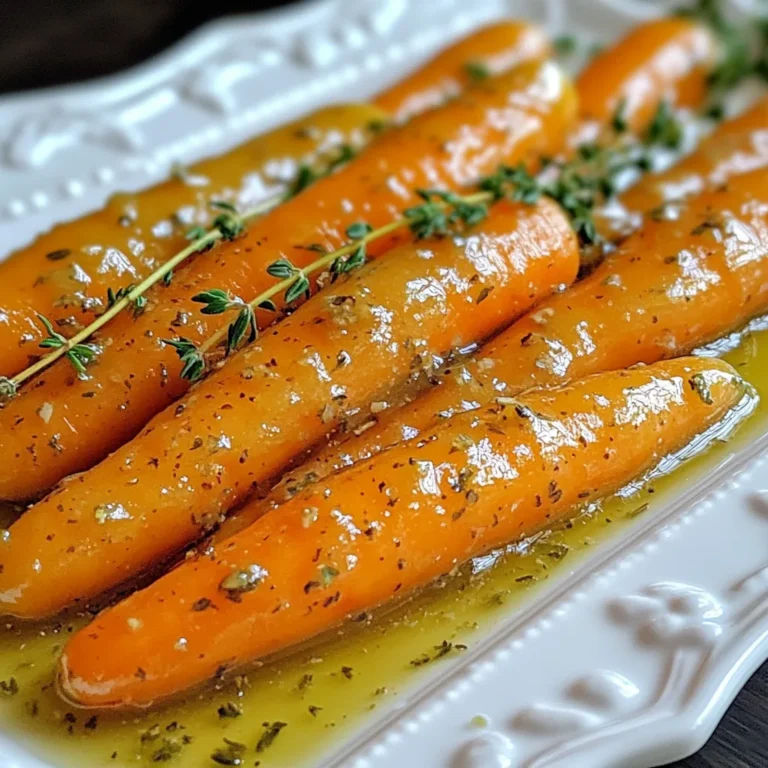
Maple Dijon Glazed Carrots Savory and Simple Recipe

- 1 pound ground chicken (or beef/turkey) - 1/2 cup breadcrumbs - 1/4 cup finely chopped green onions - 1/4 cup grated fresh pineapple (drained) - 1 tablespoon soy sauce - 1 tablespoon sesame oil - 1 teaspoon garlic powder - 1 teaspoon ginger powder - Salt and pepper to taste - 1 cup teriyaki sauce (store-bought or homemade) - 1/2 cup fresh pineapple chunks (for garnish) - Sesame seeds (for garnish) When I make these Pineapple Teriyaki Meatballs, I love how simple the ingredients are. You can use ground chicken, beef, or turkey. Each option brings its own flavor. I prefer chicken for its lightness. The breadcrumbs help the meatballs hold together. They also add a nice texture. Chopped green onions give a fresh taste, while grated pineapple adds sweetness. Be sure to drain the pineapple. This keeps the meatballs from being too wet. For seasonings, I include soy sauce and sesame oil. They add depth to the flavor. Garlic and ginger powder boost the taste even more. A pinch of salt and pepper rounds it out. The teriyaki sauce is the star of the show. You can use store-bought for convenience or make your own if you have time. Both work well and create a sweet, savory glaze. Finally, I love garnishing with fresh pineapple chunks and sesame seeds. They make the dish look inviting and taste amazing. Enjoy these meatballs as a fun family meal or at your next gathering! {{ingredient_image_1}} In a large bowl, combine the following ingredients: - 1 pound ground chicken (or beef/turkey) - 1/2 cup breadcrumbs - 1/4 cup finely chopped green onions - 1/4 cup grated fresh pineapple (drained) - 1 tablespoon soy sauce - 1 tablespoon sesame oil - 1 teaspoon garlic powder - 1 teaspoon ginger powder - Salt and pepper to taste Mix everything together until it is well combined. This step builds the flavor base for the meatballs. The ground chicken gives a nice texture, while the pineapple adds sweetness. Next, preheat your oven to 400°F (200°C). This temperature helps the meatballs cook evenly and become golden brown. Line a baking sheet with parchment paper for easy cleanup. Now, form the mixture into meatballs about 1.5 inches in size. Place each meatball on the prepared baking sheet, leaving some space between them. This helps them cook evenly and prevents sticking. Bake the meatballs in the preheated oven for about 20-25 minutes. They should be golden brown and cooked through. While the meatballs bake, heat 1 cup of teriyaki sauce in a saucepan over medium heat. Let it simmer until it becomes warm. Once the meatballs are done, transfer them into the saucepan. Coat them evenly with the teriyaki sauce. Let them simmer for an additional 5 minutes. This allows the meatballs to soak up all that delicious flavor. These steps create tasty Pineapple Teriyaki Meatballs that are ready to impress! For tasty meatballs, you can use different meats. Ground chicken gives a light flavor. Ground beef adds richness. Ground turkey is a leaner choice. Each type brings its own taste to the dish. To keep your meatballs moist, mix the ingredients well. Avoid over-mixing, as this can make them tough. Use fresh pineapple to add moisture and sweetness. The breadcrumbs also help keep the meatballs juicy. You can choose between store-bought and homemade teriyaki sauce. Store-bought is quick and easy. Homemade sauce allows you to control the flavor. If you like a sweeter sauce, add more pineapple juice. You can also try different sauces. Sweet chili sauce adds a nice kick. BBQ sauce can give a smoky flavor. Experiment to find your favorite combination. To impress your guests, serve the meatballs on a large platter. Arrange them neatly for a beautiful look. Scatter fresh pineapple chunks around the meatballs. Drizzle extra teriyaki sauce on top for a shiny finish. For added flair, sprinkle sesame seeds over the meatballs. This gives a nice crunch and makes the dish pop with color. A festive presentation makes every meal feel special. Pro Tips Use Fresh Ingredients: Always opt for fresh pineapple and high-quality ground meats for the best flavor and texture in your meatballs. Adjust Flavor to Taste: Feel free to modify the soy sauce and sesame oil quantities based on your taste preference for a stronger or milder flavor. Monitor Cooking Time: Keep an eye on your meatballs while baking; oven temperatures can vary, and overcooking can lead to dryness. Serve with Sides: Pair your meatballs with steamed rice or stir-fried vegetables to create a complete meal that balances flavors and textures. {{image_2}} You can make Pineapple Teriyaki Meatballs healthier. One great option is to use ground turkey instead of ground chicken or beef. Ground turkey is leaner and still full of flavor. It helps lower the fat content while keeping the meatballs juicy. Another choice is to use gluten-free breadcrumbs and sauces. This makes the recipe suitable for those with gluten sensitivities. Many brands offer tasty gluten-free options. You can also make your own breadcrumbs from gluten-free bread. To add more flavor, try using crushed red pepper. This spice gives your meatballs a nice kick. You can start with a little and add more to your taste. You can also mix in vegetables like finely grated carrots or bell peppers. These additions add color and nutrition. They blend well with the meat and make the dish even more exciting. When serving Pineapple Teriyaki Meatballs, think about side dishes. Steamed rice or quinoa works well. They soak up the teriyaki sauce nicely. You can also serve stir-fried vegetables for a balanced meal. For drinks, consider pairing these meatballs with a light soda or iced tea. A sweet drink complements the savory flavors. You can also enjoy a crisp white wine if you prefer something alcoholic. To store leftovers in the fridge, first, let the meatballs cool. Place them in an airtight container. You can keep them in the fridge for up to three days. Make sure they are sealed well to avoid drying out. If you want to save meatballs for later, freezing is a great option. Line a baking sheet with parchment paper and place the cooled meatballs on it. Freeze them for about one hour until they are firm. Then, transfer the meatballs to a freezer bag. Squeeze out the air to prevent freezer burn. You can store them for up to three months. To reheat without losing moisture, use the oven or stovetop. For the oven, preheat it to 350°F (175°C). Place meatballs in a baking dish and cover with foil. Heat for about 15-20 minutes. For stovetop, add them to a saucepan with a bit of water or sauce. Heat on low for about 10 minutes, stirring gently. This keeps them juicy and tasty. Yes, you can get a head start on this dish. You can mix the meatball ingredients a day before. Just store them in the fridge. When you’re ready to cook, form the meatballs and bake them. You can also bake the meatballs early and warm them in the sauce later. This saves time and helps the flavors blend well. Ground chicken is my go-to for a lighter option. It keeps the meatballs moist. Ground beef adds a richer flavor, but it can be greasier. Ground turkey is lean and healthy, but it may taste drier. Choose the meat you prefer based on your taste and health goals. To enhance your teriyaki sauce, add fresh ginger or garlic for depth. A splash of rice vinegar can brighten the flavors. For heat, mix in red pepper flakes or sriracha. You can also add a touch of honey for sweetness. These changes can make the sauce truly yours. Yes, they can be gluten-free! Use gluten-free breadcrumbs instead of regular ones. Check your teriyaki sauce for gluten ingredients. Many brands offer gluten-free options. With these swaps, you can enjoy this tasty dish without worry. This blog post detailed how to make delicious Pineapple Teriyaki Meatballs. We discussed key ingredients like ground chicken, breadcrumbs, and teriyaki sauce. You learned step-by-step instructions for mixing, shaping, and baking the meatballs. I shared tips on keeping them moist and saucing options for added flavor. You also discovered meal variations and storage tips to enjoy later. Enjoy making these meatballs. Experiment with flavors and have fun!

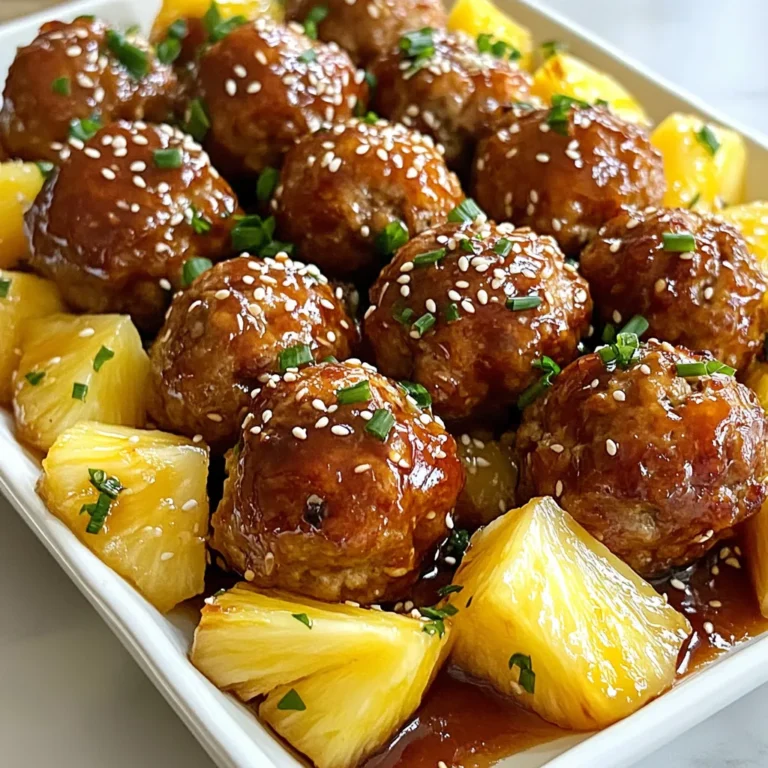
Pineapple Teriyaki Meatballs Savory and Easy Recipe

To make this tasty bread, you need key ingredients. Here’s what you will gather: - 1 medium zucchini, grated (about 1 cup) - 1 cup all-purpose flour - 1 cup whole wheat flour - 1 teaspoon baking soda - 1/2 teaspoon baking powder - 1/2 teaspoon salt - 1 teaspoon ground cinnamon - 1/2 teaspoon nutmeg - 1/2 cup brown sugar, packed - 1/4 cup granulated sugar - 1/2 cup unsweetened applesauce - 1/4 cup vegetable oil - 2 eggs, beaten - 1 teaspoon vanilla extract - 1 cup semi-sweet chocolate chunks These ingredients blend to create a moist and sweet treat. To boost flavor, we add some spices and sugars. Here's what enhances the taste: - 1 teaspoon ground cinnamon - 1/2 teaspoon nutmeg - 1/2 cup brown sugar, packed - 1/4 cup granulated sugar Cinnamon and nutmeg give warmth. The sugars add sweetness and depth. You can customize your bread with mix-ins. Here are some fun options: - 1/2 cup chopped walnuts (optional) Walnuts add crunch and flavor. You can skip them if you prefer a smoother texture. {{ingredient_image_1}} First, grab a medium zucchini. Grate it until you have about one cup. Place the grated zucchini in a bowl and add a pinch of salt. This step helps to draw out excess moisture from the zucchini. Set it aside for ten minutes. After that, squeeze the zucchini gently to remove the water. You want the zucchini dry but still fresh. In a large bowl, combine the flours, baking soda, baking powder, salt, cinnamon, and nutmeg. Whisk these ingredients together until they blend well. This mixture is key for the right texture and flavor. In another bowl, mix the brown sugar and granulated sugar. Add the unsweetened applesauce, vegetable oil, beaten eggs, and vanilla extract. Stir this mixture until it is smooth and creamy. It should look inviting, and the sweet smell will fill your kitchen. Pour the wet mixture into the dry ingredients. Gently fold them together with a spatula. Mix just until you see no dry flour left. Overmixing can make the bread tough. Now, fold in the squeezed zucchini and chocolate chunks. If you like, add the chopped walnuts too. Mix until everything is evenly distributed. Pour the batter into a greased 9x5 inch loaf pan. Spread it out evenly using your spatula. Preheat your oven to 350°F (175°C). Place the loaf pan in the oven and bake for 50 to 60 minutes. Check for doneness by inserting a toothpick. It should come out clean or with a few moist crumbs. Once done, take the loaf out and let it cool for ten minutes in the pan. Then, transfer it to a wire rack to cool completely. To keep your bread from being soggy, start by removing water from the zucchini. Grate the zucchini and sprinkle it with a pinch of salt. Let it sit for about 10 minutes. This helps draw out extra moisture. After that, gently squeeze the zucchini to remove even more water. This step makes a big difference. When mixing your ingredients, be gentle. Overmixing can make the bread tough. Combine the dry and wet ingredients until just mixed. You may still see some flour. That is okay; it will blend during baking. Fold in the zucchini and chocolate chunks carefully. You want them evenly spread but not smashed. Baking time is key. Bake at 350°F (175°C) for 50-60 minutes. Check the bread with a toothpick. It should come out clean or with a few moist crumbs. If you see wet batter, it needs more time. After baking, let the bread cool in the pan for 10 minutes. Then move it to a wire rack to cool completely. This helps maintain its shape and texture. Pro Tips Use Fresh Zucchini: For the best flavor and moisture, select fresh, firm zucchini. Smaller zucchinis tend to be sweeter and less watery. Don’t Overmix: Mix the batter just until combined to keep the bread light and tender. Overmixing can lead to a dense loaf. Cooling Time: Allow the bread to cool in the pan for 10 minutes before transferring it to a wire rack. This helps set the structure and makes slicing easier. Storage Tips: Store the bread in an airtight container at room temperature for up to 3 days, or freeze for up to 3 months. Just make sure to slice it before freezing for easy thawing! {{image_2}} You can easily make a gluten-free version of chocolate chunk zucchini bread. Substitute the all-purpose flour and whole wheat flour with a gluten-free baking blend. Look for blends that contain xanthan gum for better texture. This option keeps your bread moist and fluffy while being gluten-free. To make this bread vegan, swap the eggs with flax eggs. Mix one tablespoon of ground flaxseed with three tablespoons of water for each egg. Let it sit for a few minutes to thicken. Use unsweetened almond milk or another plant-based milk instead of regular milk if a recipe calls for it. Ensure your chocolate chunks are dairy-free. You can enhance the flavor of your zucchini bread with some fun additions. Try adding a teaspoon of espresso powder for a richer taste. A handful of dried fruit, like raisins or cranberries, adds sweetness. You can also mix in spices like allspice or cloves for a warm flavor profile. If you like nuts, chopped pecans or hazelnuts can provide a nice crunch. Store your chocolate chunk zucchini bread in an airtight container. This keeps it fresh and moist. You can leave it at room temperature for up to three days. If you want to keep it longer, consider refrigeration. Just wrap it tightly in plastic wrap or foil. Freezing is a great way to save leftovers. First, let the bread cool completely. Then slice it into pieces. Wrap each slice in plastic wrap. Place the wrapped slices in a freezer bag. This helps prevent freezer burn. You can freeze the bread for up to three months. When you're ready to eat, just thaw it in the fridge overnight. To reheat the zucchini bread, preheat your oven to 350°F (175°C). Place the slices on a baking sheet. Heat them for about 10-15 minutes, or until warm. You can also use a microwave for a quicker option. Just warm each slice for about 20-30 seconds. Enjoy it warm for a tasty treat! Yes, you can use frozen zucchini. First, thaw the zucchini completely. Squeeze out extra water before adding it to the batter. This step helps keep the bread from getting too wet. Make sure you use the same amount as fresh zucchini. To check if the bread is done, insert a toothpick into the center. If it comes out clean or with a few moist crumbs, it's ready. If wet batter sticks to the toothpick, it needs more time. Baking usually takes about 50 to 60 minutes. You can use applesauce as a substitute for eggs. For each egg, use 1/4 cup of applesauce. You can also use mashed bananas or a flaxseed meal mix. To make the flaxseed mix, combine one tablespoon of flaxseed meal with three tablespoons of water. Let it sit until it thickens. Yes, you can make mini loaves! Fill mini loaf pans with the batter. Bake them for around 20 to 30 minutes. Check doneness with a toothpick, just like with the large loaf. Mini loaves are great for sharing or gifting! Making chocolate chunk zucchini bread combines fresh zucchini with rich chocolate. We covered key ingredients, step-by-step instructions, helpful tips, and tasty variations. Remember to prepare the zucchini well and mix your ingredients carefully. You can explore gluten-free and vegan options too. Proper storage keeps your bread fresh longer. With these insights, you can bake a delightful treat that everyone will love. Enjoy your baking adventures!

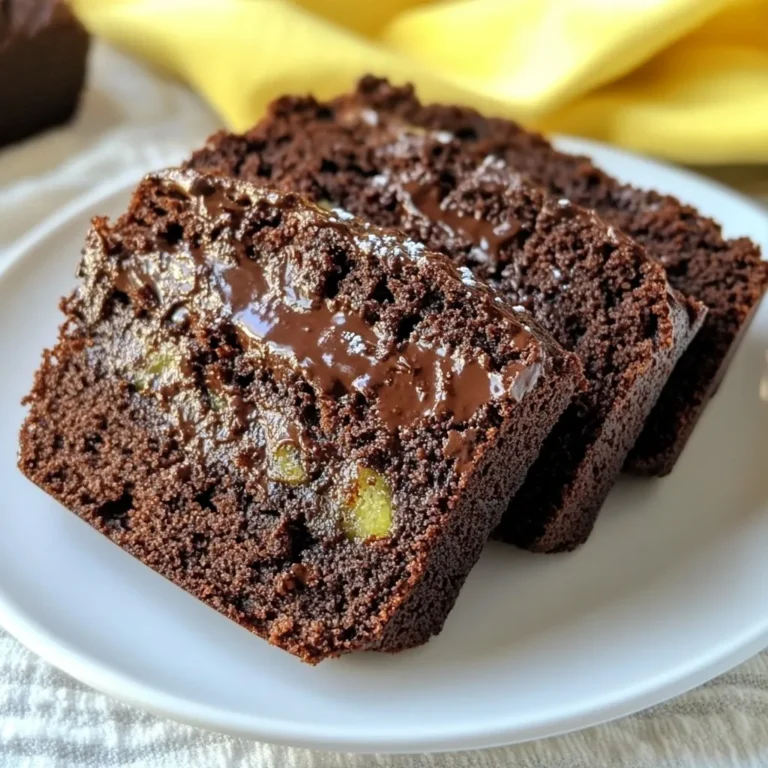
Chocolate Chunk Zucchini Bread Savory and Flavorful Treat

- 4 salmon fillets - 2 tablespoons butter, melted - 4 cloves garlic, minced - 1 lemon, zested and juiced - 2 cups asparagus spears, trimmed - 1 cup cherry tomatoes, halved The star of this dish is the salmon fillets. They provide a rich flavor and are packed with nutrients. The butter and garlic make a sauce that adds a tasty punch. The lemon brings brightness, while asparagus and cherry tomatoes add color and nutrition. - 1 tablespoon olive oil - Salt and pepper to taste - Fresh parsley for garnish Olive oil helps the veggies roast nicely, while salt and pepper bring out all the flavors. Fresh parsley adds a pop of color and freshness on top once the dish is ready. This simple mix of ingredients creates a delicious meal that is easy to prepare. {{ingredient_image_1}} First, you need to preheat your oven to 400°F (200°C). This step is key for cooking the salmon perfectly. Next, let’s make the garlic butter sauce. In a small bowl, mix two tablespoons of melted butter, four minced garlic cloves, the zest of one lemon, and the juice of that same lemon. This sauce will add great flavor to your dish. Now, grab a large sheet pan lined with parchment paper. Place four salmon fillets in the center of the pan. Make sure they have some space around them. Next, add two cups of trimmed asparagus spears and one cup of halved cherry tomatoes around the salmon. This colorful mix will look great and taste even better. Drizzle the garlic butter sauce evenly over both the salmon and vegetables. Don’t forget to drizzle a little olive oil over the asparagus and tomatoes too. Season everything with salt and pepper to taste. Bake in the preheated oven for 12 to 15 minutes. You’ll know the salmon is ready when it flakes easily with a fork and the veggies are tender. Once done, take it out and garnish with fresh parsley. Enjoy your meal! To know when your salmon is done, look for a few signs. The salmon should flake easily with a fork. The center should be opaque and not shiny. If you see this, your salmon is ready. If you have thicker fillets, adjust the time slightly. Thicker pieces may need 1-2 more minutes. Keep an eye on them to avoid overcooking. Use a fork to check for flakiness in the middle. You can switch up the garlic and lemon if you like. Try shallots instead of garlic for a milder taste. For lemon, lime juice can add a fun twist. Adding herbs can give extra depth. Fresh dill or parsley brightens the dish. A pinch of red pepper flakes adds a kick. Experiment with spices that you enjoy. Plating is all about color and arrangement. Place the salmon in the center of the plate. Surround it with asparagus and cherry tomatoes. This creates a feast for the eyes. Use colorful veggies for vibrancy. Bright red tomatoes and green asparagus make the dish pop. Garnish with fresh parsley for a touch of green. This adds both flavor and beauty to your meal. Pro Tips Use Fresh Ingredients: Fresh salmon and seasonal vegetables will enhance the flavor of the dish significantly. Don’t Overcook the Salmon: Keep an eye on the salmon while it bakes; it should be just opaque and flake easily when done. Customize Your Vegetables: Feel free to swap in your favorite vegetables, such as broccoli or bell peppers, for a personal touch. Garnish for Presentation: Fresh parsley not only adds flavor but also makes the dish visually appealing. {{image_2}} You can swap out salmon for other proteins. Chicken breasts work well and stay juicy. Shrimp is another great option. It cooks quickly and adds a nice touch. Feel free to change the veggies too! You can use broccoli, bell peppers, or zucchini. Keep the mix colorful for a fun meal. Want to change the flavor? Add spices like paprika or dill to the garlic butter. These spices give the dish a nice kick. You can also try different sauces. Teriyaki adds sweetness, while pesto brings a fresh taste. Mix and match to find your favorite combination! If you need gluten-free options, check your sauces. Many are gluten-free. You can use gluten-free soy sauce as an easy swap. For keto-friendly choices, skip the cherry tomatoes. Instead, add more asparagus or other low-carb veggies. This will keep your meal tasty and in line with your diet. To keep your garlic butter salmon fresh, use an airtight container. Glass or plastic containers work well. Make sure to seal them tightly. Store leftovers in the fridge for up to 3 days. If you want to keep them longer, consider freezing. However, salmon is best enjoyed fresh. To reheat salmon without drying it out, use the oven. Preheat it to 275°F (135°C). Place the salmon on a baking sheet and cover it with foil. Heat for about 15 minutes, or until warm. You can also use the microwave. Set it to low power and heat for short bursts. Check often to avoid overcooking. With leftovers, you can create new meals. Flake the salmon into salads or pasta dishes. It also works in tacos or on top of rice bowls. These ideas help you enjoy your meal in different ways. You bake salmon in the oven for 12-15 minutes at 400°F (200°C). This time gives you tender, flaky fish. The salmon is done when it flakes easily with a fork. If your fillets are thicker, you may need a minute or two more. Keep an eye on it to avoid overcooking. Yes, you can use frozen salmon for this recipe. Just make sure to thaw it first. Thawing helps it cook evenly. You can leave it in the fridge overnight or place it in cold water for quicker thawing. Adjust the baking time slightly if the fillets are still cold. I like to serve garlic butter salmon with simple sides. Here are some great options: - Steamed rice - Quinoa - Mashed potatoes - A fresh salad These sides complement the flavors of the salmon and make for a well-rounded meal. Absolutely! Sheet pan cooking is perfect for meal prep. It saves time and cuts down on cleanup. You can cook a full meal in one pan. Plus, it allows for easy portioning. This method works well for busy weeknights or prep for lunch. You can make a tasty garlic butter salmon dish with ease. We covered key ingredients, like salmon, butter, and veggies. I shared step-by-step instructions to make cooking simple. We also explored tips for flavor and presentation. Plus, I offered ideas for variations and storage. In summary, this meal is quick, healthy, and flexible. I hope you feel inspired to try this recipe. Happy cooking!

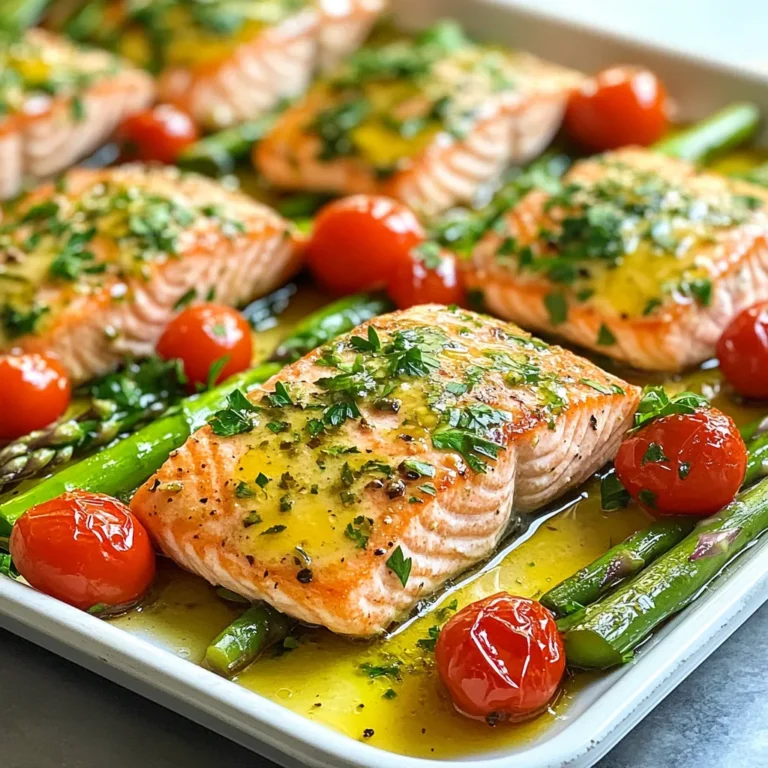
Garlic Butter Salmon Sheet Pan Quick and Tasty Meal

PREV 1 … 39 40 41 … 57 NEXT
quick dish kitchen

explore

DessertsDinnerAppetizersDrinks

Our Policies

  • Cookie Policy
  • Copyright Policy
  • Disclaimer
  • GDPR Policy
  • Terms Of Use
Back to Top
  • About
  • Contact Us
  • Privacy Policy
© 2025 quick dish kitchen