FREE DINNER EBOOK! Get your copy!
  • Cookie Policy
  • GDPR Policy
  • Disclaimer
  • Terms Of Use
  • Visit my other site: Fun Cookie Recipes
quick dish kitchen
  • Home
  • Dinner
  • Desserts
  • Drinks
  • Appetizers
  • Contact
  • About
  • Privacy Policy
  • Home
  • Dinner
  • Desserts
  • Drinks
  • Appetizers
  • Contact
  • About
  • Privacy Policy
  • Cookie Policy
  • GDPR Policy
  • Disclaimer
  • Terms Of Use
Visit my other site: Fun Cookie Recipes

HOME / CATEGORIES /

Latest

- 1 pound sirloin steak, cut into bite-sized cubes - 4 tablespoons unsalted butter - 4 cloves garlic, minced - 1 teaspoon fresh rosemary, chopped - 1 teaspoon fresh thyme, chopped - Salt and pepper, to taste - 2 tablespoons olive oil - Fresh parsley, chopped (for garnish) To make garlic butter steak bites, you need a few key tools: - A large skillet - A cutting board - A sharp knife - Tongs or a spatula - Paper towels These tools can make your cooking easier: - A meat thermometer for perfect doneness - A garlic press for quick mincing - Measuring spoons for precise seasoning - A serving platter for presentation Gathering these ingredients and tools will set you up for success. Each item plays a role in making this dish easy and fun to prepare. Enjoy the process of cooking as much as the meal itself! {{ingredient_image_1}} First, take 1 pound of sirloin steak. Cut it into bite-sized cubes. Pat the cubes dry using paper towels. This helps the steak sear better. Next, season the steak with salt and pepper. Make sure to coat all sides well. In a large skillet, heat 2 tablespoons of olive oil over medium-high heat. Once hot, add the steak cubes. Lay them in a single layer. Do not overcrowd the pan. Sear each side for about 2-3 minutes. You want them nicely browned. Cook until they reach your desired level of doneness. Then, transfer the steak bites onto a plate. In the same skillet, lower the heat to medium. Add 4 tablespoons of unsalted butter to the pan. Let it melt completely. Once melted, stir in 4 minced garlic cloves. Then, add 1 teaspoon of fresh rosemary and 1 teaspoon of fresh thyme. Cook for 1-2 minutes. Keep stirring until the garlic smells great but does not brown. Now, add the seared steak bites back into the skillet. Toss them in the garlic butter sauce. Make sure each piece is coated well. Cook for an extra minute to heat through. Finally, remove from heat. Garnish with freshly chopped parsley. Serve right away for the best flavor. To get a great sear on your steak bites, start by drying them well. Use paper towels to pat them dry. This step helps the steak get that nice crust. Season the steak with salt and pepper before cooking. Heat your skillet until it is very hot. Add the olive oil and wait until it shimmers. Place the steak in a single layer. Don’t overcrowd the pan; this keeps the heat high. Sear for about 2-3 minutes on each side until browned. If you don’t have sirloin, try using ribeye or tenderloin. Both cuts have great flavor and tenderness. For the butter, you can use ghee or olive oil for a lighter option. If you lack fresh herbs, dried herbs work fine too. Use half the amount if using dried herbs. Garlic powder can replace fresh garlic in a pinch. Remember, fresh ingredients boost taste, but substitutions can still work well. Want to kick up the flavor? Add a splash of Worcestershire sauce while cooking the steak. This sauce gives a savory boost. A pinch of red pepper flakes adds heat without overpowering the dish. For a tangy twist, squeeze fresh lemon juice before serving. You can also mix in a bit of grated Parmesan cheese for a creamy finish. Don’t forget to garnish with fresh parsley; it adds color and freshness! Pro Tips Let the Steak Rest: After cooking, allow your steak bites to rest for a few minutes. This helps retain the juices, making each bite more flavorful and tender. Use a Hot Skillet: Ensure your skillet is hot before adding the steak. A hot pan creates a nice sear and locks in the flavor, resulting in a delicious crust. Fresh Herbs Matter: Whenever possible, use fresh herbs like rosemary and thyme instead of dried. They provide a brighter, more vibrant flavor to your garlic butter sauce. Experiment with Seasoning: Don't be afraid to add extra spices or herbs to the garlic butter. A pinch of red pepper flakes or a splash of balsamic vinegar can elevate the dish even more. {{image_2}} You can add vegetables to your garlic butter steak bites for extra flavor. Try using bell peppers, onions, or mushrooms. They add great taste and color. Chop the veggies into bite-sized pieces. Sauté them in the skillet before cooking the steak. This will let the veggies soak up the garlic butter too. You can also add spinach or asparagus for a fresh touch. You do not have to stick to just a skillet. You can grill the steak bites for a smoky flavor. Preheat your grill and cook the steak bites for 2-3 minutes on each side. You can also use an air fryer. Cook the steak bites in the air fryer at 400°F for about 8 minutes. This method keeps them juicy while adding a nice crisp. Serve your garlic butter steak bites on a bed of rice or mashed potatoes. This will soak up the rich garlic butter sauce. You can also serve them with crusty bread to mop up the sauce. For a light meal, serve with a side salad. Fresh greens will balance the richness of the dish. Don’t forget to sprinkle extra parsley on top for color and flavor! After you enjoy your garlic butter steak bites, store any leftovers right away. Place them in an airtight container. Make sure they cool first to avoid steam buildup. Refrigerate these for up to three days. This keeps the steak tender and tasty. To reheat, I suggest using a skillet. Heat it over medium heat. Add a splash of water or broth to keep the steak moist. Place the steak bites in the skillet. Stir them often for about five minutes until they are warm. This method helps maintain the flavor and texture. You can freeze garlic butter steak bites for up to three months. First, let them cool completely. Then, pack them in a freezer-safe bag or container. Remove as much air as possible. When you’re ready to eat, thaw them in the fridge overnight. Reheat them in the skillet for the best results. To make sure your steak bites are tender, choose the right cut. I recommend sirloin. Cut your steak into cubes that are similar in size. This helps them cook evenly. Always pat the cubes dry before cooking. This step removes moisture for a good sear. Season your meat well with salt and pepper. Searing it quickly on high heat keeps the juices inside. Let the steak rest for a few minutes after cooking. This helps keep it juicy and tender. Yes, you can use other cuts of steak. Ribeye and tenderloin are great options. Both cuts are tender and flavorful. Just remember to adjust cooking times. Thinner cuts may cook faster, while thicker cuts may need more time. Always watch for doneness to fit your taste. You might need to check with a meat thermometer for best results. Aim for 130°F for medium-rare. Garlic butter steak bites work well with many sides. Roasted vegetables add color and crunch. Try serving with mashed potatoes for a comforting dish. A fresh green salad balances the rich flavors of the steak. Rice or quinoa can soak up the garlic butter too. Bread can be a fun choice to dip in the sauce. Choose sides that you love to make the meal your own! In this article, we covered key steps for making garlic butter steak bites. You learned about the main ingredients, cooking tools, and how to prepare the dish. I shared tips for perfecting the sear and offered variations to suit your taste. Remember to store leftovers properly for the best flavor. Making this dish can be fun and rewarding, so try it with your favorite sides. Enjoy the process, and savor each bite!

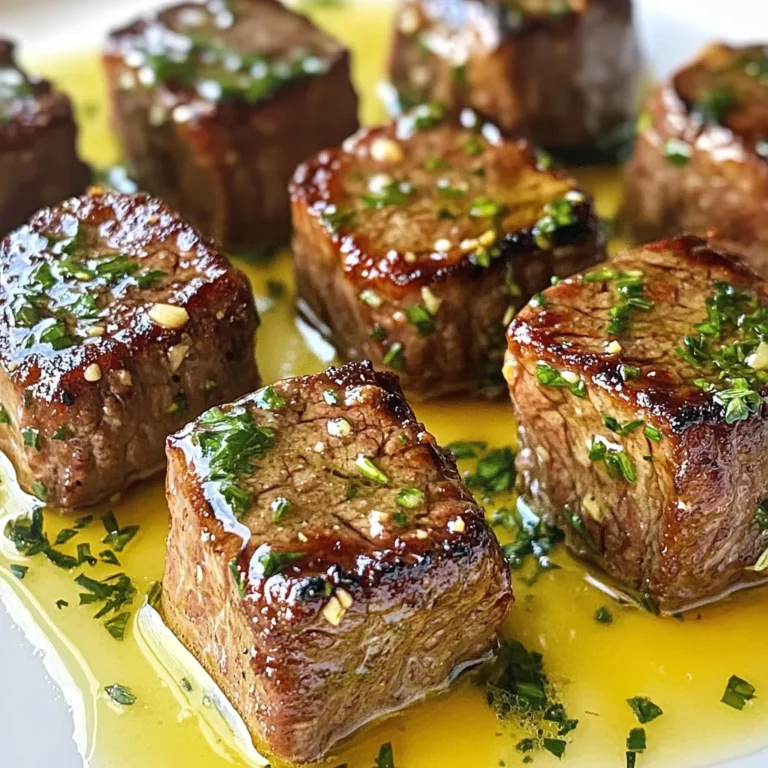
Garlic Butter Steak Bites Savory and Easy Recipe

- 4 large bell peppers (any color) - 2 cups cooked shredded chicken - 1 cup BBQ sauce - 1 cup cooked quinoa (or rice) - 1 cup corn kernels - 1 cup black beans - 1 cup shredded cheddar cheese - 1 teaspoon garlic powder - 1 teaspoon onion powder - Salt and pepper to taste - Fresh cilantro for garnish I love these BBQ Chicken Stuffed Peppers for their taste and ease. You can choose any color of bell peppers. Their bright colors make the dish pop! Using cooked, shredded chicken makes this recipe quick. You can use leftover chicken or store-bought rotisserie chicken. The BBQ sauce adds a sweet, smoky flavor. Quinoa or rice gives a nice texture and helps fill you up. I often use quinoa for an extra health boost, but rice works just as well. The corn and black beans add a nice crunch and protein, too. I love using canned corn and rinsed black beans for quick prep. Spices like garlic powder and onion powder give depth to the filling. A pinch of salt and pepper brings it all together. Finally, don’t forget the fresh cilantro! It adds a pop of color and fresh flavor when you serve. This mix of ingredients makes these stuffed peppers a hit. You can even switch things up with your favorite BBQ sauce. {{ingredient_image_1}} - Preheat the oven to 375°F (190°C). - Slice the tops off the bell peppers. - Remove the seeds and membranes. Set them aside. - In a large bowl, combine: - 2 cups cooked shredded chicken - 1 cup BBQ sauce - 1 cup cooked quinoa (or rice) - 1 cup corn kernels - 1 cup black beans, rinsed and drained - 1 teaspoon garlic powder - 1 teaspoon onion powder - Salt and pepper to taste - Mix well until everything is combined. - Fill each bell pepper with the BBQ chicken mixture. - Press down gently to pack it in. - Place the stuffed peppers upright in a baking dish. - If they don’t stand well, trim the bottom slightly. - Cover the dish with aluminum foil. - Bake in the preheated oven for 25 minutes. - Remove the foil, sprinkle 1 cup of shredded cheddar cheese on top of each pepper. - Return to the oven for an additional 10 minutes. - Bake until the cheese is bubbly and slightly golden. - Once done, let them cool for a few minutes. - Garnish with fresh cilantro before serving. When picking bell peppers, I like to choose large ones. They hold more filling. Any color works—red, yellow, or green. Each type has its own taste. Red tends to be sweeter, while green has a bit more bite. Look for firm peppers with shiny skin. Avoid any that feel soft or have blemishes. To keep your peppers firm, a few tips help. First, slice the tops and remove seeds. This lets steam escape. Second, bake them covered for part of the time. This helps cook the filling. After that, add cheese and bake uncovered. This makes the cheese bubbly and keeps peppers from getting soggy. You can prep stuffed peppers in advance. Cook the chicken and mix all the filling. Then, stuff the peppers and cover them. Store them in the fridge for up to two days. When ready to bake, just pop them in the oven. This saves time and makes dinner easy and quick! Pro Tips Choose Colorful Peppers: Using a mix of red, yellow, and green bell peppers not only adds visual appeal but also a variety of flavors. Customize Your Fillings: Feel free to add other ingredients like diced onions, jalapeños, or even different types of cheese to suit your taste. Make Ahead: You can prepare the stuffed peppers in advance and store them in the fridge. Just bake them when you're ready to serve! Experiment with Sauces: Try using different BBQ sauces or even a spicy chipotle sauce for a unique twist on the traditional flavor. {{image_2}} You can use different meats or go meatless. Ground turkey or beef works well. For a vegetarian option, try black beans or lentils. They add protein and flavor. You can also use tofu for a tasty vegan twist. Feel free to mix up the flavors! If you want a spicy kick, add jalapeños or hot sauce. For a tangy taste, try adding pineapple chunks. You can also go gourmet with fresh herbs like basil or rosemary for a unique touch. You can swap quinoa or rice for other grains. Barley or farro can add a chewy texture. If you want something lighter, try cauliflower rice. Each grain brings its own flavor and nutrition to the dish. To store leftovers safely, let the stuffed peppers cool first. Then, place them in an airtight container. This helps keep them fresh for up to three days in the fridge. Be sure to keep the container closed to avoid moisture loss. If you want to freeze your stuffed peppers, wrap each one tightly in plastic wrap. After that, place them in a freezer-safe bag. This keeps out air and prevents freezer burn. You can freeze them for up to three months. When you're ready to eat, just thaw them overnight in the fridge before reheating. To reheat stuffed peppers, use your oven for the best texture. Preheat your oven to 350°F (175°C). Place the peppers in a baking dish and cover with foil. Heat for about 20 minutes. If you prefer the microwave, heat them in short bursts to avoid sogginess. Enjoy your meal warm and tasty! Yes, you can skip quinoa. Substitute it with rice, couscous, or even cauliflower rice. Each option adds a unique taste and texture. Rice is the easiest swap. For a low-carb choice, cauliflower rice works great. Feel free to mix in other grains like farro for a nutty flavor. Stuffed peppers bake at 375°F for about 35 minutes. Cover the dish for the first 25 minutes. Remove the foil and add cheese for the last 10 minutes. This helps the peppers cook well and the cheese melt perfectly. Check if the peppers are tender before taking them out. You can serve several sides with these tasty peppers. Here are some great options: - A simple green salad with vinaigrette - Cornbread, which pairs nicely with BBQ flavors - Roasted vegetables for extra crunch - Rice or quinoa on the side - Creamy coleslaw for a refreshing touch Experiment with your favorite sides to make the meal complete! BBQ Chicken Stuffed Peppers are simple, tasty, and full of flavor. We discussed ingredients like bell peppers, shredded chicken, and BBQ sauce. I shared step-by-step instructions to help you prep, make, and bake these delicious meals. We also covered tips for choosing the best peppers and avoiding sogginess. Don't forget you can mix things up with different proteins or grains. With these ideas, you can enjoy great meals anytime. Try it and delight your taste buds!

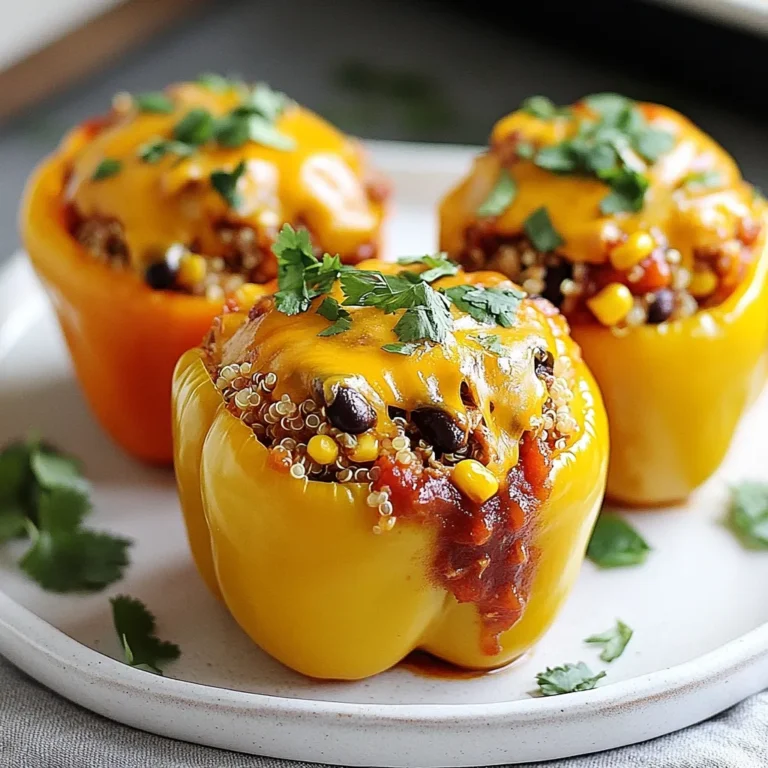
BBQ Chicken Stuffed Peppers Flavorful and Easy Meal

- 1 cup unsalted butter, softened - 1/2 cup powdered sugar - 2 cups all-purpose flour - 1/2 teaspoon salt - 1 cup dried cranberries, chopped - Zest of 1 large orange - 2 tablespoons fresh orange juice - 1 teaspoon vanilla extract - 1/4 teaspoon almond extract (optional) - Powdered sugar for dusting Unsalted butter works best for these bars. It gives you control over salt levels. You can swap unsalted butter for salted butter if needed. Just skip the added salt. For dried cranberries, look for good quality ones. You can also use other dried fruits if you prefer. Chopped nuts can add a nice crunch, too. Almond extract is optional but adds a nice touch. Fresh orange zest and juice are key. They bring bright, bold flavors to the bars. Zest adds oils that create a strong orange flavor. Fresh juice balances the sweetness with a bit of tartness. Using fresh ingredients will make your shortbread bars taste much better. Always choose ripe oranges for the zest and juice. {{ingredient_image_1}} Start by gathering your ingredients. You will need: - 1 cup unsalted butter, softened - 1/2 cup powdered sugar - 2 cups all-purpose flour - 1/2 teaspoon salt - 1 cup dried cranberries, chopped - Zest of 1 large orange - 2 tablespoons fresh orange juice - 1 teaspoon vanilla extract - 1/4 teaspoon almond extract (optional) - Powdered sugar for dusting First, preheat your oven to 350°F (175°C). Grease a 9x9-inch baking pan or line it with parchment paper. This helps with easy removal later. In a large bowl, cream the softened butter and powdered sugar. Use an electric mixer on medium speed for about 3-4 minutes. The mixture should look light and fluffy. Next, gradually add the flour and salt. Mix on low speed until combined. You want a crumbly dough. Now, stir in the chopped cranberries, orange zest, orange juice, and vanilla extract. If you like, add the almond extract for more depth. Make sure everything blends well into the dough. Press the dough evenly into your prepared baking pan. Use a spatula or your fingers to smooth the top. Now it's time to bake! Place the pan in your preheated oven. Bake for 25-30 minutes. You know they are done when the edges turn lightly golden. A toothpick inserted in the center should come out clean. Once baked, remove the bars from the oven. Let them cool in the pan for about 10 minutes. If you used parchment paper, lift the bars out. Place them on a wire rack to cool completely. After cooling, slice into bars. Dust the tops lightly with powdered sugar. This adds a sweet touch. Serve them on a decorative platter. You can garnish with fresh cranberries and orange slices for a festive look. Enjoy your lovely cranberry orange shortbread bars! To get the right texture in your bars, start with soft butter. Cream the butter and sugar well. This step adds air and makes the bars light. Mix until fluffy for about three to four minutes. When you add the flour, mix slowly. Overmixing can make the bars tough. Your dough should be crumbly but hold together when pressed. One common mistake is not measuring ingredients accurately. Use dry measuring cups for flour and sugar. Another mistake is skipping the cooling step. Let the bars cool in the pan for ten minutes. This helps them firm up before cutting. Finally, avoid baking too long. Check for golden edges and a clean toothpick for doneness. For a great finish, wait until the bars are cool. Use a fine mesh sieve to dust the sugar. This gives an even coat without clumps. If you want a fun twist, mix in a bit of orange zest with the sugar. This adds flavor and makes the bars even more festive. Enjoy the bright touch of sweetness! Pro Tips Chill the Dough: For a firmer dough that’s easier to press into the pan, chill it in the refrigerator for 30 minutes before baking. Use Fresh Ingredients: Freshly squeezed orange juice and freshly grated zest will give your bars a more vibrant flavor compared to bottled alternatives. Don't Overbake: Keep an eye on the bars while baking; they should be lightly golden on the edges but still soft in the center for the best texture. Store Properly: Keep the bars in an airtight container at room temperature for up to a week, or refrigerate for longer freshness. {{image_2}} You can switch up the flavors in your cranberry orange shortbread bars! Try adding nuts like walnuts or almonds. They add a nice crunch and flavor. You can also mix in chocolate chips. Dark chocolate pairs well with orange and cranberry. It adds a rich taste that many will love. You can make these bars gluten-free by using a gluten-free flour blend. Just make sure it works well in baking. For a vegan version, swap the butter for coconut oil or vegan butter. Use a powdered sugar that is free from animal products. You can also skip the eggs since this recipe does not need them. Feel free to change the fruits based on the season. In the summer, use fresh blueberries or raspberries. They add a burst of flavor and color. In the fall, try using diced apples with cinnamon. This will give your bars a warm, cozy taste. Each fruit brings its own charm to the bars, making them special for every occasion. To keep your cranberry orange shortbread bars fresh, store them in an airtight container. Line the container with parchment paper to absorb moisture. This helps maintain the bars' crisp texture. If you plan to eat them within a week, store them at room temperature. For longer storage, refrigeration is best. Freezing is a great way to keep these bars for later. First, cut the bars into squares. Wrap each square tightly in plastic wrap. Then, place them in a freezer-safe bag or container. They can last up to three months in the freezer. When you're ready to enjoy them, just thaw them in the fridge overnight. Cranberry orange shortbread bars are best eaten within a week when stored at room temperature. If refrigerated, they may last up to two weeks. To reheat, place a bar in the microwave for 10-15 seconds. This warms it up without losing its texture. Enjoy your delicious treats warm or at room temperature! Yes, you can make these bars ahead of time. They store well. Bake them, cool them, and cut them into bars. Place them in an airtight container. They last for about a week at room temperature. You can also freeze them for longer storage. Just wrap them tightly in plastic wrap. Thaw them overnight in the fridge before serving. You can use various fruits if you lack dried cranberries. Dried cherries work well. Raisins or dried blueberries are other great options. You can even try chopped apricots for a unique taste. Each fruit brings a different flavor, so choose what you like best. The bars are done when the edges turn a light golden brown. Insert a toothpick into the center. If it comes out clean or with a few crumbs, they are ready. Do not overbake, as this can make them dry. Keep an eye on them in the last few minutes. Cranberry orange shortbread bars are a delicious treat. We covered their ingredients, like unsalted butter and fresh zest. Fresh ingredients make a big difference in taste. I shared detailed steps for prep, baking, and cooling. You learned tips to avoid common mistakes and achieve the perfect texture. Variations allow for creativity with flavors and dietary needs. Storing and reheating tips help keep the bars fresh. Enjoy making and sharing these bars. They'll be a hit!

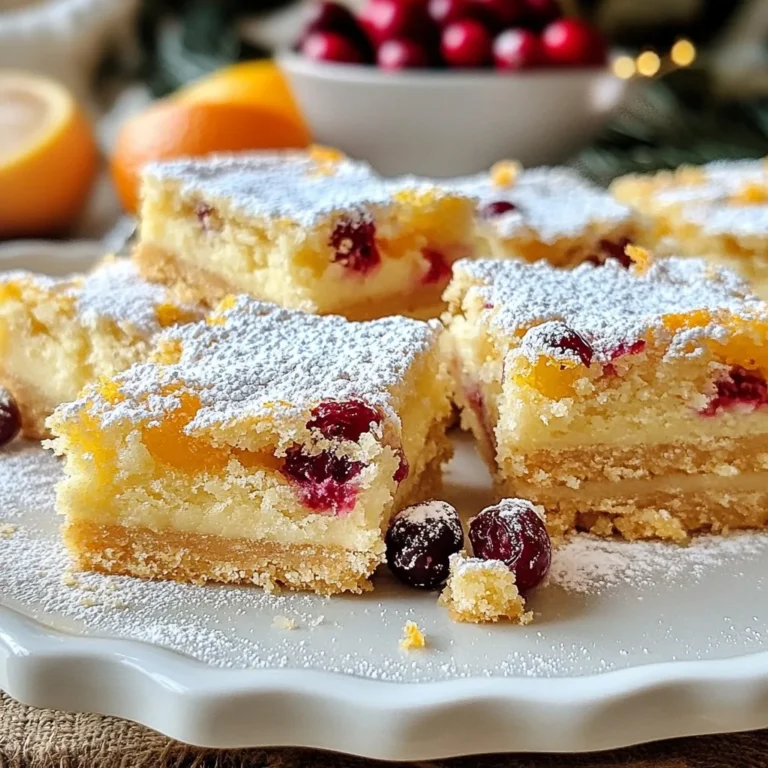
Cranberry Orange Shortbread Bars Delicious and Easy

For Lemon Garlic Roasted Cauliflower, you will need: - 1 large head of cauliflower, cut into florets - 3 tablespoons olive oil - 4 cloves garlic, minced - Zest of 1 lemon - Juice of 1 lemon - 1 teaspoon smoked paprika - 1 teaspoon salt - ½ teaspoon black pepper - Fresh parsley, chopped (for garnish) You can swap ingredients for different flavors. Here are some great options: - Cauliflower: Broccoli or Brussels sprouts work well too. - Olive oil: Use avocado oil for a light taste. - Garlic: Try garlic powder if fresh isn’t available. - Lemon: Lime juice gives a nice twist. - Smoked paprika: Regular paprika works in a pinch. - Salt: Sea salt or Himalayan salt can replace regular salt. - Black pepper: White pepper adds a different flavor. This dish is not just tasty; it's healthy too! Here’s a quick breakdown per serving: - Calories: About 160 - Protein: 3g - Fat: 14g - Carbohydrates: 9g - Fiber: 4g - Sugar: 2g With these simple ingredients, you can create a dish that’s full of flavor and nutrition. Enjoy the zesty goodness of lemon and garlic with every bite! {{ingredient_image_1}} Start by gathering your ingredients. You need one large head of cauliflower, three tablespoons of olive oil, four cloves of minced garlic, and the zest and juice of one lemon. You will also need one teaspoon of smoked paprika, one teaspoon of salt, and half a teaspoon of black pepper. Finally, don’t forget fresh parsley for garnish. Next, preheat your oven to 425°F (220°C). This step is key for getting a nice roast on your cauliflower. In a large mixing bowl, mix the olive oil, minced garlic, lemon zest, lemon juice, smoked paprika, salt, and black pepper. Whisk these together until they blend well. This mixture gives the cauliflower its bright, bold flavor. Now, cut the cauliflower into florets. Make sure the pieces are similar in size. This helps them cook evenly. Place the florets in the bowl with the lemon-garlic mixture. Toss them well, so every piece is coated. Spread the seasoned cauliflower in a single layer on a baking sheet lined with parchment paper. This helps keep the cauliflower from sticking and makes cleanup easier. Roast the cauliflower in your preheated oven for 25 to 30 minutes. Flip the florets halfway through. You want them to become golden brown and tender. Once they're done roasting, take them out and let them cool slightly. This helps the flavors settle. Garnish your roasted cauliflower with fresh chopped parsley. This adds a pop of color and a fresh taste. Serve the lemon garlic roasted cauliflower as a side dish with grilled chicken or fish. It also makes a great topping for salads or grain bowls. Enjoy the bright, zesty flavors! To get the best roasted cauliflower, follow a few simple steps. First, cut your cauliflower into equal florets. This helps them cook evenly. Next, preheat your oven to 425°F (220°C). A hot oven makes a big difference. Use parchment paper on your baking sheet. This keeps the cauliflower from sticking. Toss the florets well in your lemon-garlic mix. Make sure they are all coated. Spread them out in one layer. If they are too crowded, they will steam instead of roast. Flip them halfway through for even browning. To boost the flavor of your roasted cauliflower, think outside the box. Add fresh herbs like thyme or rosemary for a lovely aroma. You can also sprinkle some cheese on top before roasting. Parmesan works great here. If you want a kick, add red pepper flakes. The lemon and garlic already give a fresh taste, but these extras can make it pop even more. Try using lemon juice and zest from a Meyer lemon for a sweeter twist. One big mistake is not cutting the cauliflower evenly. If some pieces are big and others are small, they will cook at different rates. Another mistake is using too much oil. While oil adds flavor, too much can make the cauliflower soggy. Avoid cooking them at a lower temperature. This leads to steamed cauliflower, not roasted. Lastly, don’t rush the flipping. Give them time to get golden brown. They need that caramelization for the best taste. Pro Tips Choose Fresh Cauliflower: Select a cauliflower head that is firm, compact, and free from blemishes for the best flavor and texture. Adjust Garlic to Taste: If you love garlic, feel free to add more than four cloves for an extra punch of flavor. Experiment with Spices: Try adding different spices like cumin or cayenne pepper to customize the flavor profile to your liking. Use Lemon Zest Generously: The zest adds a bright and aromatic element; don't skimp on it for maximum flavor! {{image_2}} You can make this dish even better by adding more spices. Try cumin or coriander for a warm flavor. If you like heat, add a pinch of red pepper flakes. Fresh herbs can also boost taste. Consider using thyme or rosemary. They pair well with lemon and garlic. This recipe is already vegan and gluten-free. All the ingredients are plant-based. You do not need to change anything if you follow these diets. Just be sure to use fresh ingredients. They help enhance taste and keep the dish healthy. Roasting is great, but you can also grill or steam cauliflower. Grilling gives a smoky flavor. Just toss the florets in the lemon-garlic mix and grill them on high heat. For steaming, cook the florets until tender, then toss them in the mix. This keeps them moist and adds a fresh taste. After enjoying your Lemon Garlic Roasted Cauliflower, store leftovers in an airtight container. You can keep them in the fridge for about 3 to 5 days. This keeps the flavors fresh. Make sure the cauliflower cools down before you seal it. This helps avoid excess moisture. To reheat, you can use an oven or a microwave. For the oven, preheat it to 350°F (175°C). Spread the cauliflower on a baking sheet and heat for about 10-15 minutes. This method keeps the cauliflower crispy. If using a microwave, place the cauliflower in a microwave-safe dish. Heat in 30-second bursts, stirring in between, until warm. You can freeze Lemon Garlic Roasted Cauliflower too. First, let it cool completely. Then, place it in a freezer-safe bag or container. Remove as much air as possible. This helps prevent freezer burn. You can freeze it for up to 3 months. When ready to eat, thaw in the fridge overnight and reheat as directed. Yes, you can use frozen cauliflower. Just make sure to thaw it first. Pat it dry to remove any excess moisture. This helps the flavor stick better. The roasting time may need to be a bit longer. Check for tenderness and a nice golden color. You can serve this dish with many meals. It pairs well with grilled chicken or fish. You can also enjoy it with quinoa or rice. Add a fresh salad for a balanced meal. This roasted cauliflower also makes a great side for pasta dishes. To make it spicier, add red pepper flakes. You can mix in cayenne pepper for extra heat. Start with a small amount and taste as you go. This way, you can find the right spice level for you. Enjoy the kick it brings to the dish! This blog post covered everything you need for Lemon Garlic Roasted Cauliflower. You learned about the main ingredients, how to prepare and cook them, and tips for perfect results. We also discussed fun variations and storage tips to enjoy leftovers. Now, you can make delicious cauliflower with confidence. Use these steps and suggestions to impress family and friends. Enjoy your cooking journey!

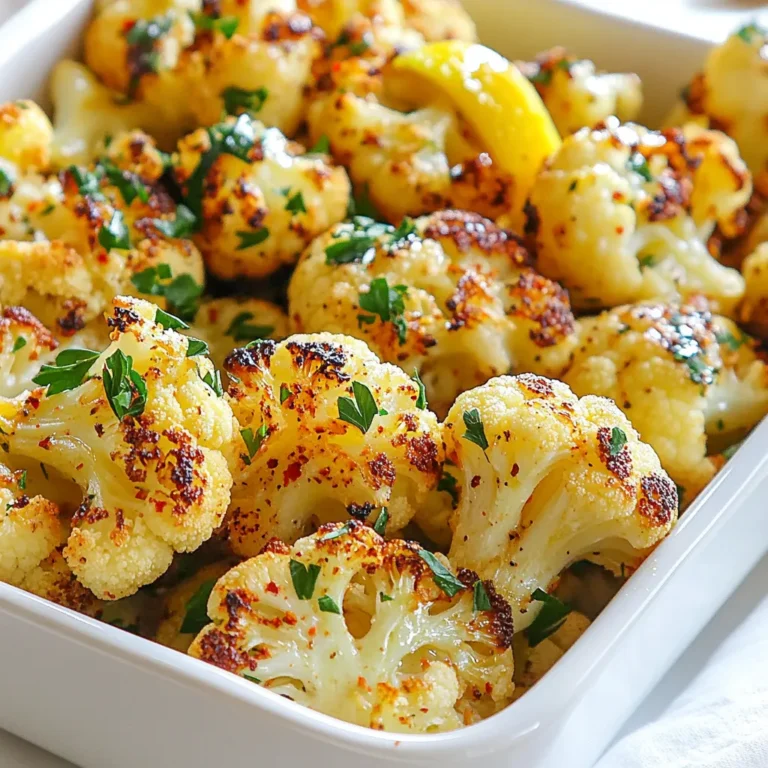
Lemon Garlic Roasted Cauliflower Simple Flavor Boost

- 2 boneless, skinless chicken breasts - 4 whole wheat pita pockets - 1 cup cherry tomatoes, halved - 1 cucumber, diced - 1/2 red onion, thinly sliced - 1 cup romaine lettuce, chopped - 1/2 cup Greek yogurt - 1/4 cup feta cheese, crumbled - 2 tablespoons olive oil - 1 teaspoon dried oregano - 1 teaspoon garlic powder - 1 teaspoon paprika - Salt and pepper to taste - Fresh dill for garnish - Extra lemon juice When I make Greek Chicken Pita Pockets, I focus on fresh, high-quality ingredients. The chicken provides protein, while the veggies add crunch and flavor. Whole wheat pita pockets are healthy and filling. Greek yogurt and feta cheese bring a creamy, tangy touch that ties everything together. The marinade is simple but essential. I love using olive oil, oregano, garlic powder, and paprika. These spices enhance the chicken’s taste and keep it juicy. Adding salt and pepper is key to bringing out all the flavors. For garnishes, fresh dill adds a nice touch. A squeeze of lemon juice brightens the dish and enhances the taste. This meal is not only quick to prepare, but it also bursts with flavor. You'll enjoy every bite! {{ingredient_image_1}} To start, we need to marinate the chicken. This step adds a lot of flavor. - In a bowl, mix together: - 2 tablespoons olive oil - 1 teaspoon dried oregano - 1 teaspoon garlic powder - 1 teaspoon paprika - Salt and pepper to taste Make sure to blend these ingredients well. - Next, coat the chicken breasts in this marinade. Let the chicken sit for at least 30 minutes. If you have more time, letting it marinate for 2 hours makes it even tastier. Now, it’s time to cook the chicken. - Preheat your grill or grill pan over medium-high heat. This helps the chicken cook evenly. - Cook the marinated chicken for about 6-7 minutes on each side. Use a meat thermometer to check that the chicken reaches 165°F (75°C). Once cooked, remove it from the heat and let it rest for a few minutes. This keeps the chicken juicy. While the chicken rests, we can prepare the filling. - In a large bowl, combine: - 1 cup cherry tomatoes, halved - 1 cucumber, diced - 1/2 red onion, thinly sliced - 1 cup romaine lettuce, chopped - 1/4 cup feta cheese, crumbled Toss these fresh veggies gently to mix them. - Slice the cooked chicken into strips and add it to the bowl. Drizzle with 2 tablespoons of fresh lemon juice. You can add more salt and pepper if you like. Mix everything well. The last step is assembling the pita pockets. - Warm the pita pockets in the oven for about 5 minutes, or until soft. This makes them easier to fill. - Carefully open each pita pocket and fill it with the chicken and vegetable mix. Top it with a dollop of Greek yogurt and garnish with fresh dill if you want. Enjoy your tasty Greek Chicken Pita Pockets! - Recommended marinating time: I suggest marinating the chicken for at least 30 minutes. For more flavor, let it sit for up to 2 hours. - Alternative marinade options: If you want to mix it up, try using yogurt as a base. You can also add lemon zest or herbs like thyme for a fresh twist. - Ensuring the chicken is cooked through: Use a meat thermometer to check the chicken. It should reach 165°F (75°C) inside. This keeps it safe and juicy. - Best practices for grilling chicken: Preheat your grill or pan to medium-high heat. This helps get nice grill marks and keeps the chicken from sticking. - How to properly fill pita pockets: Open each pita gently. Fill them with chicken and veggies, but don’t overstuff. This helps prevent spills. - Serving suggestions: Serve with a side of extra lemon wedges or a simple salad. This adds freshness and color to your plate. Pro Tips Marinate for Maximum Flavor: Allow the chicken to marinate for at least 2 hours. This enhances the flavor and tenderness of the meat. Perfectly Cooked Chicken: Use a meat thermometer to check that the chicken reaches an internal temperature of 165°F (75°C) for safe consumption. Warm Pita for Softness: Warm the pita pockets in the oven just before serving to make them soft and pliable, making it easier to fill them. Fresh Ingredients Matter: Use fresh, high-quality vegetables and herbs for the best taste and nutritional value in your pita pockets. {{image_2}} You can easily swap chicken for chickpeas or grilled vegetables. Chickpeas add protein and fiber. Simply toss canned chickpeas with olive oil, lemon juice, and spices. For grilled veggies, try zucchini, bell peppers, or eggplant. Grill them until soft and charred. To change up the taste, add different spices or herbs. Try cumin or coriander for warmth. Fresh herbs like parsley or mint can brighten flavors. You can also use flavored Greek yogurt. Add herbs or garlic to plain yogurt for a tasty twist. Serve your Greek chicken as a salad instead of in pita pockets. Use the same filling and toss it with greens. You can also serve pita pockets with sides. Try hummus, tzatziki, or a fresh Greek salad. These pair well and add extra flavor. To keep your Greek Chicken Pita Pockets fresh, store them properly. First, remove the filling from the pita. This helps prevent the bread from getting soggy. Place the chicken and vegetables in an airtight container. You can store them in the fridge for up to three days. For the pitas, wrap them in foil or plastic wrap. They can last about two days in the fridge. When it's time to enjoy your leftovers, reheat the chicken and veggies carefully. The best way is in a skillet over medium heat. Stir them for about five to seven minutes until they are warm. You can also use the microwave. Heat in 30-second intervals until warm. Don't forget to check the chicken's temperature. It should be at least 165°F (75°C) to be safe to eat. If you want to save your Greek Chicken Pita Pockets for later, freezing is a great option. You can freeze the cooked chicken and filling separately. Place them in freezer-safe containers or bags. They can stay fresh for up to three months. When you are ready to eat, thaw them in the fridge overnight. Then, reheat as mentioned above. Enjoy your tasty meal whenever you want! Cooking the chicken takes about 12 to 14 minutes. You need to grill it for 6 to 7 minutes on each side. Make sure the internal temperature reaches 165°F (75°C). This ensures it is safe to eat and juicy. Yes, you can use chicken thighs or even ground chicken. Chicken thighs are more tender and juicy. If you prefer, you can also use shredded chicken from a rotisserie bird. Adjust cooking times if needed. If you need a substitute for Greek yogurt, try sour cream or a dairy-free yogurt. These options work well in taste and texture. You can also use tzatziki sauce for a twist in flavor. In this blog post, we explored how to make delicious Greek chicken pita pockets. You learned about key ingredients, step-by-step instructions, and useful tips for success. We also covered tasty variations and storage options. Greek chicken pita pockets are not only easy to prepare, but they also offer great flavors. Try these tips and enjoy a healthy meal that delights. Your kitchen will be filled with fresh tastes!

Greek Chicken Pita Pockets Tasty and Quick Meal

- 1 cup quinoa, rinsed - 2 cups vegetable broth or water - 1 cup cherry tomatoes, halved - 1 cucumber, diced - 1 red bell pepper, diced - 1/2 red onion, finely chopped - 1 cup chickpeas, cooked (canned or boiled) - 1/2 cup Kalamata olives, pitted and sliced - 1/2 cup feta cheese, crumbled - 1/4 cup fresh parsley, chopped - 1/4 cup olive oil - 2 tablespoons lemon juice - Salt and black pepper to taste - Additional fresh parsley - Lemon wedges - Extra olive oil drizzle When gathering ingredients for your Mediterranean quinoa bowls, freshness matters. Choose ripe cherry tomatoes and a crisp cucumber. The flavors blend well, making each bite exciting. I love using Kalamata olives for their rich taste. They add a nice briny kick. Feta cheese is a must for that creamy finish. You can adjust the salt and pepper to fit your taste. If you want a bit more zest, a touch of lemon juice does wonders. For garnishes, fresh parsley brightens the dish. A drizzle of olive oil adds a nice touch of flavor. Feel free to play around with the ingredients. The beauty of these bowls is in their versatility. You can swap in your favorite veggies or add extra protein. Enjoy creating a colorful, healthy meal! {{ingredient_image_1}} Start by rinsing 1 cup of quinoa under cold water. This step removes bitterness. In a medium saucepan, combine the rinsed quinoa and 2 cups of vegetable broth or water. Bring it to a boil over medium-high heat. Once it reaches a boil, reduce the heat to low. Cover the pot and let it simmer for about 15 minutes. You want the quinoa to be fluffy and for all the liquid to be absorbed. After cooking, remove it from heat and let it sit covered for 5 minutes. Fluff the quinoa with a fork to keep it light. While the quinoa cooks, chop your vegetables. Combine 1 cup of halved cherry tomatoes, 1 diced cucumber, 1 diced red bell pepper, and 1/2 finely chopped red onion in a large bowl. Add 1 cup of cooked chickpeas to the mix. These ingredients add color and flavor. Once the quinoa is ready, add it to the vegetable mixture. Gently toss everything together until well mixed. This step ensures that all the flavors blend nicely. In a small bowl, whisk together 1/4 cup of olive oil, 2 tablespoons of lemon juice, salt, and black pepper to taste. This dressing brings brightness to the dish. Drizzle it over the quinoa and vegetable mixture. Toss gently to coat everything evenly. Taste the mixture and adjust the seasoning if needed. You can add more salt, pepper, or lemon juice based on your preference. This final touch enhances all the flavors in your Mediterranean quinoa bowls. To cook fluffy quinoa, rinse it well under cold water. This removes the bitter coating. Next, use two cups of broth for every cup of quinoa. Bring the broth to a boil. Once boiling, lower the heat and cover the pot. Let it simmer for about 15 minutes. After cooking, let it rest for five minutes, still covered. This resting time helps the grains absorb any remaining moisture. Finally, fluff the quinoa with a fork to separate the grains. If you want more zing, add extra lemon juice. Fresh herbs like parsley or dill can also brighten the dish. Using high-quality, gourmet olive oil adds richness and depth. Drizzle it on top just before serving. This small step elevates the flavor and makes your quinoa bowl shine. For a beautiful presentation, serve the quinoa in deep bowls. This allows you to layer the ingredients nicely. Drizzle a bit of extra olive oil on top for shine. A lemon wedge and a sprinkle of fresh parsley make it pop. This dish works well as a main meal or a side. Pair it with grilled chicken or fish for a complete feast. Pro Tips Use Fresh Ingredients: For the best flavor, use fresh vegetables and herbs. Seasonal produce elevates the dish. Cook Quinoa Properly: Ensure to rinse quinoa before cooking to remove saponins, which can give a bitter taste. Customize Your Bowl: Feel free to add other ingredients like avocado, roasted vegetables, or different proteins for variation. Make Ahead: This bowl can be made in advance and stored in the fridge for a quick, healthy meal during the week. {{image_2}} You can easily make this dish vegetarian or vegan. If you want a creamy bite, try using avocado or tofu instead of feta cheese. Both options add richness and healthy fats. You can also switch chickpeas for other legumes like black beans or lentils. This keeps the dish packed with protein and flavor. Feel free to get creative with your bowl! Adding leafy greens like spinach or arugula gives your meal a fresh touch. You can also toss in roasted vegetables for extra flavor. Nuts or seeds like walnuts or sunflower seeds add a nice crunch. They bring texture and healthy fats, making your bowl even better. The dressing can change the whole vibe of your dish. Instead of the olive oil and lemon mix, try using tahini for a rich, nutty flavor. A yogurt-based dressing can add creaminess and tang. Don't shy away from experimenting with herbs and spices. Fresh dill, mint, or smoked paprika can elevate your bowl in a fun way. To store leftovers, let the quinoa bowls cool first. Place them in an airtight container. This keeps moisture in and prevents drying out. You can store the bowls in the fridge for up to three days. After that, the flavors may fade. To freeze leftovers, use a freezer-safe container. Separate the quinoa from the veggies and dressing. This helps keep the textures nice. You can freeze the quinoa mixture for up to two months. When ready to eat, thaw it in the fridge overnight. For reheating, put the quinoa in the microwave or on the stove. If using a microwave, heat it for about two minutes. Add a splash of water to keep it moist. If using the stove, warm it over low heat, stirring often. Enjoy your meal without losing flavor! To make your quinoa fluffier, start by rinsing it well. Rinsing removes the bitter coating called saponin. Use cold water and a fine mesh strainer. After rinsing, cook the quinoa in vegetable broth or water. Bring it to a boil, then lower the heat to simmer. Once cooked, let it rest for five minutes. Fluff it with a fork before serving. This method helps create the light texture you want. Yes, you can prepare Mediterranean quinoa bowls ahead of time. Cook the quinoa and store it in the fridge for up to five days. Chop your vegetables and keep them in separate containers. This way, you can mix and match as you like. You can also make the dressing in advance. Just whisk it together and store it in a jar. When ready to eat, combine everything for a fresh meal. These bowls are great on their own but can be paired with tasty sides. Consider serving them with pita bread or a crisp green salad. Hummus and tzatziki also make wonderful dips. For protein, grilled chicken or shrimp add a nice touch. You can also serve them with a slice of lemon for a zesty kick. Enjoy exploring these combinations! In this blog post, we explored a vibrant Mediterranean quinoa bowl, packed with fresh veggies and flavors. I shared tips on making fluffy quinoa and enhancing flavors with herbs and spices. Remember, you can customize this dish with different ingredients or dressings to match your taste. Enjoy this healthy meal as a main dish or a side. It’s easy to make and stores well for later. Happy cooking!

Mediterranean Quinoa Bowls Flavorful Healthy Meal

- 4 cod fillets (about 6 ounces each) - 1 cup grated Parmesan cheese - 1/2 cup breadcrumbs (preferably panko for extra crunch) - 1 teaspoon garlic powder - 1 teaspoon lemon zest - 1 teaspoon dried oregano - 1/2 teaspoon paprika - Salt and pepper to taste - 2 tablespoons olive oil - 1 lemon, sliced (for garnish) - Fresh parsley, chopped (for garnish) The main ingredients make this dish shine. Cod fillets are mild and flaky, perfect for the crust. Parmesan cheese adds a rich flavor and helps form the crust. I love using panko breadcrumbs. They give a great crunch and texture. The spices and seasonings elevate the taste. Garlic powder brings warmth, while lemon zest adds brightness. Oregano gives a nice herbal note. Paprika adds a hint of color and flavor. Don't forget salt and pepper; they enhance every dish. Garnishes add a fresh touch. A drizzle of olive oil keeps the fish moist. Lemon slices brighten the plate and add zest. Fresh parsley makes it look pretty and adds flavor. These ingredients come together to create a dish that is not only tasty but also beautiful. {{ingredient_image_1}} First, preheat your oven to 400°F (200°C). This is the perfect temperature for cooking cod. Next, line a baking sheet with parchment paper. This makes cleanup easy and helps the cod cook evenly. In a mixing bowl, combine the grated Parmesan cheese, breadcrumbs, garlic powder, lemon zest, dried oregano, paprika, salt, and pepper. Use a fork to mix it all together well. You want a nice, even blend. This mixture gives the cod a great flavor and crunchy texture. Now, take the cod fillets and pat them dry with paper towels. This step helps the crust stick well. Place the fillets on your prepared baking sheet. Drizzle olive oil over each fillet. This adds moisture and helps the crust crisp up. Press the Parmesan mixture onto the top of each cod fillet. Make sure to cover them evenly. Bake the cod in the preheated oven for about 15-20 minutes. The fish is done when it flakes easily with a fork, and the crust is golden brown and crispy. Remove it from the oven and let it sit for a few minutes. To serve, garnish each fillet with fresh parsley and lemon slices. Enjoy your delicious Parmesan crusted cod! To get that perfect crunchy crust, use panko breadcrumbs. They add extra crunch. Make sure to press the cheese mixture firmly onto the cod. This helps it stick while baking. Bake the cod in a hot oven at 400°F (200°C). This high heat gives you that golden-brown color. If you want even more crunch, broil the cod for the last few minutes. Just watch it closely to avoid burning. How can you tell if your cod is done? The fish should look opaque and flake easily with a fork. This means it's cooked all the way through. If you have a food thermometer, check that the inside temperature is 145°F (63°C). This ensures it's safe to eat. The crust should be golden brown and crispy, adding to the dish's appeal. Pairing your Parmesan crusted cod with the right sides can enhance the meal. Roasted vegetables, like asparagus or broccoli, work great. A fresh green salad adds a nice crunch and brightness. Consider serving it with a side of quinoa or rice for a hearty touch. Don't forget a slice of lemon to squeeze on top; it balances the flavors perfectly. Pro Tips Choose Fresh Cod: Always opt for the freshest cod fillets you can find. Fresh fish will have a mild scent and firm texture, ensuring a tastier dish. Adjust Seasoning: Feel free to adjust the spices according to your taste. Adding a pinch of cayenne pepper can give the crust an extra kick! Perfect Baking Time: Keep an eye on the cod while it's baking. Depending on the thickness of the fillets, cooking time may vary. The fish should be opaque and flake easily with a fork. Serve with Sides: Pair this dish with a fresh salad or steamed vegetables for a complete meal. The lightness of the sides complements the richness of the Parmesan crust. {{image_2}} You can change the taste of Parmesan crusted cod easily. Try adding fresh herbs like parsley or basil. You can also use spices like thyme or dill. Lemon juice or zest gives a bright flavor. If you want heat, add a pinch of cayenne pepper. Mix and match until you find what you love! Cod is great, but many fish work well too. Try using tilapia or haddock for a similar taste. Salmon also holds up nicely with the crust. Each fish will give a unique flavor. So, don’t hesitate to explore your options with different types. You can cook Parmesan crusted cod in two main ways: baking or broiling. Baking gives a nice even cook. It keeps the fish moist inside while making the crust crunchy. Broiling cooks faster and gives extra browning on top. Both methods work, so pick one based on your time and taste! To store leftover Parmesan crusted cod, place it in an airtight container. This keeps the fish moist. Refrigerate it within two hours of cooking. Cod will last in the fridge for up to three days. You can also wrap it in plastic wrap if you don't have a container. When you reheat cod, you want to keep the crust crispy. Preheat your oven to 350°F (175°C). Place the cod on a baking sheet. Heat it for about 10 minutes. This warms the fish and keeps the crust crunchy. Avoid using the microwave, as it makes the crust soggy. If you want to freeze cod, wrap each fillet tightly in plastic wrap. Then, place them in a freezer bag. Remove as much air as you can before sealing. Cod can be frozen for up to three months. To use, thaw it in the fridge overnight before reheating. You can enjoy Parmesan crusted cod with many tasty sides. Here are some great ideas: - Steamed broccoli: This adds a bright color and fresh taste. - Roasted potatoes: They give a nice crunch and hearty feel. - Quinoa salad: A light and healthy choice that pairs well. - Rice pilaf: This adds a fluffy texture that complements the fish. - Green beans: Crisp and vibrant, they balance the meal. - White wine: A chilled Sauvignon Blanc pairs nicely with the dish. Feel free to mix and match these sides based on what you like! Fresh cod has some clear signs. Here’s what to look for: - Color: Fresh cod should be white or off-white with a slight sheen. - Smell: It should smell clean and mild, like the ocean. Avoid any strong fishy odor. - Texture: The fillet should feel firm and spring back when gently pressed. - Eyes: If you buy whole fish, look for clear, bright eyes. Always choose fresh cod for the best flavor and texture in your dish! Yes, you can easily make Parmesan crusted cod gluten-free! Here are some swaps: - Gluten-free breadcrumbs: Use these instead of regular ones. Panko works well. - Almond flour: This can be a tasty alternative for the crust. - Cornmeal: A great gluten-free option that adds crunch. These swaps keep the dish tasty while meeting gluten-free needs! This blog post shared how to make Parmesan crusted cod with the right ingredients, steps, and tips. You learned about key ingredients, like cod and Parmesan, and how to prepare them. I discussed baking methods for a perfect crust and suggested side dishes. In conclusion, making this dish is simple and fun. Use fresh ingredients and enjoy a tasty meal. Don't hesitate to experiment with flavors or sides. Happy cooking!

Parmesan Crusted Cod Simple and Tasty Recipe

To make a tasty mango coconut chia pudding, you need a few key ingredients: - 1 cup coconut milk - 1 cup ripe mango, pureed (about 1 medium mango) - 1/4 cup chia seeds - 2 tablespoons maple syrup (or honey) - 1 teaspoon vanilla extract - A pinch of salt These items come together to create a creamy and flavorful pudding. The coconut milk adds a rich taste. The mango gives it a fresh, fruity flavor. Chia seeds make the pudding thick and fun to eat. You can add some delicious toppings to your pudding. Here are a few ideas: - Fresh mango cubes - Shredded coconut - Sliced almonds - Chopped nuts These toppings add texture and extra flavor. You can mix and match based on what you like. If you can’t find some ingredients, don’t worry! Here are some good swaps: - Use almond milk or oat milk instead of coconut milk. - Try other fruits, like bananas or strawberries, if mangoes are not in season. - Use agave syrup in place of maple syrup for sweetness. These substitutions can help you customize your pudding. Enjoy making it your own! {{ingredient_image_1}} To start, gather your ingredients. You will need coconut milk, pureed mango, maple syrup, vanilla extract, and salt. In a mixing bowl, pour in one cup of coconut milk. Then, add one cup of ripe mango that you have pureed, which is about one medium mango. Next, mix in two tablespoons of maple syrup and one teaspoon of vanilla extract. Finally, sprinkle in a pinch of salt. Whisk all the ingredients together until they blend nicely. Now it’s time to add the chia seeds. Measure out a quarter cup of chia seeds and sprinkle them into your mixture. Stir well to ensure the seeds are evenly mixed in. This step is key for your pudding’s texture. The chia seeds will absorb the liquid and expand, creating a creamy pudding. Once your mixture is ready, it needs to chill. Cover the bowl with plastic wrap or move it to an airtight container. Place it in the fridge for at least four hours, or overnight if you prefer. This chilling time allows the chia seeds to soak up the liquid and thicken the pudding. After it sets, take it out and give it a good stir. If it seems too thick, just add a bit more coconut milk to reach your desired texture. Now, it’s ready to serve! To get the best texture, follow these steps. First, mix your coconut milk and pureed mango well. This helps blend the flavors. Then, add the chia seeds. Stir them in thoroughly. This ensures the seeds soak up liquid evenly. After chilling, stir the pudding again. If it feels too thick, add a splash of coconut milk. This will help you reach the right creaminess. Sweetness can change how much you enjoy this treat. Start with the 2 tablespoons of maple syrup or honey. Taste your mix before chilling. If you want it sweeter, add more syrup. You can also use ripe mango to boost sweetness. Just remember to keep your mix balanced. Too much sweetness can overpower the mango flavor. When serving, presentation matters. Use clear bowls or glasses to show off the layers. Spoon the pudding gently, then add fresh mango cubes on top. Sprinkle shredded coconut for a nice finish. This adds a fun texture and a tropical touch. Serve chilled for the best experience. Enjoy your creation with family or friends for a delightful treat! Pro Tips Use Ripe Mangoes: Ensure your mangoes are fully ripe for the sweetest and most flavorful pudding. The riper the mango, the better the taste! Adjust Sweetness: Taste the mixture before refrigerating. Depending on the ripeness of your mango, you may want to adjust the amount of maple syrup or honey to your preference. Chill Overnight: For the best texture, allow the pudding to chill overnight. This gives the chia seeds ample time to absorb the liquid and create a creamy consistency. Experiment with Toppings: Feel free to get creative with toppings! Add nuts, seeds, or even a drizzle of honey for added flavor and texture. {{image_2}} You can change the flavor of your mango coconut chia pudding by using different fruits. Some great options are strawberries, blueberries, or ripe bananas. For a tropical twist, try adding pineapple or passion fruit. Just blend the fruit until smooth and mix it with your coconut milk. Each fruit adds its own unique taste and nutrition. You can even layer different fruits for a colorful and fun dessert. If you're looking to switch up the milk, try almond, oat, or soy milk. Each type brings its own flavor. Almond milk adds a nutty taste, while oat milk gives a creamier texture. These options still work well with chia seeds and fruit. Just keep the same amount as coconut milk in the recipe. Experimenting with different milks can lead to fun new flavors. This recipe is already vegan and gluten-free, but you can enhance it further. Use maple syrup instead of honey for a fully plant-based sweetener. If you want to boost the nutrition, add some nuts or seeds as toppings. You can also use gluten-free granola for added crunch. These small changes keep your pudding healthy while adding more flavor and texture. To keep your mango coconut chia pudding fresh, store it in an airtight container. This helps keep out air and moisture. Make sure the container is clean and dry before use. If you want to layer the pudding with toppings, add them just before serving. This way, they stay fresh and tasty. When stored properly in the fridge, this chia pudding lasts about 4 to 5 days. The chia seeds will continue to absorb liquid, making the pudding thicker over time. Check it daily. If it looks or smells off, it’s best to toss it. Chia pudding is best enjoyed cold, but you can warm it if you prefer. To do this, scoop out a portion and place it in a microwave-safe bowl. Heat it for about 15 to 30 seconds. Stir well to ensure even heat. If it gets too thick, add a splash of coconut milk to restore the creamy texture. Enjoy your delicious and healthy treat! Yes, you can use fresh mango! Just peel and chop the mango into small pieces. Blend the pieces until smooth. This will give your pudding a fresh taste and nice texture. Fresh mango adds vibrant flavor and color. If you prefer chunks of mango, just add them on top after chilling. Chia pudding is very healthy! Chia seeds are packed with fiber, protein, and omega-3 fatty acids. They help you feel full and support heart health. Coconut milk adds creaminess and flavor without dairy. This treat is also low in sugar, especially if you adjust the maple syrup. It is a great choice for a nutritious snack or breakfast. You can easily make this pudding ahead! Prepare it the night before or even a few days in advance. Just mix the ingredients and store them in the fridge. The longer it sits, the thicker it gets. This makes it perfect for busy mornings or last-minute dessert. Just remember to give it a stir before serving! This article covered how to make mango coconut chia pudding. We talked about the key ingredients, optional toppings, and substitutions. You learned step-by-step instructions for preparing the pudding and tricks for perfecting the texture. I shared ideas for variations, storage tips, and answered common questions. In short, this recipe is simple and fun. With a bit of practice, you can create a tasty treat that fits your needs. Enjoy experimenting with flavors, textures, and toppings! Your mango coconut chia pudding adventure awaits.

Mango Coconut Chia Pudding Delicious and Healthy Treat

To make creamy garlic mashed cauliflower, you need the following items: - 1 large head of cauliflower, cut into florets - 4 cloves garlic, minced - 1/4 cup cream cheese (or a dairy-free alternative) - 1/4 cup unsweetened almond milk (or your choice of milk) - 2 tablespoons butter (or vegan butter) - 1 teaspoon onion powder - Salt and pepper to taste - Fresh chives, chopped for garnish You can easily swap some ingredients based on your needs. Here are some ideas: - Use Greek yogurt instead of cream cheese for a tangy flavor. - Substitute unsweetened coconut milk if you want a richer taste. - Instead of butter, try olive oil for a lighter option. - Use garlic powder if you don't have fresh garlic on hand. - If you don't have chives, green onions or parsley work well too. These swaps can still give you tasty results while fitting your diet. Each ingredient in this dish offers health benefits. Here’s a quick look: - Cauliflower: Low in calories and high in fiber. It’s great for digestion. - Garlic: Known for its immune-boosting properties and heart health support. - Cream Cheese: Provides calcium and protein; choose a low-fat version for fewer calories. - Almond Milk: Low in calories and often fortified with vitamins. - Butter: Adds flavor and healthy fats; use sparingly for balance. - Chives: Rich in vitamins A and C, they add flavor and nutrients. This dish not only tastes good but also nourishes your body. {{ingredient_image_1}} First, grab a large head of cauliflower. Cut it into small florets. This helps them cook faster. Next, fill a big pot with water and add salt. Bring it to a boil. Once boiling, add the cauliflower florets. Cook for about 10 to 12 minutes. You want them soft enough to pierce with a fork. While the cauliflower cooks, it’s time to focus on the garlic. Take four cloves and mince them finely. In a skillet, heat two tablespoons of butter over medium heat. Once hot, add the minced garlic. Sauté it for one to two minutes. You want it fragrant, but don’t let it brown. This adds great flavor to your dish. When the cauliflower is done, drain it well. Put it back in the pot. Now, add the cooked garlic along with any butter left in the skillet. Then, include a quarter cup of cream cheese and a quarter cup of almond milk. Don’t forget a teaspoon of onion powder. Season with salt and pepper to your taste. Now it’s time to make it creamy. Use a potato masher or an immersion blender. Mash or blend everything until it's smooth. If it’s too thick, add more almond milk little by little. Keep blending until you reach your preferred consistency. Taste your mixture and adjust the salt and pepper if needed. Serve it in a bowl and garnish with fresh chives for a lovely finish. To make your mashed cauliflower even creamier, use more cream cheese. You can also swap in mascarpone cheese for a richer flavor. If you want a vegan option, try cashew cream. Simply blend soaked cashews with water until smooth, and mix it in. Always taste your mix and adjust as needed to achieve your perfect creaminess. Seasoning is key to great flavor. Besides salt and pepper, try adding garlic powder for extra punch. Fresh herbs like thyme or rosemary can also enhance the taste. For a bit of heat, add a pinch of red pepper flakes. Experiment with these combinations to find your favorite mix. Cooking the cauliflower to the right time is crucial. Boil it until it's fork-tender, usually about 10-12 minutes. If it's overcooked, it becomes mushy. If undercooked, it stays crunchy. Always check with a fork before draining. This ensures you have the perfect texture for your creamy garlic mashed cauliflower. Pro Tips Use Fresh Cauliflower: Fresh cauliflower will give you the best flavor and texture. Look for firm, compact heads with no brown spots. Experiment with Flavors: Feel free to add different herbs or spices, such as garlic powder, nutritional yeast, or smoked paprika, to enhance the flavor. Adjust the Creaminess: Depending on your preference, you can add more almond milk or cream cheese to achieve your desired consistency. Perfect Sautéed Garlic: Ensure you sauté the garlic just until fragrant to avoid bitterness, as burnt garlic can ruin the dish. {{image_2}} To make creamy garlic mashed cauliflower dairy-free, swap cream cheese with a dairy-free cream cheese. Use coconut milk or oat milk instead of almond milk. Vegan butter works great too. These swaps keep the dish rich and tasty without dairy. You can add herbs and spices to boost flavor. Rosemary or thyme gives a nice touch. A pinch of smoked paprika adds warmth. For a kick, use red pepper flakes. Experiment with your favorite spices to find what you love. Mixing in extra ingredients makes this dish even better. Try adding shredded cheese like cheddar or parmesan for a cheesy twist. You can also fold in chopped spinach or kale for added nutrition. These mix-ins create a unique flavor and texture that enhances the dish. To store your creamy garlic mashed cauliflower, let it cool first. Transfer it to an airtight container. You can keep it in the fridge for up to three days. Make sure to seal it tightly. This helps keep the flavors fresh and tasty. When you’re ready to enjoy your leftovers, you can reheat them easily. Place the mashed cauliflower in a pot over low heat. Stir gently to warm it up. You can add a splash of almond milk to help it stay creamy. If you prefer the microwave, heat it in a bowl for about one to two minutes. Stir halfway through for even warming. You can also freeze creamy garlic mashed cauliflower. Place it in a freezer-safe container. Leave some space at the top, as it may expand. It can last for up to two months in the freezer. To use later, thaw it in the fridge overnight. Reheat as mentioned above, and enjoy a quick, healthy meal! Yes, you can. Prepare the creamy garlic mashed cauliflower, then let it cool. Store it in an airtight container in the fridge. It stays fresh for about three days. When you want to eat it, just reheat it gently on the stove or in the microwave. If it seems too thick, stir in a splash of almond milk. Mashed cauliflower is often lower in carbs and calories than mashed potatoes. It also packs more vitamins and fiber. Cauliflower is a great choice for those watching their weight or carbs. Plus, it has a nice, creamy texture that many people love. To make more servings, just double or triple the ingredients. Use two or three heads of cauliflower. Keep the same ratios for garlic, cream cheese, and milk. Cook in batches if your pot isn’t big enough. This way, you can serve more guests without losing quality. Creamy garlic mashed cauliflower pairs well with many dishes. Serve it with grilled chicken, roasted veggies, or a hearty steak. You can also use it as a base for sauces. For a fancy touch, drizzle olive oil on top and sprinkle with chives. Enjoy it with friends and family for a delicious meal. This post covered the key ingredients for creamy garlic mashed cauliflower, along with substitutions. I detailed how to prepare and cook, ensuring the perfect texture. You learned tips for extra creaminess, seasoning ideas, and perfect cooking times. I shared variations for dairy-free options and added flavors. Lastly, I provided storage tips for leftovers and answered common questions. In summary, making creamy garlic mashed cauliflower is easy and versatile. Enjoy experimenting with this dish!

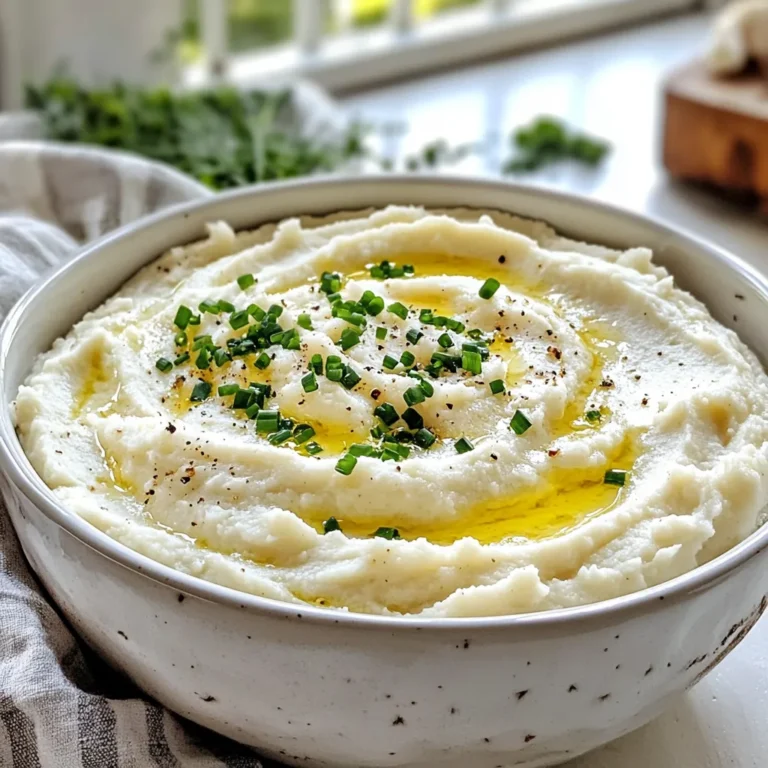
Creamy Garlic Mashed Cauliflower Easy and Healthy Dish

For this tasty dish, you need fresh and simple items. Here’s the list: - 1 lb ground chicken - 1 tablespoon sesame oil - 1/4 cup green onions, chopped - 1/2 cup bell pepper, finely diced (any color) - 2 cloves garlic, minced - 1 tablespoon fresh ginger, grated - 1/4 cup soy sauce (or tamari for gluten-free) - 2 tablespoons peanut butter - 1 tablespoon honey (or agave syrup for vegan option) - 1 tablespoon lime juice - 1/4 teaspoon red pepper flakes (optional for heat) - 1 head of butter or romaine lettuce, separated into leaves - Chopped peanuts and cilantro for garnish Each ingredient adds flavor and texture. The ground chicken gives protein. The bell pepper and green onions add crunch. Peanut butter brings creaminess, while lime juice adds brightness. To make this dish, you will need some basic tools: - Large skillet - Wooden spatula - Small bowl for mixing sauce - Whisk for blending ingredients - Cutting board and knife - Serving platter These tools make cooking easy and fun. The skillet helps cook the chicken evenly. The spatula lets you stir without making a mess. You can make your lettuce cups even better with some extras: - Chopped peanuts for crunch - Fresh cilantro for a burst of flavor - Extra lime wedges for squeezing - Red pepper flakes for added heat These optional garnishes boost the taste and look of your meal. Enjoying Peanut Chicken Lettuce Cups this way makes every bite special. {{ingredient_image_1}} Start by heating the sesame oil in a large skillet over medium heat. Add the ground chicken. Cook it until it turns brown. This takes about 5 to 7 minutes. Make sure to break it apart with a spatula as it cooks. This helps it cook evenly. Once it's done, it should be nice and crumbly. While the chicken cooks, prepare the sauce. In a small bowl, whisk together the soy sauce, peanut butter, honey, lime juice, and red pepper flakes (if you want some heat). Mix until it is smooth. This sauce adds a rich flavor to the dish. You can taste it to see if you like the balance. If you want more sweetness, add a bit more honey. Once the chicken is browned, add the chopped green onions, bell pepper, minced garlic, and grated ginger to the skillet. Sauté these ingredients for another 2 to 3 minutes. You want the veggies to soften but still have some crunch. After that, pour the prepared sauce over the chicken and veggies. Stir everything well, ensuring it all gets coated. Cook for an extra 2 to 3 minutes. This helps the flavors blend together. Once done, remove the skillet from heat and let the mixture cool slightly before serving. To make the best peanut chicken, use fresh ground chicken. Heat the sesame oil in a large skillet over medium heat. Cook the chicken until it turns brown, about 5-7 minutes. Break it apart with a spatula while it cooks. This helps it brown evenly. Add green onions, bell peppers, garlic, and ginger to the chicken. Sauté them for 2-3 minutes. This softens the veggies and adds depth. For a boost of flavor, mix soy sauce, peanut butter, honey, lime juice, and red pepper flakes in a bowl. Pour this sauce over the chicken mixture and cook for another 2-3 minutes. This allows all the flavors to blend well. Serve the peanut chicken in fresh lettuce leaves. Spoon the mix into each leaf. Top with chopped peanuts and cilantro for crunch and freshness. Arrange the cups on a platter with lime wedges for a colorful look. For extra flavor, offer extra sauce on the side for dipping. Pro Tips Prep Ahead: Prepare the chicken mixture ahead of time and store it in the fridge. This will allow the flavors to develop even more and make for a quick assembly at mealtime. Flavor Boost: For an extra kick, marinate the ground chicken in the soy sauce and ginger for about 30 minutes before cooking. This enhances the overall flavor of the dish. Freshness Matters: Use fresh, crisp lettuce leaves for the cups. They should be sturdy enough to hold the filling without tearing. Romaine or butter lettuce works best. Customizable Filling: Feel free to add other vegetables like shredded carrots, water chestnuts, or even diced mushrooms to the chicken mixture for added texture and nutrition. {{image_2}} If you want a vegetarian or vegan twist, try substituting ground chicken with plant-based proteins. You can use crumbled tofu or tempeh. Both options soak up flavors well and add a nice texture. For the sauce, replace honey with agave syrup for a vegan-friendly choice. You get a tasty dish that keeps all the fun and freshness. Besides chicken, many options can work. Ground turkey offers a leaner alternative. If you like seafood, try using cooked shrimp instead. For a unique flavor, consider shredded jackfruit. It has a meaty texture and absorbs the sauce beautifully. Each option gives you a different taste while keeping it light and fresh. You can easily customize the recipe to fit dietary needs. If you prefer gluten-free, swap soy sauce for tamari. For a nut-free version, leave out peanut butter and use sun butter instead. You can also replace the sesame oil with olive oil if that's what you have. These swaps let you enjoy Peanut Chicken Lettuce Cups without worry! To keep your Peanut Chicken Lettuce Cups fresh, store them separately. Place the chicken mixture in an airtight container. I recommend using glass containers for better storage. Store the lettuce leaves in another container lined with a paper towel. This helps absorb moisture. If you want to freeze the chicken mixture, cool it first. Once cool, transfer it to a freezer-safe bag. Squeeze out any extra air before sealing. This helps prevent freezer burn. The mixture can last up to three months in the freezer. When you’re ready to enjoy, thaw it overnight in the fridge. Reheat the chicken mixture on the stove over low heat. Stir often to warm it evenly. You can add a splash of water if it seems dry. For a quick option, use the microwave. Heat in short bursts, stirring in between. Serve the warm mixture in fresh lettuce leaves. Yes, you can use other nut butters. Almond butter or cashew butter works well. Each nut butter brings its own taste. Almond butter is mild and sweet. Cashew butter adds a creamy texture. Both options keep your dish tasty and fun. To make this dish gluten-free, use tamari instead of soy sauce. Tamari has a similar taste but is safe for gluten-free diets. Check all other ingredients, too, for hidden gluten. Most brands of peanut butter are gluten-free, but it's wise to check. This way, you can enjoy the meal without worry. These cups pair well with rice or quinoa. You can also add a fresh salad on the side. For a crunchy snack, try some veggie sticks. If you want something warm, serve a light soup. Each option makes your meal more complete. This blog post covered how to make delicious Peanut Chicken Lettuce Cups. We discussed ingredients, tools, and optional garnishes. You learned step-by-step instructions for cooking chicken, making sauce, and combining everything. I shared tips for perfecting your dish and options for dietary needs. We also went over storage and reheating tips to keep leftovers tasty. When you make this dish, feel free to explore variations. Enjoy creating your own version of these cups. Happy cooking!

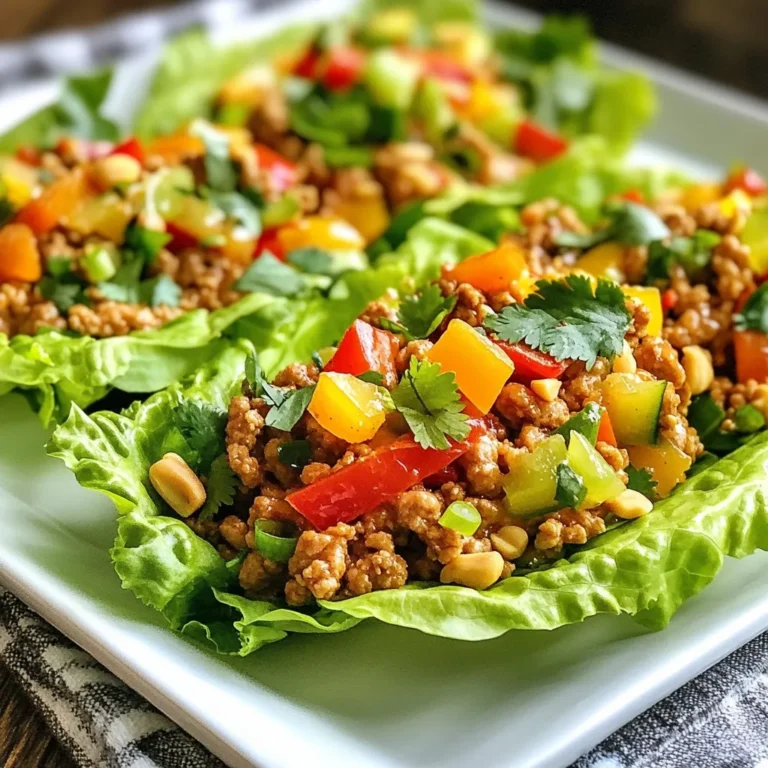
Peanut Chicken Lettuce Cups Flavorful and Fresh Meal

PREV 1 … 37 38 39 … 58 NEXT
quick dish kitchen

explore

DessertsDinnerAppetizersDrinks

Our Policies

  • Cookie Policy
  • Copyright Policy
  • Disclaimer
  • GDPR Policy
  • Terms Of Use
Back to Top
  • About
  • Contact Us
  • Privacy Policy
© 2025 quick dish kitchen