FREE DINNER EBOOK! Get your copy!
  • Cookie Policy
  • GDPR Policy
  • Disclaimer
  • Terms Of Use
  • Visit my other site: Fun Cookie Recipes
quick dish kitchen
  • Home
  • Dinner
  • Desserts
  • Drinks
  • Appetizers
  • Contact
  • About
  • Privacy Policy
  • Home
  • Dinner
  • Desserts
  • Drinks
  • Appetizers
  • Contact
  • About
  • Privacy Policy
  • Cookie Policy
  • GDPR Policy
  • Disclaimer
  • Terms Of Use
Visit my other site: Fun Cookie Recipes

HOME / CATEGORIES /

Latest

- 1 cup fresh blackberries - 2 tablespoons honey or agave syrup - Juice of 2 lemons - 2 cups sparkling water - Fresh mint leaves for garnish - Ice cubes - Additional flavor enhancements (e.g., lemon slices) Gathering the right ingredients is key to making a great Blackberry Lemon Sparkler Mocktail. You will need fresh blackberries, honey or agave syrup, and lemons. Blackberries give this drink a rich color and sweet flavor. The honey or agave syrup adds a touch of sweetness. Lemon juice gives it a nice tart taste. Sparkling water brings in the fizz, making your drink fun and bubbly. If you want to make it look special, add fresh mint leaves for garnish. Ice cubes will keep your drink cold and refreshing. You can even add lemon slices for extra flair. With these ingredients, you can create a mocktail that is not only tasty but also beautiful. First, gather your fresh blackberries and honey or agave syrup. Place them in a blender. Blend until the mixture is smooth and creamy. Next, you will need to strain the blackberry mix. Use a fine mesh sieve over a bowl. Press down with a spoon to extract every bit of juice. This step removes the seeds and gives you a smooth juice. Now, take your strained blackberry juice and mix it with the juice of two lemons. Stir it well in a large pitcher. The tart lemon will balance the sweet blackberries nicely. Next, fill four glasses with ice cubes. Pour the blackberry-lemon mixture over the ice halfway. Finally, top each glass with sparkling water. Give it a gentle stir to combine the flavors. To make your drink look special, add fresh mint leaves on top. You can also drop in a couple of whole blackberries for a pop of color. This simple garnish makes your mocktail more inviting and fun! To achieve the best flavor balance, use fresh blackberries. They add rich taste. The juice of two lemons brings bright acidity. This helps cut the sweetness from honey or agave syrup. For blending, start with blackberries and syrup. Blend until smooth. Use a fine mesh sieve to strain the mixture. Press down with a spoon to get every drop. This makes your drink smooth, with no seeds. Choose tall glasses for a great look. Clear glass shows off the pretty color. Fill each glass with ice cubes before pouring in the drink. This keeps your mocktail cold and refreshing. Pair this drink with light snacks. Think about cheese plates, fruit salads, or veggie dips. The bright flavors of the mocktail match well with fresh foods. To modify sweetness, taste the drink after mixing. Add more honey or syrup if needed. Start with a small amount. You can always add more. If you want alternatives, try maple syrup or stevia. These can change the taste but still keep it sweet. Adjust based on your preference. {{image_2}} You can change the flavor of your Blackberry Lemon Sparkler Mocktail by using other berries. Try adding raspberries or blueberries for a new twist. Each berry brings its unique taste. If you want a zesty kick, swap the lemon juice for lime or grapefruit juice. These citruses add a bright flavor that pairs well with the berries. This mocktail is easy to adapt for different diets. It is vegan-friendly since it uses honey or agave syrup. If you want a sugar-free option, use a sugar substitute like stevia. You can also find agave syrup that is labeled sugar-free. This way, everyone can enjoy the drink without worries. If you want to turn this mocktail into a cocktail, it’s simple! You can add a splash of vodka or gin. These spirits will complement the berry and lemon flavors. For a more exotic taste, try using elderflower liqueur. It will add a floral note that works nicely with the fruity base. You can prepare the blackberry juice in advance. Blend the blackberries and honey as instructed. Strain the juice and store it in the fridge. Use an airtight container to keep it fresh. This juice stays good for up to three days. Store the prepared mocktail in the fridge for up to two days. After that, the flavors may change. Look for signs of spoilage, like bubbles fading or a sour smell. These mean it’s time to toss it. You can freeze blackberries for later use. Wash and dry the berries first. Place them in a single layer on a baking sheet. Freeze until solid, then transfer to a freezer bag. This helps keep them fresh for months. When ready to use, thaw the berries in the fridge overnight. You can also add them frozen to your drink for a chill. They will add flavor and keep your mocktail cool. You can use soda water or tonic water. These will add fizz to your drink. Lemon-lime soda is another option. It will add sweetness and flavor. If you want less sugar, try club soda. The key is to pick a drink that adds bubbles. Yes, frozen blackberries work well! They can make your drink cold and refreshing. Just blend them straight from the freezer. You may need to strain them longer to remove seeds. Frozen berries may also make the drink thicker, adding a nice texture. You can store this mocktail for up to two days. Keep it in the fridge in a sealed container. The flavor may change over time, so fresh is best. If you see separation, just stir it before serving. Yes, this recipe is great for kids! It has no alcohol and is very fun to make. You can let kids help with blending or pouring. For a sweeter taste, add more honey or agave syrup. You can also use fun straws or colorful cups to make it exciting. You can make a delicious Blackberry Lemon Sparkler Mocktail using fresh ingredients. Blackberries, lemon juice, and a sweetener create a burst of flavor. You can customize the drink with mint, different fruits, and sweeteners. Follow the steps to prepare, combine, and serve this refreshing drink. Remember to store leftover juice properly and enjoy it later. Whether for a party or a quiet evening, this mocktail offers great taste for everyone. Give it a try, and you'll impress your friends and family with your drink-making skills!

Blackberry Lemon Sparkler Mocktail Refreshing Treat

To make Maple Pecan Pumpkin Granola, gather these ingredients: - 3 cups rolled oats - 1 cup pecans, roughly chopped - 1/2 cup pumpkin seeds - 1/2 cup unsweetened shredded coconut - 1/2 teaspoon salt - 1 teaspoon ground cinnamon - 1/2 teaspoon ground nutmeg - 1/4 cup olive oil or coconut oil - 1/2 cup pure maple syrup - 1 cup pumpkin puree - 1/2 cup dried cranberries or raisins These ingredients create a tasty mix. The oats give a good base. Pecans add crunch, and pumpkin seeds boost nutrition. The spices bring warmth and flavor. You can easily swap some ingredients. For a nut-free version, use sunflower seeds instead of pecans. If you want a different sweetener, try honey instead of maple syrup. Coconut oil is great, but olive oil works too. For the dried fruit, feel free to use chopped dates or apricots. This granola packs a punch of nutrition. Each serving is rich in fiber from oats and seeds. Pecans provide healthy fats, which support heart health. Pumpkin puree adds vitamins A and C, boosting your immune system. Coconut brings healthy fats, too. Dried cranberries add antioxidants. Overall, this granola is a great choice for a healthy breakfast or snack. Start by gathering all your ingredients. You need: - 3 cups rolled oats - 1 cup pecans, roughly chopped - 1/2 cup pumpkin seeds - 1/2 cup unsweetened shredded coconut - 1/2 teaspoon salt - 1 teaspoon ground cinnamon - 1/2 teaspoon ground nutmeg - 1/4 cup olive oil or coconut oil - 1/2 cup pure maple syrup - 1 cup pumpkin puree - 1/2 cup dried cranberries or raisins First, preheat your oven to 350°F (175°C). Line a large baking sheet with parchment paper. This helps prevent sticking and makes cleanup easy. In a big bowl, mix the rolled oats, chopped pecans, pumpkin seeds, shredded coconut, salt, cinnamon, and nutmeg. Make sure everything is well combined. In another bowl, whisk the olive oil or coconut oil, maple syrup, and pumpkin puree together. You want this mix to be smooth. Pour this wet mixture over the dry ingredients. Stir well so that all the oats and nuts get coated. Spread the granola mixture in an even layer on the lined baking sheet. This step helps it bake evenly. Bake in the preheated oven for 25-30 minutes. Stir the granola halfway through baking. This step ensures even browning. Keep an eye on it to stop burning. The granola should turn golden brown and crispy. You’ll know the granola is ready when it is golden and smells amazing. Let it cool completely on the baking sheet. It will get crunchier as it cools. Once cooled, mix in the dried cranberries or raisins. Store the granola in an airtight container. It lasts for up to two weeks. Enjoy your tasty Maple Pecan Pumpkin Granola! When making granola, avoid using too much oil. It can make your granola soggy. Also, don’t skip the stirring step. Stirring helps the granola bake evenly. Another mistake is not watching the time. It can burn quickly if you leave it too long. Finally, make sure to cool it fully. Cooling makes it crunchy, which is what we want. For the best flavor, use fresh spices. Ground cinnamon and nutmeg enhance the taste. Toast your nuts slightly before mixing them in. This adds depth to the flavor. Keep an eye on the oven. You want a golden brown color, not burnt. Once baked, let it cool completely. This step is key for that perfect crunch. I love serving this granola with yogurt. It adds creaminess to each bite. You can also sprinkle it over oatmeal for extra texture. Try it with milk or a milk alternative too. This granola works great as a snack on its own. You can even use it to top fruit salad for a twist. {{image_2}} You can change the granola's taste by swapping ingredients. Try using walnuts instead of pecans for a different nutty flavor. If you want a crunch, add sliced almonds or hazelnuts. For sweetness, use honey instead of maple syrup. You can also replace pumpkin seeds with sunflower seeds for a new twist. Each swap brings unique flavors to your granola. As seasons change, so can your granola! In fall, add ginger or allspice for a warm taste. During winter, try a dash of cloves or cardamom. For a spring or summer vibe, mix in some dried fruits like apricots or cherries. You can even add citrus zest for brightness. These seasonal changes keep your granola exciting all year long. Making this granola vegan is easy! Just ensure your maple syrup is pure and use coconut oil. For a gluten-free option, use certified gluten-free oats. This way, everyone can enjoy the tasty crunch of your granola. Feel free to mix in gluten-free grains like puffed quinoa or rice for added texture. These adaptations make your Maple Pecan Pumpkin Granola fit for all diets. To keep your granola fresh, store it in an airtight container. Glass jars or plastic bins work great. Place it in a cool, dry spot. Avoid areas near heat or moisture. This helps to keep the granola crunchy and tasty. Homemade granola can last up to two weeks when stored properly. After that, it may lose its crunch. Always check for any signs of spoilage, like off smells or mold. If you notice these, toss it out. Yes, you can freeze Maple Pecan Pumpkin Granola. Place it in a freezer-safe bag or container. It can last up to three months in the freezer. When you want to eat it, just thaw it in the fridge or on the counter. This method keeps it fresh for longer. To make this granola, you need rolled oats, pecans, pumpkin seeds, and coconut. Start by mixing these in a bowl. Add salt, cinnamon, and nutmeg. In another bowl, mix olive oil, maple syrup, and pumpkin puree. Pour this over the dry mix and stir well. Spread it on a baking sheet and bake at 350°F for 25-30 minutes. Stir halfway through to ensure even baking. Once golden, let it cool before adding dried fruits. Homemade granola is tasty and packed with nutrients. It often has less sugar than store-bought types. You control the ingredients, making it healthier. Oats provide fiber, which is great for digestion. Nuts and seeds add protein and healthy fats. Pumpkin puree gives vitamins like A and C, while dried fruits supply antioxidants. This granola can boost energy and keep you full longer. You can find pre-made granola in many grocery stores. Look in the cereal aisle or health food section. Online retailers also sell various brands. Be sure to check the ingredients list for added sugars and preservatives. If you prefer a fresher option, local farmers' markets may offer homemade granola too. You’ve learned how to make Maple Pecan Pumpkin Granola step by step. We explored key ingredients, common mistakes, and tips for great flavor. You can adapt this recipe for different diets or seasonal tastes. Remember to store it properly for freshness. Enjoy the crunchy, sweet goodness in your meals or snacks. Making granola at home gives you control over flavors and ingredients. Try it, and you will love the results!

Maple Pecan Pumpkin Granola Tasty and Easy Recipe

- 1 large head of cauliflower, cut into florets - 1/2 cup all-purpose flour (or gluten-free flour) - 1 teaspoon garlic powder - 1/2 teaspoon salt - 1/4 teaspoon black pepper - 3/4 cup water (adjust for batter consistency) - 1 tablespoon sesame oil - 1/4 cup honey - 2 tablespoons soy sauce (or tamari for gluten-free) - 3 cloves garlic, minced - 1 teaspoon grated fresh ginger - 1 tablespoon rice vinegar - 1 tablespoon cornstarch mixed with 2 tablespoons water (for thickening) The main ingredients create a rich base for the dish. Cauliflower florets form the heart of the recipe. They provide a hearty texture and absorb flavors well. The batter consists of flour, garlic powder, salt, pepper, and water. This mix gives the cauliflower a crispy coating. The sticky sauce combines sesame oil, honey, soy sauce, garlic, ginger, and rice vinegar. These ingredients enhance the dish’s sweet and savory notes. The cornstarch thickens the sauce, creating a glossy finish. - Sesame seeds - Chopped green onions Garnishes add a final touch to your dish. Sesame seeds give a nutty crunch. They enhance the visual appeal. Chopped green onions add freshness and color. These garnishes make your Sticky Honey Garlic Cauliflower even more inviting. You can adjust the amounts based on your taste. 1. Preheat the oven and prepare the baking sheet: Set your oven to 425°F (220°C). Line a baking sheet with parchment paper. This helps the cauliflower bake evenly and prevents sticking. 2. Prepare the batter and coat cauliflower: In a large bowl, mix 1/2 cup of flour, 1 teaspoon of garlic powder, 1/2 teaspoon of salt, and 1/4 teaspoon of black pepper. Gradually whisk in 3/4 cup of water until you get a smooth batter. Dip each cauliflower floret into the batter. Let the excess batter drip off before placing them on the baking sheet. 3. Bake cauliflower until crispy: Place the coated cauliflower in the oven. Bake for 25-30 minutes. Flip the florets halfway through. This ensures they cook evenly and become golden brown. 4. Prepare the sticky sauce while baking: While the cauliflower bakes, start the sauce. Heat 1 tablespoon of sesame oil in a small saucepan over medium heat. Add 3 cloves of minced garlic and 1 teaspoon of grated fresh ginger. Sauté them until they smell great, about 1 minute. Then, stir in 1/4 cup of honey, 2 tablespoons of soy sauce, and 1 tablespoon of rice vinegar. Bring this mixture to a gentle simmer. Add 1 tablespoon of cornstarch mixed with 2 tablespoons of water. Stir until the sauce thickens, which should take about 2-3 minutes. Remove it from heat. 5. Combine baked cauliflower with sauce: Once the cauliflower is crispy, transfer it to a large bowl. Pour the sticky sauce over the cauliflower. Gently toss everything to coat the florets evenly. 6. Bake again to caramelize: Return the glazed cauliflower to the baking sheet. Bake for another 5-10 minutes. This step helps the sauce caramelize and stick to the cauliflower. After this, your sticky honey garlic cauliflower will be ready to enjoy! - Adjusting batter consistency: The right batter makes all the difference. Start with half a cup of flour. Add water slowly until you get a smooth mix. It should coat the cauliflower but not be too runny. If it’s too thick, add a touch more water. - Flip cauliflower for even baking: To get that golden crisp, flip the cauliflower halfway through baking. This ensures both sides cook evenly. Use tongs or a spatula to turn them gently. You want them golden, not burnt. - Adding spices to the batter: Want more flavor? Mix in spices like smoked paprika or cayenne pepper. These add a nice kick. You can also try adding a pinch of cumin for warmth. - Alternative sauces and seasonings: While honey garlic is tasty, you can switch it up! Try a spicy sriracha sauce for heat. Or use a sweet chili sauce for a twist. Each option brings a new taste to the table. {{image_2}} To make this dish gluten-free, swap the all-purpose flour for gluten-free flour. This keeps the recipe tasty without gluten. You also need to change the soy sauce. Use tamari instead of regular soy sauce. Tamari is a gluten-free option. It adds the same umami flavor to the dish. You can boost the flavor of your sticky honey garlic cauliflower in fun ways. Add chili flakes if you like heat. This gives your dish a nice kick. You can also mix in other veggies, like bell peppers or broccoli. Adding proteins, such as tofu or chickpeas, makes the dish hearty. These options turn a simple side into a main course. Feel free to experiment with your favorite flavors! After enjoying your sticky honey garlic cauliflower, you might have some left. You can store leftovers in the refrigerator. Place them in an airtight container. They will stay fresh for up to three days. When you want to reheat, use an oven for the best results. Preheat your oven to 350°F (175°C). Heat for about 10 to 15 minutes, or until warm. This keeps the cauliflower crispy. You can also use a microwave, but the texture may change. If you want to keep the cauliflower longer, freezing is a good option. First, let the cauliflower cool completely. Place it in a freezer-safe container. You can also use a freezer bag. Squeeze out the air before sealing. It will last for about one month in the freezer. To keep the sauce fresh, store it separately. Pour the sauce into a small container. Make sure it’s sealed well. You can freeze it too, and it will keep for about one month. When you are ready to eat, thaw it in the fridge overnight. Reheat the sauce on the stove before serving it again. This helps to bring back its sticky goodness. To make the batter stick, you want a thick consistency. Add a bit more flour if needed. You can also use less water. This makes a denser batter that clings well to the florets. Make sure to dip each cauliflower piece fully so it gets a nice coat. If the batter drips off too much, it won’t stick during baking. Yes, you can prepare this recipe in advance. You can make the batter and coat the cauliflower a few hours ahead. Just store them in the fridge. This helps save time when you are ready to cook. You can also make the sticky sauce early, but add it just before serving. This keeps the cauliflower crispy and fresh. You can use many vegetables in this recipe. Broccoli works great for a similar taste. Brussels sprouts add a nice crunch. Zucchini and bell peppers also soak up the sauce well. Just cut them into small pieces to match the cauliflower size. Get creative and mix your favorites for a colorful dish! Yes, sticky honey garlic cauliflower is perfect for meal prep. You can portion it into containers for easy meals. Store the cooked cauliflower in the fridge for up to four days. Just heat it in the microwave or oven before serving. This makes it a tasty and quick option for lunch or dinner! In this blog post, I covered how to make sticky honey garlic cauliflower. I discussed the key ingredients, including cauliflower, and the special sticky sauce. You learned how to prepare, bake, and combine the flavors for a delicious dish. Remember to play with spices and textures to make it your own. This recipe is easy to adapt, so have fun! Enjoy your cooking and savor every bite.

Sticky Honey Garlic Cauliflower Flavorful Vegan Dish

- 1 pre-made chocolate graham cracker pie crust - 1 cup heavy whipping cream - 1/2 cup powdered sugar - 1 teaspoon peppermint extract - 1 cup semi-sweet chocolate chips - 3 tablespoons unsalted butter - 3 tablespoons green food coloring - 1/4 cup mini chocolate chips (for garnish) - Fresh mint leaves (for garnish) This pie brings together rich chocolate and fresh mint. Each ingredient plays a key role. The chocolate graham cracker crust gives a sweet crunch. Heavy cream makes the filling light and fluffy. Powdered sugar adds sweetness. Peppermint extract gives that fresh minty taste. Semi-sweet chocolate chips create a rich chocolate flavor. Unsalted butter helps smooth the chocolate mixture. Green food coloring makes it look fun and festive. Lastly, mini chocolate chips and fresh mint leaves add a nice touch for garnish. I love how easy this recipe is. You can find most of these ingredients at any grocery store. Make sure to use fresh mint leaves. They add a nice flavor and look great on top. This pie is perfect for parties or just a sweet treat at home. Enjoy every bite of this mint chocolate grasshopper pie. It’s a dessert everyone will adore! - Combine 1 cup of semi-sweet chocolate chips and 3 tablespoons of unsalted butter in a microwave-safe bowl. - Melt the mixture in the microwave, heating for 30 seconds at a time. Stir after each interval until it is smooth. Let it cool slightly before using. - In a large mixing bowl, whip 1 cup of heavy whipping cream using an electric mixer on medium speed. Stop when you see soft peaks form. - Gradually add 1/2 cup of powdered sugar. Keep whipping until you see stiff peaks. Then, mix in 1 teaspoon of peppermint extract for that fresh mint flavor. - Gently fold the cooled chocolate mixture into the whipped cream. Keep mixing until it is fully combined and smooth. - Add 3 tablespoons of green food coloring a few drops at a time. Mix until you get that bright minty color you love. - Pour the mint chocolate filling into the pre-made chocolate graham cracker pie crust. Use a spatula to smooth the top. This pie is easy to make and so delicious! Enjoy the process. To make great whipped cream, use cold equipment. This includes your bowl and beaters. Cold tools help the cream whip faster and become fluffier. For stiff peaks, whip the cream until it holds its shape. This means turning off the mixer and checking the cream. If it stands tall, you’re ready! If not, keep whipping. Getting the right green color is key. Start with a few drops of food coloring. Mix it in and check the shade. You can always add more if needed. If you want a natural option, use spinach juice or matcha powder. Both can give a lovely green hue without artificial colors. Presentation matters! Serve the pie on a bright plate. This makes the colors pop. For a fun touch, add a drizzle of chocolate sauce on the plate. Pair it with milk or a minty drink like mojito. This adds a refreshing taste that complements the pie. Enjoy your creation with friends and family! {{image_2}} You can make your Mint Chocolate Grasshopper Pie even more exciting. One way is to add a layer of mint chocolate ganache. To do this, melt semi-sweet chocolate chips with a bit of cream. Pour this mixture over the filling before chilling the pie. This adds a rich layer that enhances the chocolate flavor. Another fun twist is to incorporate crushed peppermint candies. Simply sprinkle them over the top of the pie before chilling. This not only adds a nice crunch but also boosts the mint flavor. You can even mix some crushed candies into the filling for extra surprises with each bite. If you need gluten-free options, choose a gluten-free chocolate graham cracker crust. Many brands offer this, and it works great for our pie. Check the labels to ensure they fit your needs. For a vegan adaptation, swap the heavy cream with coconut cream. Use dairy-free chocolate chips instead of semi-sweet ones. Make sure the pie crust is vegan as well. These simple changes let everyone enjoy this treat without missing out. To keep your Mint Chocolate Grasshopper Pie fresh, you should store it in the fridge. First, cover the pie tightly with plastic wrap. This keeps out air and moisture. You can also use a pie container if you have one. The pie stays fresh for about 3 to 5 days. After that, the texture may change, and it won't taste as great. If you want to save some pie for later, freezing is a good option. Follow these steps: 1. Wrap the Pie: First, make sure the pie is fully set in the fridge. Then, wrap it tightly in plastic wrap. You can also use aluminum foil for extra protection. 2. Store in a Container: Place the wrapped pie in a freezer-safe container or a zip-top bag. This helps prevent freezer burn. 3. Label and Date: Write the date on the container or bag. This way, you know how long it's been in the freezer. To thaw the pie, take it out of the freezer and place it in the fridge for several hours or overnight. This slow thawing keeps the texture smooth. You can also leave it at room temperature for about 30 minutes if you're in a hurry. Just remember, once thawed, eat the pie within 2 days for the best taste. Mint Chocolate Grasshopper Pie is a cool and creamy dessert. It combines mint and chocolate flavors for a sweet treat. The pie has a chocolate graham cracker crust and a fluffy mint filling. You can serve it chilled, making it perfect for warm days. Yes, you can use a homemade pie crust! To make your own crust, crush chocolate graham crackers into fine crumbs. Mix them with melted butter and press the mixture into a pie dish. Bake it for about 10 minutes at 350°F to set. This gives a fresh taste and a nice crunch. You can prepare this pie a day in advance. Make the filling and fill the crust as normal. Cover the pie well and place it in the fridge. This allows the flavors to blend and makes it easier for you on the day of serving. Just remember to add the garnishes right before serving! This blog post shared how to make a Mint Chocolate Grasshopper Pie. We covered the list of tasty ingredients and provided step-by-step instructions for each part. You learned tips for perfecting the whipped cream and ideas for fun variations. We also explored storage options to keep your pie fresh. Now, you can impress friends and family with this vibrant treat. Enjoy making this pie and feel proud of your baking skills!

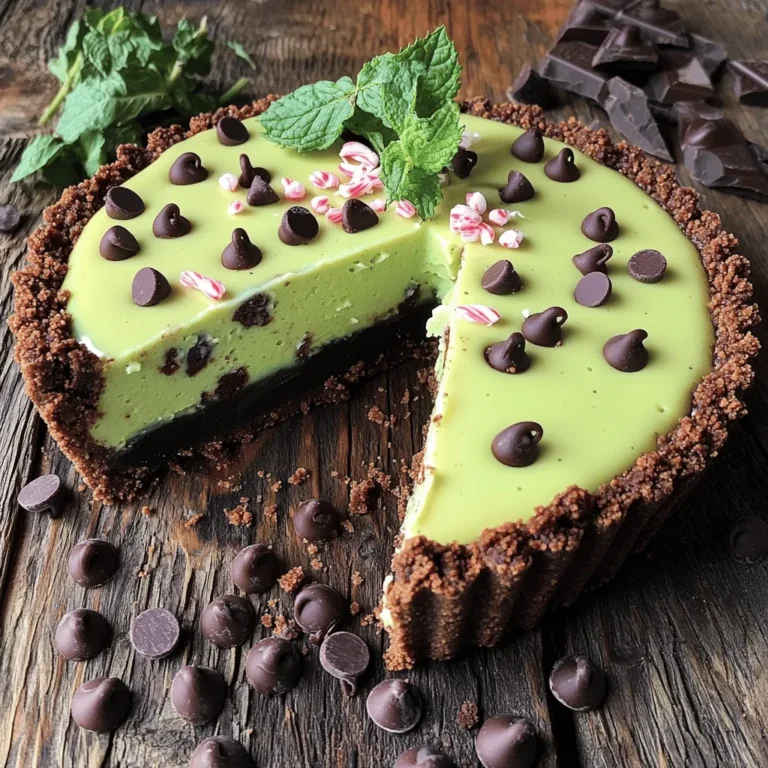
Mint Chocolate Grasshopper Pie Irresistible Treat

Here are the key ingredients for your Roasted Garlic Tomato Bruschetta. Each one adds its own flavor and charm. - Baguette - Cherry Tomatoes - Garlic - Fresh Basil - Olive Oil - Balsamic Vinegar - Seasoning (Salt and Pepper) - Optional Garnish (Shaved Parmesan) Each ingredient plays a vital role. The baguette provides a sturdy base for all the toppings. Cherry tomatoes give a sweet, juicy burst. Garlic adds depth with its rich flavor, especially when roasted. Fresh basil brings a bright, aromatic touch to the mix. Olive oil adds smoothness and richness. Balsamic vinegar gives that tangy kick that rounds it all out. Seasoning with salt and pepper enhances every bite. If you want to impress, shaved Parmesan on top makes it even better. Using fresh, high-quality ingredients makes a big difference. Choose a crusty baguette for the best texture. Look for vibrant cherry tomatoes for sweetness. Fresh basil adds a wonderful aroma, and high-quality olive oil lifts every flavor. When you gather these ingredients, you're setting the stage for a delicious treat. 1. Preheating oven and preparing garlic First, set your oven to 400°F (200°C). This heat is perfect for roasting garlic. Next, cut off the top of the garlic head. This helps the cloves cook well. Drizzle a tablespoon of olive oil on top. Wrap the garlic in foil and roast it for 30-35 minutes. The cloves will become soft and sweet. 2. Marinating the tomato mixture While the garlic roasts, grab a mixing bowl. Add 2 cups of halved cherry tomatoes to the bowl. Then, toss in 1/4 cup of chopped fresh basil leaves. Drizzle in 1 tablespoon of balsamic vinegar, along with salt and pepper to taste. Add 1 tablespoon of olive oil for richness. Mix gently and let it sit for 15-20 minutes. This helps the flavors blend. 3. Toasting baguette slices Now, take your baguette and slice it into 1-inch pieces. Lay the slices on a baking sheet. Brush each one lightly with olive oil for a crispy finish. Bake them in the oven for 8-10 minutes. Flip them halfway through to ensure even crispness. 1. Mashing roasted garlic Once the garlic is done, let it cool for a bit. Squeeze the roasted cloves out of their skins into a bowl. Use a fork to mash the garlic into a smooth paste. This will add a lovely, rich flavor to your bruschetta. 2. Spreading garlic on bread Now, take a toasted baguette slice and spread a generous layer of mashed garlic on top. This step is crucial for flavor. Each bite will burst with that sweet, roasted taste. 3. Adding the tomato topping Next, spoon the marinated tomato mixture onto the garlic-covered bread. Make sure to add a good amount of tomatoes. The juices from the tomatoes will soak into the bread, making it even tastier. 1. Best served warm Enjoy your bruschetta right away while it's warm and crispy. The warmth brings out the flavors of the roasted garlic and fresh tomatoes. 2. Pairing options This bruschetta pairs well with a light salad or a glass of white wine. You can also serve it as an appetizer at a gathering. Everyone will love the blend of flavors! - Optimal roasting time: Roast garlic for about 30 to 35 minutes. This time allows the garlic to become soft and sweet. You want it golden brown, not burnt. - Best ways to squeeze garlic: After roasting, let the garlic cool. Then, gently squeeze the cloves from the skin. They should slide out easily. Use a fork to mash them if needed. - Choosing the right tomatoes: Use ripe cherry tomatoes for the best flavor. They are sweet and juicy, perfect for bruschetta. Look for firm ones that feel heavy for their size. - Enhancing flavors with seasoning: Add salt and pepper to your tomatoes. You can also try a pinch of sugar if they taste too acidic. Balsamic vinegar adds a nice tang, balancing the sweetness of the tomatoes. - Achieving the ideal crunch: Bake your baguette slices for 8 to 10 minutes. Flip them halfway to get even crispiness. You want them golden and crunchy, not hard as a rock. - Adjusting to your oven’s behavior: Every oven is different. Keep an eye on the bread. If it browns too fast, lower the temperature slightly. If it’s not browning, increase the heat a bit. {{image_2}} You can easily change the bread type for bruschetta. Try sourdough, ciabatta, or gluten-free bread. Each option gives a new flavor and texture. You can also swap herbs. Instead of basil, use parsley or oregano. For a twist, add toppings like olives or roasted peppers. If you're gluten-free, use gluten-free bread to enjoy this dish. Many brands now offer tasty gluten-free options. For vegans, skip the cheese and use avocado instead. You can also use a vegan cheese that melts well for extra creaminess. Adding spices can really boost the flavor. A pinch of red pepper flakes adds heat. A bit of lemon zest gives a fresh, bright taste. You can also try different cheeses. Feta or goat cheese adds a tangy kick. Mix and match to find your perfect flavor! To keep your roasted garlic tomato bruschetta fresh, store leftovers in an airtight container. This helps prevent the bread from getting soggy. For best results, place the tomato mixture in a separate container. The bruschetta will stay good in the refrigerator for up to three days. To maintain the crispiness of the bread, reheat the bruschetta in the oven. Preheat your oven to 350°F (175°C). Place the bruschetta on a baking sheet and heat for about 5-7 minutes. This will help revive the crunch. You can also use a toaster oven for quick reheating. You can freeze the components of bruschetta, but it’s best to avoid freezing the assembled dish. For freezing, place the tomato mixture in a freezer-safe bag. Squeeze out the air and seal it tightly. You can freeze it for up to three months. To freeze the bread, slice it and wrap each piece in plastic wrap. Place it in a freezer bag. When you are ready to eat, thaw and toast the bread to restore texture. Bruschetta is a delicious Italian starter. It usually features toasted bread topped with fresh ingredients. The name comes from the Italian word "bruscare," meaning "to toast." Traditionally, it includes garlic, tomatoes, and olive oil. The dish has roots in central Italy, especially in Tuscany. Bruschetta is best fresh but can be stored for a short time. If you have leftovers, keep them in an airtight container. Store it in the fridge for up to two days. The bread will lose its crispness, so it's best to eat it right away. Yes, you can prepare some parts in advance. You can roast the garlic and mix the tomato topping a few hours before serving. Keep the bread separate until you're ready to serve. Toast the bread just before serving to keep it crispy. Traditional bruschetta uses baguette, which contains gluten. However, you can use gluten-free bread as a substitute. Many stores offer gluten-free options. Check labels to make sure they meet your needs. Serve bruschetta on a large platter for a nice effect. Arrange the toasted bread slices neatly. Top each piece with the tomato mixture and a touch of roasted garlic. If you like, add shaved Parmesan on top for extra flavor. Enjoy the bruschetta while it's warm and crispy! Bruschetta is simple yet delicious. We covered the key ingredients, from baguette to fresh basil. I shared easy steps for preparation and serving. Remember the tips for perfecting garlic and tomatoes. Variations allow for creative twists or dietary needs. Store leftovers and reheat to keep that tasty crunch. Embrace the joy of making bruschetta for any occasion. Enjoy making this dish your own and impress your friends!

Roasted Garlic Tomato Bruschetta Flavorful Delight

- 300g pasta (linguine or spaghetti) - 500g cherry tomatoes, halved - 250g fresh burrata cheese - 3 cloves garlic, minced - 3 tablespoons olive oil - 1 teaspoon red pepper flakes (adjust to taste) - Salt and pepper to taste - Fresh basil leaves, for garnish - Zest of 1 lemon When making Cherry Tomato Burrata Pasta, choose quality ingredients. Fresh cherry tomatoes burst with flavor and sweetness. Burrata adds a creamy touch that elevates the dish. I often use linguine, but spaghetti works well too. In the pantry, you need garlic, olive oil, and red pepper flakes. Garlic gives depth, while olive oil creates a nice base. Adjust red pepper flakes to your spice level; I like a little heat. Season your dish with salt and pepper. Fresh basil leaves brighten the plate, adding color and flavor. Lemon zest gives a fresh twist, making each bite pop. These ingredients come together to create a fresh and flavorful meal. {{ingredient_image_1}} - Boil a large pot of salted water. - Add the pasta and cook until al dente. - Reserve about 1 cup of pasta water, then drain the rest. - In a large skillet, heat olive oil over medium heat. - Add minced garlic and sauté until you smell its aroma. - Next, add halved cherry tomatoes. Season with salt, pepper, and red pepper flakes. - Cook for 5 to 7 minutes until the tomatoes soften and burst. - Toss the cooked pasta with the sautéed tomatoes in the skillet. - Add reserved pasta water little by little to create a sauce. - Cook for an extra 1 to 2 minutes until everything is hot. - Transfer the pasta to serving plates. Tear the burrata and place it on top. - Sprinkle lemon zest over the dish and add fresh basil for garnish. To know when pasta is al dente, bite a piece. It should be firm yet cooked. I suggest checking the package for timing. Remember, you can always cook it a bit longer if needed. When cooking, reserve about one cup of pasta water before draining. This water is starchy and can help your sauce stick to the pasta. Add it slowly to control the sauce's thickness. To adjust the spice level, use red pepper flakes. Start with a teaspoon. If you like more heat, you can add more. Taste as you go to find your perfect level. You can substitute ingredients for fresh ideas. Try using different tomatoes, like grape or heirloom. You can also swap burrata for mozzarella for a different flavor. Serve your pasta in shallow bowls. This makes it easy to enjoy. Place a generous piece of burrata right on top for a nice look. For garnish, sprinkle fresh basil leaves over the dish. You can also drizzle some olive oil to add shine. A touch of lemon zest brightens the dish and adds color. Pro Tips Use Quality Pasta: High-quality pasta will hold the sauce better and enhance the overall flavor of the dish. Don't Overcook the Tomatoes: Cook the cherry tomatoes just until they start to burst to preserve their sweetness and texture. Adjust Spice Level: Feel free to increase or decrease the red pepper flakes according to your heat preference for a personalized kick. Serve Immediately: This dish is best enjoyed fresh, so serve it right after plating for the best flavor and texture. {{image_2}} You can change the type of pasta for this dish. Try gluten-free pasta if needed. Brands like brown rice or quinoa pasta work well. These pasta types keep the meal tasty and light. If you want to swap out burrata, consider mozzarella or ricotta. Both add creaminess but give a different taste. Mozzarella melts nicely, while ricotta offers a fluffier texture. Want to add protein? Grilled chicken or shrimp makes a great addition. Simply cook them separately and mix them in at the end. This extra protein boosts flavor and makes the meal heartier. If you're vegetarian, try adding chickpeas. They add protein and a nice texture. Just toss them in when you mix the pasta and sauce. Make this dish more colorful with seasonal veggies. Spinach or zucchini blend well with the flavors. Add spinach during the last minute of cooking. For zucchini, slice it thin and sauté it with the tomatoes. This way, you keep the dish fresh for any season. You can also add other veggies based on what's in season. This keeps your meals exciting and tasty year-round. To keep your Cherry Tomato Burrata Pasta fresh, store leftovers in an airtight container. Use a container that fits the amount of pasta to limit air exposure. If you have extra burrata, store it separately. This keeps the cheese from getting soggy. Place the pasta in the fridge right away. It can last for up to three days. When it's time to enjoy leftovers, reheat gently. Use a skillet over low heat for the best results. Add a splash of olive oil or a bit of pasta water to keep it moist. Stir often to ensure even heating. This way, your pasta remains tasty and the burrata stays creamy. You can freeze Cherry Tomato Burrata Pasta, but it's best to freeze without the burrata. Pasta can lose texture when frozen with cheese. Place the cooled pasta in a freezer bag, removing excess air. To thaw, move it to the fridge overnight. Reheat in a skillet, adding fresh burrata just before serving for a delightful touch. To make this dish vegan, swap burrata with a plant-based cheese. You can also use cashew cream for a creamy texture. Replace olive oil with avocado oil if you prefer. Use vegetable broth instead of pasta water for added flavor. Fresh basil and lemon zest will still add brightness. Yes, you can use canned tomatoes! Choose high-quality whole or diced tomatoes. Drain excess liquid to avoid a watery sauce. Cook them in the same way as fresh tomatoes. This option is great if fresh tomatoes are out of season. Look for burrata that feels soft and plump. Check the packaging for a recent date. Fresh burrata has a creamy inside and a delicate outer shell. It should not be too dry or too runny. Smell for a fresh, milky scent. Many sides work well with this dish. A simple green salad adds crunch. Grilled vegetables bring a smoky flavor. Garlic bread is a great choice too. For a light option, try steamed asparagus or sautéed spinach. This blog post covered the tasty Cherry Tomato Burrata Pasta from ingredients to storage tips. You learned the main ingredients, how to cook and serve the dish, and even variations and storage options. This easy recipe is sure to impress. Try it with your favorite pasta and enjoy! Taste fun flavors, and don't forget to add your own twist. Cooking should be an adventure, so have fun with it!

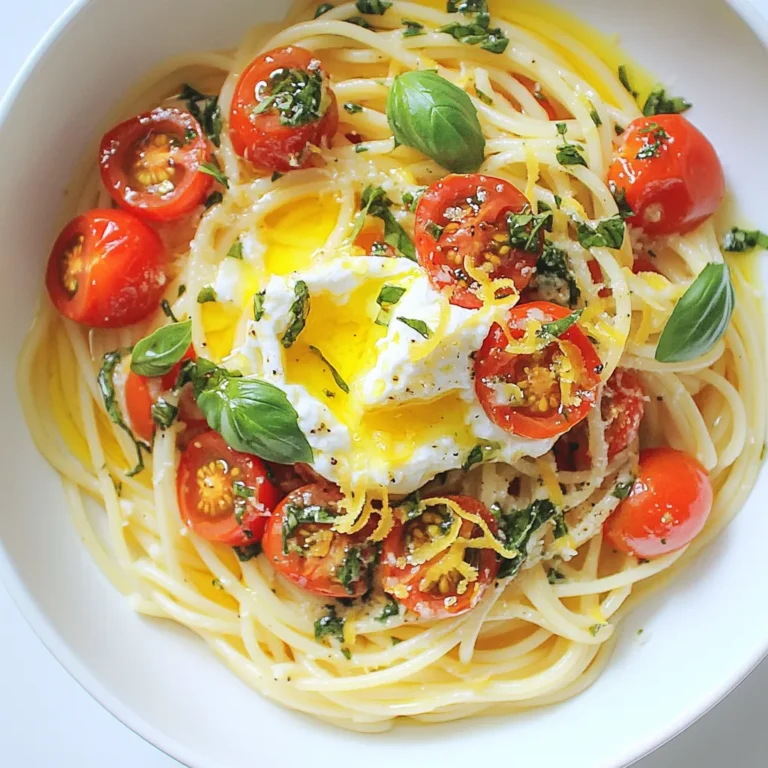
Cherry Tomato Burrata Pasta Fresh and Flavorful Meal

To create a delightful Mint Chocolate Grasshopper Pie, you need some key ingredients: - 1 pre-made chocolate cookie crust - 8 oz cream cheese, softened - 1 cup powdered sugar - 1 cup heavy whipping cream These ingredients form the base of your pie. The chocolate cookie crust gives a rich flavor and crunch. Cream cheese adds a creamy texture. Powdered sugar sweetens the mix, while heavy whipping cream makes it light and fluffy. To make your pie stand out, you will also need: - 1 teaspoon peppermint extract - 2 tablespoons green food coloring (adjust for desired color) - 1 cup mini chocolate chips - 1/4 cup crushed peppermint candies (for garnish) Peppermint extract gives the pie that fresh minty taste. Green food coloring adds a fun color, making it look festive. Mini chocolate chips provide little bursts of chocolate flavor. Crushed peppermint candies add a nice crunch on top. For decoration, grab some fresh mint leaves. They not only look pretty but also enhance the minty flavor. Placing these on top makes your pie even more inviting to eat. Now you have all the ingredients you need to whip up this cool treat! Start by beating the cream cheese in a large bowl. Use an electric mixer for a smooth and creamy texture. Once smooth, gradually add the powdered sugar. Mix until the sugar is fully combined. This step creates a sweet base for our pie. In a separate bowl, pour in the heavy cream. Whip it until stiff peaks form. This means the cream should hold its shape well. Next, gently fold the whipped cream into the cream cheese mixture. Be careful not to deflate the whipped cream. This keeps your pie light and fluffy. Now, it’s time to add flavor! Pour in one teaspoon of peppermint extract. This gives the pie its signature minty taste. Next, add the green food coloring. Mix until you get a nice, uniform shade. Adjust the color to your liking. Lastly, fold in the mini chocolate chips. They add a delightful crunch and chocolatey flavor. Pour your mint mixture into the pre-made chocolate cookie crust. Use a spatula to smooth the top. This helps make it look nice and even. Once you've smoothed it out, cover the pie with plastic wrap. Refrigerate for at least four hours. This allows the pie to set nicely. When ready, slice and enjoy this cool treat! To make a great Mint Chocolate Grasshopper Pie, you need a smooth filling. Here are some tips: - Best practices for whipping cream: Always start with cold heavy cream. Use a chilled bowl and beaters for best results. Whip until stiff peaks form. This gives your pie a light and fluffy texture. - Tips for folding without deflating: When you fold whipped cream into your cream cheese mixture, use a spatula. Gently lift and turn the mixture. This keeps the air in the cream. If you want to tweak the taste or color of your pie, here’s how: - How to modify peppermint intensity: Start with one teaspoon of peppermint extract. Taste the mixture. If you want more mint, add a little more. Go slow to avoid overpowering the pie. - Tips for achieving the desired shade of green: Use two tablespoons of green food coloring. Mix well and check the color. Add more if you like a brighter green. A beautiful pie makes it more fun to eat! Here are some ideas: - Creative serving ideas: Cut the pie into wedges. Place each piece on a plate. You can sprinkle chocolate chips around the edge for flair. - Using chocolate chips and peppermint for decoration: Top the pie with crushed peppermint candies. Add fresh mint leaves for a pop of color. This makes the pie look even more delicious. {{image_2}} You can change the crust easily. Instead of a chocolate cookie crust, try a graham cracker crust. This gives a nice twist to the pie. You can even use an almond flour crust for a gluten-free option. For a vegan or dairy-free pie, swap the cream cheese for a dairy-free cream cheese. Use coconut cream instead of heavy cream. Sweeten with a plant-based sugar like maple syrup. This keeps the creaminess and flavor while being kinder to dietary needs. Want to play with flavors? Add a splash of vanilla extract for extra depth. A bit of dark chocolate can also enhance the taste. You can change the mint and chocolate ratio too. If you love mint, add more peppermint extract. If you want a richer chocolate flavor, increase the mini chocolate chips. You can make your pie festive for holidays. For St. Patrick’s Day, keep the green color but add some gold sprinkles on top. For Christmas, mix in crushed gingerbread cookies for a spicy kick. You might even try adding cinnamon to the filling for a cozy twist. Explore these variations to make the Mint Chocolate Grasshopper Pie your own! Each change can lead to a new favorite treat. To keep your Mint Chocolate Grasshopper Pie fresh, store it in the fridge. Use plastic wrap to cover the pie tightly. This helps prevent it from drying out or picking up other flavors. The pie will last for about 3 to 5 days in the fridge. Make sure to check for any changes in texture or smell before serving leftovers. Yes, you can freeze Mint Chocolate Grasshopper Pie! To freeze, first wrap it tightly in plastic wrap, then cover it with aluminum foil. This will protect it from freezer burn. It can stay in the freezer for up to 2 months. When you’re ready to enjoy, move it to the fridge for a few hours to thaw. For best results, serve it chilled. If you want it a bit firmer, let it thaw for less time. How to make Mint Chocolate Grasshopper Pie? To make this pie, you need a few simple steps. First, beat softened cream cheese until smooth. Then, mix in powdered sugar. In a separate bowl, whip heavy cream until it forms stiff peaks. Fold this whipped cream into the cream cheese mixture. Next, add peppermint extract and green food coloring. Mix well. Finally, fold in mini chocolate chips. Pour this mix into a pre-made chocolate cookie crust, smooth it out, and chill for at least four hours. What can I use instead of a pre-made crust? If you want to skip the pre-made crust, you can make one from scratch. Crush chocolate cookies and mix them with melted butter. Press this mixture into a pie dish and chill until firm. You can also use graham crackers for a different flavor. Why is my pie not setting properly? If your pie isn't setting, it could be due to several reasons. First, make sure you whipped the cream to stiff peaks. If the cream isn’t whipped enough, it won’t hold its shape. Also, ensure the pie chilled long enough. Refrigerate it for at least four hours, or overnight for the best results. How can I enhance the mint flavor? To boost the mint flavor, add more peppermint extract. Start with an extra 1/4 teaspoon and taste as you go. You can also sprinkle crushed peppermint candies on top for an added minty crunch. What goes well with Mint Chocolate Grasshopper Pie? This pie pairs nicely with fresh fruit, like strawberries or raspberries. A scoop of vanilla ice cream can also add a creamy touch. For drinks, a peppermint tea or a rich hot chocolate can complement the pie well. Can this be made ahead of time? Yes, this pie is perfect for making ahead. You can prepare it a day or two in advance. Just keep it covered in the fridge until you’re ready to serve. This allows the flavors to meld beautifully, making it even more delicious! Making Mint Chocolate Grasshopper Pie is simple and fun. We covered the key ingredients, like cream cheese and peppermint extract. Step-by-step, you learned how to mix, assemble, and chill. Tips ensured perfect texture and flavor. Don’t forget the garnish for a lovely finish! Try your own twists on the recipe to make it your own. This pie can impress friends and family at any gathering. Enjoy your sweet creation!

Mint Chocolate Grasshopper Pie Delightful and Cool Treat

- Crusty bread (e.g., French baguette) - Ripe cherry tomatoes - Garlic - Fresh basil leaves - Olive oil - Balsamic vinegar - Seasoning (salt and pepper) - Optional toppings (Parmesan or feta cheese) Roasted Garlic Tomato Bruschetta is a simple yet tasty dish. You start with crusty bread. I love using a French baguette for its texture. It holds up well to toppings. Next, you'll need ripe cherry tomatoes. Their sweetness adds a burst of flavor. Halving them helps them roast evenly and release juices. Garlic is the star here. Roasting it makes it soft and sweet. You’ll also want fresh basil. It adds a lovely aroma and taste. For richness, olive oil is key. It enhances the flavor and helps with roasting. Balsamic vinegar adds a tangy kick. Finally, seasoning is crucial. A pinch of salt and pepper brings all the flavors together. If you want to elevate your bruschetta, consider adding Parmesan or feta cheese as a topping. With these ingredients, you create a fresh, vibrant appetizer that impresses every time. Prepping the garlic Start by peeling the outer layers of the garlic head. Keep the cloves together. Cut off about 1/4 inch from the top to expose the cloves. Drizzle olive oil over the top of the garlic. Wrap it in aluminum foil to keep it moist. Halving cherry tomatoes Next, take your ripe cherry tomatoes. Use a sharp knife to cut each tomato in half. This helps them cook evenly and release their juices. Chopping basil leaves Now, grab your fresh basil leaves. Stack a few leaves on top of each other. Roll them tightly and slice them into thin strips. This gives you nice, fragrant pieces of basil. Roasting garlic Place the wrapped garlic in your preheated oven at 400°F (200°C). Roast it for 30-35 minutes. The garlic should become soft and caramelized. Roasting tomatoes While the garlic roasts, spread the halved tomatoes on a baking sheet. Drizzle with olive oil and sprinkle with salt and pepper. Roast them for 15-20 minutes. Look for them to burst and turn golden. Mashing roasted garlic When the garlic cools, gently squeeze the cloves out of their skins. Use a fork to mash them into a paste. This will add rich flavor to your bruschetta. Mixing roasted tomatoes and garlic with herbs In a bowl, combine the roasted tomatoes with their juices, the mashed garlic, and the chopped basil. Add balsamic vinegar, salt, and pepper. Mix everything until well combined. Toasting the bread Slice your crusty bread into 1/2 inch thick pieces. Place them on a baking sheet and brush with olive oil. Toast in the oven for 5-7 minutes until golden and crisp. Now, you are ready to top your toasted bread with the tomato and garlic mix. Enjoy the burst of flavor in every bite! - Choosing the right bread Use a crusty bread like a French baguette. Its crunch holds up well. It gives a nice contrast to the soft toppings. Toasting the bread enhances its flavor and adds texture. - Importance of fresh ingredients Fresh tomatoes bring bright flavor to the bruschetta. Ripe cherry tomatoes are sweet and juicy. Fresh basil adds a fragrant touch. Always choose high-quality olive oil for the best taste. - Ideal pairings with bruschetta Bruschetta pairs well with a light salad or a charcuterie board. A glass of chilled white wine complements the flavors. You can serve it as an appetizer or a snack. - Presentation tips for serving Arrange the bruschetta on a nice platter. Drizzle some balsamic reduction on top for a touch of elegance. Garnish with extra basil leaves for color. - Overcooking tomatoes Watch the tomatoes closely while roasting. They should burst and caramelize, not turn mushy. Overcooked tomatoes lose their fresh taste. - Incorrect garlic roasting techniques Roast garlic until it's soft and caramelized. If you don’t roast long enough, the garlic will taste sharp. Too long can burn it, making it bitter. {{image_2}} You can make your bruschetta even better by adding herbs. Oregano gives a nice kick. Thyme adds a fresh taste. Both herbs pair well with the tomatoes and garlic. You can also add vegetables. Spinach adds a healthy twist. Bell peppers bring sweetness and color. These additions boost flavor and nutrition. Want to make it vegan? Simply skip the cheese or use a vegan option. Many brands offer great vegan cheese. For a gluten-free version, use gluten-free bread. Look for crusty types to keep the texture. These changes let everyone enjoy the dish. You can explore different styles too. An Italian twist might include capers or olives. These ingredients add a salty bite. For a Mediterranean vibe, try adding feta cheese and fresh mint. Each twist gives a new flavor while keeping the heart of bruschetta. To store bruschetta, let it cool first. Place it in an airtight container. This keeps the flavors fresh and prevents sogginess. If you have leftover toppings, store them separately. Use small glass jars or containers for easy access. How long does it last in the fridge? Bruschetta stays good for about 2 days. After that, the bread gets too soft. Can it be frozen? I don't recommend freezing bruschetta. The bread will lose its crunch and texture. To reheat properly, use the oven. Set it to 350°F (180°C). Place bruschetta on a baking sheet. Heat for about 5-7 minutes. This keeps the bread crispy and warm. Avoid the microwave; it makes the bread soggy. Bruschetta is a classic Italian appetizer. It dates back to the 15th century. The word "bruscare" means to toast or roast. Traditionally, it involves grilled bread topped with fresh ingredients. The most common topping is a mix of tomatoes, garlic, and basil. Bruschetta can also use different toppings, like mushrooms or beans. It’s a simple dish that celebrates fresh flavors. Yes, you can use other tomatoes! If you can't find cherry tomatoes, try grape tomatoes. They are sweet and juicy, just like cherry tomatoes. You can also use larger tomatoes, like Roma or beefsteak. Just chop them into smaller pieces. Remember to remove excess seeds and juice to avoid sogginess. Making Roasted Garlic Tomato Bruschetta takes about one hour. You need around 15 minutes to prep everything. Roasting the garlic takes 30 to 35 minutes. Roasting the tomatoes takes around 15 to 20 minutes. This recipe serves 4 to 6 people. It’s a great dish for gatherings or a quick snack. You can prepare some parts ahead of time. Roast the garlic and tomatoes in advance. You can store them in the fridge for up to three days. However, it’s best to toast the bread just before serving. This keeps the bread warm and crisp. Assemble the bruschetta right before you eat for the best taste. Bruschetta is simple and delicious. You learned the key ingredients and steps. Fresh bread, ripe tomatoes, and garlic are essential. Roasting boosts their flavors. I shared tips to avoid common mistakes and enhance taste. You can even customize it with herbs and veggies. Proper storage lets you enjoy leftovers longer. Remember, bruschetta shines when made with fresh, high-quality ingredients. Get creative and enjoy each bite!

Roasted Garlic Tomato Bruschetta Flavorful Appetizer

- 8 oz rice noodles: Choose any brand you like. Look for gluten-free options if needed. - 1 lb chicken breast: Thinly sliced for quick cooking. You can use tofu for a vegan option. - 1 red bell pepper: Julienned for sweet flavor and color. - 1 cup snap peas: Trimmed for crunch and freshness. - 2 carrots: Spiralized or julienned for added texture. - 3 green onions: Chopped for a fresh finish. - 3 tablespoons peanut butter: Smooth or crunchy, depending on your taste. Brands like Jif or Skippy work well. - 2 tablespoons soy sauce: Low sodium is best to control salt levels. - 1 tablespoon sesame oil: Adds a rich, nutty flavor. - 1 tablespoon honey or maple syrup: For sweetness. Use maple syrup for a vegan option. - 1 tablespoon ginger: Grated for a spicy kick. - 2 cloves garlic: Minced for depth of flavor. - 1 tablespoon lime juice: Fresh is best for brightness. - Crushed peanuts: For garnish, adding crunch. - Fresh cilantro: For garnish, bringing a fresh herb taste. - Lime wedges: For serving, adding a zesty touch. Feel free to add other veggies like broccoli or zucchini for more color and health benefits. {{ingredient_image_1}} To prepare rice noodles, follow the package instructions. Start by bringing water to a boil. Add the noodles and cook until al dente, about 4-6 minutes. Drain the noodles and rinse them under cold water. This rinsing is key; it stops the cooking. It also helps prevent the noodles from becoming sticky. If you want, you can also soak the noodles in hot water instead of boiling them. This method works well and saves time. For golden brown chicken, use thinly sliced chicken breast. Heat sesame oil in a large skillet over medium-high heat. Sauté the chicken for about 5-7 minutes until it is fully cooked and golden. This timing ensures your chicken stays juicy. If you prefer, you can use tofu instead of chicken. Just cook the tofu until it is crispy on the outside. Stir-frying vegetables is simple and fun. I like to add red bell pepper, snap peas, and carrots to the skillet. Add the bell pepper first and stir-fry for about 1 minute. Then, add the snap peas and carrots. Cook for another 2-3 minutes. This timing keeps your veggies tender but still crisp. Remember, overcooked vegetables lose their crunch and bright color. To make the peanut sauce, whisk together peanut butter, soy sauce, honey, grated ginger, minced garlic, and lime juice in a bowl. Mix until smooth. If you want to change the flavor, try adding a bit of chili paste for heat or using almond butter for a twist. Avoid adding too much liquid, as this can make the sauce too thin. Now, it’s time to mix everything. Add the cooked noodles to the skillet with chicken and veggies. Pour the peanut sauce over the top. Toss everything together gently until well combined. Make sure everything heats evenly for best taste. If the sauce feels too thick, you can add a splash of water to loosen it up. For a beautiful presentation, serve the noodles in bowls. Top with chopped green onions, crushed peanuts, and fresh cilantro. Lime wedges on the side add a nice touch. The garnishes not only look good but also enhance the flavors. Try serving these noodles with a side of spring rolls or a fresh salad for a complete meal. - Cook rice noodles by boiling them for a few minutes. Drain and rinse with cold water. This stops cooking and keeps them firm. - To multitask, prepare the sauce while the chicken cooks. Chop veggies as you go. This makes your meal quick. - To ensure flavors meld, add sauce to the noodles and mix well. Heat everything together for a minute. This helps all the flavors mix. - Choose creamy peanut butter for a smooth sauce. Crunchy peanut butter adds texture. Try a natural brand with no added sugar. - For fresh veggies, look for bright colors. Crisp snap peas and firm bell peppers make the dish pop. Avoid wilted or soft vegetables. - Store leftover ingredients in sealed containers. Keep veggies in the fridge for a few days. This keeps them fresh for your next meal. - Use colorful veggies for a vibrant dish. Red bell peppers, green peas, and orange carrots create a stunning plate. - Serve family-style in a big bowl or individual portions. Both ways are fun and inviting for guests. - Garnish with crushed peanuts and fresh cilantro. A wedge of lime adds a splash of color and a burst of flavor. Pro Tips Use Fresh Ingredients: Fresh vegetables and high-quality chicken will enhance the flavors of your dish significantly. Customize Your Sauce: Feel free to adjust the peanut butter and soy sauce amounts based on your preference for creaminess and saltiness. Prep Ahead: You can prepare the peanut sauce in advance and store it in the fridge for a quick meal during the week. Add Proteins: For a heartier meal, consider adding tofu or shrimp along with the chicken for added protein and flavor variation. {{image_2}} You can switch up the protein for your Thai Peanut Chicken Noodles. If you want a vegetarian or vegan option, try using tofu. Firm tofu works best. Just press it to remove water, then cube and cook until golden. If you prefer seafood, shrimp is a great choice. Cook the shrimp for about 3-4 minutes until they turn pink. For beef lovers, thinly sliced beef works well too. Cook it for about 5 minutes or until it’s browned. Adjust the cooking time based on the protein you choose to ensure it’s cooked just right. The peanut sauce can change based on your taste. Want it spicier? Add some chili paste or sriracha. Start with a teaspoon and increase based on your heat level. You can also switch the nut butter. Almond or cashew butter can give a new twist. For a zesty note, consider adding lime or lemon juice to brighten the flavor. Each variation can make this dish unique. Feel free to get creative with the vegetables. Use seasonal veggies like zucchini, bell peppers, or broccoli. They all add color and flavor. For a healthy boost, add greens like spinach or kale. Toss them in during the last minute of cooking. This keeps them vibrant and crisp. Add crunchy veggies too, like water chestnuts or bell peppers. They give a nice texture contrast. Experimenting with different vegetables keeps each meal exciting! To keep your Thai peanut chicken noodles fresh, use airtight containers. Glass or plastic containers work well. Store leftovers in the fridge for up to three days. To reheat, use a skillet over medium heat. Add a splash of water to keep the noodles moist. Stir gently to avoid sticking. If you want to save some for later, freezing works great. Let the dish cool completely before freezing. Use freezer-safe containers and leave space for expansion. When ready to eat, thaw it in the fridge overnight. For best quality, reheat it in a pan on low heat. Stir often to ensure even warming. For easy meals, portion your noodles into single servings. This makes grab-and-go lunches a breeze. Feel free to mix these noodles with other dishes. Try adding some grilled veggies or roasted chicken. When prepping in advance, cook the noodles and sauce separately. This keeps everything fresh and tasty. How can I make this dish gluten-free? You can use gluten-free soy sauce. Look for tamari as a great option. Also, choose rice noodles, which are naturally gluten-free. What can I use instead of peanut butter? If you want a different flavor, try almond or sunflower seed butter. These options give a unique taste, while still being creamy. Can I make this dish vegetarian? Yes! Replace chicken with tofu or tempeh. You can also add more veggies for added texture and flavor. How to adjust serving sizes easily? To change the servings, simply multiply or divide the ingredients. For example, use 16 oz of noodles for eight servings. Can I make this dish ahead of time? You can prep the sauce and chop veggies in advance. Cook the noodles and chicken just before serving for the best taste. What are the best sides to serve with it? Serve it with spring rolls or a fresh salad. These sides add crunch and freshness to your meal. What should I do if the sauce is too thick? If your sauce is thick, add a little water or broth. Stir well until it reaches your desired consistency. How can I add more flavor to the dish? Add a splash of lime juice or a pinch of chili flakes. Fresh herbs like cilantro can also boost the taste. What if my noodles are overcooked? If the noodles are mushy, try not to stir them too much. Add them to the dish at the end to keep some texture. This guide covered all the steps to make a delicious dish from scratch. We explored each ingredient, learned how to cook noodles and chicken perfectly, and discovered ways to enhance flavors with sauces and garnishes. Cooking is fun, and with these tips, you can impress anyone at your table. Don’t be afraid to try new variations; they can lead to exciting results. Now it’s time to get cooking and enjoy your meal!

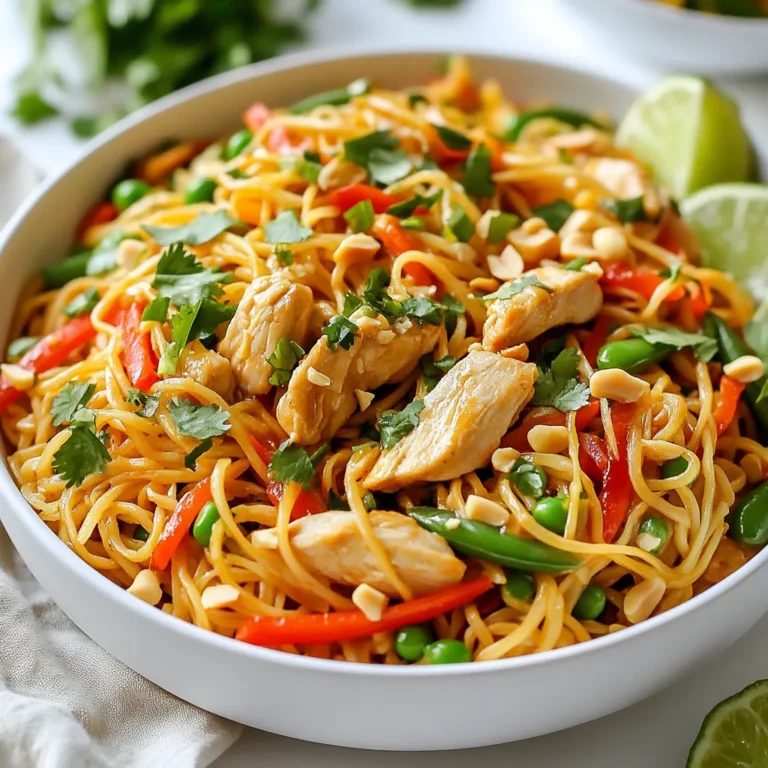
Thai Peanut Chicken Noodles Quick and Flavorful Dish

To make a tasty pineapple mango smoothie, you need these simple ingredients: - 1 cup fresh pineapple chunks - 1 ripe mango, peeled and diced - 1 banana, sliced - 1 cup coconut milk (or almond milk) - 1 tablespoon honey or agave syrup (optional) - 1/2 cup Greek yogurt (for creaminess) - Ice cubes (as needed) If you want to mix it up, try these optional add-ins: - A handful of spinach for extra nutrients - A scoop of protein powder for a boost - Fresh mint leaves for a refreshing touch - A splash of orange juice for a citrus kick To ensure your smoothie tastes great, keep these tips in mind: - Use ripe fruits for the best flavor and sweetness. - Choose fresh, high-quality pineapple and mango for a vibrant taste. - If you have leftovers, store them in an airtight container in the fridge. - Always blend your smoothie just before serving for the best texture. For the complete recipe, check out the [Full Recipe]. Start with fresh, ripe fruits. Gather your pineapple, mango, and banana. If your pineapple is not pre-cut, chop it into chunks. Peel the mango and dice it into small pieces. Slice the banana into rounds. This prep takes only a few minutes, but it sets the stage for your smoothie. Now, take your prepared fruits and put them into a blender. Add 1 cup of coconut milk or almond milk for a creamy base. Include 1/2 cup of Greek yogurt for extra creaminess. If you like a bit of sweetness, add 1 tablespoon of honey or agave syrup. Blend on high until the mixture is smooth and creamy. If you want it colder or thicker, toss in some ice cubes and blend again. Taste your smoothie, and adjust the sweetness if needed. Blend once more for a perfect finish. Pour your smoothie into chilled glasses for a refreshing treat. You can garnish it with a slice of pineapple or a few mango cubes on top. This adds a nice touch and makes it look pretty. Enjoy your smoothie right away for the best taste. If you want the full recipe, check out the Tropical Paradise Pineapple Mango Smoothie section. To get the best texture, blend your fruits well. Start with the pineapple and mango. Add the banana next. Then, pour in your coconut milk and yogurt. Blend on high and watch it become creamy. If it’s too thick, add a bit more milk. For a colder drink, toss in ice cubes. Blend again until smooth. You want it thick but drinkable. Want to make your smoothie even better? Add extras like fresh mint or a squeeze of lime. The mint gives a nice fresh taste. Lime adds a zing that wakes up the flavors. You can also try adding spinach for a green twist. It won’t change the taste much, but it boosts nutrition. One big mistake is using overripe fruit. It can make your smoothie too mushy. Always pick fresh fruits for the best flavor. Another mistake is not blending long enough. You want a smooth drink, not chunks. Lastly, don’t skip the yogurt. It adds creaminess and makes your smoothie rich. Follow these tips to enjoy a perfect pineapple mango smoothie every time! {{image_2}} You can make this smoothie dairy-free by swapping the Greek yogurt. Use a dairy-free yogurt instead. Almond or coconut yogurt works well. For a low-calorie version, skip the honey or agave. The fruits add natural sweetness, so you may not need it. You can also use unsweetened almond milk. This cuts calories while still tasting great. If you want to change the base, try almond milk or oat milk. These options are light and creamy. They keep the smoothie smooth without extra fat. You can also use coconut water for a refreshing twist. This swap adds hydration without heaviness. Each option brings its own unique flavor to the drink. For more nutrition, add a handful of spinach. It blends well and adds vitamins without changing the taste much. You can mix in other fruits, too. Try berries for a tangy twist or peaches for extra sweetness. Each fruit changes the smoothie’s flavor, making it exciting. Experiment with combinations to find your favorite mix. You can store your leftover smoothie in the fridge. Use a tight container to keep it fresh. It will stay good for about one day. Before you drink it, give it a good shake. This helps mix any ingredients that may have separated. If you want to save your smoothie for later, freezing is a great choice. Pour the smoothie into ice cube trays or freezer bags. This will keep it fresh for up to three months. When you're ready to enjoy it, just blend the frozen cubes with a little milk or water. This will bring back the smooth texture. Stored smoothies might lose some creaminess. To fix this, add a splash of milk or coconut milk. Blend it again until it’s smooth. You can also toss in some fresh fruit for extra flavor. This way, you can enjoy a tasty drink any time! For the full recipe, check out the Tropical Paradise Pineapple Mango Smoothie. You can make this smoothie ahead of time. However, I suggest you drink it fresh. Smoothies made in advance can lose their bright color and taste. If you must prepare it early, store it in the fridge for one day. Just give it a good shake or stir before drinking. This way, you’ll still enjoy most of the flavor and nutrients. If you don’t have Greek yogurt, you have options. You can use regular yogurt for a lighter taste. Coconut yogurt is a great dairy-free choice. Silken tofu will add creaminess, too. Each option changes the flavor slightly, but all work well in this smoothie. Yes, this smoothie is perfect for kids! The sweet fruits make it tasty and fun. You can adjust the sweetness to their liking, too. This drink is full of vitamins from the fruit and protein from yogurt. It’s a great way to sneak in healthy foods. Plus, kids love bright colors and creamy textures. Enjoy making this smoothie together with them! We explored the key ingredients, preparation steps, and useful tips to make a great smoothie. You learned how to tweak recipes for flavor and health. Remember, keep it fresh and store it well. Avoid common mistakes for the best result. The right mix makes every smoothie unique and fun. Use this guide to create your ideal drink at home. Enjoy the process and experiment with flavors. Smoothies are versatile and can be tailored to your taste. Happy blending!

Pineapple Mango Smoothie Refreshing and Healthy Drink

PREV 1 … 32 33 34 … 58 NEXT
quick dish kitchen

explore

DessertsDinnerAppetizersDrinks

Our Policies

  • Cookie Policy
  • Copyright Policy
  • Disclaimer
  • GDPR Policy
  • Terms Of Use
Back to Top
  • About
  • Contact Us
  • Privacy Policy
© 2025 quick dish kitchen