FREE DINNER EBOOK! Get your copy!
  • Cookie Policy
  • GDPR Policy
  • Disclaimer
  • Terms Of Use
  • Visit my other site: Fun Cookie Recipes
quick dish kitchen
  • Home
  • Dinner
  • Desserts
  • Drinks
  • Appetizers
  • Contact
  • About
  • Privacy Policy
  • Home
  • Dinner
  • Desserts
  • Drinks
  • Appetizers
  • Contact
  • About
  • Privacy Policy
  • Cookie Policy
  • GDPR Policy
  • Disclaimer
  • Terms Of Use
Visit my other site: Fun Cookie Recipes

HOME / CATEGORIES /

Latest

- 1 cup strawberries, hulled and sliced - 1 cup blueberries - 1 cup raspberries - 2 tablespoons sugar (adjust to taste) - 1 tablespoon cornstarch - 1 teaspoon vanilla extract - 1 cup rolled oats - 1/2 cup all-purpose flour - 1/2 cup brown sugar - 1/2 teaspoon cinnamon - 1/2 cup unsalted butter, melted - Pinch of salt The ingredients for triple berry crumble are simple and fresh. You will need three types of berries: strawberries, blueberries, and raspberries. Each berry adds its own unique flavor and color. Start with a cup of hulled and sliced strawberries. This base adds sweetness. Then, add a cup each of blueberries and raspberries. Their tartness balances the dish. You will also need sugar. Two tablespoons will enhance the berry flavors. If your berries are sweet, adjust the sugar down. Cornstarch helps thicken the juices. Use one tablespoon for the right texture. Add one teaspoon of vanilla extract for warmth and aroma. For the crumble topping, you need rolled oats. One cup gives a nice chewiness. Combine this with half a cup of all-purpose flour and half a cup of brown sugar. This mix creates a sweet and crumbly texture. A pinch of salt and half a teaspoon of cinnamon add depth. Finally, use half a cup of melted unsalted butter. It binds the topping and adds richness. - Alternative berries: You can swap out any berry. Try blackberries or peaches for a twist. - Sugar substitutes: Use honey or maple syrup if you want a natural sweetener. - Gluten-free options: Replace all-purpose flour with almond flour or a gluten-free blend. - Mixing bowls: You need two bowls for mixing the berries and the crumble. - Measuring cups: Accurate measurements ensure your dessert turns out great. - Baking dish: A 9-inch pie dish works best for even baking. 1. Preheat the oven Set your oven to 350°F (175°C). This heat will help cook the berries and crisp the topping. 2. Prepare the berry mixture In a large mixing bowl, add: - 1 cup strawberries, hulled and sliced - 1 cup blueberries - 1 cup raspberries - 2 tablespoons sugar (adjust to taste) - 1 tablespoon cornstarch - 1 teaspoon vanilla extract Mix gently. Let it sit to let the juices mix and the flavor grow. 3. Mix the crumble topping In another bowl, combine: - 1 cup rolled oats - 1/2 cup all-purpose flour - 1/2 cup brown sugar - 1/2 teaspoon cinnamon - 1/2 cup unsalted butter, melted - Pinch of salt Stir until it looks crumbly. This will be your crunchy topping. 1. Pouring the berry mixture into the dish Grease a 9-inch pie dish. Pour the berry mixture into the dish. Spread it out evenly. 2. Adding the crumble topping Evenly sprinkle the crumble topping over the berry layer. This will create a nice crunch. 3. Baking time and temperature Place the dish in the oven. Bake for 30-35 minutes. Look for a golden brown top and bubbling berries. 1. Cooling time before serving Once baked, take it out and let it cool for a bit. This helps the berries set. 2. Accompaniments Serve warm. Add a scoop of vanilla ice cream or a dollop of whipped cream. For a fun touch, garnish with fresh berries. Enjoy! To get the right texture, mix the oats, flour, brown sugar, and butter well. You want it crumbly but not too dry. If it feels too dry, add a bit more melted butter. Adjust the sweetness based on the berries. For tart berries, add more sugar. If your berries are sweet, cut back on the sugar. You can prepare the berry mix and crumble topping ahead of time. Keep them in the fridge until you are ready to bake. This saves time on busy days. When reheating, cover it with foil. This keeps the topping from getting too hard. Bake it at 350°F (175°C) until warm, about 15 minutes. Add spices like nutmeg or cardamom for an extra boost. A splash of almond extract can also enhance the flavor. Fresh herbs, like mint, make a great garnish. They add a nice touch and a pop of color. You can also sprinkle some on top just before serving. {{image_2}} You can switch up the berries in your crumble. Use blackberries or cherries for a new twist. Mix berries based on what you find fresh at the store. Seasonal fruits like peaches or apples can also work well. Each fruit adds its unique flavor and texture. Don’t be afraid to get creative with your berry choices! If you want a vegan option, swap butter for coconut oil or a vegan margarine. You can also use maple syrup instead of sugar for natural sweetness. For low-sugar options, try using stevia or monk fruit sweetener. Adjust the amount based on your taste. These swaps make the dessert friendly for many diets! Adding nuts or seeds can enhance the crunch of your topping. Chopped almonds, walnuts, or sunflower seeds are great choices. You can also try different types of crumble. Instead of oats, use a mix of crushed nuts for a nut-based crumble. This will change the flavor and texture, making it even more special. To keep your Triple Berry Crumble fresh, store it in the fridge. Place it in an airtight container. This helps to keep the berries juicy and the crumble from getting soggy. Use it within three days for the best taste. If you want to save it longer, freeze the crumble. Cut it into portions and wrap each piece in plastic wrap. Then, place the wrapped portions in a freezer bag. This way, you can enjoy it later. It can last up to three months in the freezer. For best taste, eat your crumble within three days if stored in the fridge. If frozen, it stays good for three months. Check for signs of spoilage before eating. If the berries look mushy or smell sour, it's time to toss it. To reheat, you can use the oven or microwave. For the oven, preheat it to 350°F (175°C). Place the crumble in an oven-safe dish and cover it with foil. Heat for about 15-20 minutes until warm. If you use the microwave, put a portion on a plate. Heat it for about 30 seconds. You may need to check and heat more if it’s not warm enough. Reheating helps keep the texture nice. Enjoy your berry delight warm! Triple Berry Crumble is a warm dessert made with three types of berries. You mix strawberries, blueberries, and raspberries together. Then, you top them with a crumbly mixture of oats, flour, and sugar. The bake gives it a golden crust. The berries become soft and juicy, creating a delightful contrast. Yes, you can use frozen berries! They work well in this recipe. Just remember to thaw them first. Drain any extra liquid to avoid a soggy crumble. If you use frozen fruit, add a bit more cornstarch to help thicken the filling. Your crumble is done when the topping turns golden brown. Check for bubbling around the edges. If the berries look hot and juicy, it’s ready to take out. Let it cool slightly before serving for the best texture. Absolutely! Doubling the recipe is easy. Just use twice the amount of each ingredient. Bake it in a larger dish so it cooks evenly. You may need to adjust the baking time slightly, so keep an eye on it. Serve your crumble warm with a scoop of vanilla ice cream. A dollop of whipped cream also pairs well. For drinks, try a cup of warm tea or a cold glass of lemonade. Each adds a nice touch to this sweet treat. In summary, we explored the simple yet delicious recipe for triple berry crumble. You learned about the key ingredients, how to substitute them, and useful tools for baking. We covered step-by-step instructions, tips for perfecting your dish, and variations to suit different diets. Finally, I shared storage and reheating methods to keep your crumble fresh. This recipe is not just easy to make; it’s a great way to enjoy seasonal fruits. Enjoy your baking and the delicious rewards that follow!

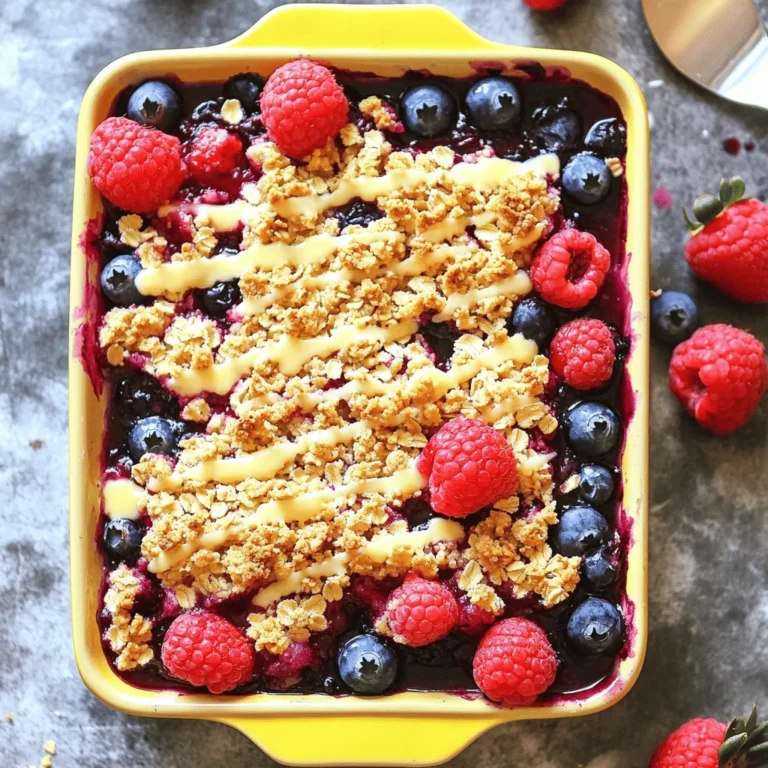
Triple Berry Crumble Delightful and Easy Dessert Recipe

- 2 medium sweet potatoes, peeled and cut into thin fries - 2 tablespoons olive oil - 1 teaspoon garlic powder - 1 teaspoon paprika - 1/2 teaspoon cayenne pepper (optional for heat) - Salt and pepper to taste - Fresh parsley, chopped (for garnish) Sweet potatoes are the star of this dish. Choose medium-sized, firm sweet potatoes. Peel them and cut them into thin fries. The thinner they are, the crispier they will get. This is true magic in an air fryer. Next, we need some oil. Use olive oil for flavor and to help the fries crisp up. You’ll also need seasonings. Garlic powder adds depth, while paprika gives a nice color. If you like heat, cayenne pepper is a great option. Salt and pepper are must-haves for taste. Garnishing is fun! Fresh parsley adds a pop of color. It makes your fries look fancy. You can also serve your fries with a dip. Garlic aioli or spicy chipotle mayo works well to enhance the flavor. Peel the sweet potatoes using a sharp knife or a vegetable peeler. Cut the sweet potatoes into thin fries. Aim for uniformity in size to ensure even cooking. If some fries are thicker, they may not cook at the same rate. Keep them all around the same thickness for the best results. Put the cut fries in a large bowl. Pour two tablespoons of olive oil over them. Toss the fries to coat them evenly. This helps them crisp up nicely. In a small bowl, mix one teaspoon of garlic powder, one teaspoon of paprika, and half a teaspoon of cayenne pepper if you like heat. Add salt and pepper to taste. Sprinkle this mix over the fries. Toss again to ensure the fries are well-coated with the spices. Preheat your air fryer to 400°F (200°C) for about five minutes. This step is key for crispy fries. Once preheated, arrange the fries in a single layer in the basket. If you have too many fries, fry them in batches. Overcrowding can make them soggy. Air fry the sweet potato fries for 15 to 18 minutes. Shake the basket halfway through cooking. This helps them cook evenly. When they turn golden brown and crispy, they are ready to enjoy. Remove them carefully and place them on a serving plate. Finish by garnishing with chopped parsley for a fresh touch. To avoid soggy fries, start with dry sweet potatoes. After cutting, pat them with a towel. The moisture will make them soft instead of crispy. Use just enough oil to coat each fry. Too much oil can lead to a mushy texture. Shaking the basket while cooking is key. Halfway through, take a moment to shake the fries. This helps them cook evenly. It also allows hot air to reach all sides, making them crispy. Get creative with your spice blends. Try adding cumin for a warm flavor. You can use chili powder for extra heat. Mix in some dried herbs like oregano or thyme for a fresh twist. Customize the heat level to suit your taste. If you love spice, add more cayenne pepper. For a milder flavor, skip the heat altogether. The choice is yours! Pair sweet potato fries with tasty dips. Garlic aioli is a classic choice. You can also serve them with spicy chipotle mayo for a kick. Ketchup and ranch dressing work well, too. For plating, stack the fries in a cone or a small basket. This makes for a fun presentation. Sprinkle chopped parsley on top for a pop of color. Enjoy your crispy treat! {{image_2}} You can change up the flavors of sweet potato fries in many ways. Try adding herbs and spices to make them unique. Here are some ideas: - Rosemary: This herb adds a great aroma. - Cumin: It brings a warm, earthy taste. - Chili Powder: For a smoky kick, add this spice. You can also mix in other vegetables. Carrots or zucchini can work well. Cut them into thin strips and toss them with your sweet potatoes. This adds color and nutrition to your dish. If you want a lighter option, use alternative oils. Instead of olive oil, try avocado oil. It has a high smoke point and adds a nice flavor. You can also omit the oil entirely. The air fryer still makes crispy fries without it. Baking is another option. Baking sweet potato fries can be healthy, but it usually takes longer. Air frying cooks them faster and gives them that perfect crunch. Choose air frying for quicker, crispier results. To keep your sweet potato fries fresh, let them cool first. Then, place them in an airtight container. Store the container in the fridge. They stay good for about 2-3 days. When you want to eat them again, reheating is key. Heat your air fryer to 350°F (175°C). Place the fries in the basket and cook for about 5-7 minutes. This helps them regain their crispy texture. Avoid using the microwave, as it can make them soggy. You can freeze sweet potato fries for later use. Start by cutting and seasoning them as usual. Spread the fries in a single layer on a baking sheet. Make sure they do not touch each other. Freeze them for about 1-2 hours. After the fries are frozen, transfer them to a freezer bag. This keeps them from sticking together. Label the bag with the date. They can last for up to 3 months in the freezer. When you are ready to cook the frozen fries, no need to thaw them. Preheat your air fryer to 400°F (200°C). Cook them for about 18-20 minutes, shaking the basket halfway. This way, they will come out crispy and flavorful, just like fresh! Sweet potato fries usually take about 15 to 18 minutes to cook in an air fryer. You should set the temperature at 400°F (200°C). I recommend shaking the basket halfway through to help them cook evenly. This method gives you that perfect crispy texture. Yes, you can use frozen sweet potatoes for air fryer fries. They are great for a quick snack. However, they may not get as crispy as fresh ones. Frozen fries often have extra moisture. This can lead to a softer texture. If you choose frozen, skip the oil and spices since they are usually pre-seasoned. The best way to season sweet potato fries is simple. I use garlic powder, paprika, and a hint of cayenne for heat. Here’s my go-to mix: - 1 teaspoon garlic powder - 1 teaspoon paprika - 1/2 teaspoon cayenne pepper (optional) - Salt and pepper to taste You can also try adding herbs like rosemary or thyme. Feel free to mix and match your favorite spices. Just remember to toss the fries well in the seasoning. This helps each fry get coated for the best flavor. In this blog post, we explored how to make the perfect sweet potato fries. We covered ingredients, preparation, and detailed steps for air frying. You learned tips for crispiness and various seasoning ideas. Remember, the right cut and evenly spaced fries make a big difference. Try mixing spices or adding dips to enhance flavor. With practice, you can create tasty fries every time. Enjoy experimenting with different recipes and flavors to find your favorite!

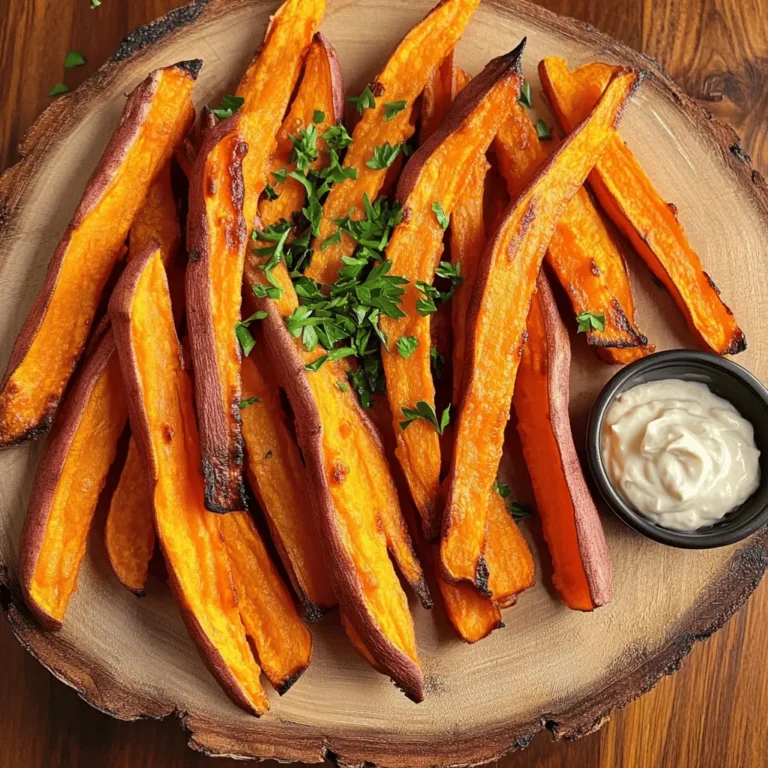
Air Fryer Sweet Potato Fries Crispy and Flavorful Treat

When making Pumpkin Spice Energy Bites, the right ingredients matter. Here’s what you need to gather: - 1 cup rolled oats - 1/2 cup natural peanut butter or almond butter - 1/2 cup pure pumpkin puree - 1/4 cup honey or maple syrup - 1 teaspoon vanilla extract - 1 teaspoon pumpkin pie spice - 1/2 teaspoon cinnamon - 1/4 cup mini chocolate chips or chopped nuts (optional) - A pinch of salt These ingredients blend well to create a tasty and healthy snack. The rolled oats give a great base, while the nut butter adds protein. Pumpkin puree brings moisture and flavor, making these bites soft and delicious. Honey or maple syrup sweetens the mix, and vanilla extract adds warmth. The spices—pumpkin pie spice and cinnamon—create that cozy fall flavor. You can also add chocolate chips or nuts for fun textures. Remember, you can adjust the amounts based on your taste. Enjoy selecting these fresh, wholesome ingredients for your energy bites! 1. In a large mixing bowl, combine 1 cup of rolled oats, 1/2 cup of pumpkin puree, and 1/2 cup of natural peanut butter or almond butter. 2. Next, add in 1/4 cup of honey or maple syrup, 1 teaspoon of vanilla extract, 1 teaspoon of pumpkin pie spice, 1/2 teaspoon of cinnamon, and a pinch of salt. 3. Mix everything together until you see a sticky dough form. This dough is the heart of your energy bites. 1. Using your hands, scoop out small amounts of the mixture, about 1 tablespoon each. Roll these into bite-sized balls. 2. Place the balls onto a parchment-lined baking sheet. This keeps them from sticking. 3. Refrigerate the bites for at least 30 minutes to help them firm up. 4. After chilling, transfer the energy bites into an airtight container. Store them in the fridge. Enjoy them for up to one week. To make the best Pumpkin Spice Energy Bites, get the mixture sticky. This stickiness helps you roll them into balls. If it feels dry, add a bit more nut butter or pumpkin puree. For sweetness, taste the mix. You can adjust it by adding more honey or maple syrup. If your bites turn out too soft, chill them longer. A little extra time in the fridge will help them firm up nicely. Presentation matters! Serve your energy bites on a decorative platter. It makes them look fancy and fun. To add flair, sprinkle some extra cinnamon or pumpkin pie spice on top. This simple touch makes them even more appealing. You can also use small paper cups for serving. They look cute and are easy to grab. {{image_2}} You can easily change up the taste of your energy bites. Here are some ideas: - Use different nut butters: Try almond or cashew butter for a new flavor. - Add dried fruits or seeds: Raisins, cranberries, or chia seeds boost nutrition. - Experiment with spices: Nutmeg or ginger can bring a nice twist to the bites. If you follow specific diets, you can make these bites work for you: - Make them vegan: Replace honey with maple syrup for a plant-based option. - Gluten-free options: Use certified gluten-free oats to keep it safe for gluten-free diets. With these variations, you can enjoy delicious Pumpkin Spice Energy Bites tailored to your taste or dietary needs! To keep your Pumpkin Spice Energy Bites fresh, store them in an airtight container in your refrigerator. This method locks in moisture and flavor, so they're ready to enjoy whenever you want. If you want to save some for later, you can store them in the freezer. Just make sure to place them in a freezer-safe bag or container to avoid freezer burn. These delightful bites will stay fresh for up to one week in the refrigerator. Be sure to check them for any signs of spoilage before enjoying. If you freeze your bites, you can enjoy them for a longer period. When you're ready to eat, simply thaw them at room temperature. This keeps their texture and flavor just right! Pumpkin Spice Energy Bites can last for a week in the fridge. Store them in an airtight container to keep them fresh. If you want them to last longer, freeze them. In the freezer, they can last for up to three months. Just make sure to thaw them at room temperature before eating. You should not use pumpkin pie filling. It has added sugar and spices, which change the taste. Pure pumpkin puree is better because it gives you full control over the flavor. This way, you can adjust the spices to your liking. Yes, these bites are healthy! Here’s why: - Oats are full of fiber and keep you full longer. - Pumpkin puree is low in calories and packed with vitamins. - Nut butter adds healthy fats and protein. - Honey or maple syrup gives natural sweetness without refined sugar. - Cinnamon may help regulate blood sugar levels. These ingredients combine to make a nutritious snack that fuels your day! In this blog post, we explored how to make delicious Pumpkin Spice Energy Bites. We covered the key ingredients, simple steps for preparation, and helpful tips to perfect the recipe. You learned about flavor customizations and dietary alternatives, too. These bites not only taste great but also offer great nutrition. Enjoy making them as a quick snack or energy boost. Keep experimenting with your own variations for fun!

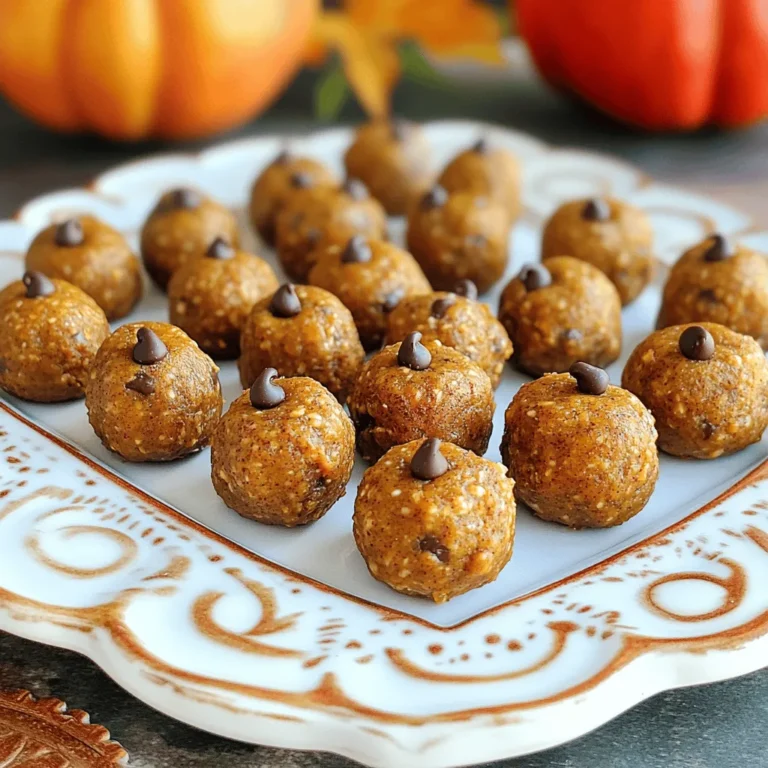
Pumpkin Spice Energy Bites Healthy Snack Idea

- 1 lb (450g) large shrimp, peeled and deveined - 2 tablespoons olive oil - 2 tablespoons chipotle in adobo sauce, minced - Zest and juice of 1 lime - 1 teaspoon ground cumin - 1 teaspoon smoked paprika - 1/2 teaspoon garlic powder - Salt and pepper to taste - 8 small corn tortillas - 1 cup shredded cabbage (red or green) - 1 avocado, sliced - Fresh cilantro leaves for garnish - Lime wedges for serving Chipotle Lime Shrimp Tacos are full of flavor. Here’s a closer look at the ingredients. First, you need shrimp. I use large shrimp for this recipe. They provide a nice bite and hold up well when cooked. You will want to coat them in olive oil. This helps the spices stick and adds a rich taste. The chipotle in adobo sauce gives the shrimp a smoky kick. It adds heat and depth. Mince it to release more flavor. Lime is key in this dish. You’ll use both the zest and juice. This boosts freshness and adds a tangy note. Cumin and smoked paprika add warmth. Cumin has a nutty flavor, while smoked paprika adds a subtle smokiness. Garlic powder brings in a savory taste. It complements the shrimp perfectly. Salt and pepper finish the seasoning. They enhance all the flavors in the dish. For the tacos, use small corn tortillas. They are soft and hold everything together well. Cabbage adds crunch. You can use red or green cabbage for color. Avocado brings creaminess to balance the spices. Slice it for easy layering. Fresh cilantro adds brightness and flavor. It’s the perfect garnish for your tacos. Lime wedges are a must. Squeeze them over the tacos for that extra zing. - Additional toppings (sour cream, hot sauce, etc.) - Variations on the shrimp seasoning Feel free to add your favorite toppings. Sour cream or hot sauce can enhance the flavor. You can also play with the seasoning on the shrimp. Try different spices to match your taste! To start, mix the shrimp with olive oil and spices. In a medium bowl, add: - 1 lb (450g) large shrimp, peeled and deveined - 2 tablespoons olive oil - 2 tablespoons chipotle in adobo sauce, minced - Zest and juice of 1 lime - 1 teaspoon ground cumin - 1 teaspoon smoked paprika - 1/2 teaspoon garlic powder - Salt and pepper to taste Toss the shrimp until they are well coated. For the best flavor, allow the shrimp to marinate for at least 15 to 30 minutes. This lets the spices soak in. You can cook the shrimp using a grill or a skillet. Both methods work well. Preheat your grill or skillet over medium-high heat. Once hot, add the shrimp in a single layer. Cook them for about 2-3 minutes on each side. Look for them to turn pink and opaque. That means they are done! Remove them from the heat. Now it's time to put your tacos together! First, warm the corn tortillas. You can do this in a dry skillet or on the grill. Heat them for about 30 seconds on each side until they are pliable. On each tortilla, add a handful of shredded cabbage. This adds crunch and freshness. Then, place a generous amount of the grilled shrimp on top. Add a few slices of avocado and garnish with fresh cilantro leaves. For a zesty touch, serve with lime wedges on the side. Squeeze fresh lime juice over the tacos just before eating for extra brightness. To make your Chipotle Lime Shrimp Tacos shine, adjust the seasoning to your taste. If you love heat, add more chipotle. If you prefer milder flavors, use less. Lime is key for balance. It adds a bright taste that cuts through the richness of the shrimp. The zest and juice work together to enhance every bite. Shrimp cooks quickly, so watch it closely. To prevent overcooking, remove it from the heat when it turns pink and opaque. This usually takes just 2-3 minutes per side. For a nice charred flavor, preheat your grill or skillet well. A good sear adds depth and smokiness to your tacos. Pair your tacos with fresh sides to complete the meal. Try serving with cilantro lime rice or black beans. For a refreshing twist, add a side of mango salsa. To present your tacos like a pro, stack them neatly on a plate. Garnish with lime wedges and cilantro leaves to impress your guests. {{image_2}} If you want to switch up the protein, chicken works great. Use boneless chicken thighs or breasts. Just marinate them like the shrimp. Grill until they are cooked through. Tofu is also a solid choice. Use firm tofu, pressed to remove moisture. Cut it into cubes and marinate it in the same chipotle mix. Grill or sauté until golden brown. For vegetarians, black beans or lentils can be tasty. They add protein and fiber. Mix them with lime juice and spices for extra flavor. You can play with spice mixes too. Try adding chili powder or cayenne for heat. For a milder taste, paprika or oregano works well. Incorporating seasonal vegetables makes the tacos fresh. Grilled corn adds sweetness. You can also use diced bell peppers or zucchini. They add color and crunch. Corn tortillas are classic, but flour tortillas work too. They are soft and easy to fold. Just warm them up in a skillet. For a lighter option, use lettuce wraps. They are crisp and low-carb. Iceberg or romaine lettuce holds the ingredients well. If you're gluten-free, look for gluten-free tortillas. Many brands offer tasty options that are easy to find. To store leftovers, place the shrimp and toppings in an airtight container. Keep the shrimp separate from the tortillas to maintain texture. You can enjoy your shrimp tacos for up to 2 days in the fridge. After that, the shrimp may lose its fresh taste. For freezing, wrap the shrimp tightly in plastic wrap, then place it in a freezer bag. This helps prevent freezer burn. You can also freeze the shredded cabbage and sliced avocado separately. To thaw, move the shrimp to the fridge overnight. This method preserves the taste and texture best. When reheating shrimp, use a skillet over low heat. This helps keep the shrimp moist and tender. Avoid high heat, as it can make them tough. For tortillas, warm them in a dry skillet for about 30 seconds on each side. This keeps them soft and pliable, perfect for your tacos. The best ways to cook shrimp for tacos are grilling and using a skillet. Both methods give great flavor. Grilling adds a smoky taste, while a skillet gives a nice sear. - Grilling: Heat your grill to medium-high. Cook shrimp for 2-3 minutes on each side. They turn pink and opaque when done. - Skillet: Heat olive oil in a skillet over medium-high heat. Add shrimp and cook for the same time as grilling. Both methods work well, so choose what you prefer or have on hand. Yes, you can prep some parts ahead of time. This makes serving easier. - Shrimp Marinade: You can marinate the shrimp a few hours before cooking them. Just keep them in the fridge. - Tortillas: Warm tortillas right before serving. You can also warm them in a pan or grill. - Toppings: Prepare toppings like shredded cabbage and avocado slices in advance. Store them separately in airtight containers. This prep helps you enjoy a quick meal when you're ready to eat. Keeping tacos warm is simple, especially at a gathering. You can use a few easy methods. - Oven: Set your oven to low heat (about 200°F or 93°C). Place the assembled tacos on a baking sheet and keep them warm there. - Tortilla Warmer: If you have a tortilla warmer, use it! It keeps tortillas warm and soft. - Cover: If you don’t have a warmer, just cover the tacos with foil. This helps hold in heat. These methods ensure your tacos stay warm and ready to enjoy. You learned how to make delicious Chipotle Lime Shrimp Tacos today. We covered the ingredients, cooking methods, and tips for flavor. I shared storage techniques to keep leftovers fresh. You also saw how to customize the tacos with different proteins and flavors. Now, you can impress your friends and family with your new cooking skills. Enjoy these tasty tacos at home or at gatherings. Happy cooking!

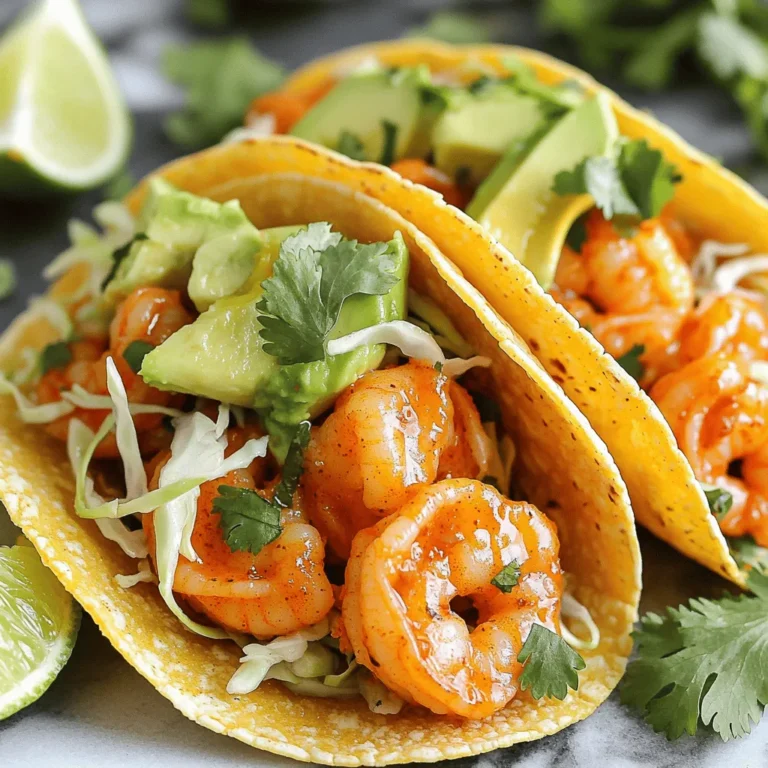
Chipotle Lime Shrimp Tacos Flavorful and Fresh Recipe

- 2 medium sweet potatoes, peeled and cubed - 1 can (15 oz) chickpeas, drained and rinsed - 4 cups spinach or mixed greens - 2 tablespoons olive oil - 1 teaspoon smoked paprika - 1 teaspoon garlic powder - 1 avocado, sliced - 1/4 cup tahini - 2 tablespoons lemon juice - Sesame seeds for garnish - Fresh herbs (like cilantro or parsley) for garnish - Salt and pepper to taste - Adjust tahini dressing consistency with water The sweet potato chickpea Buddha bowl is packed with nutrients. Sweet potatoes give you vitamins A and C. Chickpeas add protein and fiber. Together, they create a filling meal. The base of this bowl is spinach or mixed greens. These greens are rich in iron and help with digestion. Adding greens makes your meal fresh and vibrant. Next, the olive oil adds healthy fats. It also helps the sweet potatoes and chickpeas roast perfectly. Smoked paprika and garlic powder bring out the flavors. They add a warm, smoky taste. Don’t forget the tahini! This sesame paste gives a creamy texture. It also provides calcium and iron. Lemon juice adds a bright kick. The dressing pulls the bowl together and enhances the flavors. Lastly, you can add sliced avocado on top. This makes every bite creamy and delicious. Garnish with sesame seeds and fresh herbs for extra flair. These toppings add color and flavor. This Buddha bowl not only looks good but also tastes amazing. It’s a complete meal that satisfies your hunger and nourishes your body. - Preheat your oven to 400°F (200°C). This helps cook everything evenly. - Toss the cubed sweet potatoes and chickpeas with olive oil. - Add 1 teaspoon smoked paprika, 1 teaspoon garlic powder, salt, and pepper. - Mix well until everything is coated. - Spread the sweet potatoes and chickpeas on a baking sheet. - Roast them for 25-30 minutes. Stir halfway for even cooking. - Look for a nice golden color and tender texture. - In a small bowl, whisk together 1/4 cup tahini, 2 tablespoons lemon juice, and 2 tablespoons water. - Keep whisking until smooth. Adjust water to reach your desired thickness. - Add a pinch of salt to taste. - In serving bowls, lay down a base of 4 cups spinach or mixed greens. - Top the greens with the roasted sweet potatoes and chickpeas. - Slice your avocado and arrange it on top of the bowl. - Drizzle the tahini dressing generously over everything. - Finish by sprinkling sesame seeds and fresh herbs on top. - Serve while warm for the best taste! To get the best flavor and texture, spread the sweet potatoes and chickpeas in a single layer on your baking sheet. This way, each piece cooks evenly. It helps them caramelize nicely. Stir them halfway through cooking for perfect results. For the tahini dressing, you can change the amount of water until you reach your favorite texture. Add more water for a thinner dressing, or use less for a thick one. Don’t forget to taste and adjust the salt as needed. This makes a big difference! If you want more protein, think about adding quinoa or grilled chicken. Both options pair well with the sweet potatoes and chickpeas. They give your bowl extra nutrition and keep you full longer. Feel free to mix and match based on your taste! {{image_2}} You can easily change the greens in your Buddha bowl. Spinach works well, but try kale or arugula. You can also add roasted veggies like bell peppers or zucchini. They will add color and flavor. Mix and match to fit your taste. Want to spice things up? Add cayenne for heat or curry powder for warmth. A pinch of cumin can also enhance the flavor. These spices can create exciting tastes in your bowl. Don't be afraid to experiment! Switching up the dressing can change the whole dish. Lemon vinaigrette adds a bright touch. You can also try a yogurt-based dressing for creaminess. Each dressing brings its own flavor. So, have fun and find your favorite! Store leftovers in an airtight container in the fridge. This keeps them fresh and tasty. Use a glass or plastic container with a tight seal. Generally, the Buddha bowl will last 3-5 days in the refrigerator. After that, it may lose some flavor and texture. Always check for any signs of spoilage before eating. Reheat in the microwave or on the stovetop until warmed through. If using the microwave, heat in short bursts. Stir between bursts to ensure even heating. If on the stovetop, use low heat and add a splash of water to keep the veggies moist. Yes, all ingredients are plant-based! You can enjoy this bowl without worry. Sweet potatoes and chickpeas bring great flavors while keeping it vegan. Consider nut butters or yogurt as substitutes for a different flavor. Both options add creaminess. Nut butter gives a nutty taste, while yogurt adds a tangy touch. All ingredients are naturally gluten-free, ensuring safe consumption. Sweet potatoes, chickpeas, and greens fit this diet perfectly. So, you can enjoy this dish worry-free. Yes, prepare ingredients ahead of time and assemble just before serving. Store veggies and dressing separately. This keeps everything fresh and tasty when you're ready to eat. This guide covered how to make a delicious Sweet Potato Chickpea Buddha Bowl. We explored the main ingredients, step-by-step instructions, and helpful tips. You can customize the bowl to fit your taste or meal prep needs. Remember, you can enjoy this dish vegan, gluten-free, and full of flavor. With these simple steps, your meal will be tasty and satisfying. So gather your ingredients and get cooking!

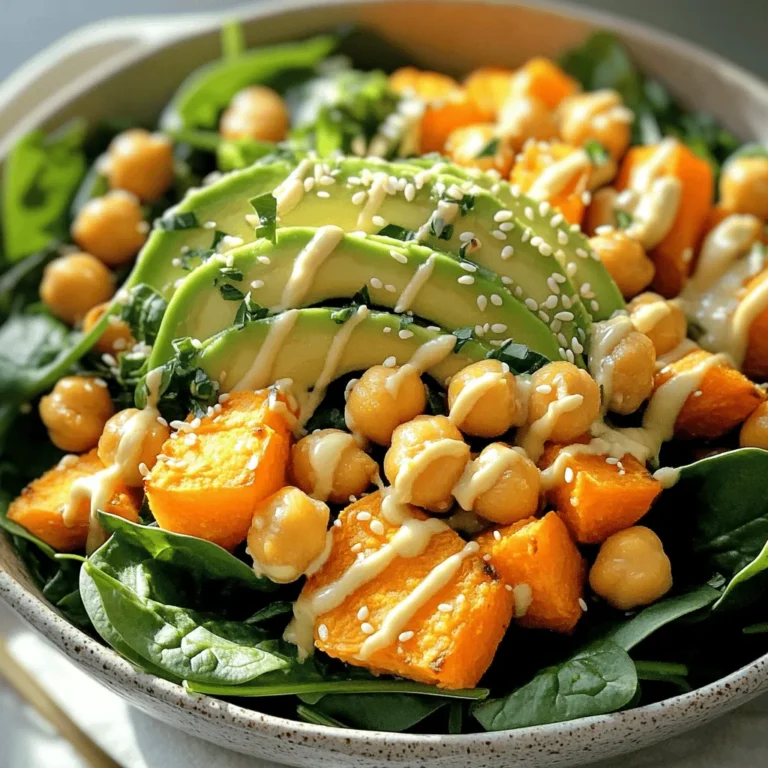
Sweet Potato Chickpea Buddha Bowl Nutritious Delight

- 1 lb sirloin steak, cut into 1-inch cubes - 4 tablespoons unsalted butter - 4 cloves garlic, minced - 2 teaspoons fresh rosemary, chopped - 2 teaspoons fresh thyme, chopped - 1 teaspoon olive oil - Salt and pepper to taste - Fresh parsley, for garnish If you can't find sirloin steak, you can use tenderloin or ribeye. They work well too. If you want less fat, try using flank steak. For butter, you can swap in ghee or margarine. If you lack fresh herbs, use dried ones. Use one-third the amount since dried herbs are stronger. You could also use garlic powder instead of fresh garlic if needed. You will need a large skillet to cook the steak bites. A good-quality knife and cutting board will help you cut the steak. Use paper towels to pat the steak dry. A spoon will help baste the steak with the butter. Finally, grab a serving dish to present the steak bites beautifully. First, take your sirloin steak and cut it into 1-inch cubes. I like to pat the steak dry with paper towels. This step helps the steak sear better. Next, season the steak cubes generously with salt and pepper. Make sure to cover all sides. This seasoning will boost the flavor. Now it’s time to heat the pan. In a large skillet, add 1 teaspoon of olive oil over medium-high heat. Wait until the oil is hot. It should shimmer a bit. Then, add the seasoned steak bites in a single layer. Avoid overcrowding the pan for best results. Sear the steak for 2-3 minutes on one side. You want it to form a nice crust. Flip the steak and sear the other side for another 2-3 minutes. Adjust the time if you want it cooked more or less. Once your steak is at the right doneness, lower the heat to medium. Add 4 tablespoons of butter, 4 minced garlic cloves, 2 teaspoons of chopped rosemary, and 2 teaspoons of chopped thyme to the skillet. As the butter melts, use a spoon to baste the steak bites with the tasty mixture. Do this for about 2 minutes. This step adds richness and flavor. Cook for another minute until the garlic turns fragrant and lightly golden. Remove the skillet from heat. Now, transfer the steak bites to a serving dish. Drizzle the garlic herb butter from the skillet on top. Finish by garnishing with fresh parsley for a pop of color. To get the best steak bites, use sirloin. This cut cooks well and has good flavor. Make sure to pat the steak cubes dry. This helps them sear nicely. Season the cubes with salt and pepper. This adds taste right from the start. Heat your skillet on medium-high. This is key for a great sear. Add the steak cubes in a single layer. Don't crowd the pan, or they won't brown well. Cook for 2-3 minutes per side for medium-rare. Adjust the time if you like your steak more well-done. For extra flavor, add garlic and herbs right after cooking. Baste the steak bites with the melted butter to enhance the taste. If you have leftovers, cool them down first. Place them in an airtight container. This keeps them fresh for longer. You can store them in the fridge for up to three days. For longer storage, freeze them in a freezer-safe bag. Be sure to remove as much air as possible. This prevents freezer burn and keeps the flavor intact. Serve the steak bites on a wooden board for a rustic look. You can also use a white platter for a clean presentation. Drizzle the garlic herb butter over the top for added flavor. Garnish with fresh parsley for color. Pair these bites with toothpicks for easy serving. They also go great with crusty bread to soak up the butter. Consider serving a fresh salad or roasted veggies on the side for a complete meal. {{image_2}} You can use many cuts of steak for this recipe. Sirloin is great, but try ribeye for more fat and flavor. Tenderloin gives a soft bite, while flank steak works well if cut thin. Each cut brings its own taste and texture. Feel free to change the herbs! Try adding oregano or basil for a different twist. You can also use dried herbs if you don’t have fresh ones. A pinch of red pepper flakes adds a nice kick. Customize the flavor to fit your taste. You can cook these steak bites in different ways. Grilling adds a smoky flavor, perfect for summer. You can also use an air fryer for a quicker option. Sous vide gives you great control over the doneness. Each method changes the texture and taste, so experiment! To keep your leftover steak bites fresh, first let them cool. Place the steak bites in an airtight container. This helps keep moisture in and prevents the bites from drying out. Store the container in the fridge. Your steak bites will stay good for about 3 to 4 days. When you’re ready to enjoy your leftovers, reheat the steak bites for the best taste. Use a skillet over medium heat. Add a small amount of butter or oil to the pan. This will help keep the meat juicy. Heat the steak bites for about 3 to 4 minutes, flipping them halfway through. You can also reheat them in the microwave, but be careful not to overcook. If you want to save your steak bites for later, freezing is a great option. Place the cooled steak bites in a freezer-safe bag. Remove as much air as you can before sealing to avoid freezer burn. You can freeze them for up to 3 months. To thaw, place them in the fridge overnight before reheating. This keeps them tasty and safe. Yes, you can use frozen steak. Thaw it first in the fridge overnight. This keeps the meat juicy. After thawing, pat it dry. This helps achieve a nice crust when you cook it. You can store garlic herb butter steak bites for about 3 days. Keep them in an airtight container. This preserves their flavor and texture. Make sure they cool down before storing. Great sides include roasted vegetables or a fresh salad. Mashed potatoes also work well. They soak up the flavorful butter. Garlic bread is another tasty choice. It adds crunch and flavor to your meal. In this blog post, I covered the key ingredients and tools needed for cooking garlic herb butter steak bites. I explained each step, from preparation to finishing touches. Tips included getting the perfect cook and how to store leftovers. You can try different cuts or cooking methods to suit your taste. Enjoying this dish is easy, and the variations keep it fun. Remember to store and reheat properly for the best results. Now, you’re ready to impress at your next meal!

Garlic Herb Butter Steak Bites Savory and Easy Treat

- 12 oz pasta (your choice: fettuccine, penne, or farfalle) - 2 large red bell peppers, roasted and peeled - 1 cup heavy cream - 1 tablespoon olive oil - 3 cloves garlic, minced - 1/2 teaspoon crushed red pepper flakes (adjust to taste) - 1/4 cup grated Parmesan cheese - Salt and pepper to taste - Fresh basil leaves for garnish - Optional: 1 cup baby spinach or arugula for added greens For this creamy roasted red pepper pasta, you can choose from several pasta types. Fettuccine, penne, or farfalle all work well. Each type gives a different texture and feel to the dish. The star of this recipe is the roasted red bell peppers. Their sweet and smoky flavor makes the sauce rich and tasty. To roast them, you will need two large peppers. This adds a vibrant color and delicious taste. Next, we use heavy cream, which brings a thick, smooth texture to the sauce. It helps bind all the flavors together. Olive oil adds a light taste and helps cook the garlic. Garlic is key for flavor. You will need three cloves, minced fine. For those who like a bit of heat, add crushed red pepper flakes. You can adjust this to fit your taste. We will also add Parmesan cheese. This cheese adds a nice salty flavor and creaminess to the dish. Lastly, salt and pepper will enhance all the flavors perfectly. If you want to add some greens, I suggest baby spinach or arugula. They mix well with the pasta and add a fresh touch. Don’t forget to garnish your dish with fresh basil leaves for a nice finish. This dish is easy to make and perfect for any night! {{ingredient_image_1}} First, preheat your oven to 450°F (230°C). Cut the red bell peppers in half and remove the seeds. Place the peppers cut-side down on a baking sheet. Roast them for 20 to 25 minutes until the skin is charred. After roasting, transfer the peppers to a bowl. Cover the bowl with plastic wrap. Let them steam for about 10 minutes. This step makes it easy to peel the skin. Removing the charred skin is key. It helps create a smooth sauce without any bitter flavors. While the peppers steam, bring a large pot of salted water to a boil. You can choose any pasta you like: fettuccine, penne, or farfalle. Cook the pasta according to the package directions. This usually takes about 8 to 12 minutes. Don’t forget to save about 1 cup of pasta water before draining the pasta. Once the peppers cool down, peel off the charred skin. Chop the peppers into smaller pieces. In a blender or food processor, combine the roasted peppers, heavy cream, minced garlic, and crushed red pepper flakes. Blend everything until it is smooth and creamy. This is where the magic happens. A smooth sauce makes the dish rich and delightful. In a large skillet, heat olive oil over medium heat. Pour the blended roasted red pepper sauce into the skillet. Warm the sauce for about 3 to 4 minutes. Stir in the grated Parmesan cheese. Add salt and pepper to taste. This enhances the flavors beautifully. Now, add the cooked pasta directly into the sauce. Toss everything together until well coated. If the sauce is too thick, add a bit of the reserved pasta water. This helps to reach your desired consistency. If you like greens, stir in baby spinach or arugula until they are just wilted. To serve, portion the pasta onto plates or bowls. Garnish with fresh basil leaves for a pop of color. You can also sprinkle some extra Parmesan on top if you wish. This dish not only looks great but tastes amazing too! To know when your peppers are perfectly roasted, look for a charred and blistered skin. After 20–25 minutes in the oven, they should be soft to the touch. The steam method helps too. Once roasted, cover them to let the steam loosen the skin. This makes peeling quick and easy. You can adjust the flavor and spice of your pasta dish easily. For more heat, add extra crushed red pepper flakes. Want a sweeter taste? Try a pinch of sugar or a splash of balsamic vinegar. You can also mix in fresh herbs like oregano or thyme for a fresh twist. If your sauce is too thick, add some reserved pasta water to thin it out. Start with a little, then mix well. For a thicker sauce, let it simmer for a few extra minutes. The starch in the pasta water helps create a creamy texture, making it stick to the pasta better. Pro Tips Choose the Right Pasta: Opt for pasta shapes that hold sauce well, like penne or farfalle, to ensure every bite is flavorful. Roast Peppers for Depth: The roasting process caramelizes the natural sugars in the peppers, enhancing the sauce's sweetness and complexity. Adjust the Spice: Feel free to modify the amount of crushed red pepper flakes based on your heat preference, starting with a small amount and adding more as needed. Add Fresh Greens: Stirring in baby spinach or arugula not only adds color but also boosts the nutritional value of the dish. {{image_2}} You can boost your creamy roasted red pepper pasta by adding protein. Here are some tasty options: - Chicken: Grilled or sautéed strips work well. Cook them first, then add them to the sauce. - Shrimp: Sauté shrimp in garlic and olive oil. Toss them in right before serving for a quick, fresh taste. - Sausage: Use Italian sausage for a hearty flavor. Cook it through before mixing it with the pasta. Want to add more greens? Here are some great veggie ideas: - Spinach: Use baby spinach for a mild flavor. Toss it in the sauce until it wilts. - Arugula: Add arugula for a peppery kick. Mix it in at the end for a fresh taste. - Zucchini: Sauté diced zucchini and add it for extra texture and nutrients. You can make this dish dairy-free with some easy swaps. Try these options: - Coconut Cream: Use coconut cream instead of heavy cream for a rich taste. - Nutritional Yeast: Swap Parmesan for nutritional yeast. It adds a cheesy flavor without dairy. - Cashew Cream: Blend soaked cashews with water for a creamy sauce base. It’s smooth and tasty! To store creamy roasted red pepper pasta, first let it cool. Place the pasta in an airtight container. Make sure to seal it well to keep air out. You can store it in the fridge for up to three days. If you want to keep it longer, consider freezing it. When reheating, use a skillet over low heat. Add a splash of water or cream to keep it moist. Stir often to heat evenly. You can also use the microwave; just cover the dish with a lid or microwave-safe wrap. Heat in short bursts, stopping to stir until warm. To freeze, place the cooled pasta in a freezer-safe container. Leave some space for expansion. Seal tightly to prevent freezer burn. It can last up to three months in the freezer. When ready to eat, thaw it overnight in the fridge. Reheat on the stove or microwave, adding cream or water as needed. You can swap the heavy cream with coconut cream or cashew cream. Use nutritional yeast in place of Parmesan cheese for a cheesy flavor. Olive oil will still work well for cooking. This keeps the dish creamy and rich without dairy. I love using fettuccine, penne, or farfalle. Each type holds the sauce well. Fettuccine gives a nice, smooth texture. Penne can trap sauce inside its tubes. Farfalle adds a fun shape to your plate. Yes, jarred roasted red peppers are a great shortcut. They save time and effort. Just make sure to drain them well. This avoids adding extra liquid to your sauce. This dish will last about three to four days in the fridge. Store it in an airtight container. Reheat gently to keep the cream from separating. Absolutely! You can roast the peppers and make the sauce ahead. Cook the pasta just before serving. This way, your pasta stays fresh and tasty. Mix everything just before you eat for the best flavor. You now have a great recipe for creamy roasted red pepper pasta. We covered the ingredients, step-by-step instructions, tips to perfect your dish, and even flavorful variations. Cooking this pasta is simple and fun. You can adjust flavors, add protein, or make it dairy-free. Remember to store your leftovers properly for later enjoyment. Enjoy making this meal and impressing those around you with your cooking skills! Making this dish should be a tasty adventure. Get ready to enjoy a delicious plate!

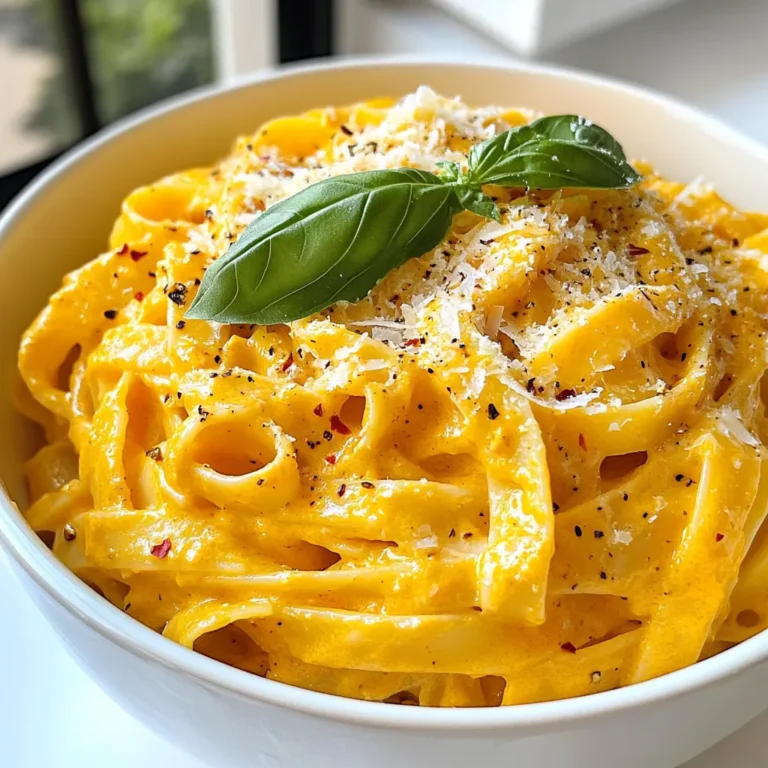
Creamy Roasted Red Pepper Pasta Easy and Flavorful Dish

To make Cheesy Taco Rice Skillet, gather these ingredients: - 1 cup long-grain white rice - 2 cups vegetable broth - 1 lb ground beef or turkey - 1 small onion, diced - 2 cloves garlic, minced - 1 packet taco seasoning - 1 can (14 oz) black beans, drained and rinsed - 1 cup corn kernels (fresh, frozen, or canned) - 1 cup diced tomatoes (fresh or canned) - 1 ½ cups shredded cheddar cheese - 1 tablespoon olive oil - Salt and pepper to taste - Fresh cilantro, chopped (for garnish) - Sour cream (for serving) - Avocado slices (for serving) You can easily swap some ingredients if needed: - Ground beef can change to ground turkey or chicken. - Use quinoa or brown rice instead of white rice for a healthier option. - For a vegan dish, replace meat with lentils or mushrooms. - Instead of vegetable broth, use water or chicken broth. - If you don’t have taco seasoning, mix chili powder, cumin, and paprika for a similar flavor. Garnishes can add color and flavor, so consider these options: - Fresh cilantro brings a bright taste that pairs well. - Sliced jalapeños add a spicy kick for those who like heat. - Chopped green onions can offer a fresh crunch. - A squeeze of lime juice can enhance the flavors nicely. - Serve with tortilla chips for extra texture. {{ingredient_image_1}} Start by boiling vegetable broth in a medium pot. This broth gives the rice a nice flavor. Once it boils, add 1 cup of long-grain white rice. Reduce the heat to low and cover the pot. Let it simmer for 18-20 minutes. The rice should be tender and all the liquid absorbed. After cooking, let it sit, covered, for 5 more minutes. Fluff the rice with a fork to make it light and airy. In a large skillet, heat 1 tablespoon of olive oil over medium heat. Add 1 small diced onion and 2 cloves of minced garlic. Sauté them for about 2-3 minutes until the onion turns translucent. This adds great flavor to your dish. Then, increase the heat to medium-high and add 1 pound of ground beef or turkey. Break the meat apart with a spatula and cook for about 5-7 minutes. Once browned, drain any excess fat from the skillet. Now it’s time to mix in the fun stuff! Stir in a packet of taco seasoning to the meat mixture. If it seems dry, add a splash of water to help it blend. Next, add 1 can of drained and rinsed black beans, 1 cup of corn, and 1 cup of diced tomatoes. Finally, fold in the cooked rice. Stir everything together and heat for 2-3 minutes until warm. Season with salt and pepper to taste. Reduce the heat to low and sprinkle 1.5 cups of shredded cheddar cheese over the top. Cover the skillet and let it sit for 2-3 minutes until the cheese melts. Your Cheesy Taco Rice Skillet is now ready to serve! To avoid overcooking rice, keep a close eye on the time. Use the right amount of broth for the rice. Bring the broth to a boil before adding the rice. Once it’s in, lower the heat and cover the pot. Let it simmer for 18-20 minutes. After that, remove it from heat and let it sit for 5 more minutes. Fluff it gently with a fork. This way, the rice stays tender and not mushy. Cheddar cheese works great for this dish, but you can explore other types too. Monterey Jack adds a creamy texture. Pepper Jack gives a nice kick with spices. For a rich flavor, try a mix of cheeses. Always shred cheese yourself for the best melt. Pre-shredded cheese often has fillers that can affect melting. To spice up your Cheesy Taco Rice Skillet, add jalapeños or diced green chilies. You can mix in some hot sauce while cooking the meat. Another option is to use spicy taco seasoning. If you love heat, add crushed red pepper flakes at the end. Adjust the spice level to fit your taste. Pro Tips Use Homemade Taco Seasoning: Making your own taco seasoning allows you to control the spices and salt levels, ensuring a fresher flavor. Customize Your Protein: Feel free to substitute the ground beef or turkey with ground chicken, or even a plant-based meat alternative for a healthier or vegetarian option. Make it a One-Pot Meal: To simplify cleanup, cook the rice directly in the skillet after browning the meat, using broth instead of water for added flavor. Garnish for Flavor: Fresh cilantro, lime juice, or sliced jalapeños can elevate the dish, adding brightness and a kick of flavor. {{image_2}} You can easily make the Cheesy Taco Rice Skillet vegetarian. Simply swap the ground meat for a plant-based protein. I love using lentils or crumbled tofu. They soak up all the taco seasoning flavors. This way, you keep the meal hearty and satisfying without meat. If you want a different protein, try chicken or pork. Ground chicken cooks well and stays tender. You can use ground pork for a richer taste. Both options go great with the taco seasoning. Just remember to cook them until they are fully done. Adding more veggies makes this dish even better. You can toss in bell peppers, zucchini, or spinach. These veggies add color and nutrients. They also give a fresh taste to the dish. Just chop them up and add them when you mix the other ingredients. This way, you get a tasty meal that is also good for you. To store leftovers, let the Cheesy Taco Rice Skillet cool down first. Use an airtight container to keep it fresh. This meal stays good in the fridge for about 3 to 4 days. Make sure to label the container with the date. This helps you remember when you made it. When you're ready to eat, you can reheat your leftovers easily. Place the dish in the microwave for about 2 to 3 minutes. Stir halfway through to ensure even heating. You can also reheat it on the stove over low heat. Just add a splash of water to keep it moist. If you want to freeze the Cheesy Taco Rice Skillet, make sure it’s completely cooled. Transfer it to a freezer-safe container. It will last for up to 3 months in the freezer. When you're ready to enjoy it again, thaw it overnight in the fridge. Reheat it as mentioned above. This way, you can enjoy a delicious meal anytime! Yes, you can make Cheesy Taco Rice Skillet ahead of time. Just prepare the dish as usual. Once it cools, store it in an airtight container. Keep it in the fridge for up to three days. When you're ready to eat, just reheat it on the stove or in the microwave. This makes it easy for busy days. Many sides go well with Cheesy Taco Rice Skillet. Here are some tasty options: - Tortilla chips: Crunchy and fun to dip. - Guacamole: Creamy and fresh, it adds a nice touch. - Garden salad: Crisp veggies balance the richness of the dish. - Mexican street corn: Sweet and savory, it's a great match. - Pico de gallo: Fresh and zesty, it adds brightness. These sides enhance your meal and bring more flavor. To make Cheesy Taco Rice Skillet gluten-free, use gluten-free taco seasoning. Ensure that all canned items, like beans and tomatoes, are gluten-free as well. Check the labels to be safe. This way, you can enjoy this dish without worrying about gluten. It’s just as tasty and satisfying! You learned how to make a tasty Cheesy Taco Rice Skillet. We covered the full list of ingredients, simple steps to cook, and tips to make it better. I shared ways to change up the recipe and how to store your leftovers. This dish is flexible and easy to enjoy anytime. Try it with new ingredients or spice levels. Remember, cooking should be fun and tasty! Enjoy your meal and share it with friends!

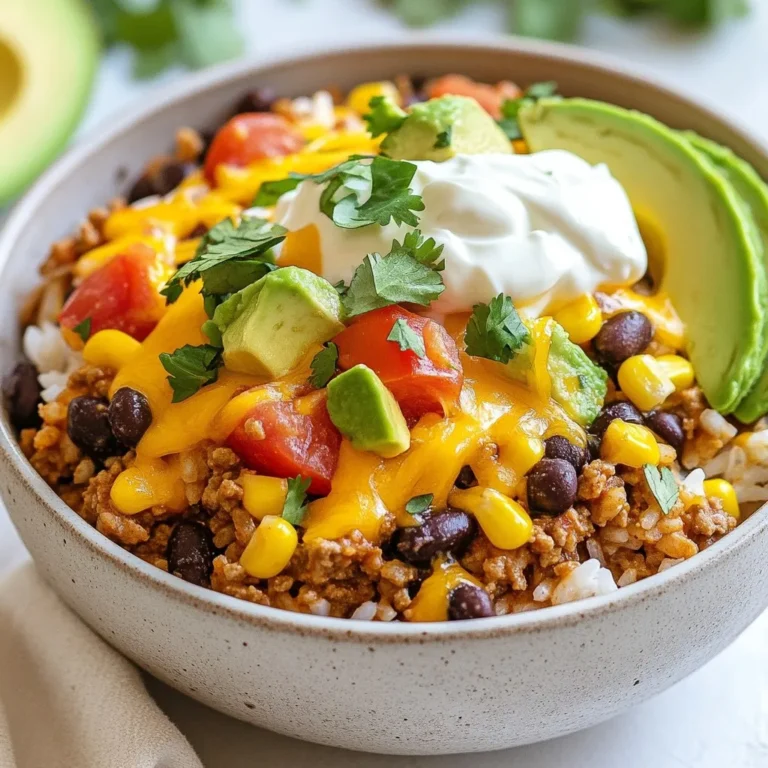
Cheesy Taco Rice Skillet Flavorful and Simple Meal

The key ingredients in Sweet Potato Apple Casserole create its rich flavor and texture. Here’s what you need: - 4 medium sweet potatoes, peeled and cubed - 2 large apples (such as Granny Smith), cored and diced - 1/2 cup maple syrup - 1/4 cup brown sugar - 1 teaspoon cinnamon - 1/2 teaspoon nutmeg - 1/4 teaspoon ginger - 1/4 cup unsalted butter, melted - 1 cup pecans, chopped - 1/3 cup oats - 1 pinch of salt Sweet potatoes bring a creamy texture and natural sweetness. I love using Granny Smith apples for their tartness, which balances the dish. Sweeteners like maple syrup and brown sugar add depth. The spices—cinnamon, nutmeg, and ginger—infuse warmth and flavor. Lastly, the pecans and oats form a crunchy topping. This blend of ingredients makes the casserole both tasty and inviting. Enjoy the process of gathering these ingredients; it sets the stage for a wonderful dish! First, preheat your oven to 375°F (190°C). This step is key for even cooking. Next, prepare the sweet potatoes. Peel and cube four medium sweet potatoes. Place them in a large pot. Cover the potatoes with salted water. Boil for about 15-20 minutes or until tender. You want them soft enough to mash. Drain the water and let them cool slightly. Now it’s time to mash the sweet potatoes. In a large mixing bowl, mash until smooth. Make sure there are no lumps. Then, combine the apple mixture. Dice two large Granny Smith apples. Stir these apples into the mashed sweet potatoes. Add 1/2 cup maple syrup, 1/4 cup brown sugar, 1 teaspoon cinnamon, 1/2 teaspoon nutmeg, 1/4 teaspoon ginger, and 1/4 cup melted butter. Mix until well combined. This blend gives the casserole its rich flavor. Let’s assemble the casserole now. Grease a 9x13 inch baking dish. Pour the sweet potato-apple mixture into the dish. Spread it evenly across the bottom. In a separate bowl, combine 1 cup chopped pecans, 1/3 cup oats, and a pinch of salt. Sprinkle this topping evenly over the sweet potato-apple layer. Bake in the preheated oven for 30-35 minutes. Check for doneness by looking for a golden brown topping. Once done, remove it from the oven. Allow it to cool slightly before serving. To make a great Sweet Potato Apple Casserole, start with tender sweet potatoes. Boil them until they are soft but not mushy. This step is key for a smooth texture. After mashing, mix in your diced apples. Granny Smith apples work best here. They add a nice tartness that balances the sweet flavors. Next, focus on the sweet and savory balance. Use maple syrup and brown sugar for sweetness. Add spices like cinnamon, nutmeg, and ginger for warmth. These flavors work well together and create a comforting dish. Garnishing can elevate your casserole. Consider adding a sprinkle of cinnamon on top before serving. A dollop of whipped cream or a scoop of vanilla ice cream makes it extra special. For pairing, serve the casserole with a simple green salad. This adds freshness to your meal. You can also enjoy it with roasted meats. The sweet notes complement savory dishes perfectly. {{image_2}} You can change some ingredients in this casserole to fit your taste. - Alternative fruits: Instead of apples, use pears for a sweeter flavor. You can also try peaches or cranberries for a tart twist. Each fruit adds its own unique taste and texture. - Different sweeteners: Maple syrup is great, but honey or agave syrup can work too. If you want less sugar, try using mashed bananas. They add sweetness and moisture. This casserole can fit many diets with a few easy changes. - Vegan options: To make it vegan, swap the butter for coconut oil or vegan butter. Use maple syrup or agave syrup for sweetness. - Gluten-free alternatives: Check if your oats are gluten-free. If not, use ground nuts or gluten-free breadcrumbs. This keeps the crunch without gluten. These swaps and adjustments keep the dish tasty and fun for everyone! To store leftovers, let the casserole cool first. Then, place it in an airtight container. This keeps it fresh. You can keep it in the fridge for up to five days. Make sure to cover it well to avoid drying out. The best container types are glass or plastic. Glass containers let you see the food inside. Plastic containers are light and easy to stack. Either option works well for storage. You can freeze the casserole for longer storage. First, let it cool completely. Then, wrap it tightly in plastic wrap. After that, place it in a freezer-safe container or bag. This prevents freezer burn and keeps the flavor. When you’re ready to eat, thaw it overnight in the fridge. To reheat, bake it in the oven at 350°F (175°C). Cover it with foil to keep it moist. Heat for about 25-30 minutes. Enjoy the warm, tasty casserole! To make Sweet Potato Apple Casserole, follow these key steps: 1. Preheat your oven to 375°F (190°C). 2. Boil four medium sweet potatoes, peeled and cubed, in salted water for 15-20 minutes. They should be tender. 3. Drain the sweet potatoes and let them cool a bit. 4. Mash the sweet potatoes until they are smooth in a large bowl. 5. Add two large diced apples, ½ cup maple syrup, ¼ cup brown sugar, 1 teaspoon cinnamon, ½ teaspoon nutmeg, ¼ teaspoon ginger, and ¼ cup melted unsalted butter. Mix well. 6. Grease a 9x13 inch baking dish and pour the mixture in, spreading it evenly. 7. In another bowl, mix 1 cup chopped pecans, ⅓ cup oats, and a pinch of salt. Sprinkle this on top of the casserole. 8. Bake for 30-35 minutes, until the topping is golden brown. Yes, you can use different types of apples. Granny Smith apples work well for their tartness. Other good choices include: - Honeycrisp: Sweet and crisp, great for texture. - Fuji: Sweet and juicy, adds nice flavor. - Braeburn: Balanced sweetness, perfect for baking. Feel free to mix varieties for a unique taste! You can store sweet potato casserole in the fridge for about 3-5 days. Use an airtight container to keep it fresh. If you want to keep it longer, you can freeze it. It will last for up to 3 months in the freezer. Just make sure to thaw it in the fridge before reheating. In this post, I shared how to make a delicious Sweet Potato Apple Casserole. You learned about key ingredients like sweet potatoes, spices, and toppings. I guided you through the preparation, mixing, and baking steps. I also offered tips for perfecting your casserole and suggested variations to suit your needs. Remember, this dish is easy to make and versatile. You can try new flavors and store it for later. Enjoy your cooking adventures, and share this recipe with others!

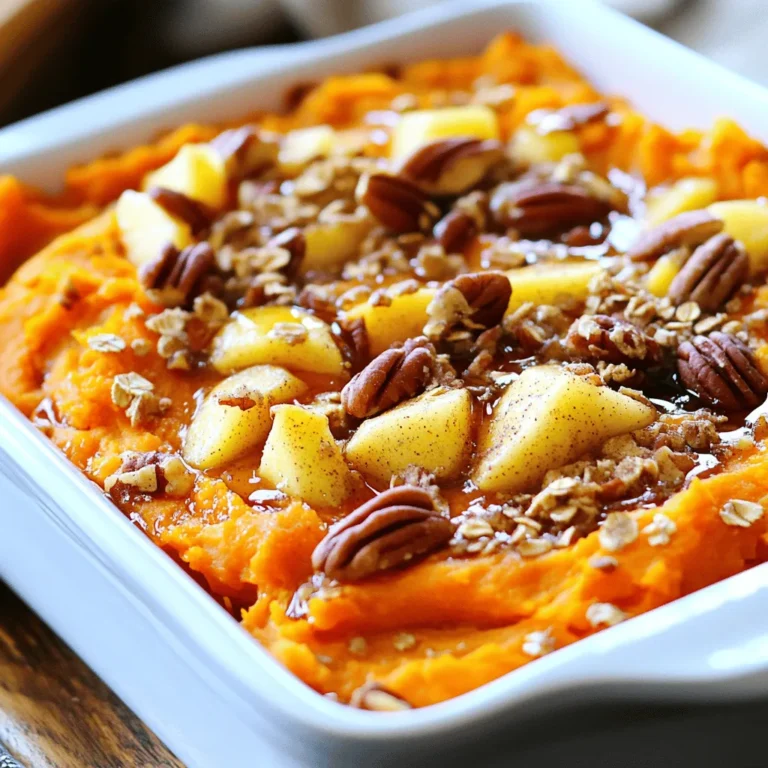
Sweet Potato Apple Casserole Flavorful and Simple Recipe

To make this dish, you need: - 4 salmon fillets (skin on, about 6 oz each) - 2 cups fresh spinach, chopped - 1 cup cream cheese, softened - 3 cloves garlic, minced - 1/2 cup grated Parmesan cheese - 1 tablespoon lemon juice - 1 tablespoon olive oil - Salt and pepper to taste These ingredients come together to create a creamy, savory filling that pairs perfectly with the salmon. The spinach brings color and nutrients, while the cream cheese and Parmesan add richness. You can enhance the dish with: - 1/2 teaspoon red pepper flakes (for heat) - Fresh parsley, chopped (for garnish) Red pepper flakes can give your dish a nice kick. The parsley adds brightness and a pop of color. If you have dietary needs, you can try these options: - Use dairy-free cream cheese for a lactose-free version. - Swap salmon for chicken or a firm fish like cod. - Replace Parmesan with nutritional yeast for a vegan option. These substitutions keep the dish tasty while fitting your diet. Remember, cooking should be fun and flexible! First, start by prepping your salmon fillets. You need four fillets, each about six ounces and with skin on. Take a sharp knife and slice into the thickest part of each fillet. Be careful! You want to create a pocket, but do not cut all the way through. This pocket will hold our tasty spinach filling. Now, let’s make the filling. Heat a skillet over medium heat and add one tablespoon of olive oil. Once the oil is hot, add three minced garlic cloves. Sauté for about one minute until the garlic smells great. Next, add two cups of chopped fresh spinach. Cook until it wilts, which takes about two to three minutes. After that, let the spinach cool a bit. In a mixing bowl, combine one cup of softened cream cheese, the sautéed spinach, half a cup of grated Parmesan cheese, one tablespoon of lemon juice, salt, pepper, and red pepper flakes if you want some heat. Mix everything well until it is smooth and creamy. You are ready to bake! Preheat your oven to 375°F (190°C). Line a baking sheet with parchment paper or lightly grease it. Stuff each salmon pocket with your creamy spinach mix. Place the stuffed salmon on the baking sheet and sprinkle with a bit of salt and pepper on top. Bake for about 20 to 25 minutes. Your salmon should be fully cooked and flaky when done. If you like a golden top, switch to broil for the last two to three minutes. After baking, let the salmon rest for a few minutes. This helps the flavors settle. Garnish with fresh parsley for a nice touch. Enjoy your delicious dish! To achieve perfectly cooked salmon, start by choosing fresh fillets. Look for a bright pink color. The skin should look shiny and moist. When cooking, keep the skin on. It helps retain moisture and adds flavor. Preheat your oven to 375°F (190°C) for even cooking. Bake for 20-25 minutes. The fish should flake easily with a fork. For a golden top, use the broil setting for the last few minutes. When stuffing salmon, avoid overfilling the pockets. This can lead to leaks during cooking. Cut the pocket carefully; do not slice all the way through. Make sure the filling is not too cold. If it is, it can cool the fish and lead to uneven cooking. Season the outside of the salmon lightly. This enhances the flavor without overpowering the stuffing. To serve, place the salmon on a bed of fluffy rice or steamed vegetables. This adds color and makes for a complete meal. Drizzle with a little olive oil for extra richness. Sprinkle fresh parsley on top for a pop of color. You can also add a lemon wedge on the side. This gives a fresh touch and a burst of flavor when squeezed. {{image_2}} You can use other fish if you want to change things up. Try trout, tilapia, or even cod. Each fish has its own taste and texture. For instance, trout is tender and rich, while cod is mild and flaky. When you stuff these fish, follow the same steps as with salmon. Just keep an eye on cooking times, as they may vary slightly. Feel free to get creative with your stuffing! Instead of spinach, try using kale or arugula. You can also add sun-dried tomatoes or artichoke hearts for extra flavor. Mix in some feta cheese or goat cheese for a tangy twist. Each filling changes the dish and gives you many options to explore. Baking is easy and keeps the fish moist. If you want a smoky flavor, try grilling the stuffed fish instead. Make sure to use a grill basket to hold everything together. Cooking on the grill gives you nice char marks and a crispy texture. Both methods work well, so choose based on your taste or mood. To store leftovers, place the salmon in an airtight container. This keeps it fresh. Make sure to cool it down first. You can keep it in the fridge for up to three days. If you want to enjoy it later, consider freezing. When you reheat salmon, do it gently. Use the oven or a microwave. If using the oven, set it to 300°F (150°C) and cover the salmon with foil. This helps keep it moist. Heat for about 10-15 minutes. If using a microwave, use medium power. Heat for short bursts, checking often to avoid overcooking. If you freeze the salmon, wrap each piece tightly in plastic wrap. Then put it in a freezer bag. This helps prevent freezer burn. You can freeze the salmon for up to three months. When ready to eat, thaw it overnight in the fridge. This keeps the texture nice. You can tell when salmon is done by looking at its color and texture. The fish should turn from bright pink to a pale pink. Use a fork to check. If it flakes easily, it is done. The internal temperature should reach 145°F (63°C). To be sure, use a meat thermometer for accuracy. This way, you ensure a perfect salmon dish every time. Yes, you can prepare the filling ahead of time. Make the creamy garlic spinach mixture and store it in the fridge for a day. You can also stuff the salmon fillets in advance. Just wrap them tightly and keep them in the fridge. Bake the salmon when you're ready to serve. This saves time and helps with meal planning. Pair your stuffed salmon with tasty sides like: - Steamed broccoli - Roasted asparagus - Garlic mashed potatoes - Lemon rice - Mixed green salad These sides add color and nutrition to your meal. They also help balance the rich flavors of the salmon. Enjoy experimenting with different combinations! You’ve learned how to make Creamy Garlic Spinach Stuffed Salmon, from ingredients to storage. Use fresh ingredients for the best taste. Remember to avoid common mistakes while cooking. You can also try different fish and fillings for fun twists. With these tips, you can impress anyone with your dish. Enjoy your cooking adventure!

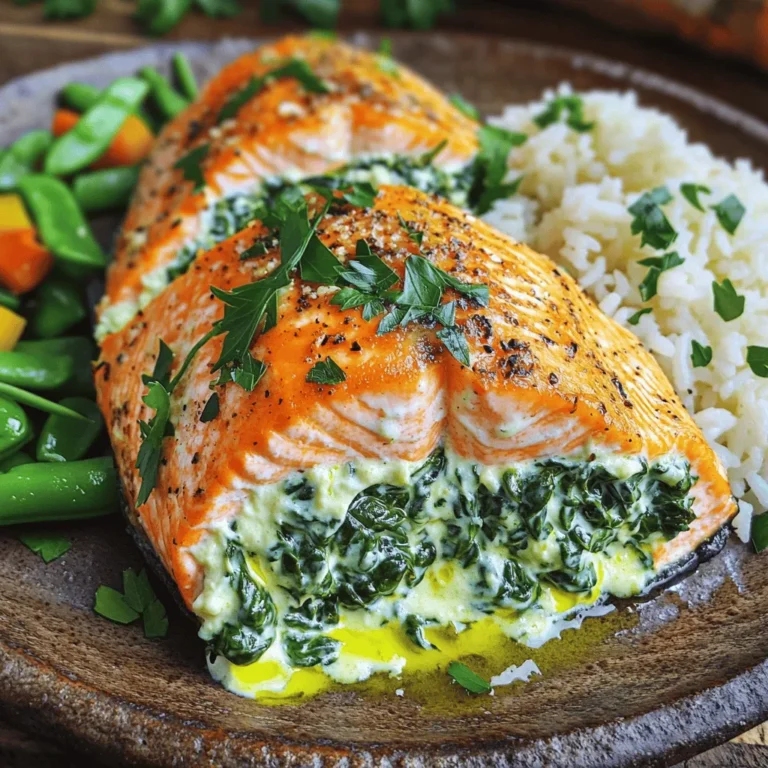
Creamy Garlic Spinach Stuffed Salmon Delightful Dish

PREV 1 … 31 32 33 … 58 NEXT
quick dish kitchen

explore

DessertsDinnerAppetizersDrinks

Our Policies

  • Cookie Policy
  • Copyright Policy
  • Disclaimer
  • GDPR Policy
  • Terms Of Use
Back to Top
  • About
  • Contact Us
  • Privacy Policy
© 2025 quick dish kitchen