FREE DINNER EBOOK! Get your copy!
  • Cookie Policy
  • GDPR Policy
  • Disclaimer
  • Terms Of Use
  • Visit my other site: Fun Cookie Recipes
quick dish kitchen
  • Home
  • Dinner
  • Desserts
  • Drinks
  • Appetizers
  • Contact
  • About
  • Privacy Policy
  • Home
  • Dinner
  • Desserts
  • Drinks
  • Appetizers
  • Contact
  • About
  • Privacy Policy
  • Cookie Policy
  • GDPR Policy
  • Disclaimer
  • Terms Of Use
Visit my other site: Fun Cookie Recipes

HOME / CATEGORIES /

Latest

Here’s what you need to make delicious edamame hummus: - 1 cup shelled edamame (fresh or frozen) - 1/4 cup tahini - 2 tablespoons olive oil - 2 cloves garlic, minced - Juice of 1 lemon - 1 teaspoon sesame oil - Salt and pepper to taste - Water, as needed for desired consistency - Optional garnishes: Red chili flakes, Fresh herbs (such as cilantro or parsley) Each ingredient plays a key role. The edamame gives a bright green color and a nutty flavor. Tahini adds creaminess and depth. Olive oil brings richness, while garlic offers a punch. Lemon juice adds brightness and balances the flavors. Sesame oil gives a nice finish. You can adjust salt and pepper to your taste. Water helps you control how smooth you want the hummus. For garnishes, red chili flakes add spice and color. Fresh herbs brighten up the dish and add freshness. With these simple ingredients, you can make a healthy snack that tastes great and looks even better! {{ingredient_image_1}} First, let's cook the edamame. If you're using frozen edamame, bring a pot of salted water to a boil. Add the edamame and cook for about 5 to 7 minutes. They should be tender but not mushy. Drain the edamame and let them cool slightly. If you prefer steaming, place the edamame in a steamer basket over boiling water. Steam for the same time, about 5 to 7 minutes. This keeps the bright green color and flavor intact. Always check for seasoning. A pinch of salt in the water helps enhance the flavor. Now, it's time to blend. In a food processor, add the cooked edamame, tahini, olive oil, minced garlic, lemon juice, and sesame oil. Pulse the mixture until it starts to break down. You may need to scrape the sides of the bowl to mix well. To achieve the right creamy texture, slowly add water. Start with one tablespoon at a time. Blend until you reach your desired consistency. Not too thick and not too runny. Once smooth, taste the hummus. Adjust the seasoning with salt and pepper. If you want more zing, add a bit more lemon juice. Blend again to mix everything evenly. For serving, transfer the hummus to a bowl. Drizzle a bit of olive oil on top. Sprinkle red chili flakes and fresh herbs for a pop of color. Try serving it with sliced veggies like cucumbers and carrots, or warm pita bread. A colorful platter makes it even more inviting! When making edamame hummus, the first step is choosing the right edamame. You can pick between fresh or frozen edamame. Fresh edamame has a nice, sweet taste, while frozen edamame is easy to find and quick to cook. I often use frozen edamame since it’s convenient and still tasty. You can buy quality edamame at local grocery stores or Asian markets. Look for brands that offer organic edamame. They usually have better flavor and nutrition. Next, let's talk about texture. A smooth, creamy hummus makes for a great snack. If your hummus is too thick, you can adjust the consistency easily. Just add water, one tablespoon at a time, while blending. This will help you reach the perfect creaminess. If you want a creamier hummus, try adding a bit more tahini or olive oil. These ingredients add richness and depth to the flavor. Now, let’s enhance the flavor! There are many optional ingredients to try. You can add red chili flakes for a spicy kick. Fresh herbs like cilantro or parsley also add brightness and color. For seasoning, I love using garlic and lemon juice, but you can explore more. Try adding smoked paprika for a subtle warmth or cumin for a unique taste. Just remember to taste as you go and adjust to your liking. Pro Tips Perfectly Cooked Edamame: Make sure to cook the edamame just until tender. Overcooking can result in a mushy texture. Aim for a vibrant green color. Adjusting Flavor: Don’t hesitate to tweak the lemon juice and garlic amounts according to your taste. A splash more lemon can brighten the flavor. Storing Leftovers: Store any leftover hummus in an airtight container in the refrigerator. It can last up to a week and can be enjoyed cold or at room temperature. Garnish for Presentation: For a beautiful finish, consider garnishing with toasted sesame seeds or a drizzle of balsamic glaze along with the olive oil. {{image_2}} To add some heat, try red chili flakes. You can mix in jalapeños for a fresh kick. If you want a different flavor, chipotle peppers lend a smoky taste. Start with a little, then adjust to your spice level. Mix in fresh herbs like basil or dill for a fresh twist. Cilantro offers a bright flavor, while parsley adds a mild note. Each herb gives a unique taste that pairs well with veggies and pita. You can also use dried herbs if fresh ones are not available. You can mix edamame with chickpeas or black beans. This gives a creamy texture and boosts protein. Each bean has its own flavor, making your hummus even more exciting. Chickpeas add earthiness, while black beans bring a slight sweetness. Combining beans also boosts your nutrition, giving you more fiber and vitamins. To keep your edamame hummus fresh, store it in an airtight container. This helps lock in the flavor and moisture. You can keep it in the fridge for up to five days. If you have leftovers, use them within this time frame for the best taste. Freezing hummus is a great way to save it for later. Use an airtight container or freezer bag. Make sure to leave some space for expansion. Edamame hummus can last up to three months in the freezer. When you want to eat it, thaw it in the fridge overnight. This slow thaw helps keep the texture nice. Check your hummus for signs of spoilage before eating. Look for an off smell or any mold. If it tastes sour, it's best to throw it out. To avoid spoilage, always use clean utensils when serving. This keeps bacteria from spoiling your tasty dip. Edamame hummus uses edamame instead of chickpeas. Edamame are young green soybeans. They give a fresh taste and bright color. Traditional hummus uses cooked chickpeas, which have a different flavor. Edamame hummus is creamy and rich. It still has the base of tahini and olive oil. You can enjoy it as a healthy snack or dip. To make edamame hummus vegan, check all the ingredients. The main ingredients are already vegan. Use tahini, olive oil, garlic, and lemon juice. These are plant-based. Just make sure your tahini has no added dairy. If you use optional garnishes like herbs or chili flakes, they are also vegan. This dish is great for everyone! You can serve edamame hummus with many tasty items. Here are some popular pairings: - Sliced cucumbers - Carrot sticks - Bell pepper strips - Warm pita bread These options are healthy and make great dips. You can also add crackers or breadsticks for crunch. A colorful platter makes it look great! In this blog post, we explored how to make edamame hummus. You learned about the key ingredients and the step-by-step process. We covered tips for choosing quality edamame and ways to enhance flavor. You also discovered various hummus variations and learned how to store your hummus properly. Edamame hummus is a delicious and nutritious snack. It’s easy to make and perfect for sharing. Enjoy experimenting with flavors to make it your own!

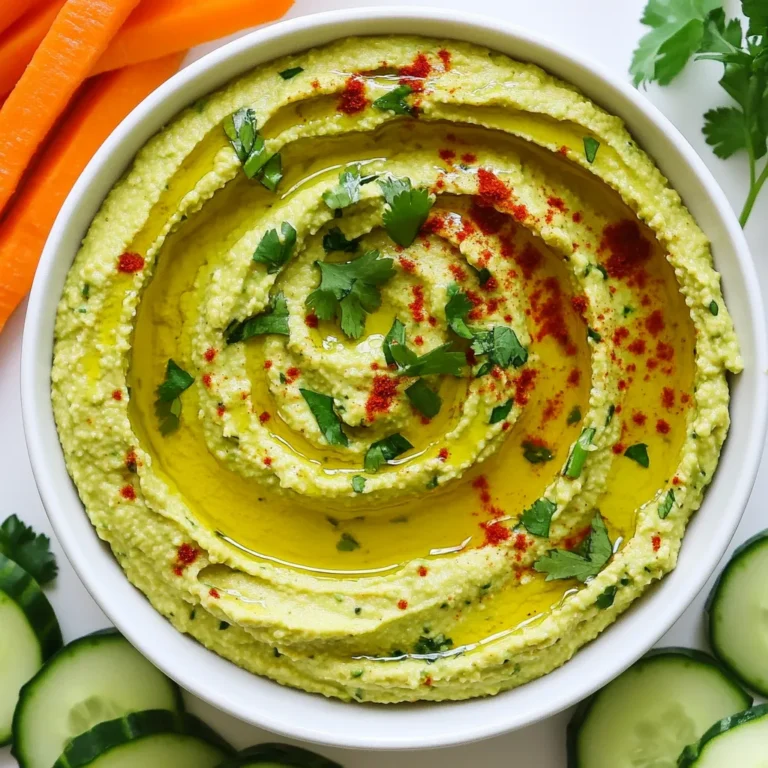
Edamame Hummus Easy Recipe for Healthy Snacking

Cheesy taco stuffed zucchini is a fun dish. This meal is tasty and easy to make. You start with fresh zucchinis, then stuff them with a cheesy taco mix. This dish is perfect for a family dinner or a gathering with friends. - 4 medium zucchinis - 1 lb ground turkey or beef - 1 small onion, diced - 2 cloves garlic, minced - 1 tsp chili powder - 1 tsp cumin - 1/2 tsp smoked paprika - 1 cup corn kernels (fresh or frozen) - 1 cup black beans, rinsed and drained - 1 cup diced tomatoes (canned or fresh) - Salt and pepper to taste - 1 cup shredded cheddar cheese - 1/4 cup fresh cilantro, chopped (for garnish) - Sour cream (optional, for serving) You can add a few fun garnishes to enhance your dish. Fresh cilantro adds a nice touch. A dollop of sour cream gives creaminess and cools the spices. You can also sprinkle some extra cheese on top for added flavor. Enjoy your cheesy taco stuffed zucchini with these tasty extras! First, gather all your ingredients. You will need 4 medium zucchinis, 1 pound of ground turkey or beef, and a small diced onion. Don’t forget the garlic, chili powder, cumin, and smoked paprika. You also need 1 cup of corn, 1 cup of black beans, and 1 cup of diced tomatoes. Finally, have salt, pepper, and 1 cup of shredded cheddar cheese ready. Preheat your oven to 375°F (190°C). Now, cut the zucchinis in half lengthwise. Use a spoon to scoop out the insides. Make sure to keep the insides for later. You want to create little boats for your filling. Set the hollowed zucchinis aside on a baking sheet. In a large skillet, heat some oil over medium heat. Add the ground turkey or beef and cook until it turns brown. If there’s a lot of fat, drain it out. Next, toss in the diced onion and minced garlic. Stir them until the onion becomes soft and clear. Now, add the chili powder, cumin, smoked paprika, and the reserved zucchini insides. Cook this mixture for about 2-3 minutes. This lets all the flavors blend together. Then, stir in the corn, black beans, and diced tomatoes. Season with salt and pepper to taste. Let everything cook for an additional 5 minutes, stirring occasionally. Once done, take the skillet off the heat. Mix in half of the shredded cheddar cheese until it melts into the warm filling. Spoon the cheesy taco mixture into the hollowed zucchini halves. Pack it in well so each boat is full. Then, sprinkle the remaining shredded cheddar cheese on top of each stuffed zucchini. Place the baking sheet in the oven and bake for 25-30 minutes. You want the zucchinis to be tender and the cheese to bubble and turn golden. When they are ready, take them out of the oven. Allow them to cool for a few minutes. Garnish with chopped cilantro before serving. Enjoy your cheesy taco stuffed zucchinis! When choosing zucchini, look for ones that are firm. They should feel heavy for their size. Check for a bright color and smooth skin. Avoid zucchinis with soft spots or blemishes. Fresh zucchini has a mild smell. Store them in a cool, dry place. For best taste, use them within a week. Cheddar cheese works great for this recipe, but you can try others too. Monterey Jack melts well and adds creaminess. Pepper Jack gives a nice kick with its spices. For a twist, use crumbled feta for a tangy flavor. Mix different cheeses for a unique blend! You can easily change the spice levels in this dish. If you like it mild, use less chili powder. For more heat, add diced jalapeños or cayenne pepper. Taste the filling as you cook to find your perfect balance. You can always serve hot sauce on the side for extra spice! {{image_2}} You can make a tasty vegetarian version of cheesy taco stuffed zucchini. Just skip the meat. Use extra black beans, lentils, or quinoa instead. They add protein and flavor. Mix in more veggies like bell peppers or mushrooms for added texture. You can still use the same spices like chili powder and cumin. Top it with cheese or a dairy-free option for a creamy finish. Switching up proteins makes this dish fun and new. You can use chicken, pork, or even tempeh. Ground chicken is a leaner choice. If you like beef, try ground beef or even a mix. You can even use shredded rotisserie chicken for a quick option. Just make sure to cook any raw meat fully before mixing it with the other ingredients. Serve your cheesy taco stuffed zucchini with tasty sides. A fresh salad pairs well for a light touch. You can also serve it with rice or quinoa for a filling meal. Cornbread or tortilla chips add a nice crunch. Add a side of salsa or guacamole for extra flavor. Don't forget a dollop of sour cream on top for creaminess! To keep your cheesy taco stuffed zucchini fresh, place it in an airtight container. Make sure it cools to room temperature first. Store it in the fridge for up to three days. If you have a lot left, you can separate the zucchini from the filling. This keeps the zucchini from getting too soggy. When you’re ready to enjoy your leftovers, preheat your oven to 350°F (175°C). Place the stuffed zucchini on a baking sheet. Cover it with foil to prevent it from drying out. Bake for about 15-20 minutes, or until heated through. You can also use a microwave. Just heat for 1-2 minutes on a microwave-safe plate. Check to see if it’s warm enough. You can freeze cheesy taco stuffed zucchini too! Wrap each piece tightly in plastic wrap or foil. Place them in a freezer bag for extra protection. Label the bag with the date. You can freeze them for up to three months. When you are ready to eat, thaw in the fridge overnight. Then, reheat as described above. Yes, you can use other veggies. Bell peppers, eggplant, or squash work well. Each veggie brings its own taste. For instance, bell peppers add sweetness. Eggplant gives a rich texture. Choose what you like best! You can swap ground turkey for ground beef or chicken. You can also use plant-based meat for a veggie option. Each choice has a different flavor and texture. Choose what fits your diet and taste. To add heat, try adding diced jalapeños or hot sauce. You can also increase the chili powder and cumin. For a smoky flavor, add chipotle peppers in adobo sauce. Adjust to your spice level. Enjoy your tasty creation! This blog post covers a tasty zucchini dish. We looked at the ingredients needed, from basics to garnishes. I shared step-by-step instructions to make cooking easier. Then, we explored tips for selecting fresh zucchini and the best cheese options. We also discussed fun variations and how to store leftovers. In summary, this dish is versatile and easy to prepare. I encourage you to try new flavors and make it your own!

Cheesy Taco Stuffed Zucchini Delightful and Easy Meal

- 1 cup red lentils, rinsed - 1 can (400ml) coconut milk - 1 medium onion, finely chopped - 3 cloves garlic, minced - 1 tablespoon ginger, grated The main ingredients make this dish rich and tasty. Red lentils cook quickly and add great texture. Coconut milk brings creaminess and a hint of sweetness. Onion, garlic, and ginger build a strong base of flavor. - 1 tablespoon curry powder - 1 teaspoon turmeric - 1 teaspoon cumin - Salt and pepper to taste Spices transform a simple dish into something special. Curry powder adds warmth and depth. Turmeric gives a lovely color and a mild flavor. Cumin adds an earthy note. Always taste and adjust salt and pepper for balance. - 1 cup vegetable broth - 1 cup diced tomatoes (fresh or canned) - Fresh cilantro, chopped (for garnish) - Lime wedges (for serving) These extra ingredients complete the dish. Vegetable broth adds richness to the curry. Diced tomatoes contribute acidity and freshness. Cilantro adds brightness when sprinkled on top. Lime wedges serve as a zesty finish. Enjoy the layers of flavor! 1. Sautéing onion, garlic, and ginger Start by heating olive oil in a large saucepan over medium heat. Add the finely chopped onion. Cook it for about five minutes until it is soft and clear. Next, add minced garlic and grated ginger. Stir and cook for one to two minutes. This step gives a great flavor base. 2. Toasting the spices Now, it’s time to add the curry powder, turmeric, and cumin. Stir the spices in the pan for about one minute. This toasting brings out their rich flavors. You will smell the spices becoming fragrant, which means you are on the right track! 1. Adding diced tomatoes Pour in the diced tomatoes. You can use fresh or canned tomatoes. Cook this mixture for three to four minutes. The tomatoes should start to break down, mixing well with the spices. 2. Simmering with vegetable broth Next, add the rinsed red lentils and vegetable broth. Stir everything together and bring it to a simmer. Once it starts bubbling, reduce the heat to low. Cover the pot and let it cook for about 15 minutes. The lentils will become tender during this time. 1. Stirring in coconut milk After the lentils are ready, stir in the coconut milk. This will make your curry creamy and rich. Let it simmer for another five minutes to blend the flavors nicely. 2. Seasoning and letting it sit Finally, season with salt and pepper to taste. Remove the pot from heat and let it sit for a few minutes. This resting time helps the flavors meld together, making each bite even better. - Ensuring perfectly cooked lentils: Rinse your lentils well before cooking. This helps remove dust and impurities. Cook them on low heat for about 15 minutes. Check them for tenderness. They should be soft but not mushy. - Adjusting the spice level: If you like it mild, start with less curry powder. You can always add more later. For heat, add a pinch of cayenne or red pepper flakes. Taste as you go to find your perfect balance. - Garnishing with cilantro and lime: After serving your curry, sprinkle fresh cilantro on top. Add lime wedges on the side. The bright flavors will lift your dish. - Accompaniments like basmati rice or naan: Serve your curry with fluffy basmati rice. Naan is also great for scooping up the curry. Both pair well with the creamy sauce. - Bowl presentation tips: Use deep bowls for serving. This keeps the curry warm and makes it easy to eat. Layer rice on the bottom, then add the curry on top. - Adding vibrant colors: Add diced tomatoes or greens for color. A sprinkle of cilantro adds a fresh look. These touches make your dish appear more appetizing and fun. {{image_2}} You can switch up the lentils or beans you use. If you want to try a different taste, use green or brown lentils. They add a nice texture, too. You can also use canned chickpeas for a protein boost. For the coconut milk, you can choose coconut cream if you want a richer flavor. If you need a lighter option, vegetable broth works well too. It still keeps the dish flavorful without the creaminess. Want to make this dish even better? Add more veggies! Spinach and bell peppers work great. They add color and nutrients, making it even more comforting. You can toss them in when you add the coconut milk. Don't forget about spices! You can add a pinch of cayenne for heat or some garam masala for a deeper flavor. Each spice brings a new twist to the curry. This recipe is already vegan and gluten-free. It fits many diets! If you want a low-carb option, try using cauliflower instead of lentils. It lowers the carbs and adds a nice crunch. Just steam the cauliflower until soft and mix it in with the curry. Feel free to make it your own! Everyone loves a dish that fits their taste and needs. To keep your creamy coconut lentil curry fresh, store it in an airtight container. Place it in the fridge if you plan to eat it within a few days. It will stay good for about 3 to 5 days this way. If you want to save some for longer, freezing is a great option. Make sure to cool the curry first. Then, divide it into smaller portions. Use freezer-safe bags or containers. This method allows you to enjoy it for up to 3 months. Just remember to label the bags with the date. When you're ready to enjoy your curry again, there are a few good ways to reheat it. You can use a microwave or a stovetop. If you choose the microwave, heat it in short bursts. Stir it often to ensure even warming. About 2 to 3 minutes should do the trick. For stovetop reheating, pour the curry into a saucepan. Heat it over low to medium heat. Stir it frequently to avoid sticking. It should take about 5 to 10 minutes to warm through. Add a splash of water or coconut milk if it seems too thick. Enjoy your creamy coconut lentil curry just as delicious as when you first made it! To make creamy coconut lentil curry, start by heating olive oil in a large pan. Add a finely chopped onion and cook until it softens. Next, stir in minced garlic and grated ginger. Cook these for a minute. Then, add curry powder, turmeric, and cumin. Toast these spices for about one minute. Pour in diced tomatoes and let them cook until they break down. After that, add rinsed red lentils and vegetable broth. Bring this mix to a simmer. Once it simmers, lower the heat, cover, and cook for about 15 minutes. After the lentils are tender, stir in coconut milk and let it simmer for five more minutes. Season with salt and pepper, then serve. Yes, you can use different types of lentils. Each type changes the cooking time and texture. For example, green or brown lentils take longer to cook and stay firmer. Red lentils cook faster and become soft, which thickens the curry. Adjust the liquid and cooking time based on the lentils you choose. Creamy coconut lentil curry pairs well with several side dishes. Here are a few options: - Steamed basmati rice - Naan bread - Quinoa For beverages, try serving it with: - A light white wine - Coconut water - Sparkling water with lime These options enhance the meal and make it more enjoyable. Creamy coconut lentil curry combines simple ingredients for a rich dish. You start with red lentils and coconut milk, adding spice with curry powder and cumin. Sautéing onion, garlic, and ginger builds a flavorful base. You can adjust spices for your taste and pair it with rice or naan for a full meal. In conclusion, this dish is easy to make and flexible. Try different ingredients or spices to make it your own. Enjoy the wholesome flavors and share it with others!

Creamy Coconut Lentil Curry Simply Easy and Comforting

- Key Ingredients for the Dip - 1 cup all-purpose flour - 1/2 cup unsalted butter, softened - 3/4 cup brown sugar, packed - 1/4 cup granulated sugar - 1 teaspoon vanilla extract - 1/2 teaspoon salt - 1 cup cream cheese, softened - 1/2 cup powdered sugar - 1 cup mini chocolate chips These ingredients create a creamy and sweet dip. Each one plays a key role. The flour gives it structure, while the butter and cream cheese add creaminess. The sugars bring sweetness, and the chocolate chips add that classic cookie taste. - Optional Dipping Accompaniments - Graham crackers - Pretzels - Apple slices Dipping options add fun flavors and textures. I love how the crunch of pretzels balances the dip's creaminess. Apples provide a fresh bite, making the dip feel lighter. You can mix and match based on your taste. Enjoy! {{ingredient_image_1}} How to Heat Flour Safely First, take 1 cup of all-purpose flour. Place it in a microwave-safe bowl. Heat the flour in the microwave. Do this in 30-second intervals. Check the temperature until it reaches 160°F (70°C). This step kills any harmful bacteria. Let the flour cool slightly before using it. Mixing Techniques for Creamy Texture Use a large mixing bowl for the next steps. Take 1/2 cup of softened unsalted butter. Add it to the bowl with 3/4 cup of brown sugar and 1/4 cup of granulated sugar. Beat these together with an electric mixer. Mix until the mixture is light and fluffy. This step gives your dip a creamy base. Step-by-Step Mixing Instructions Now you can add in 1 teaspoon of vanilla extract. Also, add 1 cup of softened cream cheese. Mix until everything combines smoothly. Gradually add the cooled flour and 1/2 teaspoon of salt. Stir until just combined. Be careful not to overmix. Tips for a Smooth Consistency To finish, gently fold in 1 cup of mini chocolate chips. Make sure they are evenly spread throughout the dip. This gives you that classic chocolate chip flavor in every bite. Importance of Chilling Time Transfer the dip to a serving bowl. Cover it with plastic wrap. Chill the dip in the fridge for at least 30 minutes. This time allows the flavors to blend. It also helps thicken the dip. Serving Suggestions Once chilled, it’s ready to serve. You can enjoy it with graham crackers, pretzels, or apple slices. Each of these adds a fun crunch to your dip. Get creative and share this treat with friends or family! Achieving the Right Consistency To make the best chocolate chip cookie dough dip, focus on texture. You want it creamy, not too thick or runny. Start by heating the flour. This step kills harmful bacteria, making it safe to eat raw. Heat it in the microwave for about 30 seconds. Let it cool before mixing it in. When you mix the butter and sugars, beat them until fluffy. This adds air and makes the dip light. Common Mistakes to Avoid One common mistake is not cooling the flour properly. If it’s too hot, it can melt the butter and cream cheese. This makes the dip too thin. Another mistake is overmixing after adding the flour. Mix just until combined; otherwise, the dip can become tough. Lastly, do not skip chilling the dip. This step helps flavors blend and improves the texture. How to Boost Flavor with Add-ins You can elevate the flavor of your dip with simple add-ins. Try mixing in crushed nuts, like walnuts or pecans, for added crunch. You might also add a splash of almond extract for a unique twist. If you love a bit of spice, a dash of cinnamon enhances sweetness nicely. Suggested Flavor Variations Consider changing the chocolate chips to other treats. You can use peanut butter chips, white chocolate, or even toffee bits for a fun flavor. For a seasonal touch, add pumpkin spice or peppermint extract during holidays. These variations keep the dip exciting for every occasion. Pro Tips Heat the Flour Properly: Ensure the flour is heated to 160°F (70°C) to eliminate any harmful bacteria. This step is crucial for the safety of your dip. Use Softened Ingredients: Make sure your butter and cream cheese are softened to room temperature. This helps in achieving a smooth and creamy texture for the dip. Chill for Best Flavor: Allow the dip to chill in the refrigerator for at least 30 minutes. This resting time helps the flavors meld together beautifully. Customize Your Dippers: Experiment with different dippers like fruit, cookies, or pretzels to find your perfect pairing with the cookie dough dip. {{image_2}} You can easily make this dip gluten-free. Start by swapping regular flour for gluten-free flour. This keeps the dip tasty while meeting gluten-free needs. - Substituting Ingredients: Use a gluten-free blend that works well for sweet treats. Check labels to ensure they are safe. - Best Gluten-Free Flour Options: Almond flour and coconut flour are great choices. These flours add flavor and keep the dip smooth. This dip is a blank canvas for your creativity. You can add mix-ins to suit your taste. - Alternative Mix-ins (Nuts, Candy): Try adding chopped nuts or candy pieces. Chopped pecans or mini M&Ms can give a fun crunch. - Customizing for Different Occasions: For a holiday twist, add peppermint extract or festive sprinkles. You can change the flavor to fit any party theme. For the best storage, use an airtight container. This keeps your chocolate chip cookie dough dip fresh. I like to use glass containers. They seal well and do not absorb odors. If you don’t have glass, plastic containers work too. Just make sure they close tightly. To keep the dip fresh, cover it with plastic wrap before sealing the container. This extra layer helps lock in moisture. You can also place a piece of wax paper on top of the dip before covering it. This keeps air out and adds more freshness. The dip lasts about 3 to 5 days in the fridge. Always check for signs of spoilage before eating. Look for changes in color or smell. If it has an off scent, it’s best to toss it. Also, if you see any mold, do not eat it. When stored properly, you can enjoy this dip for a few days. Is the Dip Safe to Eat Raw? Yes, the dip is safe to eat raw. We heat the flour to kill harmful bacteria. This step makes the dip safe and keeps it yummy. Always follow this step to enjoy your dip without worry. Can I Freeze Chocolate Chip Cookie Dough Dip? You can freeze the dip. Just place it in an airtight container. It will keep well for up to three months. When ready to eat, thaw in the fridge overnight. Stir it a bit before serving to get the right texture back. What to Serve with Cookie Dough Dip? You can serve the dip with many tasty options. Graham crackers, pretzels, and apple slices all work great. Each adds a fun crunch and flavor. You can even try cookies for a cookie-on-cookie treat! Can I Use Other Dipping Options? Absolutely! You can use anything you like. Try vanilla wafers, chocolate chips, or even fruit. Get creative! The fun part is mixing and matching to find your favorite dipper. Enjoy exploring new tastes! This blog post covered everything you need for a tasty cookie dough dip. You learned the key ingredients and how to mix them safely. We talked about chilling for the best flavor and texture. I shared tips to enhance the dip and showed you ways to customize it for any event. Finally, storage tips help keep your dip fresh. Enjoy making this dip and impressing your friends with your skills!

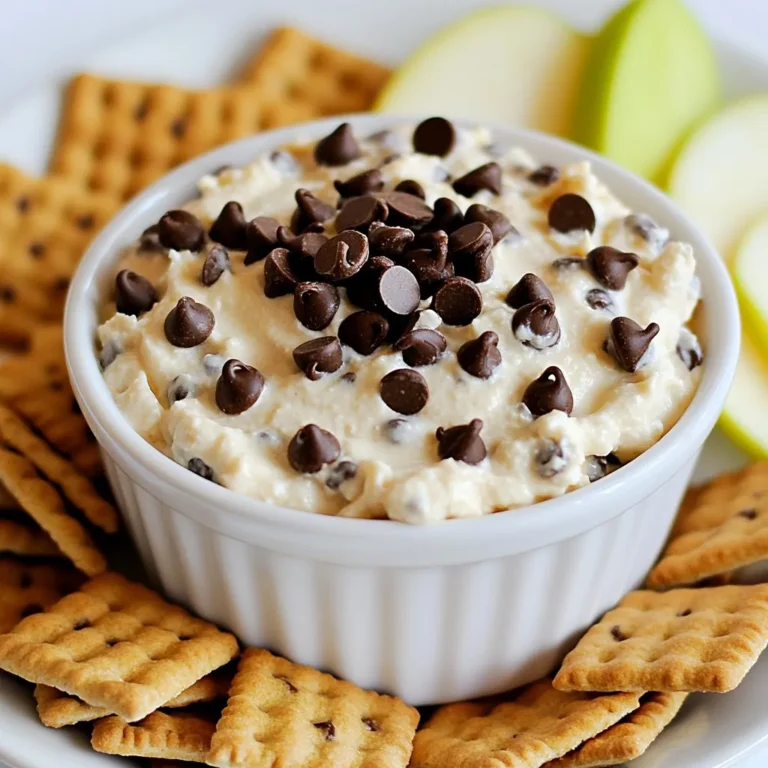
Chocolate Chip Cookie Dough Dip Irresistible Delight

- 4 ears of fresh corn, husked and halved lengthwise - 1/4 cup honey - 2 tablespoons olive oil - 1-2 jalapeños, finely diced - 1 teaspoon smoked paprika - 1 teaspoon garlic powder - Salt and pepper to taste - Fresh cilantro, chopped (for garnish) - Lime wedges (for serving) For Jalapeño Honey Corn Ribs, you need fresh corn. I love using corn that is sweet and crisp. You can find it at most stores or farmers' markets. The honey adds a nice sweetness, while the jalapeños add heat. You can adjust the number of jalapeños based on your spice preference. Olive oil helps the glaze stick to the corn. Smoked paprika gives it a lovely depth of flavor. Garlic powder adds a savory note that balances the sweetness. Don’t forget salt and pepper; they enhance all the flavors. Garnish with fresh cilantro for a bright pop. Lime wedges on the side give an extra zing. The blend of flavors in these ingredients makes every bite a delight. Enjoy creating this tasty dish! {{ingredient_image_1}} To start, you need to heat your grill or oven. Set it to medium-high, around 400°F (200°C). If you plan to use the oven, grab a baking sheet. Line it with parchment paper to keep the corn from sticking. Next, let’s make the honey glaze. In a small bowl, combine the honey, olive oil, diced jalapeños, smoked paprika, garlic powder, salt, and pepper. Stir it well until smooth. If you want more heat, add extra jalapeños. Taste as you go to find your perfect spice level. Now, it’s time to cook the corn. Brush the corn ribs with the honey glaze on all sides. Place the corn on the grill or in the oven. For grilling, cook for about 10-15 minutes. Turn them every few minutes for even cooking. If you're baking, roast them for 20-25 minutes, turning them occasionally. You want them tender with nice grill marks. Once cooked, take the corn ribs off the heat. Drizzle any leftover glaze on top while they’re still hot. Garnish with fresh cilantro and serve with lime wedges. Enjoy this sweet and spicy treat! To make your Jalapeño Honey Corn Ribs burst with flavor, use fresh ingredients. Fresh corn, honey, and herbs add depth. Adjust spice levels by changing the number of jalapeños. Start with one for a mild kick. You can always add more for heat. Grilling corn ribs is fun and easy. Keep your grill at medium-high heat. This helps the corn cook evenly. Turn the corn every few minutes. This way, you get nice grill marks and avoid burning. To prevent overcooking, watch for tenderness. The corn should be soft but still firm. Pair your corn ribs with simple sides. A fresh salad or grilled veggies work well. You can also serve them with rice or beans for a hearty meal. For presentation, stack the corn ribs on a platter. Sprinkle fresh cilantro on top and add lime wedges for color and zest. Pro Tips Adjust the Spice Level: If you prefer a milder dish, remove the seeds and membranes from the jalapeños before dicing them. This will reduce the heat significantly. Use Fresh Ingredients: For the best flavor, opt for fresh corn on the cob and high-quality honey. Fresh ingredients will enhance the overall taste of your corn ribs. Experiment with Flavors: Feel free to add other spices or herbs to the glaze, such as cumin or lime zest, to give your corn ribs a unique twist. Serve Immediately: These corn ribs are best enjoyed hot off the grill or out of the oven, as they maintain their tenderness and flavor when served fresh. {{image_2}} You can change the heat level by using other peppers. For a mild option, try bell peppers. For more heat, consider serrano or habanero peppers. Adjust the amount based on your taste. You can also add spices like cayenne pepper or chili powder for an extra kick. This gives your dish a new twist without losing its core flavor. Garnishes can elevate your dish. Fresh herbs like parsley or green onions add color and taste. You can also drizzle sauces like ranch or spicy mayo for a fun touch. Try serving the corn ribs with a zesty yogurt dip to balance the spice. These options make your plate look and taste great. Want to make it gluten-free? This recipe is already safe for you. For vegan options, swap honey with agave syrup or maple syrup. This keeps the flavor while meeting dietary needs. You can also use sugar substitutes like monk fruit or stevia for the glaze without losing sweetness. These changes let everyone enjoy your Jalapeño Honey Corn Ribs! To store leftovers, let the corn ribs cool completely. Place them in an airtight container. This keeps them fresh longer. You can store them in the fridge for up to 3 days. After that, they may lose their taste and texture. The best way to reheat corn ribs is in the oven. Preheat the oven to 350°F (175°C). Place the ribs on a baking sheet. Cover them with foil to keep moisture in. Heat for about 10 minutes. This method keeps the flavor and texture intact. You can also use a grill. Just warm them for a few minutes until hot. Yes, you can freeze Jalapeño Honey Corn Ribs! For freezing, wrap each rib tightly in plastic wrap. Then, place them in a freezer bag. Make sure to remove as much air as possible. They can last up to 3 months in the freezer. To thaw, move them to the fridge overnight. Reheat them as mentioned above for the best taste. Jalapeño Honey Corn Ribs are a fun twist on classic corn. They use fresh corn, cut into rib shapes. You coat them in a sweet and spicy glaze made from honey and jalapeños. This dish brings together great flavors. The smoked paprika and garlic powder add depth to the taste. The result? A delicious and vibrant side dish that everyone loves. Yes, you can prepare Jalapeño Honey Corn Ribs ahead of time. You can husk and cut the corn earlier in the day. Make the honey glaze and store it in the fridge. When you're ready, just brush the glaze on the corn and grill or bake. This way, you save time when serving your meal. These corn ribs pair well with many dishes. Try serving them with grilled meats like chicken or steak. They also go great with a fresh salad or rice. For a full meal, add some beans or corn salad. The sweet and spicy flavors will balance well with savory dishes. You can easily change the spice level of the glaze. Use fewer jalapeños if you want less heat. For more spice, add an extra jalapeño or two. You can also remove the seeds to lower the heat. If you want a different flavor, try adding cayenne pepper or chili powder. You can use frozen corn if fresh corn isn't available. Just make sure to thaw it and drain excess water. Keep in mind that frozen corn may not have the same crunch as fresh. Still, the glaze will make it tasty. Just follow the same cooking steps to enjoy your corn ribs. This blog post gave you a simple guide to making Jalapeño Honey Corn Ribs. We covered ingredients, cooking methods, and tips to enhance flavor. Remember to experiment with spices and garnishes to make this dish your own. Proper storage can keep your corn ribs fresh for later. Enjoy trying out these methods and sharing them with friends. Making this dish can be fun and tasty, adding a zesty kick to your meals.

Jalapeño Honey Corn Ribs Flavorful Grilled Delight

- 3 medium sweet potatoes, peeled and cut into 1-inch cubes - 4 cloves of garlic, minced - 3 tablespoons olive oil Sweet potatoes are the star of this dish. They bring a natural sweetness and a creamy texture. Garlic adds a punch of flavor. It gives a nice depth to each bite. Olive oil helps everything roast beautifully, making the sweet potatoes crisp on the outside. - 1 teaspoon dried rosemary - 1 teaspoon dried thyme - 1 teaspoon smoked paprika Dried rosemary adds an earthy note. It pairs well with the sweet potatoes. Dried thyme gives a hint of freshness. Smoked paprika adds a subtle smokiness. These spices work together, creating a lovely flavor blend. - Fresh parsley - Salt and pepper Fresh parsley adds a pop of color and brightness. It makes the dish look appealing. Salt and pepper enhance all the flavors. They help to balance the sweetness of the sweet potatoes. {{ingredient_image_1}} - First, preheat your oven to 425°F (220°C). This step is key for a great roast. - Next, peel and cube the sweet potatoes into 1-inch pieces. This size helps them cook evenly. - In a large bowl, combine the cubed sweet potatoes, minced garlic, and olive oil. - Sprinkle in the dried rosemary, dried thyme, smoked paprika, salt, and pepper. - Toss everything well, so each piece is coated in oil and spices. This step adds rich flavor. - Spread the sweet potato mix on a large baking sheet. Make sure they are in a single layer. This helps them roast nicely. - Place the baking sheet in the oven. Roast for about 25 to 30 minutes. - Flip the sweet potatoes halfway through. This ensures even browning and crispness. To get the best sweet potatoes, spread them in a single layer on the baking sheet. This helps them roast evenly. If the sweet potatoes are crowded, they will steam instead of roast. Flip the sweet potatoes halfway through cooking for even browning. This step is key to getting that nice golden color and soft texture. Want to kick up the flavor? Add chili flakes for heat. This small touch changes the taste and adds a nice kick. I also suggest using fresh herbs instead of dried. Fresh rosemary and thyme give a bright, bold flavor that dried herbs can’t match. Just chop them finely and mix them in. If you don’t have olive oil, try other oils like avocado or sunflower oil. Each oil adds its own flavor. You can also use other root vegetables. Carrots or parsnips work well in this recipe. Just cut them into similar-sized pieces for even cooking. Pro Tips Cut Uniformly: Ensure that all sweet potato cubes are cut into 1-inch pieces for even cooking. This helps them roast uniformly, achieving the perfect texture and flavor. Use Fresh Herbs: While dried herbs are convenient, using fresh rosemary and thyme can elevate the flavor profile of your roasted sweet potatoes. Don’t Overcrowd the Pan: Spread the sweet potatoes in a single layer on the baking sheet. Overcrowding can cause them to steam instead of roast, resulting in a less crispy texture. Experiment with Spices: Feel free to mix up the spices. Adding a pinch of cayenne pepper or a sprinkle of cinnamon can add a unique twist to your dish. {{image_2}} You can add maple syrup to your sweet potatoes. This gives them a nice sweetness. It balances the garlic and herbs well. Consider mixing in spices like cayenne for heat or cinnamon for warmth. Each adds a unique twist to the dish. You can easily make this dish vegan and gluten-free. Ensure the olive oil is pure and the spices are fresh. All the ingredients in this recipe are naturally vegan and gluten-free. This makes it a great choice for everyone. Garlic herb roasted sweet potatoes pair well with many proteins. Try them with grilled chicken or fish. They also work great next to a hearty salad. You can even use them as a topping for a fresh green salad. This adds flavor and makes your meal more filling. To keep your garlic herb roasted sweet potatoes fresh, place them in a container. Use a tight-sealing container to prevent air from getting in. They will last up to five days in the fridge. Make sure they cool down before you store them. This helps keep the texture right. You can reheat your sweet potatoes in two ways: the oven or the microwave. For the oven, preheat to 350°F (175°C). Spread the sweet potatoes on a baking sheet. Heat for about 10-15 minutes. This method helps them stay crispy. For the microwave, place them on a microwave-safe plate. Heat in short bursts of 30 seconds until warm. This method is faster but may soften them a bit. If you want to save some for later, you can freeze roasted sweet potatoes. First, let them cool completely. Then, spread them on a baking sheet in a single layer. Freeze for about 1-2 hours until firm. After that, transfer them to a freezer bag or container. Remove as much air as possible. They can last up to three months in the freezer. When you're ready to eat, thaw them in the fridge overnight before reheating. Garlic herb roasted sweet potatoes can last 3 to 5 days in the fridge. Store them in an airtight container. Make sure they cool down first. This keeps them fresh and tasty. You can reheat them easily when you're ready to eat. Yes, you can use other types of potatoes. Yukon gold or red potatoes work well. They have a nice texture and flavor. Just cut them into 1-inch cubes like sweet potatoes. Adjust cooking time if needed, as different potatoes may cook at different rates. Garlic herb roasted sweet potatoes pair well with many dishes. They go great with grilled chicken or fish. You can also serve them with a green salad or as a side for steak. They add color and flavor to any meal. Feel free to get creative and mix them into grain bowls or tacos! Garlic herb roasted sweet potatoes are easy and tasty. You learned about key ingredients like sweet potatoes, garlic, and olive oil. The right seasonings make a big difference. I shared simple steps to prepare, roast, and store them well. Remember, you can add your touch with spices or sweeteners. Enjoy serving them with your favorite dishes. Use these tips to make your cooking fun and flavorful. Happy roasting!

Garlic Herb Roasted Sweet Potatoes Flavorful Delight

To make banana bread blondies, you need these key items: - 2 ripe bananas, mashed - ½ cup brown sugar - ¼ cup granulated sugar - ½ cup unsalted butter, melted - 1 large egg - 1 teaspoon vanilla extract - 1 cup all-purpose flour - ½ teaspoon baking powder - ¼ teaspoon baking soda - ¼ teaspoon salt These ingredients form the base of your blondies. The ripe bananas add natural sweetness and moisture. You can enhance your blondies by adding: - ½ cup chocolate chips - ¼ cup chopped walnuts or pecans These optional ingredients give your blondies a fun twist. The chocolate adds richness, while nuts provide crunch. You can swap ingredients if needed: - Use coconut oil instead of butter for a dairy-free option. - Substitute applesauce for mashed bananas for a different flavor. - Try using almond flour for a gluten-free version. These substitutions keep the recipe flexible. You can enjoy banana bread blondies no matter your dietary needs. First, preheat your oven to 350°F (175°C). Line an 8x8 inch pan with parchment paper. Leave some paper hanging over the edges. This will help you lift the blondies out later. In a large bowl, mash your ripe bananas until smooth. Mix in ½ cup brown sugar and ¼ cup granulated sugar. Stir in the melted butter until everything blends well. Next, add one large egg and one teaspoon of vanilla extract. Whisk it all together until it is smooth. In another bowl, combine 1 cup of all-purpose flour, ½ teaspoon of baking powder, ¼ teaspoon of baking soda, and ¼ teaspoon of salt. Slowly fold this dry mix into the banana mix. Make sure not to over-mix. If you want extra flavor, add ½ cup of chocolate chips and ¼ cup of chopped nuts. Gently fold these in. Now, pour the batter into your prepared pan. Spread it evenly across the bottom. Place the pan in your preheated oven. Bake for 20 to 25 minutes. To check if they are done, insert a toothpick in the center. If it comes out clean, your blondies are ready to come out. After baking, let the blondies cool in the pan for about 10 minutes. Use the parchment edges to lift them out carefully. Place them on a wire rack to cool completely. Once cool, cut into 16 squares. Enjoy them as a sweet treat or serve them at gatherings! To keep your banana bread blondies moist, use ripe bananas. Ripe bananas add natural sweetness and moisture. Also, do not over-mix your batter. Over-mixing can make them dry. Mixing should be gentle, just until combined. Adding chocolate chips or nuts also helps add moisture and texture. I recommend an 8x8 inch baking pan for this recipe. This size ensures even baking. Line the pan with parchment paper. This helps with easy removal after baking. If you use a different size, baking time may change. Always check for doneness with a toothpick. If your blondies are too dry, check your oven temperature. An oven that is too hot can dry them out. If they are too gooey, they may need more time in the oven. Keep an eye on them during the last minutes of baking. If they stick to the pan, make sure you use parchment paper next time. This will help them lift out easily. {{image_2}} To make gluten-free banana bread blondies, swap regular flour for a gluten-free blend. Look for a mix that includes xanthan gum. This helps the blondies rise and stay moist. You can still use the same amounts of bananas and sugars. The taste will remain delicious and satisfying. For vegan banana bread blondies, replace the egg with a flax egg. To make one, mix one tablespoon of ground flaxseed with three tablespoons of water. Let it sit for five minutes until it thickens. Use plant-based butter instead of regular butter. The blondies will taste just as good without the eggs or dairy. You can add spices or fruits for extra flavor. Try adding cinnamon or nutmeg for warmth. A pinch of cardamom can also bring a new twist. You might also fold in some chopped fruits like apples or berries. These additions can make your blondies unique and exciting. Store your banana bread blondies in an airtight container. This keeps them fresh and soft. If you don’t have a container, wrap them tightly in plastic wrap. Place them at room temperature for short-term storage. Keep them away from direct sunlight. This helps maintain their flavor and texture. To freeze banana bread blondies, let them cool completely. Cut them into squares, then wrap each piece in plastic wrap. Place the wrapped blondies in a freezer bag or container. This prevents freezer burn. You can freeze them for up to three months. When ready to eat, thaw them in the fridge overnight or at room temperature. Banana bread blondies last for about a week at room temperature. If stored properly, they can stay fresh for up to two weeks in the fridge. Always check for signs of spoilage, like an off smell or mold. For the best taste, enjoy them within the first few days. You can tell when your blondies are done by using a toothpick. Insert it in the center. If it comes out clean or with just a few crumbs, they are ready. Do not wait until they look dry. They may continue to bake as they cool. Yes, you can make these blondies dairy-free. Use a dairy-free butter substitute instead of unsalted butter. You can also swap the chocolate chips for dairy-free ones. This way, you keep the taste while making them suitable for those avoiding dairy. You can serve these blondies warm with a scoop of vanilla ice cream. Drizzle some caramel sauce on top for added sweetness. They also pair well with fresh fruit or a dollop of whipped cream. Cut them into squares for easy sharing at parties or gatherings. Here is the complete recipe: - 2 ripe bananas, mashed - ½ cup brown sugar - ¼ cup granulated sugar - ½ cup unsalted butter, melted - 1 large egg - 1 teaspoon vanilla extract - 1 cup all-purpose flour - ½ teaspoon baking powder - ¼ teaspoon baking soda - ¼ teaspoon salt - ½ cup chocolate chips (optional) - ¼ cup chopped walnuts or pecans (optional) 1. Preheat your oven to 350°F (175°C). Line an 8x8 inch pan with parchment paper. 2. In a bowl, mix the mashed bananas, brown sugar, and granulated sugar. Stir in the melted butter. 3. Add the egg and vanilla extract. Whisk until smooth. 4. In another bowl, combine flour, baking powder, baking soda, and salt. 5. Fold the dry mix into the banana mix until just combined. 6. Fold in chocolate chips and nuts if using. 7. Pour batter into the pan and spread it evenly. 8. Bake for 20-25 minutes. Check with a toothpick. 9. Cool in the pan for 10 minutes, then lift out and cool on a wire rack. You learned about the key ingredients for tasty banana bread blondies. We explored steps to prepare, bake, and serve them. I shared tips to keep them moist and troubleshoot issues. You also discovered unique variations, including gluten-free and vegan options. Finally, I provided storage tips to keep your blondies fresh. Now, you’re ready to bake delicious banana bread blondies with confidence. Enjoy the process and share your results!

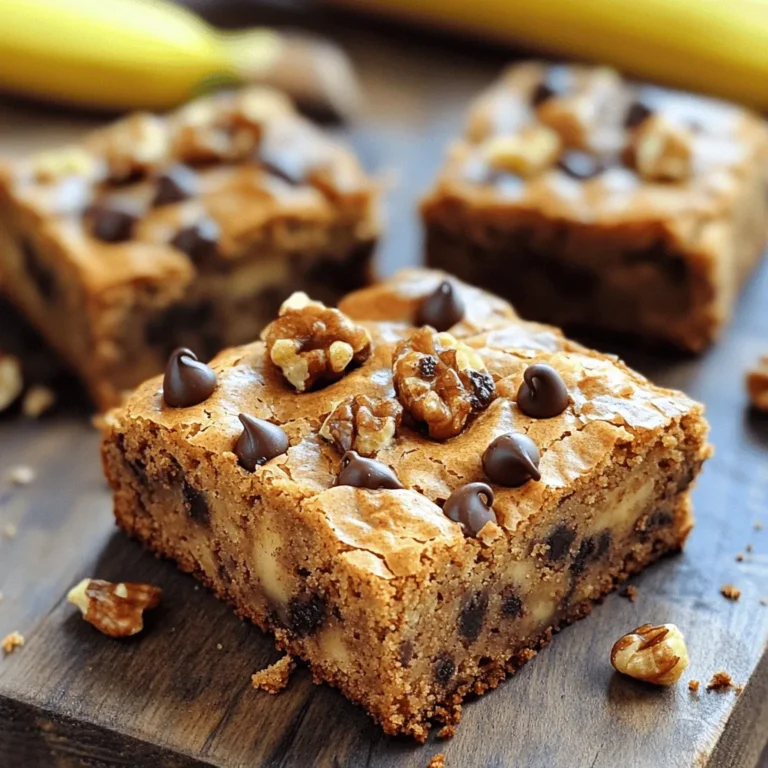
Banana Bread Blondies Delicious and Simple Treat

- 1.5 pounds boneless, skinless chicken thighs - 1/4 cup honey - 1/4 cup Sriracha sauce - 2 tablespoons soy sauce - 1 tablespoon sesame oil - 2 garlic cloves, minced - 1 teaspoon ground ginger - 1 tablespoon lime juice - 1 bell pepper (any color), cut into 1-inch pieces - 1 medium red onion, cut into wedges - Wooden or metal skewers You can swap chicken thighs for chicken breast or pork. For a vegan twist, use tofu. You might also try tempeh or seitan. If you want a different flavor, consider using a sweet chili sauce instead of Sriracha. For a gluten-free option, use tamari instead of soy sauce. For quality chicken, visit a local butcher or a trusted grocery store. Look for chicken that feels firm and has a pink color. When selecting vegetables, pick bell peppers that are firm and vibrant. A red onion should feel heavy for its size and have dry skin. Always choose fresh, in-season produce for the best taste. To make the marinade, mix these ingredients in a large bowl: - 1/4 cup honey - 1/4 cup Sriracha sauce - 2 tablespoons soy sauce - 1 tablespoon sesame oil - 2 minced garlic cloves - 1 teaspoon ground ginger - 1 tablespoon lime juice Stir until everything blends well. Add the chicken cubes and coat them nicely with the marinade. Cover the bowl and put it in the fridge. Let it marinate for at least 30 minutes. For a stronger flavor, you can marinate it for up to 2 hours. If you use wooden skewers, soak them in water for at least 30 minutes. This step stops them from burning on the grill. If you choose metal skewers, you can skip this step. Metal skewers are reusable and won't catch fire. Once the chicken is marinated, it’s time to thread the ingredients. Take a skewer and add chicken, bell pepper pieces, and onion wedges. Alternate the pieces to create a nice look. Make sure not to pack them too tightly. This way, they cook evenly and get nice grill marks. Preheat your grill to medium-high heat. Place the kabobs on the grill and cook them for about 10 to 12 minutes. Turn them every few minutes. The chicken should be cooked all the way through. It should not be pink in the center. The vegetables should also have nice grill marks. In the last few minutes of grilling, take any leftover marinade and brush it over the kabobs. This adds an extra layer of flavor and makes them shine. Glazing is important because it enhances the taste and makes the kabobs look great. When the kabobs are ready, take them off the grill and let them rest for a couple of minutes. Serve them warm with sides like rice, a fresh salad, or flatbread. For a beautiful dish, place the kabobs on a large platter with fresh lettuce or herbs. Drizzle extra Sriracha or honey on top just before serving for a stunning finish. - Cooking tips for juicy chicken: Start with chicken thighs. They stay moist and tender. Marinate the chicken for at least 30 minutes. This adds flavor and moisture. Use a mix of honey and Sriracha for a sweet and spicy kick. Ensure your grill is hot before adding kabobs. This helps to sear the meat quickly. - Avoiding common grilling mistakes: Don't overcrowd the skewers. Leave space between the pieces. This allows heat to circulate. Always check for doneness. Chicken should reach 165°F in the center. If you see pink, keep grilling. - Adding herbs or spices to the marinade: Fresh herbs like cilantro or basil work well. Add them to the marinade for extra freshness. You can also try a pinch of cumin or smoked paprika. These will give your kabobs a unique taste. - Experimenting with different sauces: While Sriracha and honey are great, consider other options. Try teriyaki sauce for a sweet Asian twist. Or use barbecue sauce for a smoky flavor. You can even mix sauces for a unique blend. - Oven roasting instructions: Preheat your oven to 400°F. Arrange the kabobs on a baking sheet lined with foil. Roast for about 15-20 minutes. Turn them halfway through for even cooking. - Stovetop alternatives: If you don't have a grill, use a skillet. Heat some oil over medium-high heat. Cook the kabobs for about 10 minutes, rotating often. This method gives a nice sear while keeping the chicken juicy. {{image_2}} You can swap out chicken for beef or shrimp. Beef adds a rich flavor, while shrimp cooks fast and soaks up the marinade well. If you want a vegetarian dish, try using firm tofu or tempeh. These options work great with the same marinade. If you love sweet and spicy, try adding more honey or Sriracha. You can also blend in some mango or pineapple juice for a fruity kick. This makes the kabobs sweeter and adds a bright flavor. Experiment with different spice levels to find what suits you best. Use seasonal vegetables like zucchini, cherry tomatoes, or mushrooms. These add color and texture to your kabobs. You can also use fruits like peaches or pineapples. The fruit caramelizes on the grill, adding a sweet touch that pairs well with the spicy chicken. To keep your kabobs fresh, store them in the fridge. Use an airtight container for best results. They will stay good for up to three days. If you want to save them longer, freeze the kabobs. Wrap them tightly in plastic wrap or foil. Place them in a freezer-safe bag. They can last for up to three months in the freezer. When you're ready to eat your leftovers, reheat them safely. You can use the microwave or the oven. If using a microwave, place kabobs on a plate and cover them. Heat in 30-second bursts until warm. For the oven, preheat it to 350°F (175°C). Place kabobs on a baking sheet and heat for about 10-15 minutes. This will help keep the flavors and textures nice. Preparing kabobs ahead of time is easy. You can marinate the chicken and store it in the fridge. This makes your cooking time faster on busy days. Portion out the chicken and veggies for meal plans. Use small containers to keep everything organized. This way, you can grab and go when you need a quick meal. I recommend marinating the chicken for at least 30 minutes. For the best flavor, you can go up to 2 hours. This lets the chicken soak in all the tasty flavors of honey, Sriracha, and spices. You can serve many delicious sides with kabobs. Here are some ideas: - Steamed rice - Fresh salad - Grilled corn - Flatbread - Couscous These sides complement the kabobs well and balance the flavors. Yes, you can make kabobs in the oven! Preheat your oven to 400°F (200°C). Place the kabobs on a baking sheet lined with foil. Bake for about 15-20 minutes, turning halfway through. This method works well if you can't grill outside. The kabobs have a nice kick from the Sriracha. If you prefer less spice, you can adjust the amount of Sriracha in the marinade. You can also mix in more honey to balance the heat. Feel free to experiment with different sauces! Here are some great options: - Teriyaki sauce - Barbecue sauce - Garlic sauce - Sweet chili sauce These can change the flavor and add a fun twist. To keep veggies from burning on the grill, try these tips: - Cut veggies into larger pieces. - Soak wooden skewers before using. - Brush with olive oil to add moisture. - Grill on a lower heat setting. These steps help veggies cook evenly without burning. In this blog post, we explored making delicious Sriracha Honey Chicken Kabobs. You learned about the key ingredients and their replacements. We looked at sourcing quality items and step-by-step grilling tips. I shared secrets for perfecting flavor and various cooking methods, plus storage tips for leftovers. Enjoy your kabob-making journey! Keep experimenting with flavors and ingredients. Your meals will be tasty and fun!

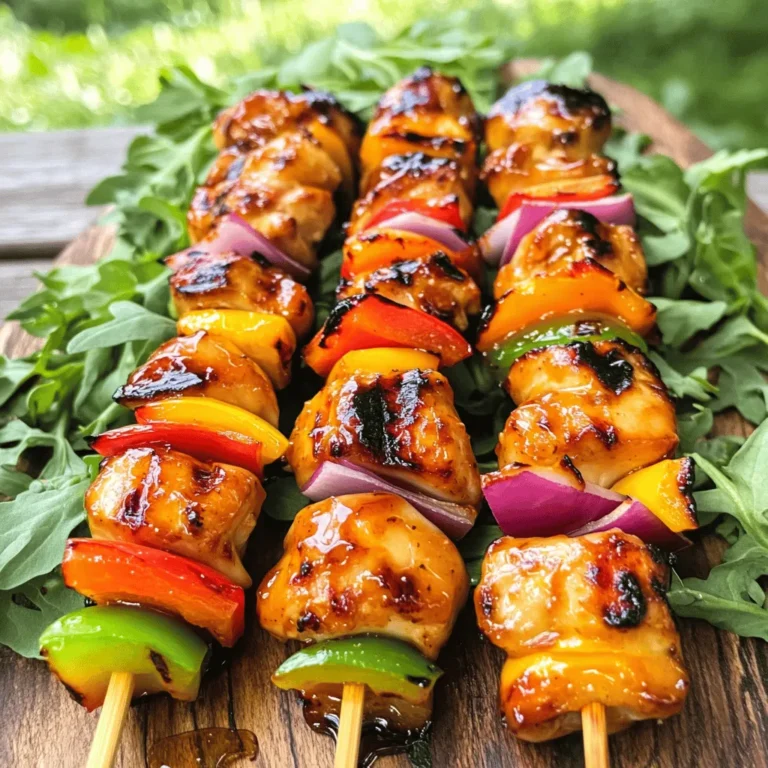
Sriracha Honey Chicken Kabobs Easy Grilling Recipe

- 1 lb large shrimp, peeled and deveined - 3 tablespoons olive oil - 3 tablespoons fresh lime juice - Zest of 1 lime - 1 garlic clove, minced - 1 teaspoon chili powder - 1/2 teaspoon cumin - Salt and pepper to taste - 1/4 cup fresh cilantro, chopped In this recipe, we focus on fresh, vibrant ingredients. The large shrimp serve as the star of the dish. Their sweet and tender meat pairs perfectly with the zesty lime. The olive oil adds richness and helps the spices stick. Lime juice brightens the dish, giving it a refreshing kick. Lime zest adds an extra punch of flavor. Garlic adds aroma and depth. The spice blend includes chili powder and cumin. These spices bring warmth and earthiness. Adjust the salt and pepper to your taste. Fresh cilantro is the final touch. Its bright green color and flavor elevate the dish. Use it generously for a burst of freshness. Gather these ingredients to create a dish that is flavorful and fresh. Each component plays a role in making this shrimp shine. Enjoy the lively taste of this zesty cilantro lime shrimp! To start, gather your marinade ingredients. In a large bowl, mix: - 3 tablespoons olive oil - 3 tablespoons fresh lime juice - Zest of 1 lime - 1 minced garlic clove - 1 teaspoon chili powder - 1/2 teaspoon cumin - Salt and pepper to taste Whisk these together until they blend well. Next, add the shrimp. Make sure to coat them evenly in the marinade. I recommend letting the shrimp marinate for 15 to 20 minutes in the fridge. This time helps the flavors soak in deeply. Now, heat a large skillet over medium-high heat. Once hot, add the marinated shrimp. Spread them in a single layer. Cook the shrimp for 2 to 3 minutes on each side. Watch closely! They should turn pink and opaque. Avoid overcooking, as shrimp can become tough. After cooking, remove the skillet from heat. Stir in the chopped cilantro for a fresh burst of flavor. For a nice presentation, serve the shrimp on a platter. Garnish with extra cilantro and lime wedges. This adds a vibrant look. You can also add a side of rice or avocado slices for a complete meal. Enjoy your zesty creation! - Suggestions for additional spices: You can add a pinch of paprika for sweetness or cayenne for heat. For a smoky touch, try smoked paprika. These spices can boost the flavor without overpowering the shrimp. - Using fresh herbs vs. dried herbs: Fresh cilantro brings bright flavor. If you use dried cilantro, use less since it's more concentrated. Fresh herbs bring life to your dish. Always choose fresh when possible for the best taste. - Best cooking methods for shrimp: Sautéing shrimp in a skillet gives a nice sear. You can also grill them for a smoky flavor. Both methods cook shrimp quickly, keeping them juicy. - How to check for doneness: Shrimp turn pink and opaque when cooked. They curl into a "C" shape. If they form an "O," they may be overcooked. Aim for 2-3 minutes on each side for perfect shrimp. - Serving in a unique style: Serve the shrimp on a colorful platter. You can add lime wedges and extra cilantro for a fresh look. Consider using a bed of rice or fresh greens as a base. - Pairing with colors and textures: Add bright veggies like bell peppers or avocado for contrast. This not only makes your plate pop but also adds more nutrients. Mix textures by adding crispy tortilla chips or a creamy avocado dip on the side. {{image_2}} You can make Zesty Cilantro Lime Shrimp even better by adding vegetables. Try bell peppers or onions. These veggies add crunch and color. You can also mix in zucchini or corn for more texture. If you want to switch protein, shrimp is not the only choice. Chicken or tofu works well too. Just marinate them like the shrimp. These alternatives keep the dish fresh and exciting. For spice lovers, add a pinch of cayenne or jalapeños. These will kick up the heat. You can also use a spicy salsa for extra flavor. If you prefer sweet, try honey or mango. This will give a nice tangy twist to the dish. Adding pineapple chunks or a dash of orange juice can create a sweet and tangy treat. Experiment with these flavors for a new take on the classic recipe. Zesty Cilantro Lime Shrimp is great in many forms. You can serve it as a taco. Just fill tortillas with shrimp, fresh cilantro, and lime. It’s a fun way to eat! Another option is to make a salad. Toss the shrimp with mixed greens and avocado for a light meal. For grilling fans, skewering shrimp is a great idea. Just thread them on sticks and grill until cooked. This adds a smoky flavor and looks amazing on the plate. Store leftover Zesty Cilantro Lime Shrimp in an airtight container. This keeps the shrimp fresh and flavorful. Place it in the fridge right after serving. The shrimp can last in the fridge for 2 to 3 days. Make sure to check for any off smells before eating. To freeze shrimp, first, let them cool completely. Place the shrimp in a freezer-safe bag, removing as much air as possible. Label the bag with the date for reference. You can freeze shrimp for up to 3 months. When ready to cook, thaw shrimp overnight in the fridge. If you're in a hurry, you can place the bag in cold water. The best way to reheat shrimp is in a skillet. Heat a little olive oil over medium heat. Add the shrimp and cook for about 2 minutes until heated through. Avoid cooking them too long to keep them tender. You can also reheat shrimp in the microwave. Use a low setting and check often to avoid dryness. Adding a splash of lime juice can help keep the flavors fresh. To make this dish less spicy, reduce the chili powder. You can also skip it entirely. Instead, add a pinch of smoked paprika for flavor without the heat. This way, you keep the taste but lower the spice level. Yes, you can use frozen shrimp. First, thaw the shrimp overnight in the fridge. If you need them fast, place them in a bowl of cold water for about 15-20 minutes. Pat them dry before marinating to help the flavors stick. You can serve this shrimp with rice, quinoa, or a fresh salad. Avocado slices or a tangy slaw also pair nicely. If you have tortillas, make tacos for a fun twist. Lime wedges on the side add a nice touch. To avoid overcooking, cook shrimp for just 2-3 minutes on each side. They should turn pink and opaque. Keep a close eye on them. If they curl tightly, they are done. Remove them from heat right away for best results. This blog post covered how to make Zesty Cilantro Lime Shrimp delicious and easy. You learned about key ingredients, step-by-step cooking instructions, and creative serving ideas. Remember to use fresh herbs for the best flavor. Don't hesitate to try variations or add your favorite spices. Follow the tips for storing and reheating to keep your dish tasty. Enjoy this dish any time you want a quick, flavorful meal. I hope this inspires you to cook and share with others!

Zesty Cilantro Lime Shrimp Flavorful and Fresh Dish

- 2 pounds Yukon Gold potatoes - 4 cloves garlic - 1 cup heavy cream - ½ cup unsalted butter - 1 cup freshly grated Parmesan cheese - Fresh chives for garnish - Salt and black pepper, to taste The heart of my Garlic Parmesan Mashed Potatoes lies in the essential ingredients. I love using Yukon Gold potatoes for their creamy texture. They mash beautifully and hold flavor well. You’ll need two pounds of these potatoes, peeled and quartered. Next, the garlic brings a punch of flavor. I use four cloves of minced garlic. This gives the dish its signature taste. Fresh garlic is best, as it adds a nice depth to the potatoes. Heavy cream is my secret to making these mashed potatoes rich and smooth. One cup is just right for that creamy goodness. For optional flavor boosts, I recommend unsalted butter and freshly grated Parmesan cheese. The butter adds richness, while the cheese melts in and gives a savory kick. I use half a cup of butter and a full cup of cheese. Finally, fresh chives make a great garnish. They add a pop of color and fresh taste. Don’t forget seasoning! Salt and black pepper are key to enhancing all the flavors. Adjust them to your taste. With these ingredients, you can create a side that is both comforting and gourmet. To start, take 2 pounds of Yukon Gold potatoes. Peel and quarter them. Place the potatoes in a large pot. Cover them with water and add a pinch of salt. Bring the water to a boil over medium-high heat. Once boiling, reduce the heat to a simmer. Cook the potatoes for about 15 to 20 minutes. You want them to be tender. To check for doneness, pierce a potato with a fork. If it goes in easily, they are ready. While the potatoes cook, let’s prepare the garlic. Take ½ cup of unsalted butter and melt it in a small saucepan over medium heat. After the butter melts, add 4 cloves of minced garlic. Sauté the garlic for about 2 minutes. You want it fragrant but not brown. Keep a close eye on it to avoid burning. Once the potatoes are tender, drain them in a colander. Return the potatoes to the pot. Grab a potato masher and mash the potatoes until they are smooth and creamy. This step is key for a great texture. Next, gradually mix in the garlic and butter mixture. Then, pour in 1 cup of heavy cream. Stir until everything is well combined and creamy. Now for the best part: adding the cheese! Fold in 1 cup of freshly grated Parmesan cheese. Mix it until the cheese melts into the potatoes. Taste your mashed potatoes and season with salt and black pepper to your liking. This final touch makes all the difference. To avoid lumpy mashed potatoes, start with Yukon Gold potatoes. These potatoes have a smooth texture. Boil them until they are fork-tender. Drain them well before mashing. This step helps remove excess water. For creaminess without over-mixing, mash the potatoes gently. Use a potato masher for best results. After mashing, slowly add the heavy cream and garlic butter. This method keeps the potatoes fluffy. You can try different cheeses for new flavors. Gruyère or mozzarella adds a rich taste. Mixing in herbs like rosemary or thyme can enhance the dish. Fresh herbs bring brightness and a lovely aroma to your potatoes. The best tools for boiling and mashing potatoes include a large pot and a potato masher. Choose a pot that holds enough water for the potatoes. A sturdy masher will help you achieve the right texture. For mixing, a wooden spoon or spatula works well. These tools help combine the ingredients smoothly. Remember to have a colander ready for draining the potatoes. {{image_2}} You can easily adjust this recipe to fit dietary needs. For a gluten-free option, you don’t need to change much. All the main ingredients are gluten-free. Just make sure your butter and cheese are pure and safe for gluten-free diets. If you want a dairy-free version, swap the heavy cream with almond milk or coconut cream. Use dairy-free butter and skip the cheese or use a dairy-free alternative. These changes still give you creamy mashed potatoes. For those watching carbs, you can use cauliflower instead of potatoes. Steam or boil the cauliflower until tender. Then mash it just like the potatoes. It offers a similar texture with fewer carbs. To make these mashed potatoes even tastier, consider adding roasted garlic. Roasting garlic makes it sweeter and less harsh. Just roast whole garlic cloves in the oven until soft, then mash them in with the potatoes. You can also mix in sour cream or cream cheese. This adds extra creaminess and tang. Start with a small amount, then adjust based on your taste. Each option gives your mashed potatoes a unique twist. Garlic Parmesan Mashed Potatoes pair well with many dishes. They complement roasted chicken, grilled steak, or baked fish beautifully. Add a side of green beans or a fresh salad to round out the meal. For a fun presentation, try serving them in individual ramekins or in a large bowl with a sprinkle of chives on top. You can even use a piping bag to create swirls for a fancy look. These little touches make your meal feel special and inviting. To keep your Garlic Parmesan Mashed Potatoes fresh, use airtight containers. Glass or plastic containers work well. Make sure to cool the potatoes to room temperature first. Store them in the fridge at 40°F or below. They can last for up to three days. Always remember to label the containers with the date. When you reheat mashed potatoes, you want them creamy again. The best way to do this is on the stove. Use low heat and stir often. If you're in a hurry, the microwave is fine too. Heat in short bursts of one to two minutes. Stir in between to avoid hot spots. Always check the temperature; it should reach 165°F before serving. You can freeze Garlic Parmesan Mashed Potatoes for later use. First, let them cool completely. Then, spoon them into freezer-safe bags or containers. Remove as much air as possible before sealing. Label the bags with the date. They can last about two months in the freezer. To thaw, place them in the fridge overnight. Reheat on the stove or in the microwave until warm. Yes, you can use other potatoes. Yukon Gold potatoes work well for their creamy texture. Russet potatoes are also great. They create a fluffier mash but can be a bit dry. Red potatoes hold their shape well but can be grainy. You can add many spices and herbs. Try fresh parsley or thyme for a herbal note. A pinch of paprika adds warmth. Sour cream gives a tangy twist. You can also mix in roasted garlic for a deeper flavor. You can prepare them in advance. Make the mashed potatoes and let them cool. Store them in an airtight container in the fridge. Reheat them gently on the stove or in the oven. Add a splash of cream to bring back creaminess. These mashed potatoes can last about three to four days in the fridge. Store them in an airtight container to keep them fresh. Always check for off smells or changes in texture before eating. To achieve creaminess, use high-fat dairy like heavy cream. Warm the cream before adding it to the potatoes. Avoid over-mixing, as this can make them gummy. Use a potato masher instead of a mixer for the best texture. For Garlic Parmesan Mashed Potatoes, start with 2 pounds of Yukon Gold potatoes. Boil them until tender, then mash them. Mix in sautéed garlic, butter, and heavy cream. Finally, fold in 1 cup of freshly grated Parmesan cheese. Season to taste and garnish with fresh chives. This recipe serves six and takes about 35 minutes. Garlic Parmesan mashed potatoes bring comfort and flavor to your table. We discussed the key ingredients, including Yukon Gold potatoes and garlic. Then, I shared simple steps to ensure perfect texture and taste. You can also explore flavor variations to match your meal. Don't forget to store any leftovers properly for later enjoyment. Now, you're ready to create this tasty side dish that pairs well with many options. Enjoy your cooking and the smiles it brings!

Garlic Parmesan Mashed Potatoes Flavorful Creamy Side

PREV 1 … 30 31 32 … 58 NEXT
quick dish kitchen

explore

DessertsDinnerAppetizersDrinks

Our Policies

  • Cookie Policy
  • Copyright Policy
  • Disclaimer
  • GDPR Policy
  • Terms Of Use
Back to Top
  • About
  • Contact Us
  • Privacy Policy
© 2025 quick dish kitchen