FREE DINNER EBOOK! Get your copy!
  • Cookie Policy
  • GDPR Policy
  • Disclaimer
  • Terms Of Use
  • Visit my other site: Fun Cookie Recipes
quick dish kitchen
  • Home
  • Dinner
  • Desserts
  • Drinks
  • Appetizers
  • Contact
  • About
  • Privacy Policy
  • Home
  • Dinner
  • Desserts
  • Drinks
  • Appetizers
  • Contact
  • About
  • Privacy Policy
  • Cookie Policy
  • GDPR Policy
  • Disclaimer
  • Terms Of Use
Visit my other site: Fun Cookie Recipes

HOME / CATEGORIES /

Latest

- 1 cup all-purpose flour - 1/2 cup unsalted butter, softened - 1/4 cup granulated sugar (for crust) - 1/4 teaspoon salt - 1/2 teaspoon baking powder - 1 package (8 oz) cream cheese, softened - 1/2 cup powdered sugar - 1 teaspoon vanilla extract - 1 large egg - 1 teaspoon ground cinnamon - 1/4 cup granulated sugar (for topping) To make churro cheesecake bars, gather your main ingredients. The all-purpose flour gives the crust structure. Softened unsalted butter helps create a rich flavor. Granulated sugar adds sweetness to both the crust and topping. Cream cheese is key for the creamy filling. Powdered sugar sweetens the cream cheese and adds smoothness. Vanilla extract gives a lovely aroma. A large egg binds the filling together. Ground cinnamon and salt enhance the flavors. - Chocolate chips - Nuts (e.g., pecans or walnuts) - Additional spices (e.g., nutmeg) You can personalize your churro cheesecake bars with optional ingredients. Adding chocolate chips brings extra sweetness and richness. Chopped nuts add crunch and flavor. You can also mix in spices like nutmeg for a unique twist. These options let you create your perfect dessert! {{ingredient_image_1}} - Preheat oven to 350°F (175°C). - Line an 8x8-inch baking pan with parchment paper. - Cream 1/2 cup softened butter and 1/4 cup granulated sugar. - Add 1 cup flour, 1/4 teaspoon salt, and 1/2 teaspoon baking powder to the butter mixture. - Mix until crumbly. Press about two-thirds of the dough into the pan. - Beat 8 oz cream cheese until smooth. - Add 1/2 cup powdered sugar, 1 teaspoon vanilla, and 1 large egg. - Mix until creamy, then spread over the crust. - Crumble the remaining dough over the cream cheese layer. - In a small bowl, mix 1/4 cup granulated sugar and 1 teaspoon ground cinnamon. - Sprinkle this mixture over the crumbled dough. - Bake for 25-30 minutes. - Use a toothpick to check doneness; it should come out clean. - Cool in the pan for 10 minutes. - Lift out using the parchment paper and cool on a wire rack. - Cut into squares and serve. To achieve a crumbly crust, start with softened butter. Cream it well with granulated sugar until light. Mix the flour, salt, and baking powder gently into the butter. Do not overmix. This keeps the crust light and crumbly. For a creamy cheesecake layer, beat the cream cheese until it is smooth. Add the powdered sugar, vanilla extract, and egg gradually. Mix until everything is well combined but not overmixed. This ensures your cheesecake is rich and smooth. For a festive look, serve the churro cheesecake bars on a decorative platter. Dust them with powdered sugar and a sprinkle of cinnamon. This adds color and makes them more appealing. Pair them with a scoop of ice cream or a dollop of whipped cream. These additions bring extra creaminess and flavor. You can also serve with fresh fruit for a bright touch. One common mistake is overmixing the cream cheese. This can make the texture grainy. Mix just until smooth for best results. Another mistake is not cooling the bars properly before cutting. Let them cool in the pan for at least 10 minutes. Use the parchment paper to lift them out and cool on a wire rack. This step helps you cut clean squares and keeps the texture intact. Pro Tips Use Room Temperature Ingredients: Make sure your cream cheese and butter are at room temperature for easy mixing and a smoother texture. Don't Overmix the Crust: Mix the crust ingredients just until combined. Overmixing can lead to a tough texture. Cooling Time is Key: Allow the bars to cool completely before cutting to help maintain their shape and prevent them from falling apart. Customize Your Toppings: Feel free to add chocolate chips or nuts to the cream cheese layer for added flavor and texture. {{image_2}} You can change up the taste of your churro cheesecake bars easily. Adding chocolate flavors gives you a rich, sweet twist. Mix in some chocolate chips to the cream cheese layer for a creamy surprise. For a fun fall treat, try pumpkin spice cheesecakes. Replace some sugar with pumpkin puree and add warm spices. You will love how these flavors blend! If you need a gluten-free option, swap all-purpose flour with gluten-free flour. This keeps the bars tasty and safe for those with gluten issues. You can also use a graham cracker crust. Simply crush graham crackers and mix them with melted butter. Press this mixture into your pan instead of making dough. This change adds a nice crunch. Toppings can make your dessert even better! Drizzling with caramel sauce adds a sweet touch. Just warm the sauce slightly and let it flow over the bars. You can also add fruit toppings like strawberries or blueberries. Fresh fruit gives a bright, fresh taste. Get creative and mix flavors you enjoy! You can store your churro cheesecake bars at room temperature or in the fridge. If you keep them at room temperature, place them in a covered container. They stay fresh for a couple of days this way. However, for longer storage, use the fridge. A sealed container will help keep them moist and tasty. I recommend using a glass or plastic container with a tight lid. To freeze your churro cheesecake bars, first let them cool completely. Then, cut them into squares. Wrap each square in plastic wrap. Place the wrapped bars in a freezer bag or container. Make sure to remove as much air as possible. They will freeze well for up to three months. To thaw, take out as many bars as you want. Leave them in the fridge overnight or let them sit at room temperature for a few hours. In the fridge, churro cheesecake bars last about five to seven days. You can check for spoilage by looking for a change in texture or smell. If the bars feel sticky or have an off smell, it’s best to throw them away. Always trust your senses when it comes to food safety. Churro cheesecake bars are a fun dessert. They mix creamy cheesecake with a crunchy, cinnamon-sugar topping. This dessert has a sweet and buttery crust. I love how the softness of the cheesecake pairs with the crispy topping. These bars are great for parties or a special treat. Everyone enjoys their warm, cozy flavors. Yes, you can make these bars ahead of time. Just bake them and let them cool. Once cool, cover them in plastic wrap or place them in an airtight container. You can keep them in the fridge for about a week. If you want to store them longer, you can freeze them for up to three months. Just remember to thaw them in the fridge before serving. To check if the bars are done, look for a golden top. Insert a toothpick in the center; it should come out clean. If it has wet batter on it, bake a bit longer. The edges should be slightly firm, while the center can be a little soft. Trust your eyes and the toothpick test for perfect results. Yes, you can substitute cream cheese. Neufchâtel cheese is a great option; it has less fat and is creamy. You can also try Greek yogurt for a tangy flavor. For a dairy-free option, use a plant-based cream cheese. These alternatives can give a different taste, but they will still work well in the recipe. Churro cheesecake bars blend sweet, creamy, and crunchy in every bite. We covered essential ingredients like cream cheese and butter, plus optional flavors. I shared step-by-step instructions for a perfect bake. Remember key tips for texture and common mistakes to avoid. Enjoy customizing your bars with flavors that excite your taste buds. Whether you serve them fresh or frozen, they’ll be a hit. Create your own twist and share with friends. You won't regret it!

Churro Cheesecake Bars Delightfully Sweet Treat

- 1 cup quinoa, rinsed - 1 cup cherry tomatoes, halved - 1 cucumber, diced - 1/2 red onion, finely chopped - 1/2 cup Kalamata olives, pitted and sliced - 1/2 cup feta cheese, crumbled - 1/4 cup fresh parsley, chopped In this salad, quinoa acts as a great base. It’s light, fluffy, and packed with protein. Using fresh vegetables adds crunch and vibrant colors. Cherry tomatoes bring sweetness, while cucumbers add a refreshing bite. Red onion gives a nice sharpness, balancing the flavors well. Kalamata olives add a salty depth, and feta cheese provides a creamy texture. The fresh parsley brings it all together with its bright flavor. - 1/4 cup olive oil - 2 tablespoons lemon juice - 1 teaspoon dried oregano - Salt and pepper to taste The dressing is simple yet flavorful. Olive oil adds richness, while lemon juice gives it a zesty kick. Dried oregano brings an earthy note that ties in the Mediterranean theme. Salt and pepper enhance all the flavors, making the salad pop. - Approximately 250 calories per serving - 10g protein, 15g fat, 25g carbs per serving - Quinoa is a complete protein, making it great for vegetarians. This salad is not just tasty; it’s also nutritious. Quinoa is packed with protein and fiber. The fresh veggies provide vitamins and minerals. Feta cheese adds calcium, while olives offer healthy fats. Together, these ingredients create a wholesome dish that supports a healthy diet. {{ingredient_image_1}} Start by rinsing 1 cup of quinoa under cold water. This helps remove any bitter taste. Next, take a saucepan and combine the rinsed quinoa with 2 cups of vegetable broth. Bring this mixture to a boil. Once it boils, reduce the heat to low, cover, and let it simmer for about 15 minutes. You will know it’s done when the quinoa is fluffy and the liquid is absorbed. Afterward, use a fork to fluff the quinoa and set it aside to cool. While the quinoa cools, chop your vegetables and herbs. You will need 1 cup of halved cherry tomatoes, 1 diced cucumber, and 1/2 finely chopped red onion. Add 1/2 cup of sliced Kalamata olives and 1/4 cup of chopped fresh parsley to the bowl. Once everything is chopped, mix these ingredients in a large bowl. In a small bowl, whisk together 1/4 cup of olive oil, 2 tablespoons of lemon juice, and 1 teaspoon of dried oregano. Season with salt and pepper to taste. This dressing will bring all the flavors together. If you want a bolder taste, adjust the lemon juice or oil to your liking. After mixing, pour the dressing over the salad and add the cooled quinoa. Gently toss all the ingredients together until well combined. Let the salad sit for at least 15 minutes. This allows the flavors to meld beautifully before serving. To make your quinoa salad shine, start with the right technique. Fluffing quinoa correctly is key. Once the quinoa is cooked, use a fork to gently separate the grains. This helps prevent clumping and gives a light texture. Let it cool to room temperature before mixing it with your veggies. For marinating, let your salad sit for at least 15 minutes. This time allows the flavors to blend well. The longer you wait, the better the taste! Presentation can elevate your dish. Serve the salad in a large bowl. Top it with extra feta and a sprinkle of fresh parsley for color. For a fun twist, use clear cups for individual servings. This way, you can showcase all the vibrant layers. Pair your salad with grilled meats. Chicken or lamb works great and adds protein. You can also serve it with pita bread for a complete meal. Watch out for overcooking your quinoa. If you cook it too long, it can become mushy. Stick to about 15 minutes for perfect results. Don't skimp on seasoning! A little salt and pepper can make a huge difference. Taste your salad after mixing and adjust as needed. This ensures every bite is full of flavor. Pro Tips Rinse the Quinoa: Always rinse quinoa thoroughly before cooking to remove its natural coating, called saponin, which can taste bitter. Use Fresh Herbs: Fresh parsley adds a vibrant flavor to the salad, but you can also experiment with other herbs like mint or basil for a different twist. Chill Before Serving: For the best flavor, let the salad chill in the refrigerator for at least 30 minutes before serving; this allows the ingredients to marinate. Customize Your Ingredients: Feel free to add or substitute ingredients based on your preference, such as bell peppers, chickpeas, or avocado for added texture and nutrition. {{image_2}} You can easily switch grains in this salad. Couscous or bulgur works well, too. These grains offer a different texture and flavor. For a vegetarian option, keep the feta. If you want it vegan, replace the feta with avocado or a nut-based cheese. Want to add crunch? Toss in some nuts or seeds like almonds or sunflower seeds. They add great texture and taste. You can also mix up the dressing. Try balsamic vinegar or tahini for a new twist. Each dressing gives the salad a unique flair. This salad shines in summer. Add seasonal veggies like bell peppers, zucchini, or corn for fresh flavors. In winter, roast vegetables like sweet potatoes or Brussels sprouts. They add warmth and depth to the dish. Each season brings new life to your Mediterranean quinoa salad! To keep your Mediterranean quinoa salad fresh, store it in an airtight container. Place the salad in the fridge as soon as you finish eating. This method helps keep flavors intact. Your salad will stay fresh for about three to five days. Check for any signs of spoilage before eating. You can freeze quinoa salad, but be aware it may lose some texture. To freeze, place the salad in a freezer-safe container. Make sure to leave space for expansion. When you want to eat it, move the salad to the fridge to thaw overnight. For a quicker option, you can thaw it in a bowl of cold water. Reheat quinoa salad gently to keep its texture. Use the microwave or a stovetop pan. If using a microwave, heat in short bursts, stirring often. On the stovetop, add a splash of water to keep it moist. This method helps maintain the salad's fresh flavors. You can add proteins to make your salad heartier. Here are some great options: - Grilled chicken or shrimp - Chickpeas or black beans - Hard-boiled eggs - Tofu or tempeh - Sliced turkey or ham Adding these ingredients boosts the protein content. This makes the meal more satisfying. You can mix and match these proteins based on your taste. Yes, you can prepare this salad ahead. Make it a day before serving for great flavor. Here are some tips for meal prep: - Cook the quinoa and let it cool. - Chop the veggies and store them in the fridge. - Mix the dressing separately and keep it sealed. - Combine everything just before serving. This helps keep the salad fresh and crisp. Mediterranean Quinoa Salad has many serving styles. Here are some ideas: - Serve in a large bowl for sharing. - Use clear cups for individual servings. - Garnish with extra feta and parsley for flair. - Pair it with grilled meats for a complete meal. This salad works well for picnics, potlucks, and gatherings. It’s a colorful and tasty dish that everyone will enjoy! This blog post covered how to make a delicious Mediterranean quinoa salad. We discussed key ingredients like quinoa, fresh veggies, herbs, and a tasty dressing. I shared step-by-step cooking instructions and tips to perfect your salad. Remember, adjusting flavors and exploring variations can keep your meals exciting. By storing properly, you can enjoy leftovers later. Make this dish a staple for any occasion—healthy, tasty, and easy to prepare. You'll love how it brightens your table and your meals!

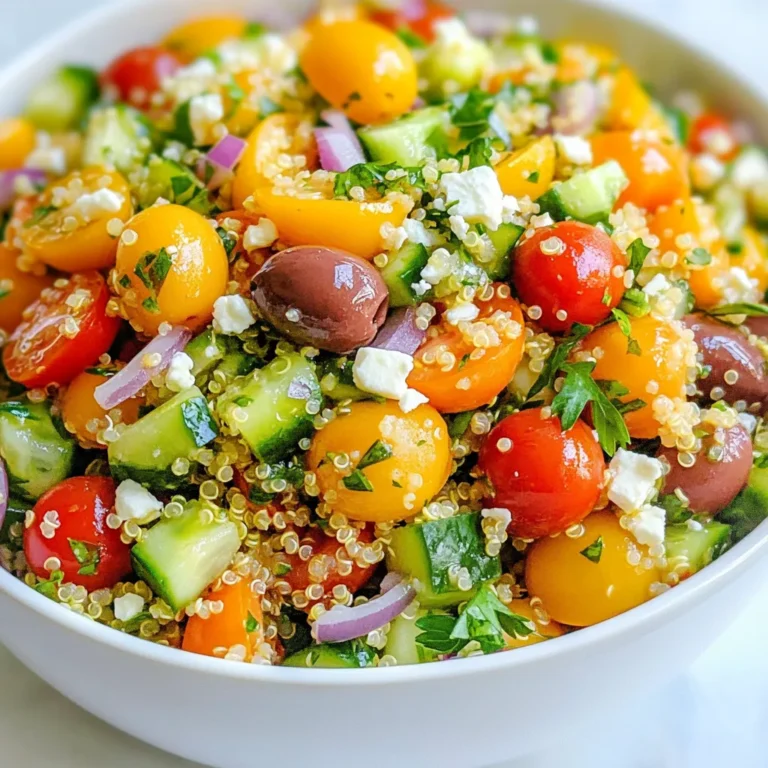
Mediterranean Quinoa Salad Fresh and Flavorful Delight

- 1 lb salmon fillet, skinless and cubed - 1/4 cup soy sauce - 1/4 cup brown sugar - 2 tablespoons honey - 1 tablespoon grated fresh ginger - 2 cloves garlic, minced - 1 tablespoon sesame oil - 1 red bell pepper, cut into chunks - 1 zucchini, sliced into rounds - 1 small red onion, cut into chunks - 1 tablespoon sesame seeds (for garnish) - 4-6 skewers (if using wooden skewers, soak in water for 30 minutes) Feel free to mix in extra flavors. You can add: - Pineapple chunks for a sweet bite - Snap peas for crunch - A splash of rice vinegar for tang These options boost taste and texture, making the kabobs even better. To make these kabobs right, you need: - A mixing bowl for the marinade - A grill or grill pan for cooking - Skewers for holding the ingredients - A brush for adding extra marinade These tools help you create a tasty dish with ease. {{ingredient_image_1}} To start, gather your ingredients. You need salmon, soy sauce, brown sugar, honey, ginger, garlic, and sesame oil. Cut your salmon into cubes. In a bowl, mix the soy sauce, brown sugar, honey, ginger, garlic, and sesame oil. Stir until the sugar dissolves. This will be your teriyaki marinade. Put the salmon cubes in a new bowl and pour half of the marinade over them. Make sure each piece is coated well. Cover the bowl and refrigerate it for at least 30 minutes. This wait helps the salmon soak up the flavors. While the salmon marinates, prepare your veggies. Cut the red bell pepper, zucchini, and red onion into chunks. Grab your skewers, and if they are wooden, soak them in water for 30 minutes. This prevents burning on the grill. Now, thread the veggies onto the skewers. Alternate between the red bell pepper, zucchini, and red onion. Once the veggies are ready, take the salmon out of the fridge. Carefully add the salmon pieces to the skewers, alternating with the veggies. Marinating is key for tasty salmon kabobs. For the best flavor, use fresh ginger and minced garlic. These ingredients give a bright taste. Letting the salmon marinate for at least 30 minutes is crucial. If you have more time, marinate for up to two hours. This allows deeper flavor absorption. Remember to reserve some marinade for later. You can brush this on the kabobs while they grill. This adds even more flavor and keeps the salmon moist. To grill your kabobs, preheat your grill or grill pan to medium-high heat. This ensures a good sear on the salmon and veggies. Place the kabobs on the grill carefully. Cook for about 8-10 minutes. Turn the kabobs gently. This helps to keep the salmon pieces intact. You want that nice, flaky texture! During the last few minutes, sprinkle sesame seeds on top. This gives a nice crunch. After grilling, let the kabobs rest for a couple of minutes. This helps the juices stay inside. Serve them on a platter, drizzle with leftover marinade, and enjoy! When making teriyaki glazed salmon kabobs, avoid overcooking the salmon. Salmon cooks quickly. Keep an eye on it while grilling. If you leave it too long, it will become dry. Also, don’t skip marinating the salmon. This step adds a lot of flavor. Lastly, remember to soak wooden skewers. This keeps them from burning on the grill. To get the best texture, cut the salmon into even cubes. This ensures they cook at the same rate. Marinate the salmon for at least 30 minutes. This helps the fish absorb the flavors. When grilling, use medium-high heat. This cooks the salmon evenly while keeping it moist. Turn the kabobs gently to avoid breaking the salmon apart. Pair your teriyaki glazed salmon kabobs with steamed rice. The rice soaks up the rich teriyaki sauce. You can also add a fresh salad on the side. A crunchy cucumber salad works great. For drinks, try serving with green tea or a light white wine. These pair well with the sweet and savory flavors of the kabobs. Pro Tips Choose the Right Salmon: Opt for fresh or high-quality salmon for the best flavor and texture. Wild-caught salmon is often more flavorful than farmed varieties. Marination Time: For a deeper flavor, marinate the salmon for longer, up to 2 hours. Just be cautious not to over-marinate, which can lead to a mushy texture. Grill Temperature: Ensure your grill is preheated to medium-high before adding the kabobs. This helps achieve a nice char without drying out the salmon. Rest the Kabobs: Allow the kabobs to rest for a couple of minutes after grilling. This helps the juices redistribute, making the salmon more tender and moist. {{image_2}} You can switch up the salmon with other proteins. Chicken works well and so does shrimp. Both pair nicely with teriyaki sauce. For chicken, use boneless thighs for juiciness. If you choose shrimp, use large ones for better grilling. Firm tofu is a great choice for a meat-free option. Feel free to mix in other veggies for more flavor. Cherry tomatoes add a sweet burst. Mushrooms bring a nice earthy taste. You can also try asparagus or bell peppers of different colors. Broccoli florets are great, too. Just remember to cut them into similar sizes for even cooking. You can make this dish vegan easily. Use firm tofu or tempeh instead of salmon. Marinate the tofu just like you would the fish. For a veggie option, load up on mushrooms, zucchini, and bell peppers. You can also add pineapple for a sweet twist. This keeps the teriyaki flavor while being plant-based. After enjoying your teriyaki glazed salmon kabobs, you may have some left. To keep them fresh, let the kabobs cool down to room temperature first. Then, place them in an airtight container. Store this container in the fridge. Leftover kabobs will stay good for up to three days. When you're ready to eat the leftovers, reheating is simple. You can use the microwave for quick heating. Place the kabobs on a microwave-safe plate and cover them. Heat in short bursts of 30 seconds. Check if they are warm enough before serving. If you prefer, you can also reheat them on a grill. This keeps the taste fresh and adds a little char. If you want to store the kabobs for a longer time, freezing is a great option. First, wrap each kabob tightly in plastic wrap. Then, place them in a freezer bag. Make sure to remove as much air as possible. They will last about three months in the freezer. When you’re ready to eat them, thaw the kabobs in the fridge overnight. For best results, reheat them on the grill or in the oven to keep them juicy and tasty. Yes, you can! Feel free to swap the teriyaki marinade. You could try a lemon herb mix or a spicy chili sauce. Both can give the salmon a new twist. Just remember to balance flavors. A good marinade should be sweet, salty, and have a bit of acid. Check the color and texture. Cooked salmon turns from dark pink to light pink. It should easily flake with a fork. The internal temperature should reach 145°F. Use a meat thermometer for accuracy. If you don't have one, look for opaque flesh. Many sides complement these kabobs. Here are some ideas: - Steamed rice - Fresh salad - Grilled asparagus - Roasted sweet potatoes - Stir-fried vegetables These sides add color and flavor to your meal. Try mixing and matching to find your favorite combination! This blog post covered how to make tasty kabobs. We explored the key ingredients, like proteins and spices. I shared helpful tips for cooking and marinating to boost flavor. We looked at common mistakes and how to store leftovers correctly. Remember, you can also mix in other proteins or veggies if you want. Enjoy your kabobs today and make them your own! Happy cooking!

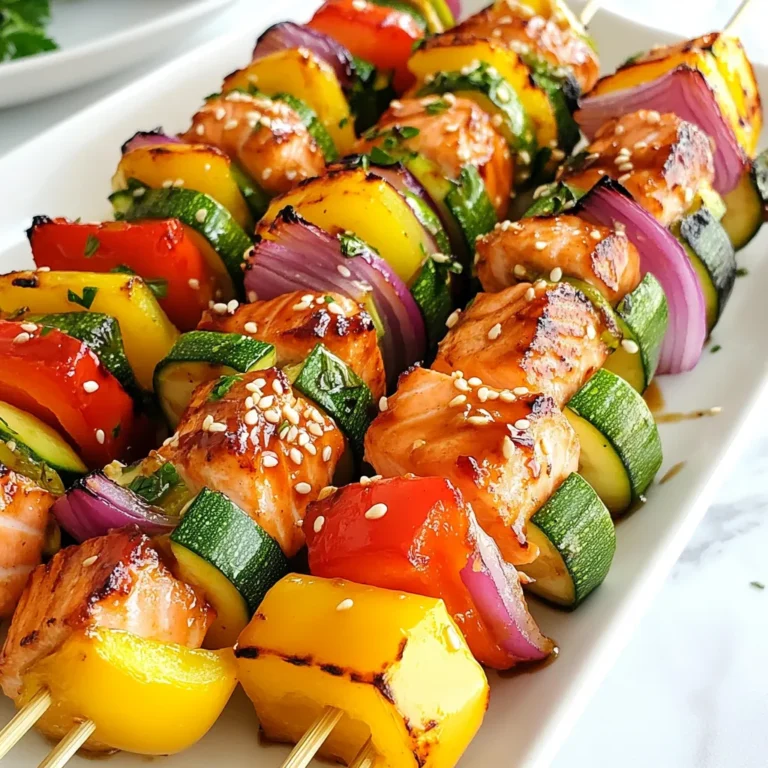
Teriyaki Glazed Salmon Kabobs Flavorful and Simple Dish

- 4 boneless, skinless chicken breasts - 2 cups fresh spinach, washed and chopped - 1 cup cream cheese, softened The main ingredients make this dish rich and tasty. Chicken breasts provide a lean protein. The fresh spinach adds color and nutrients. Cream cheese brings a creamy texture and flavor. - 1 cup shredded mozzarella cheese - 1/2 cup grated Parmesan cheese Using different cheeses can change the taste. Mozzarella melts well and adds stretch. Parmesan gives a sharp flavor that enhances the dish. Feel free to mix both for a unique taste. - 2 garlic cloves, minced - 1 teaspoon garlic powder - 1/2 teaspoon onion powder - Salt and pepper to taste - 1 teaspoon paprika (for garnish) Seasoning is key to great flavor. Fresh garlic and garlic powder boost taste. Onion powder adds a sweet note. Salt and pepper bring out all the flavors. Paprika adds a lovely color and slight heat. Adjust these to suit your taste. Preheat the oven Start by preheating your oven to 375°F (190°C). This step is key to cooking the chicken evenly. Prepare the filling In a large bowl, mix 1 cup of softened cream cheese, 2 cups of chopped spinach, and 1 cup of shredded mozzarella cheese. Add 1/2 cup of grated Parmesan cheese, 2 minced garlic cloves, 1 teaspoon of garlic powder, and 1/2 teaspoon of onion powder. Season with salt and pepper. Stir until everything is well blended. Stuff the chicken Take 4 boneless, skinless chicken breasts. Carefully cut a pocket into each one. Make sure to not cut all the way through. Use a spoon to fill each chicken pocket with your tasty spinach and cheese mix. Secure the chicken with toothpicks Grab some toothpicks to close the pockets. Insert them to keep the filling inside while cooking. This step ensures your filling stays put and makes for a neat presentation. Sear the chicken In a large oven-safe skillet, heat 1 tablespoon of olive oil over medium-high heat. Season the outside of the chicken with salt, pepper, and a sprinkle of paprika. Once the oil is hot, add the stuffed chicken. Sear each side for about 4-5 minutes until they look golden brown. Bake until cooked through Carefully transfer the skillet to your preheated oven. Bake for 20-25 minutes. Use a meat thermometer to check if the chicken is done. It should reach an internal temperature of 165°F (75°C). - Ensuring chicken is juicy: To keep your chicken juicy, do not overcook it. Use a meat thermometer. The chicken should reach 165°F (75°C). This helps it stay moist and tender. - Avoiding overstuffing: When stuffing the chicken, be careful not to overfill. If you pack in too much filling, it can spill out during cooking. A good rule is to fill the pocket generously, but not to the brim. - Consistency of the cheese mixture: Aim for a creamy and spreadable filling. If it is too thick, add a splash of milk or cream. This will help it blend well and stuff easily into the chicken. - Alternative ingredients: You can mix things up! Try adding ricotta cheese or feta for a different flavor. You can also use kale or Swiss chard in place of spinach for a fun twist. - Checking chicken doneness: Always check that your chicken is fully cooked. Use a meat thermometer in the thickest part of the breast. It should read 165°F (75°C) for safety. - Proper use of toothpicks: When you use toothpicks to seal the chicken, insert them at an angle. This helps hold the filling inside. Remember to remove them before serving! {{image_2}} You can change ingredients to fit your needs. For a dairy-free option, try using cashew cream. It gives a nice texture and flavor. You could also use vegan cheese instead of cream cheese and mozzarella. For the greens, spinach is great, but you can swap it for kale or Swiss chard. Both add a different taste and nutrition. Just remember to chop them finely. If you want to switch it up, try grilling the chicken instead of baking it. Grilling adds a smoky flavor that pairs well with the cheesy filling. Just be sure to keep the grill at medium heat. Another option is using a slow cooker. This method makes the chicken very tender. Just sear the chicken first, then place it in the slow cooker with the filling. Cook on low for 4 to 6 hours. To boost the flavor, add sun-dried tomatoes to the filling. They add a nice tangy taste that mixes well with the cheese. Chop them finely and mix them in with the other ingredients. You can also incorporate spices like Italian seasoning or red pepper flakes. These spices will give the dish a bit of heat and depth. Just adjust the amount to your taste. Storing leftovers is easy. After dinner, let the chicken cool. Place it in an airtight container. This keeps it fresh. You can store it in the fridge for up to three days. When you're ready to eat it again, reheat the chicken in the oven. Set the oven to 350°F (175°C). Heat for about 15 to 20 minutes. This way, the chicken stays moist and warm. You can also use a microwave for quick reheating. Just cover it with a damp paper towel. This helps keep it juicy. Freezing stuffed chicken is a great way to save it for later. First, let the chicken cool completely. Wrap each piece tightly in plastic wrap. Then, place the wrapped chicken in a freezer bag. Remove as much air as possible. This helps prevent freezer burn. You can freeze it for up to three months. When you want to eat it, take it out of the freezer a day before. Thaw it in the fridge overnight. To cook from frozen, bake it at 375°F (190°C) for about 40 to 50 minutes. Make sure it reaches an internal temperature of 165°F (75°C). Understanding how long it lasts is important. In the fridge, your creamy spinach stuffed chicken lasts about three days. In the freezer, it can stay good for up to three months. Use these tips to enjoy your leftovers safely. Always check for any off smells or changes in texture before eating. Can I use frozen spinach? Yes, you can use frozen spinach. Just thaw and drain it well. Excess water can make your filling too runny. I recommend squeezing out any extra liquid before mixing it into the cheese. What to serve with creamy spinach stuffed chicken? This dish pairs well with many sides. Try it with sautéed vegetables or a light salad. You can also serve it over rice or pasta for a hearty meal. Is this recipe gluten-free? Yes, this recipe is gluten-free. All the ingredients used, including the cheeses and the seasonings, do not contain gluten. Always check labels to be safe, especially for pre-packaged items. How to make it low-calorie? To lower the calories, use less cream cheese and cheese. You can also substitute with low-fat versions. Using chicken thighs instead of breasts can add flavor without many extra calories. My filling leaks out, what went wrong? If your filling leaks out, you might have cut the chicken too deep. Make sure to cut just enough to create a pocket. Also, use toothpicks to seal the chicken tightly. Why is my chicken dry? Dry chicken usually means it was overcooked. Use a meat thermometer to check the internal temperature. It should reach 165°F (75°C) but not more. Keeping an eye on cooking time helps too. In this post, we explored how to make creamy spinach stuffed chicken. We covered the main ingredients like chicken, spinach, and cream cheese. You learned about cheese options and the best seasonings to use. The step-by-step guide helped simplify preparation, stuffing, and cooking. Remember, using juicy chicken is key to success. Don’t forget the tips for variations and storage. With these insights, you can create a delicious meal for any occasion. Enjoy your cooking adventure!

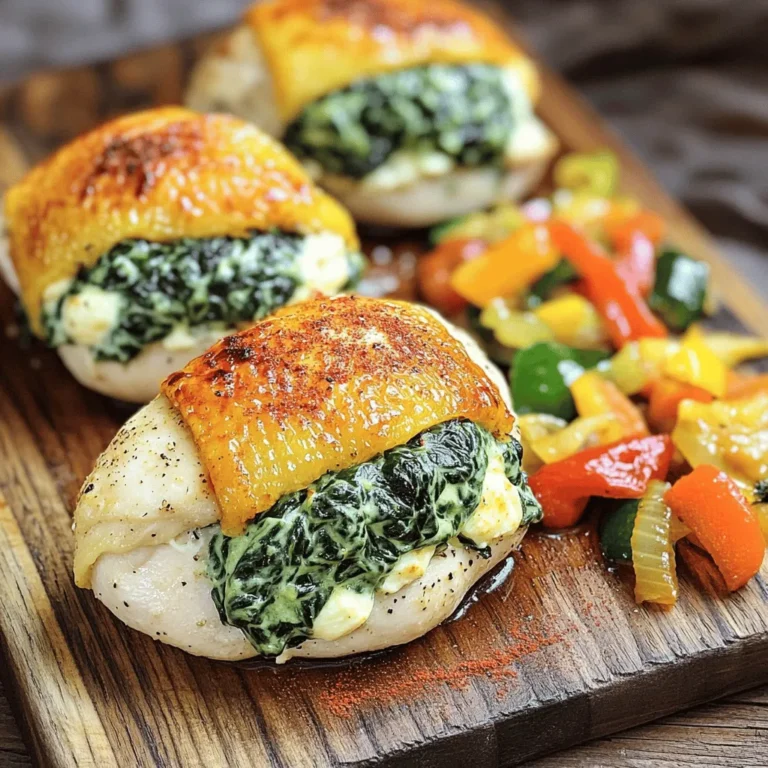
Creamy Spinach Stuffed Chicken Flavorful Dinner Delight

- 1 cup rolled oats - 1 cup whole wheat flour - 1/2 cup brown sugar, packed These main ingredients form the base of your oatmeal raisin cookies. The rolled oats give a hearty texture, while whole wheat flour adds fiber and a nutty taste. Brown sugar sweetens the cookies and keeps them moist. - 1/2 cup unsweetened applesauce - 1/4 cup honey or maple syrup - 1/2 cup raisins - 1/4 cup chopped walnuts (optional) The unsweetened applesauce replaces some fat and adds moisture. Honey or maple syrup provides natural sweetness. Raisins bring chewiness, while walnuts add a nice crunch if you choose to include them. - 1/2 teaspoon baking soda - 1/2 teaspoon cinnamon - 1/4 teaspoon salt - 1 teaspoon vanilla extract - 1/4 cup unsweetened almond milk (or any milk of choice) Baking soda helps the cookies rise, making them light. Cinnamon adds warmth and spice. Salt enhances all the flavors, while vanilla extract gives a lovely aroma. Almond milk or any milk option keeps the dough moist and binds everything together. Each ingredient plays a key role in making these oatmeal raisin cookies delightful and nourishing for breakfast. 1. Preheat your oven to 350°F (175°C). This ensures even baking. 2. Line a baking sheet with parchment paper for easy cleanup. 3. In a large mixing bowl, combine: - 1 cup rolled oats - 1 cup whole wheat flour - 1/2 teaspoon baking soda - 1/2 teaspoon cinnamon - 1/4 teaspoon salt Mix these dry ingredients well. This step is key for even flavor. 1. In a separate bowl, whisk together: - 1/2 cup brown sugar, packed - 1/2 cup unsweetened applesauce - 1/4 cup honey or maple syrup - 1 teaspoon vanilla extract - 1/4 cup unsweetened almond milk (or any milk of choice) Keep whisking until the mixture is smooth. This helps blend the flavors. 1. Gradually add the wet mixture to the dry ingredients. Stir until just combined. Don’t overmix. 2. Fold in: - 1/2 cup raisins - 1/4 cup chopped walnuts (optional) Make sure these add-ins are evenly distributed. 3. Scoop tablespoon-sized amounts of the dough onto the prepared baking sheet. Space them about 2 inches apart. 4. Flatten each cookie slightly with the back of a spoon. This helps them bake evenly. 5. Bake in the preheated oven for 12-15 minutes, or until the edges are lightly golden. Keep an eye on them! 6. Once done, remove from the oven and let cool on the baking sheet for 5 minutes. Then, transfer to a wire rack to cool completely. Enjoy the wonderful smell! To keep your oatmeal raisin breakfast cookies soft and chewy, follow these steps: - Use applesauce: This ingredient adds moisture, making cookies tender. - Do not over-bake: Take them out when edges are golden, but centers look soft. - Cool them properly: Let cookies cool on the sheet for a few minutes before moving. For measuring ingredients accurately, try these methods: - Use a kitchen scale: Weigh your flour for the best results. - Spoon and level: For dry ingredients, spoon the flour into the cup and level it off with a knife. Presentation is key to making breakfast special. Here are some tips: - Colorful plates: Arrange cookies on a bright plate to catch the eye. - Add fruit: Serve with fresh fruit like berries or bananas for a colorful touch. - Yogurt side: A small bowl of yogurt adds creaminess and pairs well with cookies. To enhance your meal, consider these pairing ideas: - Milk: A glass of almond milk or regular milk complements cookies well. - Coffee or tea: A warm drink rounds out the breakfast experience. Oatmeal and raisins pack great nutritional advantages. Here are some benefits: - Fiber: Oats are high in fiber, which helps digestion and keeps you full longer. - Antioxidants: Raisins offer antioxidants, promoting good health. Exploring whole grain benefits is essential for breakfast: - Energy boost: Whole grains provide lasting energy to kick-start your day. - Nutrient-rich: They contain vitamins and minerals that support overall health. {{image_2}} You can change the flavor of your oatmeal raisin cookies easily. One fun idea is to add chocolate chips. The mix of oats and chocolate makes a tasty treat. You could also add spices like nutmeg or ginger. These spices add warmth and depth to the cookies. Just a pinch can transform the flavor completely. If you follow a vegan diet, you can make a vegan version of these cookies. Use flaxseed mixed with water instead of eggs. This will help bind the ingredients together. For those who need gluten-free options, try using alternative flours. Almond flour or oat flour works well. These choices keep the cookies soft and tasty. You can also play with the texture of your cookies. If you like chewy cookies, bake them for less time. If you prefer crisp cookies, leave them in the oven a bit longer. Another fun idea is to use different types of nuts. You can swap walnuts for pecans or almonds. Each nut adds its own flavor and crunch to the cookies. To keep your oatmeal raisin breakfast cookies fresh, store them in an airtight container. This helps to lock in moisture and flavor. I recommend using a glass or plastic container with a tight lid. Place a piece of parchment paper between layers if you stack them. This prevents sticking and keeps them intact. You can freeze these cookies for later enjoyment. To freeze unbaked cookies, scoop the dough onto a baking sheet. Space them out well and freeze until firm. Transfer the frozen dough to a freezer bag. For baked cookies, let them cool completely first. Then, place them in a freezer-safe container. To thaw, simply take the cookies out and let them sit at room temperature for about 30 minutes. You can also warm baked cookies in the oven for a few minutes at 350°F (175°C) for that fresh-baked taste. These cookies last about a week at room temperature if stored properly. Look for signs of spoilage like hard texture or an off smell. If they feel dry or crumbly, that’s a sign they’ve gone stale. Keeping an eye on freshness helps you enjoy every bite. Can I make these cookies ahead of time? Yes, you can make these cookies ahead. They store well in an airtight container. Just let them cool completely before storing. You can also freeze the dough for up to three months. When ready to bake, just thaw it and bake as directed. What can I substitute for applesauce? You can use mashed banana or yogurt instead. Both options keep the cookies moist. If you use banana, it adds a slight flavor. Yogurt will keep the texture similar to applesauce. How can I make the cookies less sweet? To reduce sweetness, cut back on brown sugar. You could also skip the honey or maple syrup. Adding more oats can balance the sweetness too. What adjustments are needed for high altitude baking? At high altitudes, you may need to add more flour. Decrease sugar slightly, and add a bit more liquid. This helps the cookies rise well and bake evenly. Are oatmeal raisin cookies a healthy breakfast option? Yes, these cookies can be a healthy breakfast. They include oats, which provide fiber. The raisins add natural sweetness and some vitamins. How many calories are in one cookie? One cookie has about 100 calories. This may vary slightly based on size and added ingredients. They make a great, filling snack that won’t weigh you down. We covered a lot on making perfect oatmeal raisin cookies. We discussed the key ingredients and the step-by-step process. Tips for baking and serving help you create tasty treats. Variations let you personalize your cookies, while storage info keeps them fresh. Remember, these cookies can be a healthy breakfast choice when made right. Enjoy baking, and let your creativity shine in the kitchen!

Oatmeal Raisin Breakfast Cookies Delightful Treats

- 2 large sweet potatoes - 2 tablespoons olive oil - 1 teaspoon garlic powder - 1 teaspoon paprika - ½ teaspoon cumin - Salt and pepper to taste - ½ cup mayonnaise - 1-2 chipotle peppers in adobo sauce, finely chopped - 1 tablespoon lime juice - 1 clove garlic, minced Sweet potatoes are the star of this dish. They have a natural sweetness that pairs well with savory spices. When buying sweet potatoes, look for firm ones with smooth skin. Olive oil helps crisp the fries in the oven. Garlic powder adds flavor, while paprika gives a nice color. Cumin adds warmth to the mix. Don't forget to add salt and pepper to enhance all the flavors. For the chipotle aioli, I love using mayonnaise as a base. It gives a creamy texture that perfectly complements the fries. Chipotle peppers in adobo sauce add a smoky heat, which makes this dip special. The lime juice adds brightness, and minced garlic gives it an extra kick. Adjust the amount of chipotle peppers based on your heat preference. With these ingredients, you're ready to make sweet potato fries that are crispy, savory, and delicious! 1. Preheat your oven to 425°F (220°C). This step gets the oven hot for crispy fries. 2. Line a baking sheet with parchment paper. This helps with easy cleanup and prevents sticking. 3. Peel the sweet potatoes. Use a sharp peeler for smooth, easy peeling. 4. Cut the sweet potatoes into thin strips. Aim for about 1/4 inch thick. This helps them cook evenly. 1. In a large bowl, toss the sweet potato strips with olive oil. Use 2 tablespoons to coat them well. 2. Add garlic powder, paprika, cumin, salt, and pepper. Mix everything until the sweet potatoes are fully coated. 3. Spread the seasoned sweet potatoes on the prepared baking sheet. Make sure they are in a single layer. This ensures they get crispy. 4. Bake in the preheated oven for about 25-30 minutes. Flip them halfway through to get an even crispness. They should be golden brown and crispy when done. 1. While the fries bake, mix the aioli ingredients. In a small bowl, combine ½ cup mayonnaise, chopped chipotle peppers, lime juice, and minced garlic. 2. Adjust the amount of chipotle peppers to your taste. Start with one and add more if you like it spicier. 3. Stir everything together until smooth and creamy. This aioli pairs perfectly with the sweet potato fries. Serve the fries warm with the aioli on the side for dipping. Enjoy your delicious homemade treat! To get crispy sweet potato fries, cut them evenly. This helps them cook at the same rate. Aim for strips about 1/4 inch thick. Thinner cuts will crisp up better. When baking, use a hot oven. Preheat it to 425°F (220°C). Line your baking sheet with parchment paper. This helps the fries not stick. Spread the fries out in a single layer. They should not touch or overlap. This allows hot air to circulate, making them crispy. Flip the fries halfway through baking for even crispiness. You can adjust the chipotle aioli to fit your taste. If you want more heat, add more chipotle peppers. Start with one pepper and taste. You can always add more if needed. For a different flavor, swap the mayonnaise for Greek yogurt. This gives a creamier texture with less fat. You can also try adding fresh herbs like cilantro for a fresh twist. If you like a tangy touch, add more lime juice. Mixing in a pinch of smoked paprika can also enhance the flavor. Enjoy creating your perfect dip! {{image_2}} You can spice up your sweet potato fries with many flavors. Try different spice mixes like taco seasoning or curry powder. These add a fun twist to the taste. Adding fresh herbs can also boost flavor. You can sprinkle on chopped rosemary or thyme before baking. These herbs work well with sweet potatoes. They bring out a new taste that is fresh and bright. If you want a vegan option, use vegan mayonnaise. It gives you the same creamy texture without eggs. For those who like milder flavors, try using roasted red peppers instead of chipotle. They still add a nice depth to the aioli but with less heat. Other options include jalapeños or even sweet peppers for a different kick. Adjust the heat to fit your taste! To keep your sweet potato fries fresh, store them in an airtight container. Let the fries cool first before putting them away. This helps prevent steam, which can make fries soggy. Place the container in the fridge. The fries will stay good for about three days. When you're ready to eat the fries again, reheating them is key. The best way is to use the oven. Preheat it to 400°F (200°C). Spread your fries on a baking sheet, and bake for about 10 minutes. This will help them regain their crispy texture. You can also use an air fryer for a quick and crispy result. For the chipotle aioli, keep it in a sealed jar in the fridge. This keeps it fresh and tasty. Homemade aioli will last about one week. Always check for any changes in smell or texture before using. If you have leftover aioli, it’s great to use as a spread for sandwiches or a dip for veggies. Just remember to store it properly to enjoy its rich flavor later! To keep sweet potato fries crispy, first, dry them well after cutting. Water makes them soggy. After washing, pat them dry with a towel. Use a good amount of oil, like olive oil, to coat them. Spread the fries out on the baking sheet. They should not touch. This helps them get crispy. - Use a high oven temperature: Preheat to 425°F (220°C). - Flip halfway through baking: This helps them cook evenly. - Avoid overcrowding: Give each fry space to breathe. Yes, you can use regular potatoes, like Russets. They taste different and have a different texture. Sweet potatoes are sweeter and softer. Regular potatoes are starchier and crispier. If you swap, adjust your seasonings to balance the flavor. - Sweet potatoes: Naturally sweet, softer texture. - Regular potatoes: Earthy, crispier, and more starchy. Many dips work well with sweet potato fries. Here are some favorites: - Ketchup: A classic choice. - Ranch dressing: Creamy and tangy. - BBQ sauce: Adds a smoky flavor. - Guacamole: Creamy and fresh. - Hummus: A healthy option with a nice flavor. Feel free to try new dips! We explored how to make sweet potato fries and a tasty chipotle aioli. You learned which ingredients to use, how to prepare and season the fries, and tips for achieving crispiness. Customizing your aioli and trying different flavors can add fun to your meal. Remember to store leftovers properly to maintain their freshness. With these steps, you can enjoy delicious fries any time. Enjoy your cooking!

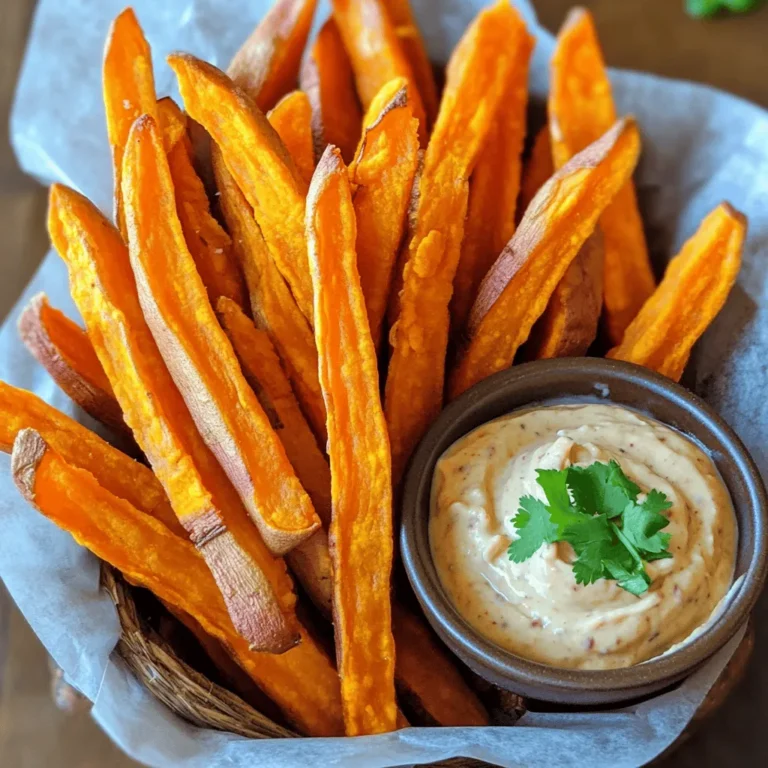
Savory Sweet Potato Fries with Chipotle Aioli Recipe

To make Greek Lemon Chicken Soup, gather these simple ingredients: - 1 lb boneless, skinless chicken breast - 6 cups low-sodium chicken broth - 1 cup uncooked orzo pasta - 2 large carrots, diced - 1 celery stalk, diced - 1 medium onion, chopped - 3 garlic cloves, minced - 2 large eggs - 1/4 cup fresh lemon juice - Zest of 1 lemon - 1 tablespoon olive oil - Salt and pepper to taste - Fresh dill or parsley for garnish Using fresh ingredients makes a big difference. Fresh vegetables, like carrots and celery, add great taste. Fresh herbs, like dill or parsley, bring bright flavors. They also make the soup look nice. Dried ingredients can work in a pinch, but they lack that fresh burst. Use fresh lemon juice instead of bottled for the best taste. You can swap some ingredients if needed: - Chicken: Use leftover chicken or rotisserie chicken for quick prep. - Pasta: Try rice or quinoa instead of orzo for a gluten-free option. - Broth: Vegetable broth will work if you want a lighter soup. - Herbs: Basil or thyme can replace dill or parsley for a different flavor. These swaps can still keep the soup tasty while matching your pantry. First, gather your ingredients. You need: - 1 lb boneless, skinless chicken breast - 6 cups low-sodium chicken broth - 1 cup uncooked orzo pasta - 2 large carrots, diced - 1 celery stalk, diced - 1 medium onion, chopped - 3 garlic cloves, minced - 2 large eggs - 1/4 cup fresh lemon juice - Zest of 1 lemon - 1 tablespoon olive oil - Salt and pepper to taste - Fresh dill or parsley for garnish Next, chop the onions, carrots, and celery. This adds flavor to the soup. Heat the olive oil in a large pot over medium heat. Add the diced onions, carrots, and celery. Sauté for about 5 to 7 minutes. Cook until the veggies are soft. Now, add the minced garlic to the pot. Cook for 1 more minute until the garlic smells nice. Pour in the chicken broth and bring it to a boil. Add the chicken breasts and orzo pasta. Simmer for 10 to 12 minutes. Check the chicken to make sure it’s fully cooked. When done, remove the chicken and let it cool. Shred the chicken into bite-sized pieces using two forks. In a small bowl, whisk together the eggs, lemon juice, and lemon zest. This mix gives the soup a rich flavor. To temper the egg mixture, slowly ladle a cup of hot soup broth into it while whisking. This step stops the eggs from cooking too fast. Once tempered, pour the egg mix back into the pot. Stir constantly to keep the eggs smooth. Add the shredded chicken back into the soup. Season with salt and pepper to taste. Heat the soup gently for a few more minutes, but do not let it boil. Now, your Greek Lemon Chicken Soup is ready to serve! Garnish with fresh dill or parsley for a nice touch. Enjoy! To make your Greek lemon chicken soup shine, use fresh ingredients. Fresh chicken and vegetables add great taste. Sauté your onions, carrots, and celery until soft. This builds a strong base for your soup. Use low-sodium chicken broth for better control of salt. After adding chicken and orzo, stir often to prevent sticking. When whisking the egg mixture, do it slowly. This helps avoid curdling and gives a smooth finish. One common mistake is boiling the soup after adding the egg mixture. This can scramble the eggs. Always heat gently after adding. Another mistake is not shredding the chicken finely. Large pieces might not blend well with the soup. Lastly, be careful with salt. Always taste before adding more. Your broth may already have enough salt. If you have larger chicken breasts, cook them a bit longer. Check for doneness using a meat thermometer. It should read 165°F. For orzo, if you prefer a firmer texture, reduce the cooking time by a minute. If you want a thicker soup, add more orzo. Just remember to adjust the broth to keep it balanced. {{image_2}} You can make Greek lemon chicken soup even better by adding more veggies. Try diced zucchini, spinach, or green beans. These add color and nutrients. You can also toss in some peas for a sweet touch. Each vegetable brings its own taste, making the soup more exciting. Feel free to mix and match based on what you have at home. If you want to change the protein, you have options. You can use turkey instead of chicken. Shredded rotisserie chicken works great, too. For a vegetarian version, try chickpeas or lentils. They give a nice texture and protein boost. Tofu is also a good choice for a plant-based option. Always cook your protein well to keep the flavors rich. To make this soup gluten-free, swap the orzo for rice or gluten-free pasta. Both options cook well and soak up the flavors. You can also skip the pasta entirely for a lighter soup. Just add extra veggies for a filling meal. Always check labels on packaged items to ensure they are gluten-free. You can keep Greek lemon chicken soup in the fridge for up to three days. Let it cool to room temperature before putting it in an airtight container. This keeps the flavors locked in. Make sure to store it without any garnishes. Add fresh herbs right before serving for the best taste. If you want to save the soup for later, freezing works well. Use a freezer-safe container or zip-top bag. Be sure to leave some space at the top, as the soup will expand when frozen. The soup can last for about three months in the freezer. To keep it fresh, label the container with the date. To reheat, you can use the stovetop or microwave. If using the stovetop, pour the soup into a pot and heat it over medium heat. Stir it often to warm it evenly. If using the microwave, place the soup in a microwave-safe bowl. Heat it in short bursts, stirring in between. Check the temperature to make sure it’s hot throughout. If the soup seems thick after freezing, add a little broth or water to thin it out. Avgolemono is a Greek word. It means "egg and lemon." This sauce adds a rich taste to many dishes. You find it in soups, like Greek lemon chicken soup. The eggs and lemon juice create a creamy texture. It brings a bright flavor that lifts the soup. Yes, you can use leftover chicken. It saves time and adds great taste. Just shred the chicken into bite-sized pieces. Add it to the soup during the last few minutes of cooking. This way, the chicken heats up but does not overcook. To make your soup more tangy, add extra lemon juice. Start with one tablespoon and taste it. You can add more if you like it tangier. Another option is to add lemon zest. This gives the soup a fresh, bright flavor. This article covered how to make Greek lemon chicken soup. We explored the main ingredients, preparation steps, and cooking tips. You learned how to avoid common mistakes and found variations for customizing your soup. We also discussed storage methods and answered some common questions. As you try this recipe, remember to enjoy the process. Cooking is about experimenting and finding your flavor. With practice, you’ll create a dish that warms both body and soul. Happy cooking!

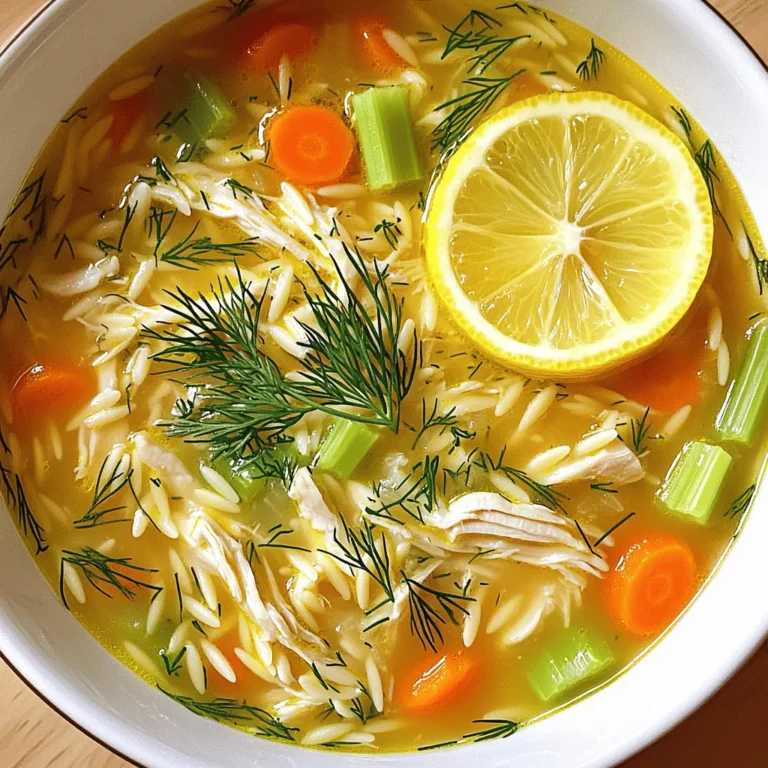
Greek Lemon Chicken Soup Flavorful and Easy Recipe

For these tasty wraps, you need fresh and simple items. Here’s what you will gather: - 1 lb flank steak, thinly sliced - 1 head of butter or romaine lettuce, leaves separated - Sliced cucumber - Sliced carrot The marinade gives the beef its amazing flavor. You will use: - 3 tablespoons soy sauce - 2 tablespoons brown sugar - 1 tablespoon sesame oil - 1 tablespoon gochujang (Korean chili paste) - 2 cloves garlic, minced - 1 teaspoon ginger, grated Mix these ingredients well to coat the beef. The sugar adds sweetness, while the gochujang brings heat. To make your wraps even better, you can add some fun toppings: - 1 tablespoon sesame seeds - 1 bunch green onions, chopped These garnishes give a nice crunch and extra flavor. Enjoy your wraps with these bright and fresh additions! To start, gather your ingredients for the marinade. You will need: - 3 tablespoons soy sauce - 2 tablespoons brown sugar - 1 tablespoon sesame oil - 1 tablespoon gochujang - 2 cloves garlic, minced - 1 teaspoon ginger, grated In a bowl, mix the soy sauce, brown sugar, sesame oil, gochujang, garlic, and ginger. Whisk these ingredients together until the brown sugar dissolves completely. This mix will add great flavor to the steak. Next, take your flank steak, which should be thinly sliced. Add the slices directly into the marinade. Make sure each piece is covered in the mix. Cover the bowl with plastic wrap or a lid. Place it in the fridge for at least 30 minutes. If you want even more flavor, let it marinate for up to 2 hours. Now, heat your grill or grill pan over medium-high heat. Take the marinated beef out of the fridge. Let any extra marinade drip off the meat. Place the beef slices on the grill. Cook for about 2-3 minutes on each side. Aim for a nice browning. Once done, remove the beef and sprinkle sesame seeds and chopped green onions on top for extra flavor and color. Now, you are ready to put together your wraps. Enjoy the fresh taste of your Korean BBQ beef lettuce wraps! Grilling the beef gives it a nice char. You can use a grill pan if you don't have an outdoor grill. Make sure the grill is hot before adding the beef. This helps the meat sear well. Sear each side for about 2-3 minutes. This keeps the beef juicy and tender. To boost flavors, marinate the flank steak longer. You can marinate it for up to 2 hours. This allows the soy sauce and gochujang to soak in deep. Adding sesame seeds after grilling adds a nutty crunch. Fresh green onions bring a fresh bite too. Serve these wraps warm for the best taste. Place grilled beef in the lettuce and add fresh veggies. Try sliced cucumber and carrot for crunch. You can also add kimchi for a spicy kick. These wraps are great for parties or family dinners. Enjoy them with rice or noodles for a complete meal. {{image_2}} You can switch out the flank steak for other proteins. Chicken thighs work great. They soak up flavors well. You can also use pork tenderloin or shrimp. Both are tasty and cook quickly. If you want a plant-based option, try tofu. Firm tofu absorbs the marinade well. Just press it to remove extra water before marinating. While butter lettuce is popular, you can use other types too. Romaine lettuce offers a nice crunch. Leafy greens like kale or collard greens can add a twist. Just make sure the leaves are large enough to hold your filling. Crisp lettuce helps keep the wrap fresh and light. Get creative with your sauces! Besides the marinade, try a spicy sesame sauce. Mix together sesame oil, soy sauce, and chili flakes for heat. A peanut sauce adds a nutty flavor that pairs well. You can also use a sweet soy glaze for a different taste. Each sauce can change the whole dish. Don’t be afraid to mix and match! After you enjoy your Korean BBQ beef, you may have leftovers. To store leftover beef, first let it cool down. Place it in an airtight container. Make sure to cover it well. Store the container in the fridge. It will keep fresh for up to three days. If you want to save it longer, consider freezing it. Lettuce wraps are best when fresh. If you have leftover wraps, store them separately. Keep the beef in one container and the lettuce in another. This way, the lettuce stays crisp. You can store the lettuce in a damp paper towel. Place it in a sealed bag in the fridge. This method helps keep the leaves fresh for about two days. To freeze the beef, place it in a freezer-safe bag. Remove as much air as possible before sealing. You can freeze it for up to three months. When you are ready to eat, thaw it in the fridge overnight. Avoid refreezing any beef that has been thawed. Enjoy your meal again by reheating the beef on the grill or in a pan. Yes, you can use other cuts. Ribeye and sirloin work well too. Just keep the meat thin. Thin slices cook quickly and stay tender. For best results, marinate for the same amount of time. This helps the flavors soak in. To add heat, use more gochujang. You can also try Korean red pepper flakes. Add them to the marinade for extra spice. For a kick, include sliced fresh chili peppers. Adjust the heat to your taste. Many side dishes pair well with these wraps. Try making kimchi for a classic touch. You can also serve rice or pickled vegetables. A fresh salad with a light dressing works great too. These sides balance the rich flavors of the beef. You learned about key ingredients for Korean BBQ beef lettuce wraps, from marinades to garnishes. I shared step-by-step instructions to marinate and grill flank steak. Plus, I provided tips for flavor, cooking methods, and serving ideas. I also covered delicious variations and storage tips for leftovers. In conclusion, these wraps are flexible and fun. Experiment with different proteins and toppings. Enjoy this dish with friends and family to make great memories around the table.

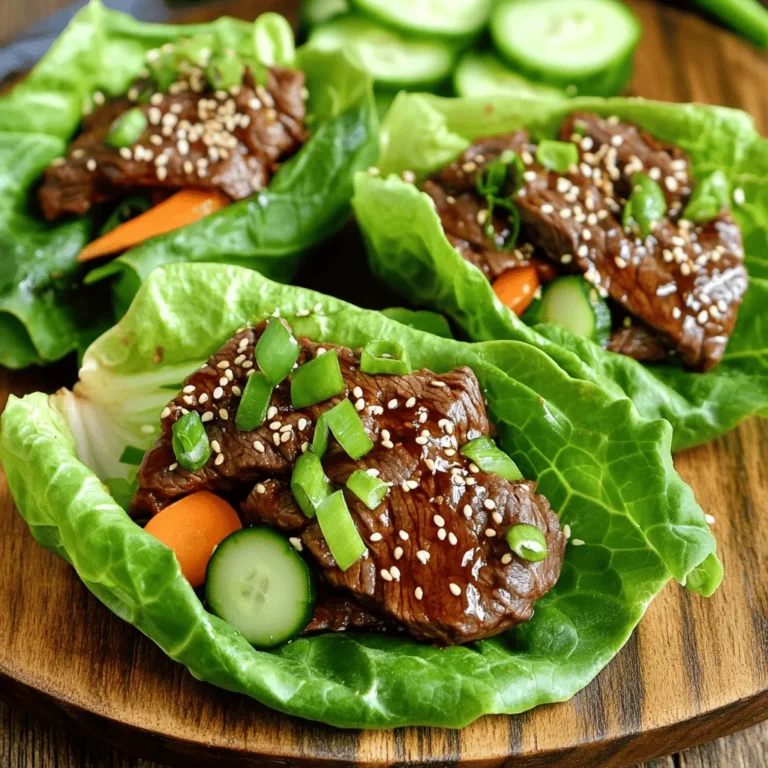
Korean BBQ Beef Lettuce Wraps Flavorful and Fresh Dish

You need 1 cup of roasted espresso beans. These beans give the snack a strong coffee taste. They also add a nice crunch. Use 1 cup of dark chocolate chips with 70% cocoa. This chocolate brings rich flavor. It pairs well with the espresso beans for a great taste. Add 1 tablespoon of coconut oil. This oil helps the chocolate melt smoothly. It also adds a light coconut flavor to the mix. A pinch of sea salt is great for sprinkling. It balances the sweetness of the chocolate. This small touch makes each bite even better. These four simple ingredients create a delightful treat. Combining them gives you a crunchy, sweet, and salty snack. The flavor pairs well with coffee or as a quick boost. First, grab a baking sheet. Line it with parchment paper. This makes it easy to lift off the beans later. Make sure the paper is smooth. Any bumps can cause the chocolate to stick. Next, take a microwave-safe bowl. Add 1 cup of dark chocolate chips and 1 tablespoon of coconut oil. The oil helps the chocolate melt smoothly. Heat the bowl in the microwave. Set it to 30 seconds and stir after each round. This should take about 1 to 2 minutes. Once melted, let the chocolate cool for one minute. Now, add 1 cup of roasted espresso beans to the melted chocolate. Stir gently. You want each bean to be covered well. Use a fork or slotted spoon to scoop them out. Place each bean on the lined baking sheet. While the chocolate is soft, sprinkle a little sea salt on top. This adds a nice flavor! Put the baking sheet in the fridge for about 30 minutes. This will let the chocolate harden. Once set, check for clumps. Break them apart if needed. Transfer the beans to an airtight container for storage. Enjoy your tasty treat anytime! To make great chocolate-covered espresso beans, start with high-quality beans. Look for freshly roasted espresso beans. They should be dark and shiny. Try to find beans that smell rich and bold. A good flavor is key to making your treat shine. You might want to choose beans from a local roaster. This way, you can get fresh beans that taste amazing. For melting chocolate, I suggest using dark chocolate chips with 70% cocoa. These chips melt well and taste rich. Use a microwave-safe bowl for easy melting. Heat the chocolate in 30-second bursts. Stir after each round to get a smooth texture. If you want a glossy look, add a tablespoon of coconut oil. This will help the chocolate stay silky and shiny. To avoid clumping, make sure your chocolate is smooth before adding the beans. Stir gently when coating the beans so every bean gets a nice layer. Use a fork or slotted spoon for easy lifting. This way, you can let excess chocolate drip off. Place the coated beans on your parchment-lined baking sheet without crowding them. This helps each bean stay separate and look good. {{image_2}} You can change the flavor by using different types of chocolate. Milk chocolate gives a sweet taste. White chocolate adds a creamy touch. Each type of chocolate changes how the beans taste. Try them all to find your favorite! Adding flavorings can make your beans unique. A splash of vanilla extract gives a warm hint. Almond extract adds a nutty twist. Just a little goes a long way. Mix in the flavor before adding the beans to the chocolate. For a spicy kick, add cayenne pepper. This adds heat to the sweet chocolate. Just a pinch is enough to make a big difference. It creates a fun contrast with the smooth chocolate and bold espresso. This variation is perfect for those who love a little adventure in their snacks! Chocolate-covered espresso beans pack a great punch of taste and nutrition. In one serving of about 1 ounce, you get: - Calories: 150-200 - Fiber: 2 grams - Protein: 3 grams - Fat: 9 grams This snack combines healthy fats from coconut oil and the rich flavor of dark chocolate. Dark chocolate is rich in antioxidants. These help protect your body from damage. It may also improve heart health by boosting blood flow. A study shows 70% cocoa chocolate can lower blood pressure. Espresso adds a nice caffeine boost. Caffeine can improve focus and energy. It also may enhance your mood. While espresso beans are tasty, they can have some side effects. Too much caffeine can lead to jitters or trouble sleeping. Some people may feel anxious if they consume a lot. It’s best to enjoy these beans in moderation. If you’re not used to caffeine, start slow. You can find chocolate-covered espresso beans at most grocery stores. Look in the snack aisle or near coffee products. They are also sold at specialty coffee shops. For a wider selection, try online retailers like Amazon or specialty food websites. Homemade chocolate-covered espresso beans last about two weeks when stored properly. Keep them in an airtight container to maintain freshness. If you want them to last longer, you can keep them in the fridge. This will help them stay crisp and tasty. Yes, you can use sugar-free chocolate for this recipe. Just make sure it melts well. Sugar-free chocolate can give a different flavor but still tastes great. You can enjoy your snack with fewer calories if you choose this option. The best way to store chocolate-covered espresso beans is in an airtight container. Keep them in a cool, dry place, away from direct sunlight. This will help keep them fresh and crunchy. If you live in a hot area, the fridge can also be a good choice. You can make chocolate-covered espresso beans without coconut oil. The oil helps the chocolate melt smoothly and coat the beans better. If you skip it, use a high-quality chocolate that melts well. You may need to adjust the melting time to get the right texture. This guide covered how to make chocolate-covered espresso beans. You learned about ingredients like roasted espresso beans, dark chocolate, and coconut oil. I shared step-by-step instructions and essential tips to enhance your results. Variations let you customize flavors and explore new twists. The nutritional info shows health benefits and possible effects of espresso beans. Now, you have the tools to create delicious treats at home. Enjoy making your unique snacks!

Chocolate Covered Espresso Beans Delightful Snack Treat

- 4 salmon fillets - 1/4 cup honey - 4 cloves garlic, minced - 2 tablespoons soy sauce - 2 tablespoons olive oil - 1 teaspoon fresh ginger, grated - 1 cup snow peas, trimmed - 1 red bell pepper, sliced - 1 tablespoon fresh lemon juice - Salt and pepper to taste - Fresh parsley, chopped (for garnish) The main ingredients for this dish are salmon fillets, honey, and garlic. Salmon gives a rich taste and healthy fats. Honey adds sweetness and helps with caramelization. Garlic gives a bold flavor that pairs well with salmon. For the additional ingredients, soy sauce brings a savory depth. Olive oil keeps everything moist while cooking. Fresh ginger adds warmth and a hint of spice. Snow peas and red bell pepper bring crunch and color. Lemon juice adds brightness and balances the sweetness. Don’t forget salt and pepper! They enhance all the flavors. Lastly, fresh parsley is a lovely touch for garnish. This mix of ingredients creates a vibrant, tasty meal. The sweet, savory sauce coats the salmon and veggies perfectly. You will love how simple this recipe is. It’s fun to make and even better to eat! 1. First, preheat your oven to 400°F (200°C). This helps the salmon cook evenly and get that perfect texture. 2. In a small bowl, whisk together the sauce ingredients. Mix the honey, minced garlic, soy sauce, olive oil, grated ginger, and lemon juice until smooth. This sauce adds a tasty glaze to your salmon. 1. Next, cut four large pieces of aluminum foil. Each piece should be about 12 inches long. This size will hold your salmon and veggies nicely. 2. Place one salmon fillet in the center of each foil piece. This step keeps the fish moist and flavorful. 3. Season the salmon fillets with salt and pepper. Then, drizzle the honey garlic sauce over each fillet, making sure to coat them well. A good coating makes all the difference in flavor! 1. Now, distribute the snow peas and sliced red bell pepper evenly around the salmon on each foil piece. These veggies add color and crunch. 2. Fold the sides of the foil over the salmon and vegetables, creating a tightly sealed packet. This keeps all the flavors inside while cooking. 3. Place the foil packs on a baking sheet and bake in the preheated oven for about 20-25 minutes. The salmon should cook through and flake easily with a fork when done. Carefully open the foil packs and watch out for steam! Transfer the tasty contents to plates and enjoy your delicious meal! - Ensure the salmon is fresh: Fresh salmon has a bright color and a clean smell. Look for firm fillets. If you can, buy from a trusted fish market. This will make your meal taste better. - Adjusting cook time based on fillet thickness: Thicker fillets take longer to cook. If your salmon is thick, add a few extra minutes in the oven. Check for doneness by seeing if it flakes easily with a fork. - Marinade preparation tips: The honey garlic sauce is key. Mix the honey, minced garlic, soy sauce, olive oil, ginger, and lemon juice well. Let it sit for a few minutes before using. This helps the flavors blend. - Best side dishes to complement: Serve with rice or quinoa for a full meal. A fresh salad adds a nice crunch. Roasted vegetables are also great to balance the flavors of the salmon. {{image_2}} You can switch up the veggies in your foil packs. Try using broccoli, asparagus, or zucchini. Each adds a unique flavor and texture. Seasonal options like carrots in fall or cherry tomatoes in summer work great too. Fresh veggies can brighten up your meal. You can boost the taste by adding spices and herbs. Consider mixing in some chili flakes for heat or fresh thyme for a fragrant touch. If you want to switch proteins, chicken or tofu are good substitutes. Just adjust the cooking time for thickness. These changes can make each meal exciting! To keep your honey garlic salmon fresh, follow these tips: - Refrigerating: Place leftovers in an airtight container. They stay good for up to three days. Keep the salmon and veggies together for the best taste. - Freezing: If you want to save some for later, wrap each foil pack tightly in plastic wrap. Then, place them in a freezer-safe bag. They can last up to two months. When ready to eat, thaw overnight in the fridge. To reheat your salmon packs properly, use these methods: - Best Methods: The oven works best. Preheat to 350°F (175°C). Place the foil pack on a baking sheet and heat for 15 minutes. You can also use a microwave, but it may make the salmon a bit dry. - Tips to Maintain Flavor and Texture: Add a splash of water or broth inside the pack before reheating. This helps keep the salmon moist and tasty. Always check that the salmon is heated through before eating. How long to cook salmon in foil? You cook salmon in foil for about 20 to 25 minutes. This time works well at 400°F (200°C). The salmon should flake easily with a fork when done. Cooking time may change based on the thickness of the fillets. Thicker fillets may need more time to cook through. Always check for doneness to avoid overcooking. Can I use frozen salmon fillets? Yes, you can use frozen salmon fillets. However, I suggest thawing them first for even cooking. If you use frozen salmon, add about 5 to 10 minutes to the cooking time. Make sure the salmon is cooked fully before serving. What to serve with Honey Garlic Salmon? Honey garlic salmon goes well with many sides. You might try rice, quinoa, or a fresh salad. Roasted vegetables also pair nicely for a complete meal. If you want a crunchy side, add some garlic bread. It soaks up any leftover sauce too! Is this recipe suitable for meal prep? Yes, this recipe is great for meal prep. You can make it ahead of time and store the packs in the fridge. Simply reheat them in the oven or a microwave when you're ready to eat. This makes busy weeknights much easier! In this post, we explored a simple honey garlic salmon recipe. You learned about key ingredients like fresh salmon, honey, and garlic. I provided easy steps for preparing and cooking salmon in foil packs. Plus, we covered tips for enhancing flavor and storing leftovers. This dish is not only tasty but also quick to make. You can customize it with different vegetables or proteins. Enjoy experimenting and sharing this healthy meal with family and friends!

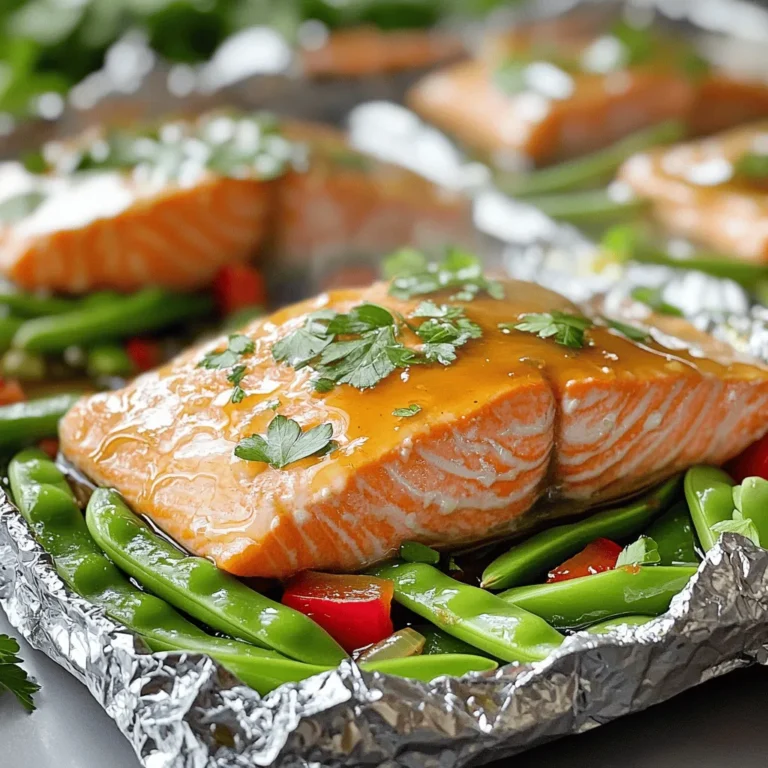
Honey Garlic Salmon Foil Packs Simple and Tasty Meal

PREV 1 … 24 25 26 … 58 NEXT
quick dish kitchen

explore

DessertsDinnerAppetizersDrinks

Our Policies

  • Cookie Policy
  • Copyright Policy
  • Disclaimer
  • GDPR Policy
  • Terms Of Use
Back to Top
  • About
  • Contact Us
  • Privacy Policy
© 2025 quick dish kitchen