FREE DINNER EBOOK! Get your copy!
  • Cookie Policy
  • GDPR Policy
  • Disclaimer
  • Terms Of Use
  • Visit my other site: Fun Cookie Recipes
quick dish kitchen
  • Home
  • Dinner
  • Desserts
  • Drinks
  • Appetizers
  • Contact
  • About
  • Privacy Policy
  • Home
  • Dinner
  • Desserts
  • Drinks
  • Appetizers
  • Contact
  • About
  • Privacy Policy
  • Cookie Policy
  • GDPR Policy
  • Disclaimer
  • Terms Of Use
Visit my other site: Fun Cookie Recipes

HOME / CATEGORIES /

Latest

- 1 cup orzo pasta - 2 cups broccoli florets - 1 cup shredded sharp cheddar cheese - 1 tablespoon olive oil - 1 small onion, finely chopped - 2 cloves garlic, minced - 4 cups vegetable broth - 1/2 cup heavy cream - 1/4 teaspoon nutmeg - Salt and pepper to taste - 2 tablespoons grated Parmesan cheese - Fresh parsley for garnish In this creamy broccoli cheddar orzo recipe, I focus on fresh, simple ingredients. The orzo pasta gives a nice texture that pairs well with the cheese and broccoli. You can pick any broccoli florets. The sharp cheddar cheese adds a rich flavor that makes this dish special. For the additional ingredients, I use olive oil and butter for a great base. The onion and garlic create a lovely aroma as they cook. The vegetable broth helps to build the sauce. Heavy cream adds a rich creaminess that brings it all together. A hint of nutmeg rounds out the flavors, making it warm and inviting. If you want to take it up a notch, try the optional add-ins. Grated Parmesan cheese adds a salty kick. Fresh parsley makes a bright garnish that looks nice on your plate. This dish is not only tasty but also colorful and fun to serve. Enjoy making this delightful meal! {{ingredient_image_1}} 1. Start by boiling a large pot of salted water. The water should taste a bit like the sea. 2. Add 1 cup of orzo pasta to the boiling water. Cook it for about 8-10 minutes. Check the package for exact times. 3. With 2-3 minutes left, add 2 cups of broccoli florets to the pot. This helps the broccoli cook just right. 4. Once done, drain the orzo and broccoli in a colander. Set them aside. 1. In the same pot, heat 1 tablespoon of olive oil over medium heat. 2. Add 1 small onion, finely chopped. Sauté for about 3-4 minutes until it turns soft and clear. 3. Stir in 2 cloves of minced garlic. Cook for another minute until it smells great. 1. Increase the heat to medium-high. Pour in 4 cups of vegetable broth. Bring it to a boil. 2. Reduce the heat and let it simmer for about 5 minutes. This helps the flavors mix. 3. Stir in 1/2 cup of heavy cream and 1/4 teaspoon of nutmeg. Let it simmer for 2-3 more minutes. 4. Gradually add in 1 cup of shredded sharp cheddar cheese. Stir until it melts and becomes creamy. 5. Add the cooked orzo and broccoli back into the pot. Mix everything gently until well coated. 6. Season with salt and pepper to taste. If you want, sprinkle in 2 tablespoons of grated Parmesan cheese. Mix again. To get that perfect creamy texture, add cheese slowly. If you dump it all at once, the cheese can clump. Let it melt gradually for a smooth sauce. Heavy cream also plays a key role here. It adds richness and helps bind everything together. This makes the dish velvety and delicious. To boost the flavor, try adding a pinch of red pepper flakes or a dash of garlic powder. These spices give a nice kick without overpowering the dish. Fresh herbs like thyme or basil also work well. Always taste your dish as you go. Adjust the salt and pepper to your liking. This small step can really make a big difference. For a beautiful presentation, serve the orzo in deep white bowls. This contrast really makes the colors pop. Top each bowl with extra cheddar cheese and freshly chopped parsley. These simple touches make your meal look gourmet. You can also sprinkle a bit of grated Parmesan on top for added flavor. Enjoy your lovely meal! Pro Tips Use Fresh Broccoli: Fresh broccoli adds vibrant color and a crunchy texture to your dish. Avoid overcooking to maintain its bright green hue and nutritional value. Cheese Selection: For a sharper flavor, opt for aged cheddar cheese. Mixing different types of cheese can also enhance the creaminess and taste. Perfectly Cooked Orzo: Be sure to cook the orzo until it's al dente. It will continue to absorb liquid and soften after mixing with the sauce. Garnish for Flair: Fresh parsley not only adds a pop of color but also a fresh flavor that balances the richness of the cheese and cream. {{image_2}} You can make this dish even better by swapping cheese types. Try using gouda or mozzarella for a different taste. These cheeses melt well and add unique flavors. Adding more vegetables boosts nutrition and color. Consider bell peppers, spinach, or peas. These veggies mix in smoothly and add crunch. To make this dish heartier, incorporate chicken or shrimp. Cook the protein separately and mix it in before serving. This addition gives you extra protein and makes the meal more filling. If you prefer plant-based options, try adding chickpeas or tofu. These options are great for plant lovers and taste delicious. If you need a gluten-free meal, use gluten-free orzo. Many brands offer great alternatives that taste just as good. For creaminess, explore alternative sauces. Use coconut cream or cashew cream for a rich flavor. These options keep the dish creamy without gluten. To store your creamy broccoli cheddar orzo, let it cool first. Then, place it in an airtight container. This keeps it fresh and tasty. You can safely store it in the fridge for up to three days. Make sure to label the container with the date for easy tracking. For reheating, use the stovetop for the best results. Place the orzo in a pan over low heat. Add a splash of vegetable broth or cream to keep it creamy. Stir gently as it warms up. If you prefer the microwave, use a microwave-safe bowl. Heat it in short bursts, stirring in between, and add liquid as needed. You can freeze creamy broccoli cheddar orzo if you want to save some for later. Allow it to cool completely, then scoop it into freezer-safe bags or containers. Remove as much air as possible. It can last in the freezer for up to three months. When you're ready to enjoy it, thaw it in the fridge overnight. Reheat as explained above to keep that creamy texture. This way, you can savor your delightful meal anytime! You can use several pasta types instead of orzo. Good options are: - Ditalini - Acini di pepe - Small shells When using these pasta types, adjust the cooking time. Check the package for the right time to cook. The goal is to keep it al dente. Yes, you can make this dish ahead of time. Prepare it up to the mixing stage. Store it in the fridge for up to three days. Use an airtight container for best results. To reheat, warm it on the stove over low heat. Add a splash of broth or cream to keep it creamy. Stir often to avoid sticking. You can make a dairy-free version easily. Use plant-based milk instead of heavy cream. Look for unsweetened options like almond or oat milk. For cheese, try a vegan cheddar or nutritional yeast. Both will add flavor without dairy. Adjust your seasonings to taste for the best results. You learned how to create a creamy broccoli cheddar orzo dish. We covered important ingredients, step-by-step instructions, and useful tips. You can explore variations based on your diet, from vegetarian to gluten-free options. Remember to store leftovers properly to enjoy them later. This meal is simple and flexible, allowing for creativity. I hope you feel ready to make this tasty dish at home. Enjoy every bite and share your experience!

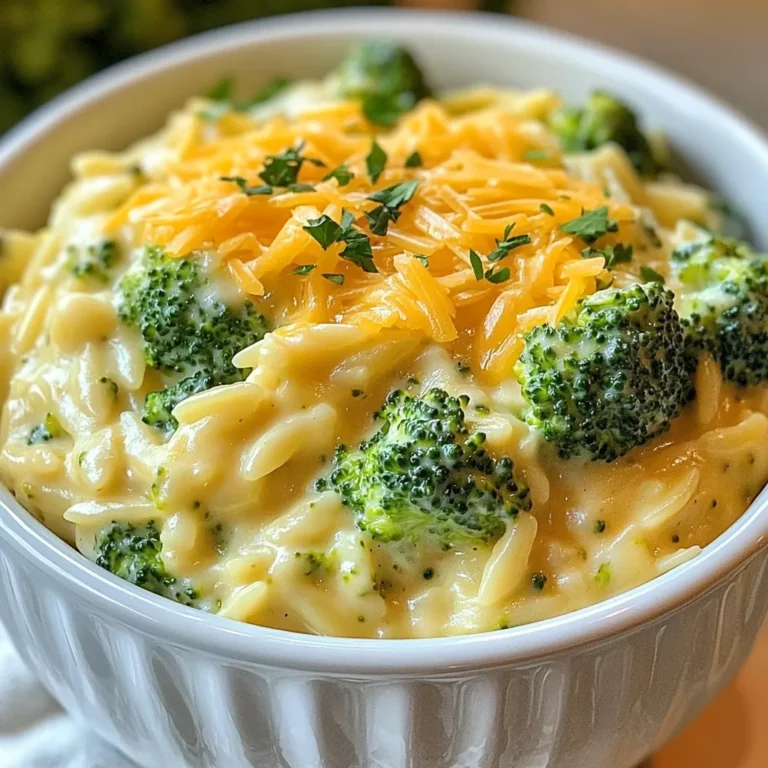
Creamy Broccoli Cheddar Orzo Delightful Meal Idea

- 2 cups all-purpose flour - 1 teaspoon baking powder - 1/2 teaspoon baking soda - 1/2 teaspoon salt - 1 teaspoon ground cinnamon When making this bread, start with the dry ingredients. Whisk together the flour, baking powder, baking soda, salt, and ground cinnamon. This mix is key. It helps the bread rise and gives it taste. - 1/2 cup unsalted butter, softened - 1 cup granulated sugar - 2 large eggs - 1 teaspoon vanilla extract - 3/4 cup buttermilk (or 3/4 cup milk + 1 tablespoon lemon juice) Next, gather your wet ingredients. Cream the butter and sugar until they are light and fluffy. Then, add the eggs one by one. Mix in the vanilla. Finally, add the buttermilk slowly. The wet mix brings moisture and richness to the bread. - 2 medium apples, peeled, cored, and diced (preferably Granny Smith or Honeycrisp) - 1/4 cup brown sugar - 1 teaspoon ground cinnamon (for topping) - 2 tablespoons granulated sugar (for topping) - Optional: Chopped walnuts or pecans for extra crunch For added flavor, fold in diced apples. I love using Granny Smith or Honeycrisp. They add a sweet and tart crunch. Mix the brown sugar, cinnamon, and granulated sugar for the topping. This blend will create a sweet crust. If you like nuts, add walnuts or pecans for texture and taste. Set your oven to 350°F (175°C). This helps the bread bake evenly. Grease a 9x5-inch loaf pan or line it with parchment paper for easy removal later. In a medium bowl, whisk together the following dry ingredients: - 2 cups all-purpose flour - 1 teaspoon baking powder - 1/2 teaspoon baking soda - 1/2 teaspoon salt - 1 teaspoon ground cinnamon Mix them well and set this bowl aside. This mixture helps the bread rise and gives it flavor. In a large bowl, beat together: - 1/2 cup unsalted butter, softened - 1 cup granulated sugar Use an electric mixer for 2-3 minutes. You want a creamy and light mixture. This step adds air and makes the bread fluffy. Add 2 large eggs, one at a time. Mix well after each egg. Then, add 1 teaspoon vanilla extract. This adds sweetness and aroma to your batter. Gradually mix the dry ingredients into the butter mixture. Alternate with 3/4 cup buttermilk. Start and end with the flour mixture. Mix until just combined. Be careful not to overmix; this keeps the bread tender. Gently fold in: - 2 medium apples, peeled, cored, and diced If you like, add chopped walnuts or pecans for a nice crunch. This adds flavor and texture to the bread. In a small bowl, mix together: - 1/4 cup brown sugar - 1 teaspoon ground cinnamon - 2 tablespoons granulated sugar This topping gives the bread a sweet, crunchy crust. Pour half of the batter into the loaf pan. Sprinkle half of the cinnamon sugar mixture on top. Add the rest of the batter and finish with the remaining topping. Use a knife to gently swirl the topping into the batter. This creates a pretty marbled look. Place the loaf in your preheated oven. Bake for 60-70 minutes. To check for doneness, insert a toothpick into the center. It should come out clean. If the top browns too fast, loosely cover it with aluminum foil. After baking, let the bread cool in the pan for about 10 minutes. Then, transfer it to a wire rack to cool completely. Slice it while warm. You can add a dollop of butter on top for extra flavor. Enjoy your delicious bread! Mixing is key to getting that soft, airy bread. Start by creaming the butter and sugar well. This adds air and lightness. When you mix in the dry ingredients, do it slowly. Alternate with the buttermilk. Always end with the flour mixture. This helps keep the texture light. Be careful not to overmix. If you mix too much, the bread can become dense. Just mix until you see no dry flour. The apples you pick matter for this recipe. I suggest using Granny Smith or Honeycrisp apples. These types add a nice tartness. They hold their shape well during baking. Avoid soft apples like Red Delicious. They can turn mushy and change the bread's texture. Fresh, firm apples give the best flavor and bite. You can add more flavor to your bread! Try mixing in a pinch of nutmeg or ginger. These spices pair well with cinnamon. If you want a nutty crunch, add chopped walnuts or pecans. They bring great texture and taste. For a fun twist, consider adding raisins or dried cranberries. They add sweetness and a pop of color. {{image_2}} You can make this bread gluten-free! Use a good gluten-free flour blend. Look for one with xanthan gum. This helps mimic the texture of regular flour. You can also try almond flour or coconut flour. Just mix these with a bit of tapioca flour for best results. If you want a vegan version, swap out the eggs. Use flax eggs instead. To make one flax egg, mix 1 tablespoon of ground flaxseed with 2.5 tablespoons of water. Let it sit for 5 minutes to thicken. For milk, you can use almond, soy, or oat milk. These will work great in the recipe. Want to add more flavor? You can mix in dried fruits like raisins or cranberries. Chocolate chips are another fun option! They add a sweet touch. You can also stir in spices like nutmeg or ginger for a warm twist. Don’t be afraid to get creative! To store your leftover cinnamon sugar apple bread, you have two main options: refrigeration and room temperature. For room temperature, wrap the bread tightly in plastic wrap or foil. This keeps it moist. Place it in a cool, dry spot. It can last for about 2-3 days this way. If you prefer refrigeration, place the wrapped bread in the fridge. This option keeps it fresh longer but may dry it out. To enjoy its best flavor, let it sit at room temperature for 30 minutes before serving. Freezing is a great way to keep your bread fresh. First, let the bread cool completely. Then, wrap it tightly in plastic wrap. Make sure it's airtight. For extra protection, place the wrapped bread in a freezer bag. Label it with the date. When you want to eat it, simply take the bread out of the freezer. Unwrap it and place it in the fridge overnight to thaw. If you need it fast, you can use the microwave in short bursts. Just be careful not to overheat it. When stored at room temperature, your bread stays fresh for about 2-3 days. If you refrigerate it, it can last up to a week. In the freezer, it can stay fresh for about 2-3 months. Remember to check for any signs of spoilage before enjoying your bread. Store it well, and savor each bite! Yes, you can! While Granny Smith and Honeycrisp are great choices, you have other options. Fuji apples add sweetness, while Jonagold offers a nice balance of flavor. Use any firm apple that holds up well in baking. Just make sure to peel, core, and dice them before adding to the batter. To check if the bread is done, insert a toothpick into the center. If it comes out clean, your bread is ready. If there is wet batter on the toothpick, it needs more time. The bread should be golden brown on top. If it browns too fast, cover it loosely with foil. Absolutely! You can prepare the batter a day in advance. Just store it in the fridge. Bake it fresh when you’re ready. If you have leftover bread, cool it down, wrap it well, and store it. You can reheat slices in a toaster or oven for a warm treat. This bread pairs well with many things! Serve it warm with butter for a tasty snack. You can also enjoy it with cream cheese or a scoop of vanilla ice cream. For a drink, try it with hot cider or coffee for a cozy breakfast or dessert. You can now bake the perfect Bakery-Style Cinnamon Sugar Apple Bread. We covered all the steps you need, from mixing dry and wet ingredients to tips for flawless results. Remember, choosing the right apples and avoiding overmixing are key. You can also explore variations like gluten-free or vegan options. Don't forget to store leftovers properly to enjoy your bread longer. With these tips, you’ll create a delicious treat everyone loves. Enjoy your baking adventure!

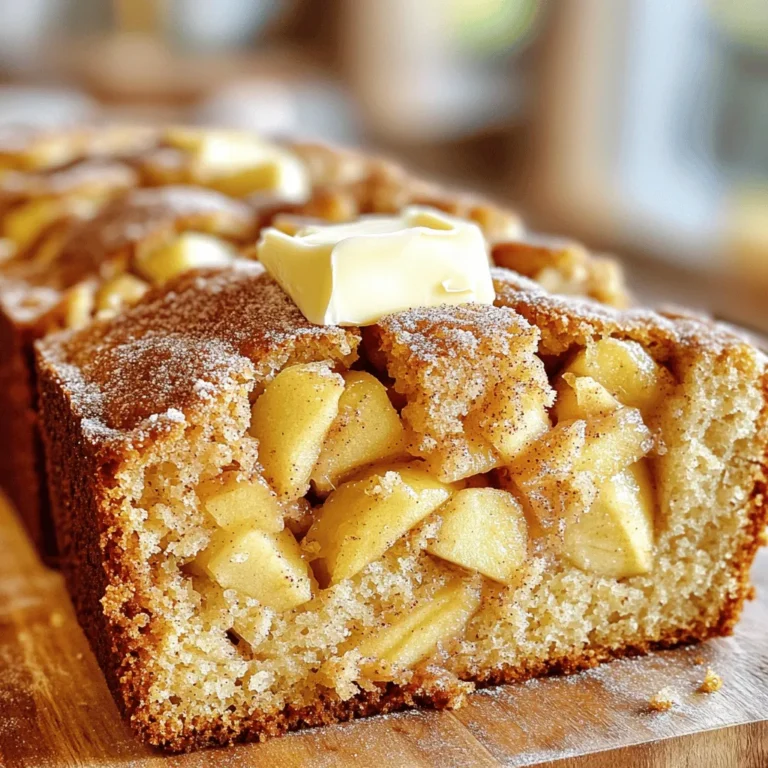
Bakery-Style Cinnamon Sugar Apple Bread Recipe Delight

To make Pumpkin Cheesecake Layered Bars, gather these simple ingredients: - 1 cup graham cracker crumbs - 1/2 cup unsalted butter, melted - 1/4 cup granulated sugar - 2 cups pumpkin puree - 1 teaspoon cinnamon - 1/2 teaspoon nutmeg - 1/4 teaspoon ginger - 1/4 teaspoon cloves - 1 (8 oz) package cream cheese, softened - 1/2 cup powdered sugar - 2 large eggs - 1 teaspoon vanilla extract - Pinch of salt - Whipped cream (for serving, optional) Using high-quality ingredients makes a big difference. For the graham cracker crumbs, choose fresh ones from the store or crush your own. Fresh pumpkin puree offers a better flavor than canned. Always pick cream cheese that is full-fat. It makes the bars creamy and rich. Spices should be fresh for the best taste. Check the dates on your jars! You can easily swap some ingredients if you need to: - Use whole wheat graham cracker crumbs for a healthier crust. - Substitute melted coconut oil for unsalted butter if you want a dairy-free option. - For a spice change, add pumpkin pie spice instead of individual spices. - Cream cheese can be replaced with a vegan cream cheese for a dairy-free treat. - If you don't have pumpkin puree, you can use mashed banana or applesauce, but this will change the flavor. Start by preheating your oven to 350°F (175°C). This step is key to getting a good bake. Next, grab an 8x8 inch baking dish. Line it with parchment paper. Let the edges hang over the sides. This makes it easy to lift the bars out later. In a medium bowl, mix together 1 cup of graham cracker crumbs, 1/2 cup of melted unsalted butter, and 1/4 cup of granulated sugar. Stir until it looks like wet sand. Press this mixture firmly into the bottom of your prepared dish. Make sure it’s even and compact. Bake the crust for 10 minutes. After baking, take it out and let it cool a bit. In a large bowl, combine 2 cups of pumpkin puree, 1 teaspoon of cinnamon, 1/2 teaspoon of nutmeg, 1/4 teaspoon of ginger, 1/4 teaspoon of cloves, and a pinch of salt. Mix well until smooth. Set this pumpkin mixture aside. In another bowl, beat 1 (8 oz) package of softened cream cheese until smooth. Add 1/2 cup of powdered sugar, 2 large eggs, and 1 teaspoon of vanilla extract. Beat until creamy and well mixed. Pour half of the cream cheese mixture over the cooled graham cracker crust. Spread it evenly across the crust. Next, carefully layer the pumpkin mixture over the cream cheese layer. Spread it out gently. Finally, spoon dollops of the remaining cream cheese mixture on top. Use a knife to swirl it gently. Be careful not to overmix. Bake the layered bars in the oven for 35-40 minutes. The center should be set and only slightly jiggly. Once done, take it out and let it cool at room temperature for about an hour. Then, refrigerate for at least 2 hours. This cooling helps the bars firm up. When ready to serve, lift them out using the parchment paper and cut into squares. Enjoy with a dollop of whipped cream! To create a beautiful swirl in your Pumpkin Cheesecake Layered Bars, use a spoon. After adding the cream cheese mixture on top of the pumpkin layer, gently dollop it. Then, with the back of the spoon, swirl it lightly. Be careful not to mix too much. The goal is to see both layers. This gives your bars a stunning look. One common mistake is overmixing the cream cheese layer. This can lead to a dense texture. Another mistake is skipping the cooling time after baking. If you cut the bars too soon, they may fall apart. Be patient and let them cool and set in the fridge. Lastly, ensure your oven is at the right temperature. An incorrect temperature can change the baking time and texture. When serving your bars, cut them into equal squares for a nice look. You can dust them with a sprinkle of cinnamon or nutmeg for flair. Adding whipped cream on top enhances the flavor and adds a touch of elegance. For a fun twist, place a small pumpkin candy on each bar. This not only looks great but also adds a sweet surprise for your guests. {{image_2}} You can add twists to your Pumpkin Cheesecake Layered Bars. Try drizzling caramel on top for a sweet touch. Just melt some caramel candies with cream and pour it over the bars before serving. For chocolate lovers, mix cocoa powder into the cream cheese layer. You can also fold chocolate chips into the pumpkin layer for a delightful surprise. Both options will give your bars a unique taste! If you need gluten-free bars, swap out the graham crackers. Use gluten-free cookie crumbs or almond flour mixed with butter and sugar. This will create a tasty crust that everyone can enjoy. Make sure to check labels on all ingredients to avoid gluten. To make these bars vegan, substitute cream cheese with a vegan version made from cashews or tofu. Use flax eggs instead of regular eggs. Combine one tablespoon of ground flaxseed with three tablespoons of water for each egg. For the crust, you can use coconut oil instead of butter. These swaps keep the flavor while making it plant-based! To keep your pumpkin cheesecake layered bars fresh, first, let them cool. Once they reach room temperature, cover them tightly with plastic wrap or aluminum foil. You can also place them in an airtight container. Store them in the fridge, where they will stay good for about 5 days. If you want to keep them longer, freezing is a great option. You can freeze these bars for up to 3 months. First, cut them into squares. Wrap each piece in plastic wrap. Then, place the wrapped pieces in a freezer-safe bag or container. Be sure to label it with the date. When you want to enjoy them, just take out what you need and let them thaw in the fridge overnight. If you prefer warm bars, you can reheat them easily. Preheat your oven to 350°F (175°C). Place the bars on a baking sheet and cover them with foil. Heat for about 10-15 minutes or until warm. For a quick option, you can use the microwave. Just warm them for 15-20 seconds, but be careful not to overheat. Enjoy them fresh and tasty! Pumpkin Cheesecake Layered Bars can last up to five days in the fridge. Keep them in an airtight container. This helps them stay fresh and tasty. After five days, they may start to lose flavor and texture. Yes, you can make these bars ahead of time. They are perfect for parties or holiday gatherings. Just bake and chill them in the fridge. This allows the flavors to blend well. They taste even better after a day! If you want to replace cream cheese, try using Greek yogurt or mascarpone. Both options add creaminess to the bars. You can also use a dairy-free cream cheese for a vegan twist. Just ensure it has a similar texture for the best results. Yes, you can use butternut squash puree instead of pumpkin puree. It has a similar taste and texture. You can even use sweet potato puree for a different flavor. Just make sure it’s smooth to keep the bars creamy. In this post, I shared how to make delicious pumpkin cheesecake layered bars. We covered the ingredients needed, tips for quality, and clever substitutions. You learned step-by-step how to prepare the dish, from the crust to baking. I shared tricks for the perfect swirl and ways to avoid common mistakes. Variations for flavors like caramel and vegan options were also included. Finally, I discussed storage and answering common questions. Enjoy making these tasty bars and impress your friends and family!

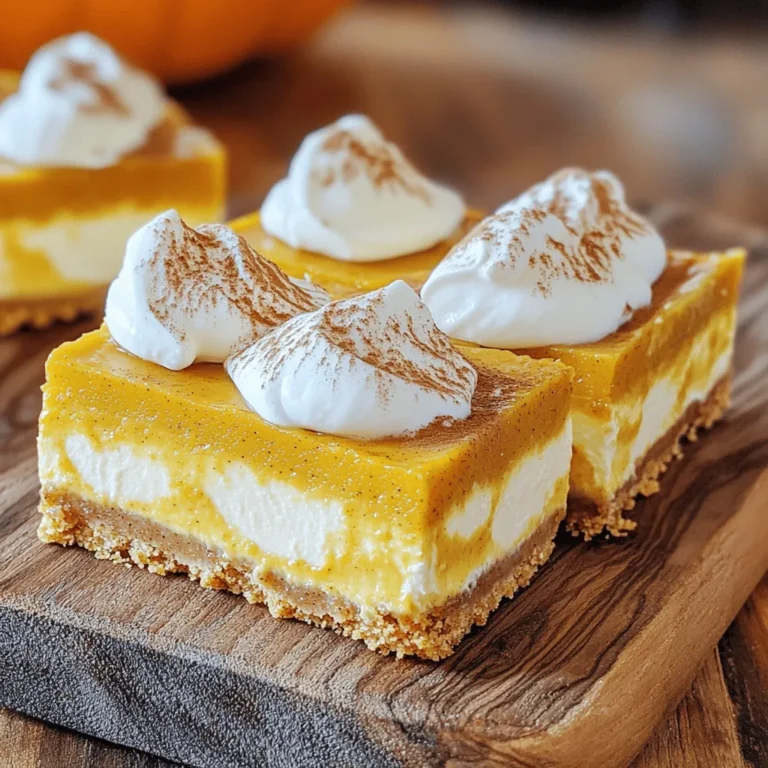
Pumpkin Cheesecake Layered Bars Irresistible Delight

To make tasty air fryer spicy sweet chili chicken bites, gather these key ingredients: - 1 pound boneless, skinless chicken thighs, cut into bite-sized pieces - 1/2 cup all-purpose flour - 1 teaspoon garlic powder - 1 teaspoon onion powder - 1/2 teaspoon smoked paprika - 1/2 teaspoon cayenne pepper (adjust for heat preference) - Salt and pepper to taste - 1 large egg, beaten - 1 cup panko breadcrumbs - 1/2 cup sweet chili sauce These ingredients blend flavors and help create a crispy coating. For those who love a kick, add these optional ingredients to enhance taste: - 2 tablespoons sriracha (for extra heat) This addition brings a zesty flair to your chicken. To make your dish look great and add freshness, use these garnishes: - Chopped green onions - Sesame seeds These garnishes add color and texture, making your chicken bites pop on the plate. First, take 1 pound of boneless, skinless chicken thighs. Cut them into bite-sized pieces. In a large bowl, season the chicken with salt, pepper, garlic powder, onion powder, smoked paprika, and cayenne pepper. Mix the chicken well, so every piece gets coated. This step adds so much flavor to your chicken bites. Now, let’s create a breading station. Grab three bowls. In the first bowl, add 1/2 cup of all-purpose flour. In the second bowl, crack and beat one large egg. In the third bowl, place 1 cup of panko breadcrumbs. This setup will help you coat the chicken easily and keep it neat. Preheat your air fryer to 400°F (200°C). Lightly oil the air fryer basket. This helps keep the chicken from sticking. Arrange the chicken bites in a single layer. Don’t overcrowd them; they need space to crisp up. If you have too many, cook in batches. Air fry the chicken bites for 10-12 minutes. Flip them halfway through. They should turn golden brown and crispy. Check that the internal temperature reaches 165°F (75°C). Once cooked, transfer the chicken bites to a large mixing bowl. Pour in 1/2 cup of sweet chili sauce. If you want more heat, add 2 tablespoons of sriracha. Toss the chicken bites well, making sure every piece is coated in sauce. Place the spicy sweet chili chicken bites on a serving platter. For a fun touch, garnish with chopped green onions and sesame seeds. Enjoy these bites with extra sweet chili sauce on the side for dipping! To make great chicken bites, start with good chicken. I use boneless, skinless thighs for juiciness. Cut them into even pieces. This helps them cook evenly. Season them well with salt, pepper, garlic powder, onion powder, smoked paprika, and cayenne pepper. Don't rush this step! The seasoning is key for flavor. When breading, dip the chicken in flour first. This helps the egg stick better. Make sure to shake off extra flour. Then, coat it in panko breadcrumbs. This gives the bites a crunchy texture. Air fry at 400°F for 10-12 minutes. Flip them halfway for even browning. Avoid overcrowding the air fryer basket. If you put too many pieces in, they won’t cook well. They need space to crisp up. Also, do not skip preheating the air fryer. This step ensures that the chicken cooks evenly. Watch the cooking time closely. If you overcook them, they can become dry. Check the internal temperature with a meat thermometer. It should reach 165°F. Lastly, don’t skip the sauce toss! It coats the chicken bites, adding flavor and moisture. Want to kick up the flavor? Try adding more spices to the breading. You can mix in some Italian seasoning or even curry powder for a twist. If you love heat, add more cayenne or a sprinkle of chili flakes. For a sweet touch, drizzle some honey on top after tossing in the sauce. Fresh herbs like cilantro or basil can also brighten the dish. Don’t forget about garnishes! Chopped green onions and sesame seeds add color and crunch. Serve with extra sweet chili sauce on the side for dipping. {{image_2}} You can mix up the flavor by using different sauces. Try barbecue sauce for a smoky taste. Teriyaki sauce adds a sweet and savory twist. You can even use ranch dressing for a cool touch. Each sauce changes the flavor. Feel free to explore and find your favorite! Not a fan of chicken? You can use shrimp or tofu instead. Shrimp cooks quickly and adds a nice texture. Tofu absorbs flavors well and is a great plant-based option. Just cut it into bite-sized pieces and follow the same steps. It’s fun to try new proteins! Change your recipe with the seasons. In summer, add fresh herbs like basil or cilantro. In fall, mix in pumpkin spice for a unique twist. Winter is great for adding some orange zest for brightness. Each season can bring a new taste to the chicken bites! After enjoying your air fryer spicy sweet chili chicken bites, store any leftovers in an airtight container. This helps keep the chicken bites fresh. They will last for up to three days in the fridge. Make sure they cool down to room temperature before sealing them up. This prevents moisture from making them soggy. When it's time to reheat your chicken bites, use the air fryer for the best outcome. Preheat your air fryer to 350°F. Place the chicken bites in a single layer in the basket. Heat them for about 5-7 minutes, flipping halfway through. This method keeps them crispy and warm without drying them out. If you want to keep your chicken bites longer, you can freeze them. First, let them cool completely. Then, place them in a single layer on a baking sheet. Freeze until solid. Once frozen, transfer them to a freezer-safe bag. They can stay in the freezer for up to three months. To reheat, follow the same method as above, adding a few extra minutes if needed. Cook the chicken bites for 10-12 minutes in the air fryer. Flip them halfway to ensure even cooking. The bites should be golden brown and crispy when done. Always check that the internal temperature reaches 165°F (75°C) for safety. Yes, you can use chicken breasts instead of thighs. However, thighs have more fat and stay juicier. If you prefer chicken breasts, cut them into similar-sized pieces. Adjust the cooking time if needed, as breasts may cook a bit faster. These chicken bites pair well with a variety of sides. Consider serving them with: - Steamed rice - Fresh salad - Vegetable stir-fry - Sweet potato fries You can also serve extra sweet chili sauce for dipping. To make homemade sweet chili sauce, mix the following: - 1/2 cup sugar - 1/3 cup rice vinegar - 1 tablespoon garlic, minced - 1 teaspoon red pepper flakes - 1 tablespoon cornstarch mixed with 2 tablespoons water Heat and stir until thickened. Adjust spice levels to your liking. This blog post covered how to make tasty chicken bites. We discussed key ingredients and steps needed for success. I shared tips to avoid mistakes and enhance flavor, plus fun variations. You can store leftovers easily and reheat them for a quick meal. Now, you have all you need to create and enjoy these delicious bites. Get cooking and have fun experimenting with new flavors!

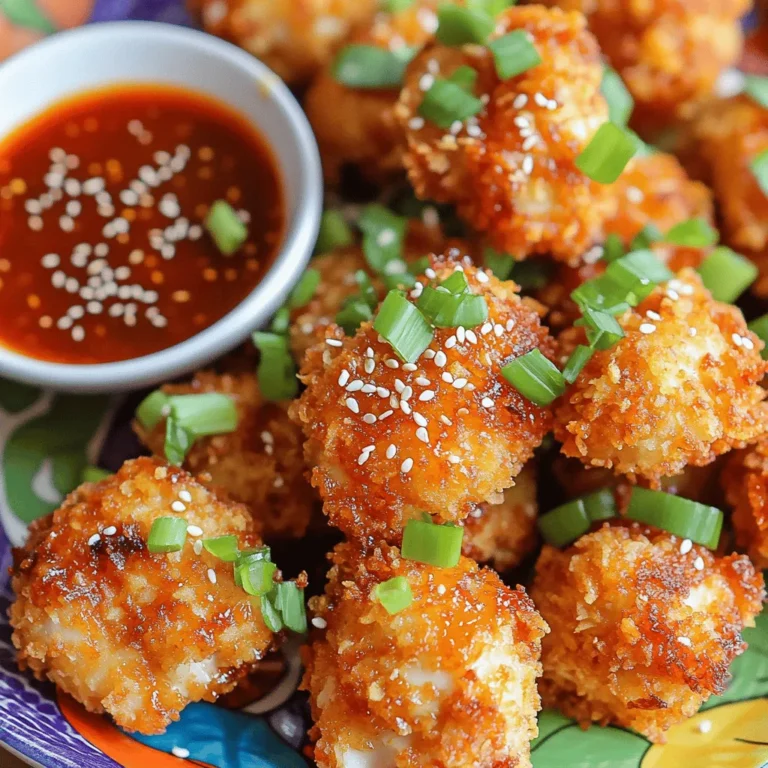
Air Fryer Spicy Sweet Chili Chicken Bites Delight

- 2 medium zucchinis, cut into fry-shaped strips - 1/2 cup all-purpose flour - 1/2 teaspoon garlic powder - 1/2 teaspoon onion powder - 1/2 teaspoon smoked paprika - Salt and pepper to taste - 2 large eggs, beaten - 1 cup panko breadcrumbs - 1/2 cup grated Parmesan cheese - 4 tablespoons unsalted butter, melted - Fresh parsley, chopped, for garnish Zucchini is the star of this dish. It adds a fresh taste and texture. You need two medium zucchinis. Cut them into fry-shaped strips to mimic traditional fries. Next, you’ll need the dry ingredients. These are key to making the coating flavorful. Mix together all-purpose flour, garlic powder, onion powder, smoked paprika, salt, and pepper. The spices add great depth to each bite. For the wet ingredients, you will need two large eggs. Beat them in a bowl. This will help the coating stick to the zucchini. Now for the crunchy topping. Use panko breadcrumbs mixed with grated Parmesan cheese. Panko gives a light and crispy texture. The Parmesan adds a delicious salty flavor. Finally, melt four tablespoons of unsalted butter. This will help the fries crisp up in the oven. You can also add fresh chopped parsley for a nice pop of color. This garnish makes the dish look fresh and inviting. Gather these ingredients, and you're ready to make crispy garlic butter Parmesan zucchini fries. Enjoy the process! Preheating and Preparing the Baking Sheet Start by preheating your oven to 425°F (220°C). This helps the fries cook evenly and become crispy. While the oven heats, line a baking sheet with parchment paper. This keeps the fries from sticking. Mixing the Seasoned Flour In a shallow dish, combine 1/2 cup of all-purpose flour, 1/2 teaspoon of garlic powder, 1/2 teaspoon of onion powder, and 1/2 teaspoon of smoked paprika. Add salt and pepper to taste. Mix well. This blend adds great flavor to the fries. Preparing the Egg Coating and Breadcrumb Mixture In another dish, place 2 large beaten eggs. In a third dish, mix 1 cup of panko breadcrumbs with 1/2 cup of grated Parmesan cheese. This will create a crunchy coating for the fries. Flour Coating Take each zucchini strip. First, coat it in the seasoned flour. Shake off any extra flour. This step helps the egg stick better. Egg Dipping Next, dip the floured zucchini into the beaten eggs. Allow any excess egg to drip off. This keeps the coating from becoming soggy. Breadcrumb Coating Finally, coat the zucchini strips in the panko-Parmesan mixture. Press lightly to make sure the crumbs stick well. This creates a nice crunchy texture. Arranging on Baking Sheet Lay the breaded zucchini fries on the prepared baking sheet. Make sure they are in a single layer. This allows the hot air to circulate and helps them crisp up. Drizzling with Butter Drizzle 4 tablespoons of melted unsalted butter evenly over the fries. This adds flavor and helps them brown nicely while baking. Baking Time and Monitoring Place the baking sheet in the preheated oven. Bake for 20 to 25 minutes, or until the fries are golden brown and crispy. Flip the fries halfway through baking for even cooking. This ensures every side gets that perfect crunch. Importance of Panko Breadcrumbs Panko breadcrumbs are a game changer. They are lighter and crispier than regular breadcrumbs. This helps your zucchini fries get that perfect crunch. Using panko ensures each bite gives a satisfying crunch. You can find panko at most grocery stores. Preheating the Oven Correctly Preheating your oven to 425°F (220°C) is key. This high heat helps the fries cook evenly. If your oven isn’t hot enough, the fries can turn soggy. Always give your oven at least 10-15 minutes to warm up before baking, and don’t skip this step. Additional Spices to Include Want to kick it up a notch? Try adding some cayenne pepper or Italian seasoning. A pinch of cayenne adds heat, while Italian seasoning brings a nice herb flavor. Experiment with spices you love. Just remember to balance flavors so they don’t overpower the zucchini. Substitutes for Parmesan Cheese No Parmesan cheese? No problem! You can use pecorino cheese for a sharper taste. Nutritional yeast is a great vegan option. It gives a cheesy flavor without using dairy. Choose a substitute based on your taste and diet needs. Best Dips to Pair These fries shine with a good dip. Try ranch dressing for a classic touch. You can also serve them with garlic aioli or marinara sauce. Each dip brings out the flavors of the fries in a fun way. Complementary Dishes Zucchini fries pair well with many meals. Serve them alongside grilled chicken or fish. They also make a great snack at parties. You can even toss them in a salad for some extra crunch. Enjoy these fries however you like! {{image_2}} You can swap zucchini for other veggies. Try using eggplant. Slice it into fry shapes, just like zucchini. Eggplant has a rich taste that pairs well with garlic butter. Sweet potatoes are another great option. They bring a sweet flavor and a vibrant color. Slice them into sticks and coat them just as you would zucchini. You can change the cheese for a new taste. Parmesan is great, but you might like mozzarella or cheddar. These cheeses melt beautifully and add a different flavor. For a spicy kick, add hot sauce to your egg mixture. You can also sprinkle some cayenne pepper into the breadcrumb mix. This will give your fries a spicy twist that really wakes up your taste buds. If you're gluten-free, you can use almond flour or a gluten-free flour blend. This keeps the recipe safe for those with gluten sensitivities. For a vegan option, replace eggs with a mixture of ground flaxseed and water. Use nutritional yeast instead of Parmesan cheese. This gives a cheesy flavor without dairy. These variations can help you enjoy crispy garlic butter Parmesan zucchini fries in many ways! To keep your zucchini fries fresh, use proper containers. Glass or plastic containers with tight lids work well. Let the fries cool down before placing them in the container. This helps prevent sogginess. Store them in the fridge for up to three days. Always label your container with the date. This way, you’ll know when to use them. When it comes to reheating, the oven is best. Preheat it to 350°F (175°C). Place the fries on a baking sheet. Bake for about 10-15 minutes. This helps regain their crispiness. If you use a microwave, they will warm up quickly, but they might become soft. To keep some crunch, avoid the microwave if you can. If you want to freeze zucchini fries, do this right after cooking. Let them cool completely. Then, spread them in a single layer on a baking sheet. Freeze for about an hour. Once frozen, transfer them to a freezer bag. Remove as much air as possible. They can last for up to three months in the freezer. When ready to eat, bake them straight from the freezer without thawing. To make zucchini fries crispy, use panko breadcrumbs. They are lighter and crunchier than regular bread crumbs. Coat the fries well in flour first. This helps the egg and breadcrumbs stick better. Bake them at a high temperature, around 425°F (220°C). This ensures they cook quickly and turn golden brown. Don't forget to drizzle melted butter on top before baking. This adds flavor and helps with crispiness. Using frozen zucchini is not the best choice. Frozen zucchini tends to be mushy when cooked. Fresh zucchini holds its shape and texture better. If you must use frozen, thaw it first and squeeze out excess moisture. This might help, but fresh is still the better option for crispy fries. If you do not have Parmesan cheese, you can use Pecorino Romano. It has a similar flavor but is saltier. Nutritional yeast is a great vegan option. It adds a cheesy taste without dairy. You can also use any hard cheese you like, such as Grana Padano or aged Gouda. Just remember, each cheese will give a different taste. Zucchini fries last about 3 to 4 days in the fridge. Store them in an airtight container to keep them fresh. When you want to eat them, reheat them in the oven for best results. This will help restore some of the crispiness. Avoid the microwave, as it may make them soggy. In this post, we explored making crispy zucchini fries. We covered ingredients, preparation steps, and baking instructions. I shared tips for the ultimate crunch and ways to enhance flavor. You learned about alternatives, storage methods, and common questions. Now you can enjoy a healthier snack with tasty variations. Experiment with flavors and serve them in fun ways! Enjoy your cooking!

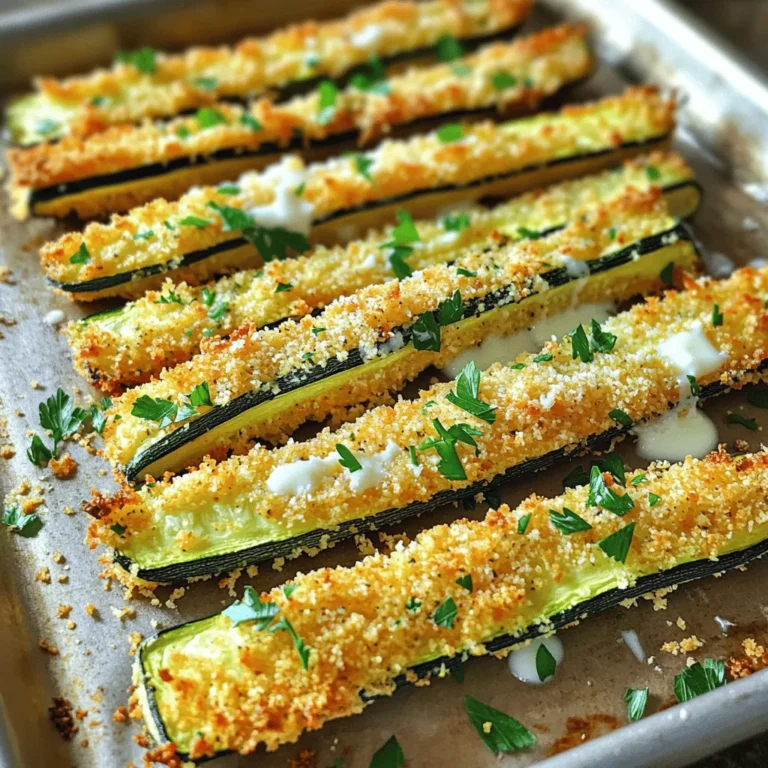
Crispy Garlic Butter Parmesan Zucchini Fries Delight

To make these tasty treats, you need a few key items: - 1 cup pumpkin puree - 1 cup graham cracker crumbs - 1/2 cup cream cheese, softened - 1/2 cup powdered sugar - 1 teaspoon pumpkin pie spice - 1/4 teaspoon vanilla extract - 1 cup white chocolate chips - Crushed nuts or extra graham cracker crumbs for coating These ingredients give the truffles a rich and creamy flavor. Pumpkin puree brings that classic autumn taste. The cream cheese adds smoothness, while the graham cracker crumbs give a nice crunch. You can add some fun twists to your truffles. Here are a few ideas: - A pinch of sea salt for a salty-sweet kick - A splash of maple syrup for extra sweetness - Chopped pecans or walnuts for added texture These extras let you make the truffles your own. Feel free to try different spices too, like cinnamon or nutmeg. You will need some simple tools to make these truffles: - Large mixing bowl - Spoon or spatula for mixing - Baking sheet lined with parchment paper - Microwave-safe bowl for melting chocolate - Small cookie scoop or your hands for shaping Having these tools ready will make the process smooth and easy. Enjoy making your truffles! To start, gather all your ingredients. In a large bowl, mix 1 cup of pumpkin puree and 1/2 cup of softened cream cheese. Add in 1/2 cup of powdered sugar, 1 teaspoon of pumpkin pie spice, and 1/4 teaspoon of vanilla extract. Stir until the mix is smooth and creamy. Next, fold in 1 cup of graham cracker crumbs. Keep mixing until the mixture is thick and easy to mold. This step is key to getting the right texture for your truffles. With your mixture ready, it’s time to shape the truffles. Use your hands to scoop out about a tablespoon of the mixture. Roll it gently between your palms to form a ball. Place each truffle on a parchment-lined baking sheet. Repeat this step until you shape all the mixture into truffles. This should yield about 12 tasty treats. Once done, pop them in the freezer for 30 minutes. This helps them firm up and makes them easier to coat. While the truffles chill, melt 1 cup of white chocolate chips. Use a microwave-safe bowl and heat the chips in 20-second bursts. Stir after each interval until the chocolate is smooth. After the truffles have chilled, take them out of the freezer. Dip each truffle into the melted chocolate, letting any extra drip off. For a fun twist, roll the coated truffles in crushed nuts or more graham cracker crumbs. Finally, return the truffles to the baking sheet. Chill them again for another 30 minutes to let the chocolate set. Enjoy these delightful bites chilled or at room temperature! To get the best texture and flavor, mix the right amounts of pumpkin puree and cream cheese. This gives a smooth and creamy base. Use fresh pumpkin puree for a rich taste. If you use canned, choose one with no added sugar. The graham cracker crumbs add a nice crunch. They should blend well without being too dry. Adding a pinch of salt can enhance the flavors too. A common mistake is overmixing the truffle mixture. You want it smooth but not too runny. If it feels too wet, add more graham cracker crumbs. Make sure to chill the truffles long enough before dipping. If they are too soft, they will fall apart in the chocolate. Also, don't rush the melting of white chocolate. Heat it in small bursts to prevent burning. Serve these truffles in mini cupcake liners. This keeps them neat and adds a fun touch. You can sprinkle some nutmeg or cinnamon on top for extra flair. For a more festive look, use crushed nuts or colored sprinkles. These truffles taste great chilled but can also be served at room temperature. Enjoy them as a sweet treat at parties or as a cozy snack at home. {{image_2}} You can change up how your truffles look and taste by using different coatings. Here are some fun ideas: - Crushed nuts: Almonds, pecans, or walnuts add a nice crunch. - Coconut flakes: Toasted coconut gives a tropical feel to your truffles. - Dark chocolate: For a richer taste, dip your truffles in dark chocolate instead of white. - Sprinkles: Colorful sprinkles can make them fun for kids or parties. You can also play with the flavors in your truffles. Here are a few options: - Maple syrup: Swap out some powdered sugar for maple syrup for a sweet twist. - Nutmeg: Add a pinch of nutmeg for an extra spice kick. - Peanut butter: Mix in a little peanut butter for a creamier texture and unique flavor. - Vanilla bean: Use fresh vanilla bean instead of extract for a gourmet touch. Make your truffles special for each season. Here are some ideas to try: - Chocolate drizzle: In winter, drizzle melted dark chocolate on top for a cozy look. - Cinnamon: In the fall, sprinkle cinnamon on top for added warmth. - Orange zest: In summer, add orange zest for a refreshing flavor. - Holiday spices: During the holidays, mix in spices like cardamom or ginger for a festive flair. These variations make your no-bake pumpkin pie truffles even more fun to enjoy! To keep your no-bake pumpkin pie truffles fresh, store them in an airtight container. Place parchment paper between layers to stop sticking. Make sure your container is in the fridge. This keeps the truffles cool and firm, which helps maintain their shape and flavor. These truffles last about one week in the fridge. If you store them right, they taste great for days. Just remember to check for any changes in smell or texture before eating. If they look or smell off, it’s best to toss them. You can freeze these truffles for up to three months. To freeze, first place them on a baking sheet in a single layer. Once frozen, transfer them to a freezer-safe bag. This method helps avoid freezer burn. When you're ready to enjoy them, let them thaw in the fridge overnight. This keeps them tasty and fresh! Yes, you can make these truffles a day or two ahead. Just store them in the fridge. They taste even better after chilling overnight. This gives the flavors time to blend well. You can use mascarpone cheese if you want a richer taste. Another option is Greek yogurt for a lighter feel. Both will work well in the recipe. Just make sure they are smooth and soft for easy mixing. Yes! Use a dairy-free cream cheese or nut-based spread. Coconut cream can also work. Just ensure your chocolate chips are dairy-free, too. This way, you can still enjoy these tasty truffles without dairy. To keep the chocolate smooth, melt it slowly. Heat it in short bursts, stirring often. You can also mix in a bit of coconut oil. This helps keep the chocolate nice and creamy while dipping the truffles. No-bake pumpkin pie truffles are easy and fun to make. You learned the ingredients needed, tools required, and steps to create them. We discussed tips to enhance texture and flavor, along with common mistakes to avoid. By exploring variations and storage tips, you can enjoy these treats all year round. Make these truffles your own, and savor the tasty pumpkin flavor. Enjoy sharing with friends and family!

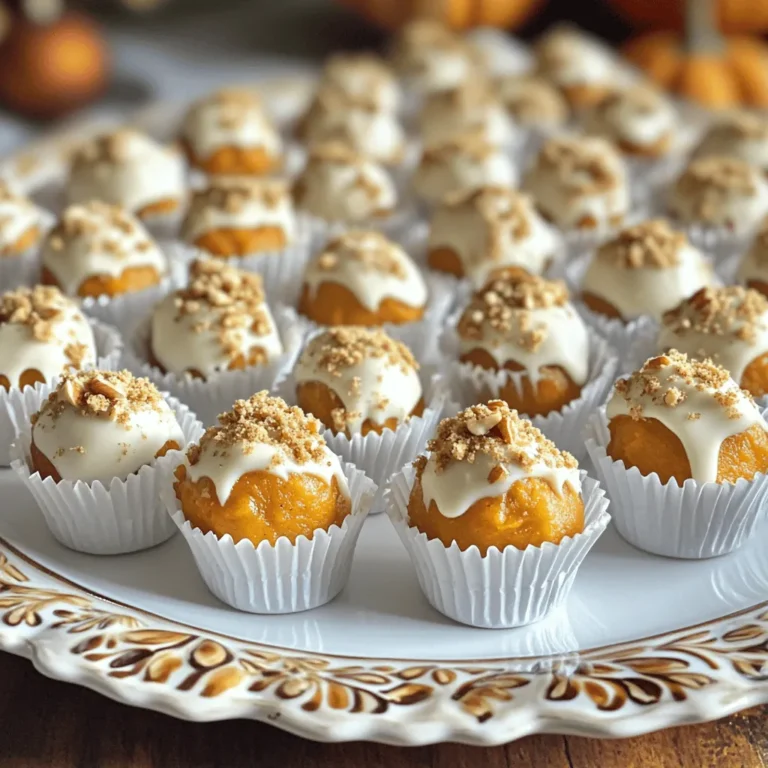
No-Bake Pumpkin Pie Truffles Simple and Tasty Treat

For Air Fryer Teriyaki Salmon Bites, you will need: - 1 lb salmon fillet, skinless and cut into bite-sized cubes - 1/4 cup soy sauce (or tamari for gluten-free) - 2 tablespoons honey or maple syrup - 1 tablespoon rice vinegar - 1 teaspoon fresh ginger, grated - 1 teaspoon garlic, minced - 1 tablespoon sesame oil - 1 tablespoon cornstarch - 2 green onions, sliced (for garnish) - Sesame seeds (for garnish) If you have dietary needs, you can swap some ingredients: - Use tamari instead of soy sauce for gluten-free needs. - Maple syrup can replace honey for a vegan option. - If you can't find sesame oil, olive oil will work in a pinch. Using fresh ingredients makes a big difference. Fresh salmon has a better taste and texture. Fresh ginger and garlic add strong flavors. This dish shines with bright, crisp garnishes like green onions and sesame seeds. The quality of your ingredients can turn a good meal into a great one. Always choose the best you can find. To start, gather your ingredients. You need soy sauce, honey or maple syrup, rice vinegar, fresh ginger, minced garlic, and sesame oil. In a mixing bowl, whisk together these ingredients. Aim for a smooth mix. This blend will give your salmon bites a rich flavor. The soy sauce adds saltiness while honey brings sweetness. Ginger and garlic add a nice kick. Next, cut your salmon fillet into bite-sized cubes. Make sure the pieces are uniform for even cooking. Place these cubes in the bowl with your marinade. Gently toss them to coat each piece well. Cover the bowl and let it sit in the fridge. Marinate for 15 to 30 minutes. This step infuses the salmon with all those tasty flavors. After marinating, take the salmon out of the fridge. Sprinkle the cornstarch over the salmon bites. Toss them again to coat evenly. This will help create a crispy texture. Preheat your air fryer to 400°F (200°C) for about 5 minutes. Then, place the salmon bites in the air fryer basket in a single layer. Avoid overcrowding for best results. Cook them at 400°F (200°C) for 8 to 10 minutes. Remember to shake the basket halfway through. This ensures even cooking. Once done, the salmon should look golden and crisp. Carefully remove the bites and place them on a platter. Garnish with sliced green onions and sesame seeds before serving. Enjoy your delicious teriyaki salmon bites! To get perfect salmon bites, focus on timing and temperature. Set your air fryer to 400°F (200°C). Cook the salmon for 8 to 10 minutes. Check for doneness by flaking the fish with a fork. It should easily separate and look opaque. The salmon should be juicy inside with a slight crisp outside. To avoid sticking, coat the air fryer basket lightly with cooking oil. You can also use parchment paper designed for air fryers. This helps the salmon bites to lift off easily. Remember to space the salmon out in the basket. Crowding makes them stick together. Having the right tools makes cooking easier. I suggest using silicone tongs to handle hot salmon. A good set of measuring spoons can help with the marinade. Also, a mixing bowl for marinating is key. These tools make the process smooth and enjoyable. {{image_2}} You can switch up the marinade for new flavors. Try using orange juice instead of rice vinegar. It adds a nice citrus twist. You can also use coconut aminos for a sweeter, milder taste. Add crushed red pepper for some heat. This makes the dish spicy and exciting. Not a salmon fan? No problem! You can use chicken, shrimp, or tofu. Cut the chicken into small pieces like the salmon. For shrimp, make sure they are deveined and peeled. If using tofu, press it first to remove extra water. This helps it absorb the marinade better. Pair your teriyaki salmon bites with rice or quinoa. Both will soak up the tasty sauce. Steamed vegetables like broccoli or snap peas work well, too. For a fun twist, serve it in lettuce wraps. This keeps the meal light and fresh. Don’t forget to sprinkle extra sesame seeds on top for crunch. After cooking your teriyaki salmon bites, let them cool first. Place them in an airtight container. You can store them in the fridge for up to three days. Make sure they are fully covered to keep them fresh. If you want to keep them longer, consider freezing. To reheat your salmon bites, use an air fryer or oven. Preheat the air fryer to 350°F (175°C). Cook for about 5-7 minutes. This helps keep them crispy. If using an oven, set it to 350°F (175°C). Bake for about 10 minutes. Check that they are warmed through before serving. You can freeze teriyaki salmon bites for up to two months. Place them in a freezer-safe bag. Make sure to remove as much air as you can before sealing. When ready to eat, thaw them in the fridge overnight. Reheat them as mentioned above for the best texture. Yes, you can use skin-on salmon. Just remember to remove the skin after cooking. Skin can add extra flavor, but it may not crisp well in the air fryer. If you prefer a lighter texture, go for skinless salmon. You can check if the salmon is done by using a fork. Gently flake the salmon at its thickest part. If it flakes easily and is opaque, it is ready. The ideal internal temperature is 145°F (63°C). Teriyaki salmon bites pair well with many sides. Here are some great options: - Steamed rice - Quinoa - Stir-fried vegetables - Asian slaw - Cucumber salad These sides add color and flavor to your meal. They also balance the rich taste of the salmon. This post covered everything you need to make delicious air-fried salmon bites. We discussed ingredients, marinade steps, and cooking tips to ensure perfect results. Fresh ingredients elevate flavor, while alternate options fit dietary needs. Remember to store and reheat properly for the best taste. Explore different marinades and proteins to keep meals exciting. Your kitchen journey with salmon can be simple and fun. Enjoy cooking and sharing these bites with loved ones!

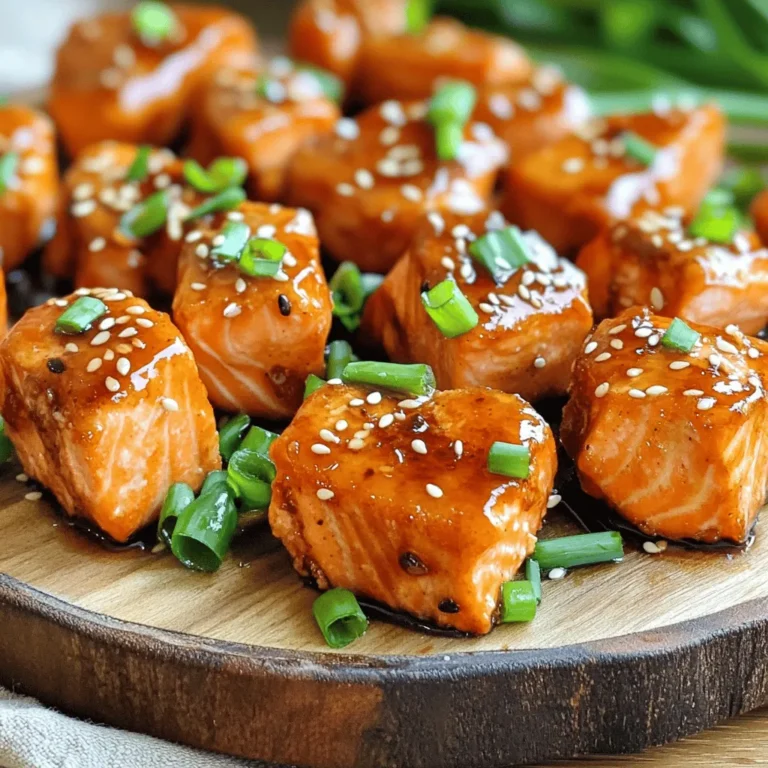
Air Fryer Teriyaki Salmon Bites Easy and Tasty Recipe

To make these scones, gather these key ingredients: - 2 cups all-purpose flour - 1/2 cup granulated sugar - 1 tablespoon baking powder - 1/2 teaspoon salt - 1/2 cup unsalted butter (1 stick), browned - 1/2 cup heavy cream - 1/4 cup pure maple syrup - 1 large egg - 1 teaspoon vanilla extract These ingredients create a rich base for your scones. The browned butter adds a deep, nutty flavor. The maple syrup brings sweetness and pairs well with the other tastes. To make your scones even better, consider adding: - 1/2 cup chopped pecans - 1/2 cup dried cranberries - 1/2 cup chocolate chips These add-ins can enhance texture and flavor. Pecans give a nice crunch, while cranberries add tartness. Chocolate chips bring a sweet touch that many love. For the glaze, you will need: - 1 cup powdered sugar - 2-3 tablespoons maple syrup - 1 tablespoon browned butter This glaze is the finishing touch. It adds sweetness and a beautiful shine. Adjust the maple syrup to get the right consistency for drizzling. First, set your oven to 400°F (200°C). This step is key for baking scones. While the oven heats, line a baking sheet with parchment paper. This keeps the scones from sticking and makes cleanup easier. To brown the butter, place the 1/2 cup of unsalted butter in a small saucepan. Cook it over medium heat. Keep swirling the pan as it melts. Watch for a golden color and nutty scent. This takes about 5-7 minutes. Once it’s ready, remove it from the heat and let it cool slightly. This rich flavor is what makes your scones special. In a large bowl, whisk together these dry ingredients: - 2 cups all-purpose flour - 1/2 cup granulated sugar - 1 tablespoon baking powder - 1/2 teaspoon salt In another bowl, mix the wet ingredients: - 1/2 cup browned butter - 1/2 cup heavy cream - 1/4 cup pure maple syrup - 1 large egg - 1 teaspoon vanilla extract Whisk these together until well mixed. This step builds flavor and texture. Now, pour the wet mixture into the dry bowl. Gently fold it with a spatula. Stop mixing when you see some lumps; that's okay. If you want to add a crunch, fold in 1/2 cup of chopped pecans. Once combined, turn the dough onto a floured surface. Shape it into a round disk about 1 inch thick. Cut this disk into 8 wedges, like slicing a pizza, and place them on your prepared baking sheet. Bake your scones in the preheated oven for 15-18 minutes. They should look lightly golden brown when done. Let them cool on the baking sheet for a few minutes. This cooling time helps them set. While the scones cool, prepare the maple glaze. In a small bowl, mix together: - 1 cup powdered sugar - 2-3 tablespoons maple syrup - 1 tablespoon browned butter Stir until smooth. If it’s too thick, add more syrup. Once your scones are warm, drizzle this glaze generously over each one. This glaze adds a sweet finish that ties everything together. To get the best scone texture, use cold butter. Cold butter creates steam and makes your scones flaky. You can even freeze the butter for a bit before using it. When mixing, stop as soon as the dough comes together. Some lumps are okay. Overmixing can lead to tough scones. To bake evenly, space your scones apart on the baking sheet. Leave at least two inches between each wedge. This allows hot air to flow freely around them. Rotate the baking sheet halfway through baking. This helps the scones brown evenly on all sides. When making the glaze, mix the powdered sugar, maple syrup, and browned butter until smooth. If it's too thick, add more maple syrup a little at a time. Use a spoon or a whisk to drizzle the glaze over the warm scones. Start from the center and work your way out for an even coating. {{image_2}} You can change up the flavor of your scones by adding different nuts or fruits. Pecans are great, but walnuts or almonds also work well. If you like fruit, try adding dried cranberries or blueberries. Just chop the nuts or fruit and fold them into the dough. This adds texture and a burst of flavor to every bite. If you love chocolate, try making chocolate chip scones. Use the same base recipe and add about 1 cup of chocolate chips instead of nuts. The sweet, creamy chocolate pairs well with brown butter. This twist makes the scones extra special. Enjoy them warm with a cup of coffee or tea. You can easily make gluten-free scones. Substitute the all-purpose flour with a gluten-free flour blend. Look for blends that include xanthan gum, as it helps with texture. You may need to adjust the liquid slightly since gluten-free flours can absorb more moisture. Follow the same steps in the recipe, and you'll have tasty gluten-free scones! To keep your scones fresh, store them in an airtight container. This helps maintain their soft texture. You can keep them at room temperature for up to 2 days. If you want to keep them longer, consider refrigeration. Just remember, the cold can change the texture slightly. Freezing is a great option if you have extra scones. Wrap each scone in plastic wrap. Then place them in a freezer bag. They can last up to 3 months in the freezer. When you're ready to enjoy them, simply thaw them at room temperature. To enjoy your scones warm, reheat them in the oven. Set your oven to 350°F (175°C). Place the scones on a baking sheet for about 5 to 10 minutes. This helps restore their fresh-baked taste. You can also use the microwave for quick reheating. Heat them for about 15 to 20 seconds, but be careful not to dry them out. To make flaky scones, use cold ingredients. Cold butter helps create layers. Cut the butter into small pieces and mix it quickly with the dry ingredients. Do not overmix the dough. This keeps the air pockets for that perfect flaky texture. Yes, you can use margarine. However, it may not give the same rich flavor as browned butter. Butter adds a nice nutty taste that margarine lacks. If you want the best flavor, stick with butter. You can use a flaxseed meal or applesauce instead of an egg. Mix 1 tablespoon of flaxseed meal with 2.5 tablespoons of water. Let it sit for a few minutes until it thickens. Use this mixture in place of the egg in the recipe. You can use whole milk or half-and-half instead of heavy cream. If you want a thicker texture, mix milk with a little butter. This will mimic the richness of heavy cream in your scone recipe. The scones will last for about 2-3 days at room temperature. Keep them in an airtight container. If you want to keep them longer, freeze them. They last up to 3 months in the freezer. Thaw them overnight in the fridge when ready to eat. You learned how to make tasty brown butter maple glazed scones. We covered essential ingredients, mixing steps, and baking tips. You also found great add-ins for flavor and how to store leftovers. Remember, practice makes perfect. Use these steps to impress friends and family with your baking skills. Enjoy every bite of your fresh scones and have fun experimenting with flavors. Happy baking!

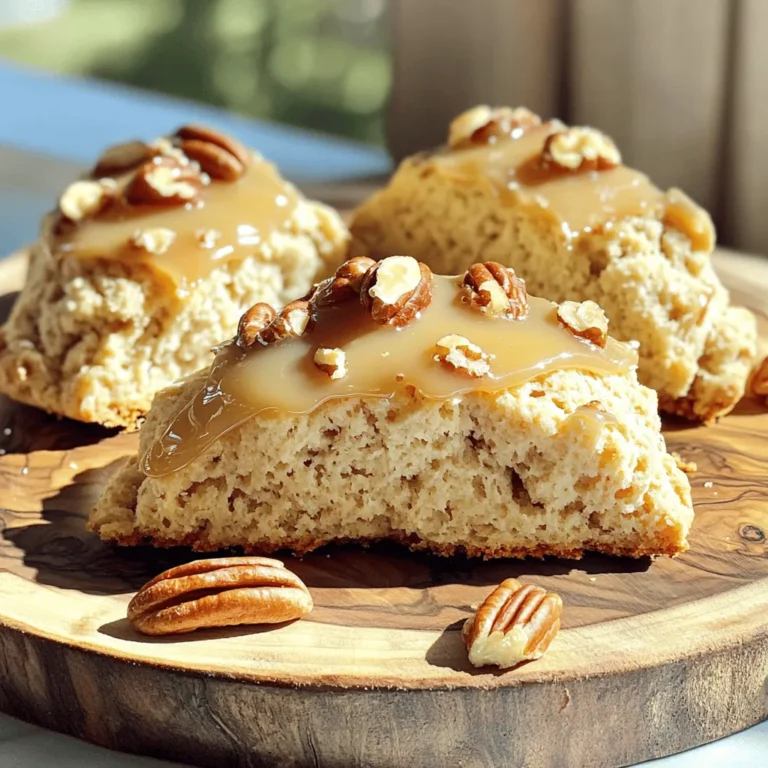
Brown Butter Maple Glazed Scones Rich Flavor Delight

- 1 cup almond flour - 1/2 cup rolled oats - 1/2 cup natural peanut butter (or almond butter) - 1/4 cup honey or maple syrup - 1/4 cup protein powder (vanilla or chocolate flavor) - 1/2 teaspoon vanilla extract - 1/4 cup mini chocolate chips - A pinch of salt These main ingredients form the base of your no-bake cookie dough protein bites. Almond flour gives a nutty flavor and smooth texture. Rolled oats add heartiness. Peanut butter or almond butter provides creaminess and protein. Honey or maple syrup sweetens without refined sugar. Protein powder boosts nutrition. Vanilla extract enhances taste. Mini chocolate chips add fun and sweetness. A pinch of salt balances the flavors. - Chopped nuts - Dried fruit Feel free to mix in some chopped nuts or dried fruit. Nuts add more crunch and healthy fats. Dried fruit brings natural sweetness and chewiness. You can customize these bites to your taste. - Protein content - Healthy fats - Fiber content These protein bites pack a punch. The protein helps build and repair muscles. Healthy fats from nut butter support brain health and keep you full. The fiber from oats aids digestion and keeps you satisfied. Enjoy these bites as a snack or post-workout treat. They offer great nutrition without guilt. Start by grabbing a large mixing bowl. Add 1 cup of almond flour, 1/2 cup of rolled oats, and 1/4 cup of protein powder. I prefer using vanilla or chocolate protein powder for a tasty boost. Mix these dry ingredients well. You want them evenly combined so every bite is full of flavor. Next, it’s time to add the wet ingredients. Pour in 1/2 cup of natural peanut butter, 1/4 cup of honey or maple syrup, and 1/2 teaspoon of vanilla extract. Don’t forget a pinch of salt to enhance the taste! Use a spatula or your hands to mix everything together until it forms a dough-like consistency. This part is fun and a little messy, but it’s worth it! Now, take the dough and form it into small balls. I suggest making them about 1 inch in size. If the mixture feels too sticky, chill it in the fridge for about 10-15 minutes. This will make it easier to handle. Once shaped, place the cookie dough bites on a parchment-lined baking sheet or plate. Refrigerate them for about 30 minutes to help them firm up. After chilling, they are ready to eat! To manage stickiness, you need to mix well. If the dough feels too wet, add more almond flour. This will help firm it up a bit. If it’s still hard to handle, chill the dough in the fridge for 10-15 minutes. This makes it easier to roll into balls. You can add fun flavors and textures to your bites. Try adding chopped nuts or dried fruit for a nice crunch. You can also swap the peanut butter for almond butter. This gives a different taste. Use flavored protein powder too. Chocolate adds richness, while vanilla brings a light touch. These protein bites are great on their own. But you can also enjoy them with a glass of milk or a smoothie. They make a great snack after a workout. You could top them with a drizzle of honey for added sweetness. {{image_2}} You can easily change the flavors with protein powder. Use chocolate for a rich taste or vanilla for a lighter option. Both work well! You can also switch nut butters. Use almond butter for a nutty twist or sunflower seed butter for a nut-free snack. Each choice creates a new flavor profile! If you need gluten-free options, almond flour and oats are great choices. Check that your oats are certified gluten-free. For vegan bites, swap honey with maple syrup. Use a plant-based protein powder as well. These changes keep the bites tasty and safe for different diets. Think about adding seasonal flavors! In fall, mix in pumpkin spice or chopped apples. In winter, use peppermint extract or crushed candy canes. For summer, add dried fruits like cranberries or apricots. These little changes make the bites festive and fun! To keep your No-Bake Cookie Dough Protein Bites fresh, use airtight containers. Glass or plastic containers work well. Make sure the lid seals tightly to keep out air and moisture. This way, your bites stay tasty and safe. These protein bites can last up to a week in the fridge. Store them in your airtight container. If you notice any changes in smell or texture, it is best to discard them. Always check before enjoying! You can freeze these bites for longer storage. First, place them in a single layer on a baking sheet. Freeze for about an hour until they are firm. After that, transfer them to an airtight container or a freezer bag. Label the bag with the date. When you're ready to eat, let them thaw in the fridge overnight. Enjoy them cold or at room temperature! Yes, you can make these protein bites vegan. To do this, swap the honey for maple syrup. Use almond butter instead of peanut butter for a nut-free option if needed. Choose a plant-based protein powder to keep it vegan. You can also add more oats or even some chia seeds for binding. To boost the protein in these bites, consider adding more protein powder. You can also mix in seeds like chia, hemp, or flaxseeds. Using a higher protein nut butter, such as powdered peanut butter, is another great choice. These options keep the bites tasty while increasing their protein punch. If you need a substitute for almond flour, try oat flour or coconut flour. Both work well in this recipe. You can even use ground sunflower seeds for a nut-free option. Just remember that coconut flour absorbs more liquid, so you might need to adjust the wet ingredients slightly. These protein bites are easy to make and tasty. You blend simple ingredients like almond flour and peanut butter. They offer great nutrition with healthy fats and protein. You can customize them with nuts or fruits. Store them right, and they last longer. Try different variations to suit your taste. These bites are perfect as a snack any time. Enjoy making and sharing them with friends and family.

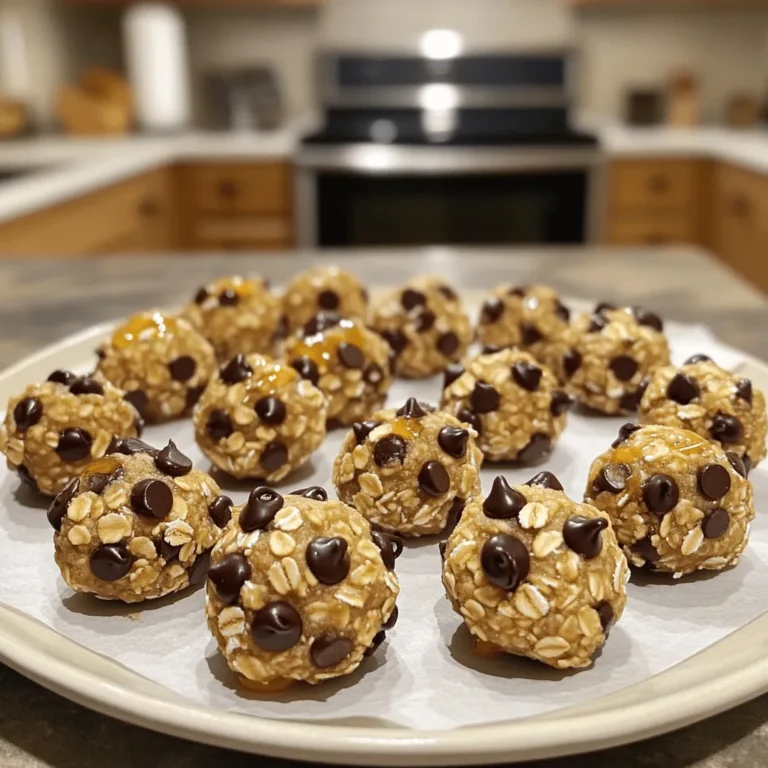
No-Bake Cookie Dough Protein Bites Perfect for Snacking

For this dish, you need 9 oz (250g) of fresh tortellini. You can choose either cheese-filled or spinach-filled tortellini. Fresh tortellini cooks quickly and tastes great. It adds a nice texture to the dish. Next, gather the veggies and cheese. You will need: - 1 cup cherry tomatoes, halved - 1 cup fresh mozzarella balls (bocconcini) - 1/2 cup fresh basil leaves The cherry tomatoes add color and sweetness. The fresh mozzarella brings creaminess. The basil gives that lovely fresh taste. Lastly, you will need some nuts and seasoning. Here’s what to use: - 1/4 cup pine nuts, toasted - 1/4 cup extra virgin olive oil - 2 tablespoons lemon juice - Salt and pepper to taste - Balsamic glaze, for drizzling (optional) Toasted pine nuts add a nice crunch. The extra virgin olive oil and lemon juice blend well for a rich flavor. Salt and pepper make all the tastes pop. The balsamic glaze is optional but adds a nice sweet touch. To cook the tortellini, first, bring a pot of salted water to a boil. This step is key. Salt adds flavor to the pasta. Once the water is boiling, add 9 oz of fresh tortellini. You can use cheese or spinach-filled tortellini. Cook according to package instructions, usually about 3-5 minutes. You want it to be al dente, which means firm but not hard. Drain the tortellini and set it aside. Next, we will make the pesto. Grab your food processor for this step. Add 1/2 cup of fresh basil leaves, 1/4 cup of toasted pine nuts, 1/4 cup of extra virgin olive oil, and 2 tablespoons of lemon juice. Blend these ingredients until smooth. It should look creamy and bright green. Season with salt and pepper to taste. This fresh pesto will bring a lot of flavor to your dish. Now, it’s time to mix everything together. In a large bowl, combine the drained tortellini, 1 cup of halved cherry tomatoes, and 1 cup of fresh mozzarella balls. These add color and taste to your dish. Pour the prepared pesto over the tortellini mixture. Gently toss everything until it is well-coated. If needed, adjust the seasoning for your taste. To serve, divide the tortellini salad into bowls. For an extra touch, drizzle balsamic glaze on top. It adds a sweet and tangy flavor. You can also garnish with more basil leaves and a sprinkle of pine nuts for a nice look. Enjoy your fresh and easy dish! To cook tortellini just right, start with a large pot of salted water. Bring it to a boil. Add the fresh tortellini and cook for 3 to 5 minutes. Check if they float; that means they are ready. Drain them well, but don’t rinse. This keeps the starch, which helps the sauce stick. To make your pesto pop, use fresh ingredients. I love using fresh basil and toasted pine nuts. Blend them with good olive oil and a splash of lemon juice. Taste as you go. Adjust the salt and pepper to suit your liking. A little more lemon juice can brighten the flavor. For a beautiful dish, serve the tortellini in bowls. Add extra basil leaves on top for color. A sprinkle of pine nuts adds a nice crunch. Drizzle with balsamic glaze for flair. This makes your meal look and taste gourmet. Enjoy the fresh, vibrant colors on your plate! {{image_2}} You can easily change some ingredients in this recipe. If you don’t have fresh tortellini, try using dried tortellini. Just cook it longer, about 8-10 minutes. For the cheese, swap fresh mozzarella with feta or goat cheese. These will add a nice tang. If cherry tomatoes are not in season, you can use sun-dried tomatoes or diced regular tomatoes. This dish can fit many diets. If you want it gluten-free, choose gluten-free tortellini. For a vegan twist, skip the cheese and use a nut-based pesto. You can also use nutritional yeast to add a cheesy flavor. Always check labels to make sure the ingredients fit your needs. For a heartier meal, you can add protein. Grilled chicken, shrimp, or chickpeas make great choices. Cook chicken or shrimp before adding them to the salad. If using chickpeas, just rinse and mix them in. This boosts your meal and keeps it filling. After a meal, you might have some tasty tortellini left. To store it, place the leftovers in an airtight container. Make sure to cover it well to keep it fresh. You can keep it in the fridge for up to three days. If you see any signs of spoilage, such as a strange smell or mold, throw it away. When you want to enjoy your leftovers, reheating is easy. You can use the microwave for quick heating. Place the tortellini in a bowl and cover it with a damp paper towel. Heat it for about one to two minutes. Stir halfway through to heat evenly. You can also reheat on the stove. Just add a little olive oil to a pan and warm it gently. This method keeps the flavors fresh. If you have more than a few leftovers, freezing works well. First, let the tortellini cool completely. Then, place it in a freezer-safe container or bag. Squeeze out any air to prevent freezer burn. You can freeze it for up to three months. When you're ready to eat, thaw it in the fridge overnight. Reheat as mentioned above, and you’ll have a quick meal ready! It takes about 15 minutes to make this dish. You spend 10 minutes prepping and 5 minutes cooking. This quick time is perfect for busy days. You get a fresh meal in no time. Yes, you can use frozen tortellini. Just follow the cooking time on the package. Frozen tortellini may take a bit longer to cook. Make sure it is cooked until al dente for the best texture. You can serve it with a simple green salad. Garlic bread or bruschetta pairs nicely too. A light soup, like minestrone, makes a great side dish. You can also add grilled chicken for extra protein. Enjoy mixing and matching to fit your taste! This blog post covered making Minute Caprese Pesto Tortellini. We explored fresh tortellini, vegetables, and nuts. I shared step-by-step cooking tips and how to prepare tasty pesto. You learned how to improve your dish and beautifully present it. We also discussed ingredient swaps and storage tips for leftovers. In the end, this dish is quick and fun. Enjoy cooking and sharing it with others!

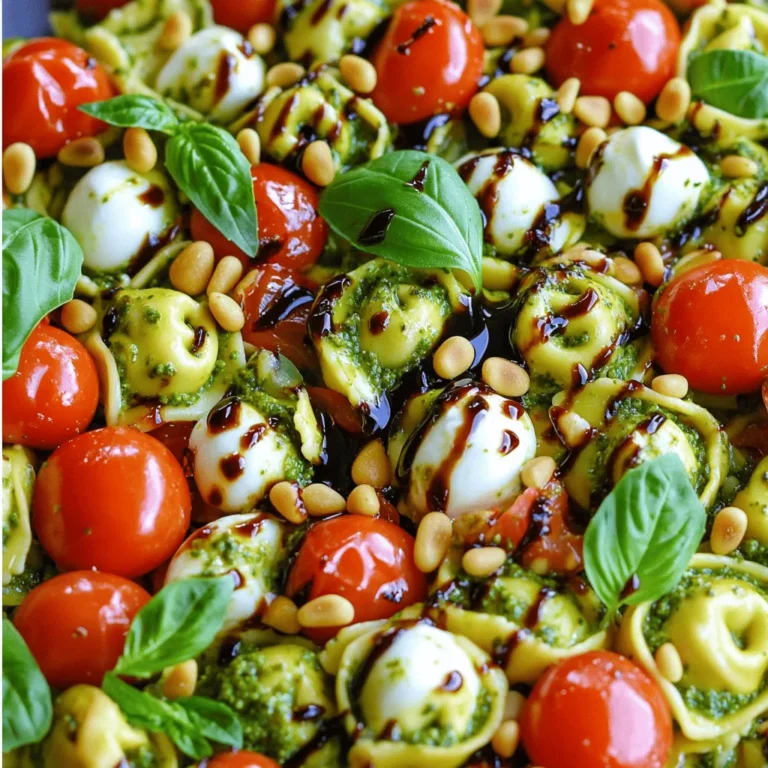
Minute Caprese Pesto Tortellini Fresh and Easy Dish

PREV 1 … 19 20 21 … 57 NEXT
quick dish kitchen

explore

DessertsDinnerAppetizersDrinks

Our Policies

  • Cookie Policy
  • Copyright Policy
  • Disclaimer
  • GDPR Policy
  • Terms Of Use
Back to Top
  • About
  • Contact Us
  • Privacy Policy
© 2025 quick dish kitchen