FREE DINNER EBOOK! Get your copy!
  • Cookie Policy
  • GDPR Policy
  • Disclaimer
  • Terms Of Use
  • Visit my other site: Fun Cookie Recipes
quick dish kitchen
  • Home
  • Dinner
  • Desserts
  • Drinks
  • Appetizers
  • Contact
  • About
  • Privacy Policy
  • Home
  • Dinner
  • Desserts
  • Drinks
  • Appetizers
  • Contact
  • About
  • Privacy Policy
  • Cookie Policy
  • GDPR Policy
  • Disclaimer
  • Terms Of Use
Visit my other site: Fun Cookie Recipes

HOME / CATEGORIES /

Latest

- 1 lb boneless, skinless chicken breasts - 1 head of garlic - 1 tablespoon olive oil - 1 small onion, chopped - 1 red bell pepper, diced - 1 can (15 oz) white beans (cannellini or great northern), drained and rinsed - 1 can (4 oz) diced green chilies - 4 cups chicken broth - 1 teaspoon ground cumin - 1 teaspoon chili powder - ½ teaspoon smoked paprika - 1 cup heavy cream - 1 cup corn (frozen or canned) - Salt and pepper to taste - Fresh cilantro for garnish - Lime wedges for serving - Large pot or Dutch oven - Aluminum foil - Whisk or wooden spoon Gathering the right ingredients is key to making this chili shine. You start with chicken breasts, which are lean and tender. Roasting a head of garlic adds a sweet, rich flavor. The olive oil helps sauté the veggies and chicken well. The onions and red bell peppers bring a nice crunch. White beans give the chili body and protein. Diced green chilies add a mild heat. Chicken broth keeps everything moist and flavorful. The spices—cumin, chili powder, and smoked paprika—give the chili depth. Heavy cream makes it rich and creamy. Corn adds sweetness and texture, while salt and pepper enhance all the flavors. For garnishes, fresh cilantro brightens the dish. Lime wedges offer a zesty kick when squeezed over the chili. Make sure you have a large pot or Dutch oven for cooking. Aluminum foil is needed to wrap the garlic for roasting. A whisk or wooden spoon helps you stir and mix all the ingredients together. 1. Start by preheating your oven to 400°F (200°C). 2. Cut off the top of the head of garlic to expose the cloves. 3. Drizzle the garlic with olive oil. 4. Wrap the garlic in aluminum foil and place it in the oven. 5. Roast for 30-35 minutes until the cloves are soft and fragrant. 1. In a large pot, heat 1 tablespoon of olive oil over medium heat. 2. Add the chopped onion and diced red bell pepper. 3. Sauté for about 5 minutes until the vegetables soften and become fragrant. 1. Now, add the boneless, skinless chicken breasts to the pot. 2. Cook for about 5 minutes on each side until lightly browned. 1. Stir in the ground cumin, chili powder, smoked paprika, salt, and pepper. 2. Let the spices cook for a minute to bloom and develop their flavors. 1. Squeeze the roasted garlic from its skins into the pot. 2. Add the white beans, diced green chilies, chicken broth, and corn. 3. Stir well and bring the mixture to a gentle simmer. 1. Let the chili simmer for 20-25 minutes to cook the chicken thoroughly. 2. Remove the chicken breasts and shred them using two forks. 3. Return the shredded chicken to the pot. 4. Stir in the heavy cream and let the chili simmer for another 5 minutes. 5. Taste and adjust the seasoning if needed for the perfect flavor. To boost the flavor of your chili, consider adding spices like cayenne pepper or oregano. A dash of lime juice can brighten the dish. Fresh herbs, like cilantro, give a nice taste. Use fresh herbs for a stronger flavor. Dried herbs work well too, but use less. About one-third of the amount is a good rule. If you want a creamier chili, try using half-and-half or coconut milk instead of heavy cream. You could also add cream cheese for extra richness. Adjust the creaminess by adding more or less cream. Start with a cup, then taste and tweak to your liking. Meal prepping is a game changer. Chop your veggies and roast the garlic in advance. Store them until you're ready to cook. Using rotisserie chicken is also a smart time-saver. Shred the chicken and add it directly to the pot. It cuts down on cooking time and gives great flavor. {{image_2}} You can make this chili without chicken if you want a vegetarian dish. Use plant-based protein, like tofu or tempeh. These options cook well and soak up flavors. Adjust the broth, too. Use vegetable broth instead of chicken broth. For cream, you can swap heavy cream for plant-based cream. This way, your dish stays creamy and tasty. If you like heat, add jalapeños or more chili powder. Start with one jalapeño, chopped fine. You can always add more spice later. To balance the heat, add extra cream or a dash of sugar. This helps to tone down the spice while keeping the flavor strong. White beans are great, but you can try different beans too! Black beans or pinto beans add a new twist. They change the texture and flavor of the chili. Mix and match to find your favorite combination. Each bean type brings its own taste and feel, making the dish unique. To keep your One-Pot Creamy Roasted Garlic White Chicken Chili fresh, store it in an airtight container. Make sure it cools down before sealing it. In the fridge, it stays good for about 3 to 4 days. Always check for any off smells or signs of spoilage before enjoying leftovers. You can freeze the chili for a longer shelf life. First, let it cool completely. Then, pour it into freezer-safe bags or containers. Remove as much air as possible to prevent freezer burn. It can last up to 3 months in the freezer. When you want to eat it, move it to the fridge for overnight thawing. For reheating, warm it on the stove over low heat. Stir often to keep it smooth. The chili is great for meal prep! Use leftovers for lunches or dinners throughout the week. You can also serve it over rice or quinoa for a filling meal. Another idea is to use it as a topping for baked potatoes or nachos. It adds a tasty twist to many dishes, making your meals more exciting! The total time is about 1 hour. You will spend 15 minutes prepping and 45 minutes cooking. This includes roasting the garlic, sautéing the veggies, and simmering the chili. It is quick and easy, perfect for a weeknight meal. Yes, you can use canned chicken. The pros are that it saves time and effort. However, the flavor may not be as rich as fresh chicken. Fresh chicken gives a better texture, while canned chicken is softer. Choose based on your needs. You can serve this chili with several sides. Some great options are: - Cornbread - Tortilla chips - Rice - Fresh avocado - Sour cream - Shredded cheese These toppings add flavor and fun to your meal. To make this chili gluten-free, use gluten-free chicken broth. Check the labels on your canned ingredients. Some canned beans and chilies may contain gluten. Most of the other ingredients are naturally gluten-free, making it easy to adjust. Yes, you can adapt this recipe for a slow cooker. First, roast the garlic as directed. Then, add all the ingredients, except for the cream, to the slow cooker. Cook on low for 6-8 hours. Add the cream in the last 30 minutes for a creamy finish. This blog post walked you through making a tasty One-Pot Creamy Roasted Garlic White Chicken Chili. You learned about key ingredients, step-by-step instructions, and creative variations. Remember to adjust spices and try different beans for added fun. This chili is easy to store and perfect for meal prep. Enjoy your cooking journey! Try this recipe and share it with friends. Your kitchen will be a little warmer and a lot tastier.

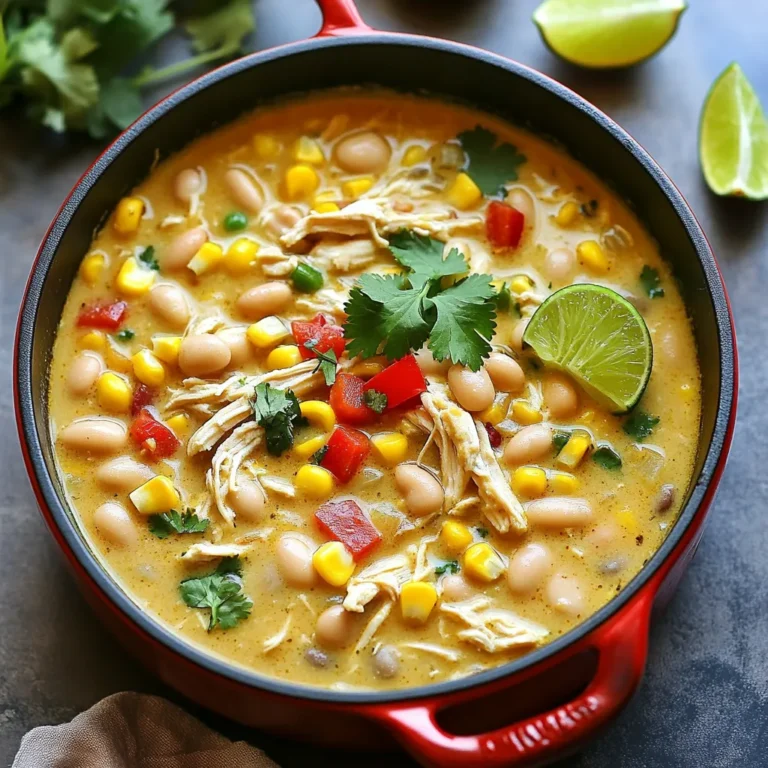
One-Pot Creamy Roasted Garlic White Chicken Chili Delight

- 2 cups broccoli florets - 1 cup sharp cheddar cheese - 1/2 cup breadcrumbs (panko optional) - 1/4 cup grated Parmesan cheese - 1/4 cup green onions - 1 large egg - 1 teaspoon garlic powder - 1/2 teaspoon onion powder - Salt and pepper to taste Gather these ingredients to start making your cheesy broccoli tots. First, you want fresh broccoli. Look for vibrant green florets. They should smell fresh, not stale. Next, choose a sharp cheddar cheese for a bold flavor. It melts well and gives the tots a great taste. For crunch, use breadcrumbs. I often recommend panko for that extra crispiness. If you can't find it, regular breadcrumbs work too. Don't forget the Parmesan cheese. It adds a salty depth. The green onions give a fresh twist. They add flavor and color to the mix. Lastly, you need an egg. This helps bind the mixture. It holds everything together as it cooks. Now, for the seasonings! Garlic powder gives a nice punch. Onion powder adds sweetness. Adjust salt and pepper to your taste. With all these ingredients, you’re on your way to making tasty broccoli tots that everyone will love! 1. Steam the broccoli florets: Begin by steaming 2 cups of broccoli florets for about 4-5 minutes. You want them tender but not too soft. 2. Chop the broccoli finely: Once steamed, let the florets cool a bit. Then, chop them finely. This helps the tots hold together better. 1. Combine all ingredients in a bowl: In a large mixing bowl, mix the chopped broccoli, 1 cup of shredded sharp cheddar cheese, 1/2 cup of breadcrumbs, 1/4 cup of grated Parmesan cheese, and 1/4 cup of chopped green onions. 2. Ensure mixture holds together: Add 1 beaten egg, 1 teaspoon of garlic powder, and 1/2 teaspoon of onion powder. Season with salt and pepper. Mix everything well. The mixture should hold together when you shape it into small balls. 1. Preheat the air fryer: Set your air fryer to 375°F (190°C) and let it preheat for about 5 minutes. 2. Form the mixture into tots: Take the mixture and form it into small tot shapes, about 1 inch long. 3. Cook and flip halfway through: Lightly spray the air fryer basket with cooking spray. Place the tots in a single layer, making sure they don’t touch. Air fry for 10-12 minutes. Flip the tots halfway through cooking to ensure they brown evenly. Enjoy making these tasty treats! - Use panko breadcrumbs for extra crunch. Panko creates a light, crispy layer that enhances each bite. - Don’t overcrowd the air fryer basket. Space allows hot air to circulate, giving you evenly cooked tots. - Let tots cool slightly before serving. This helps the cheese set and makes them easier to eat. - Serve with a dipping sauce. Ranch or sriracha mayo adds flavor and fun to your meal. - Overcooking or undercooking the tots. Keep an eye on the time and check for golden brown color. - Not chopping broccoli finely enough. Small pieces mix better and create a nice texture in each tot. {{image_2}} You can switch up the cheese for fun. Try using mozzarella for a milder taste. Pepper jack adds a nice kick. For a creamier texture, mix in some cream cheese. It makes the tots rich and smooth. Want to change it up? Use cauliflower instead of broccoli. It gives a nice flavor and texture. You can also add fresh herbs like parsley or basil. They bring a fresh taste and color to your tots. Boost the flavor by adding cooked bacon or ham. This gives the tots a savory twist. If you like heat, spice things up with jalapeños. Just chop them fine and mix them in. They add a fun bite! To keep your broccoli tots fresh, store them in the fridge. Place them in an airtight container. They will last for about 3 to 4 days. If you want to save them for longer, freezing is a great option. - Best practices for freezing: - Allow the tots to cool completely. - Arrange them in a single layer on a baking sheet. - Freeze them for about 1 hour. - Once firm, transfer them to a freezer bag. - Label the bag with the date. They will stay good for up to 3 months. When you want to enjoy leftovers, the air fryer is your best friend. It brings back the crispy texture. - Use the air fryer for crispy texture: - Preheat your air fryer to 375°F (190°C). - Place the tots in a single layer. - Heat for about 5 to 7 minutes. If you don’t have an air fryer, the oven works too. - Oven reheating methods: - Preheat your oven to 350°F (175°C). - Arrange the tots on a baking sheet. - Bake for about 10 to 15 minutes, until hot and crispy. These methods will keep your cheesy broccoli tots tasty and enjoyable! Yes, you can use frozen broccoli florets. Just steam them until they are soft, then chop them finely. Frozen broccoli is a great time-saver. It also works well in this recipe. These cheesy broccoli tots last about 3-4 days in the fridge. Store them in an airtight container for best results. If you want to keep them longer, freeze the tots. They can last up to 2 months in the freezer. Yes, you can bake these tots in the oven. Preheat your oven to 400°F (200°C). Line a baking sheet with parchment paper. Place the tots on the sheet, leaving space between them. Bake for about 20-25 minutes or until they are golden brown and crispy. Flip them halfway through for even cooking. These cheesy broccoli tots are a fun and tasty way to eat veggies. We covered the main ingredients, preparation steps, and tips for perfect results. Remember to adjust flavors and textures to fit your taste. You can swap ingredients or add spices for a unique twist. Storing and reheating is easy, keeping your tots crisp and delicious. Enjoy creating different versions of this dish, making it a family favorite!

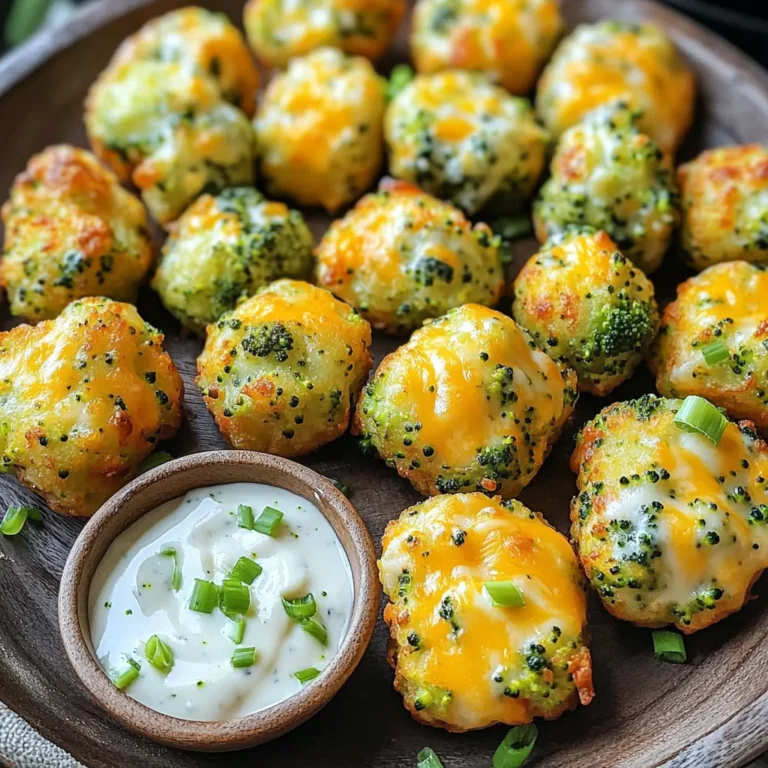
Air Fryer Cheesy Broccoli Tots Simple and Delicious

- 1 cup rolled oats - 1 cup almond milk (or any milk of choice) - 1/2 cup Greek yogurt, plain - 1 tablespoon chia seeds - 1 tablespoon protein powder (vanilla flavor) - 1 tablespoon honey or maple syrup (adjust to taste) - 1 teaspoon vanilla extract - 1 cup fresh strawberries, hulled and sliced - 2 tablespoons cream cheese, softened - Optional: crushed graham crackers for topping These ingredients come together to create a delicious high-protein strawberry cheesecake overnight oats. The rolled oats serve as a hearty base, while the almond milk adds creaminess. Greek yogurt boosts the protein content and gives a nice tang. Chia seeds help thicken the mixture and add fiber. For flavor, I love adding protein powder, which gives a sweet vanilla taste. Honey or maple syrup offers a touch of sweetness, while vanilla extract enhances the overall flavor. Fresh strawberries add a burst of freshness, and the cream cheese gives that cheesecake vibe. If you want a fun crunch, sprinkle some crushed graham crackers on top. This recipe is easy to prepare and perfect for breakfast or a snack. Just gather these ingredients, and you're ready to make a treat that tastes great and fills you up! - In a medium bowl, combine 1 cup rolled oats, 1 cup almond milk, 1/2 cup Greek yogurt, 1 tablespoon chia seeds, 1 tablespoon protein powder, 1 tablespoon honey (or maple syrup), and 1 teaspoon vanilla extract. - Stir well until all ingredients mix together completely. - Gently fold in 1 cup of sliced strawberries. - Reserve a few slices for garnishing later. - In a separate small bowl, mix 2 tablespoons of softened cream cheese with 1 teaspoon of honey. - Blend until it is smooth and creamy. - Layer the oats mixture in a jar or container. - Add dollops of the cream cheese mixture between the oat layers for that cheesecake effect. - Cover the container with a lid. - Refrigerate overnight or for at least 4 hours to let the oats soak and flavors blend. - When ready to serve, give the oats a good stir. - Garnish with the remaining strawberry slices. - Optionally, sprinkle crushed graham crackers on top for added crunch. To get the best texture, soak the oats overnight. This gives them time to absorb the liquid. If you want them creamier, add a bit more milk. You can also mix in a splash of cream or yogurt for a richer taste. You can change the sweetness to fit your taste. Start with one tablespoon of honey. If you want it sweeter, add more. For those on different diets, try using stevia or agave nectar. These options can help you cut back on sugar while still enjoying flavor. Layer the oats and cream cheese in a clear jar. This makes it look beautiful and tasty. You can use mason jars or small clear containers. Top with fresh strawberries and a sprinkle of crushed graham crackers for a fun look. This way, your overnight oats are not just good to eat but pretty to see too! {{image_2}} You can mix in other fruits to change the taste. Blueberries and raspberries work well. They add color and flavor that brightens your oats. You can also use flavored protein powders. Chocolate or strawberry protein makes it fun and tasty. Just remember to adjust the sweetness if you change flavors. If you want a dairy-free option, use coconut yogurt instead of Greek yogurt. This keeps it creamy and tasty. You can swap almond milk for any plant-based milk you like. For a vegan twist, skip the honey and use maple syrup. To make it gluten-free, choose certified gluten-free oats. This way, everyone can enjoy this delightful breakfast. Toppings can take your overnight oats to the next level. Try adding nuts like almonds or walnuts for crunch. Seeds like chia or flax can boost nutrition. You can also use different granola types for extra texture. Consider adding dark chocolate chips or coconut flakes for a sweet touch. The more toppings, the more fun! Store your High-Protein Strawberry Cheesecake Overnight Oats in the fridge. Use a glass or plastic container with a tight lid. This keeps the oats fresh and prevents them from drying out. If you have extra layers, consider using jars. Mason jars work great for this. They also let you see the pretty layers! These oats stay fresh for up to four days in the fridge. After that, the oats might get mushy or lose flavor. If you notice a sour smell or an off taste, it's best not to eat them. Always trust your senses! Yes, you can freeze these oats! To freeze, portion them into freezer-safe containers. Leave a little space at the top, as oats may expand. When you're ready to eat, take them out and thaw in the fridge overnight. You can also warm them up in the microwave. Stir well before serving to mix in any separated ingredients. Enjoy your oats just like fresh! Yes, you can use quick oats. Quick oats absorb water faster and become softer. They will give your dish a smoother texture. However, they may not hold their shape as well as rolled oats. If you use quick oats, reduce the soaking time to about 2-3 hours. Absolutely! This recipe is perfect for meal prep. You can make several servings at once. Just layer the oats in jars and store them in the fridge. They will stay fresh all week. This helps you save time on busy mornings. To make your oats creamier, try these tips: - Use more Greek yogurt or almond milk. - Blend the yogurt with the milk before mixing. - Soak the oats longer, up to 8 hours, for better absorption. Yes, you can replace Greek yogurt. If you're allergic to dairy, use coconut yogurt or almond yogurt. These options provide a similar creamy texture. They may change the flavor slightly but will still be delicious. Overnight oats last about 4-5 days in the fridge. Store them in an airtight container. Always check for any off smells or changes in texture. If they look or smell strange, it’s best to toss them out. This recipe for overnight oats mixes convenience and taste. You start with rolled oats, almond milk, and Greek yogurt for a healthy base. Adding strawberries and cream cheese gives it a creamy twist. Adjust sweetness and toppings to fit your taste. These oats are perfect for breakfast or a snack. Experiment with fruits and flavors to keep it exciting. Proper storage is key for freshness. Try this easy recipe, and enjoy a delicious, nutritious meal anytime!

High-Protein Strawberry Cheesecake Overnight Oats Recipe

To make Air Fryer Cinnamon Sugar Donuts, you need: - 1 cup all-purpose flour - 1/4 cup granulated sugar - 1 tablespoon baking powder - 1/2 teaspoon salt - 1 teaspoon ground cinnamon - 1/2 cup milk - 1/4 cup unsalted butter, melted - 1 large egg - 1 teaspoon vanilla extract - 1/4 cup granulated sugar (for coating) - 1 teaspoon ground cinnamon (for coating) Each ingredient plays a key role. If you need to make changes, here are some tips: - Use whole wheat flour for a healthier option. - Swap granulated sugar with brown sugar for a deeper flavor. - Almond milk works well if you need a dairy-free choice. - You can use applesauce instead of butter for a lighter option. Quality matters for great donuts. Here are my tips: - Choose fresh baking powder for the best rise. - Use fresh ground cinnamon for a stronger taste. - Always check the expiration date on milk. - Use unsalted butter to control the salt in your donuts. - Buy organic ingredients when possible for better flavor and health. With these details, you'll set yourself up for success in making these delightful treats! To start, gather the ingredients. You need 1 cup of all-purpose flour, 1/4 cup of sugar, and 1 tablespoon of baking powder. Also, grab 1/2 teaspoon of salt and 1 teaspoon of cinnamon. In one bowl, whisk the dry ingredients together. Make sure they mix well. In another bowl, combine 1/2 cup of milk, 1/4 cup of melted butter, 1 egg, and 1 teaspoon of vanilla. Mix these until smooth. Now, pour the wet mix into the dry mix. Stir gently until just combined. Avoid overmixing; it makes donuts tough. Next, grease your donut pan lightly. Fill each cavity halfway with the batter. Preheat your air fryer to 350°F (175°C). Cook the donuts in batches for 5-7 minutes. Check if they’re golden brown. A toothpick should come out clean from the center. If not, cook for a couple more minutes. While the donuts cook, mix 1/4 cup of sugar with 1 teaspoon of cinnamon in a shallow dish. Once the donuts cool for about 2 minutes, roll each one in the cinnamon sugar blend. Make sure they’re fully coated. Finally, place the donuts on a plate or wire rack to cool completely. Enjoy your warm, sweet treats! To get the best donut texture, mix the dry and wet ingredients gently. Overmixing makes donuts tough. Use a light hand when stirring until just combined. Grease your donut pan well for easy removal. This will help keep the shape perfect. One common mistake is cooking at too high a temperature. This can burn the outside while leaving the inside raw. Always preheat your air fryer to 350°F (175°C) before cooking. Another mistake is not letting the donuts cool before coating. If you coat them too hot, the sugar will melt away. To boost flavor, use fresh ground cinnamon. This adds a warm and rich taste. You can also add a splash of vanilla to the batter for depth. Consider adding a dash of nutmeg for a more complex flavor profile. For a sweet twist, drizzle melted chocolate on top before serving. {{image_2}} You can switch out granulated sugar for other sweeteners. Consider using honey or maple syrup. These add a unique flavor. You might need to adjust the wet ingredients. If using a liquid sweetener, cut back a bit on milk. Want to mix things up? Try adding cocoa powder or nuts to the batter. One tablespoon of cocoa powder gives a chocolate twist. Chopped nuts add crunch and flavor. Walnuts or pecans work great. Just fold them in gently with the batter. For an extra treat, try glazing your donuts. A simple glaze needs powdered sugar and milk. Mix one cup of powdered sugar with two tablespoons of milk. Drizzle it over warm donuts for a sweet finish. You can also add vanilla or almond extract for more flavor. To keep your donuts fresh, place them in an airtight container. This will help prevent them from getting stale. If you store them this way, they can last for about 2 days at room temperature. For longer storage, move them to the fridge. They will stay good for about a week. Just remember to let them cool completely before you store them. When you want to enjoy your leftover donuts, reheating is easy! Preheat your air fryer to 300°F (150°C). Place the donuts in the basket and heat them for about 3-5 minutes. This will help them regain their warm, soft texture. If you don't have an air fryer, you can also use a microwave. Just heat them for 10-15 seconds. Be careful not to overheat them, or they may become tough. If you want to save some donuts for later, freezing is a great option! Let the donuts cool completely, then wrap each one in plastic wrap. Place the wrapped donuts in a freezer-safe bag. They can stay fresh in the freezer for up to 2 months. When you're ready to eat one, just take it out and let it thaw at room temperature. You can then reheat it as mentioned before for a tasty treat! Yes, you can use whole wheat flour. It gives a nutty taste. Swap it for all-purpose flour in equal amounts. The donuts will be denser but still tasty. To make these donuts dairy-free, use plant-based milk. Almond milk or oat milk works great. Replace the unsalted butter with coconut oil or vegan butter. This keeps the donuts soft and delicious. You can try many coatings! Powdered sugar adds a sweet touch. Chocolate glaze gives a rich flavor. For a twist, mix spices like nutmeg or ginger. You can even top them with sprinkles for fun! You now have all the tools to make amazing air fryer donuts. We covered the best ingredients, measurements, and tips for high quality. You learned how to prepare the batter, cook it perfectly, and add tasty finishes. I shared tips to avoid mistakes and enhance flavor. We also explored fun variations and how to store leftovers for later. With this knowledge, you can whip up delicious donuts anytime you want. Enjoy your baking and impress your friends with your tasty creations!

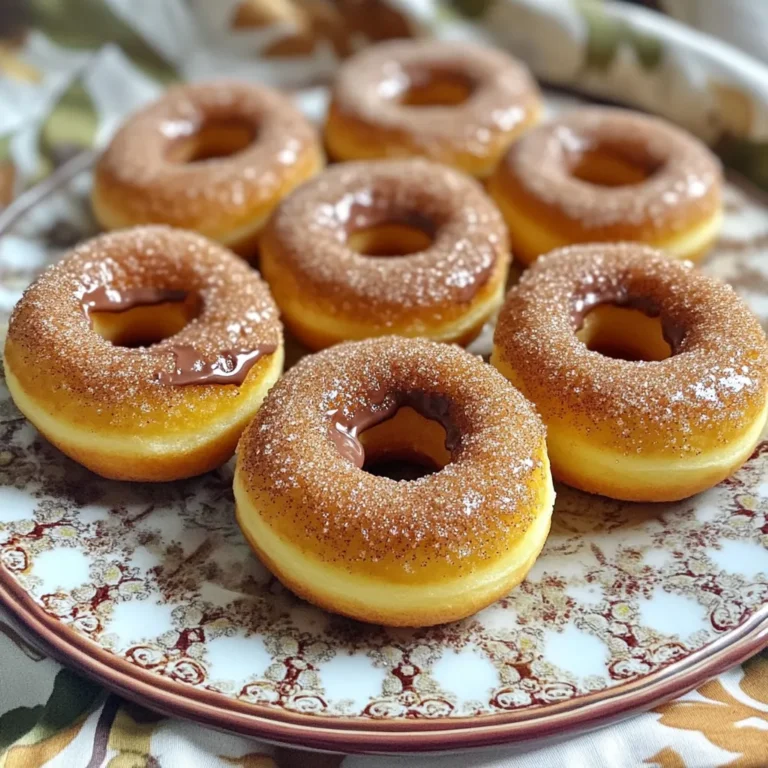
Air Fryer Cinnamon Sugar Donuts Easy and Delicious Treat

- 1 cup quinoa - 2 cups vegetable broth or water - 1 cup cherry tomatoes - 1 cucumber - 1 bell pepper - 1/4 cup red onion - 1/4 cup fresh parsley - 1/4 cup fresh mint - 1/4 cup feta cheese (optional) - 3 tablespoons olive oil - 2 tablespoons lemon juice - Zest of 1 lemon - Salt and pepper to taste Benefits of quinoa: Quinoa is a complete protein. It has all nine amino acids. This grain is high in fiber. It also helps with digestion and keeps you full. Importance of fresh vegetables: Fresh veggies add color and crunch. They bring vitamins and minerals to your meal. Eating a variety of vegetables boosts your health. Advantages of using olive oil: Olive oil is rich in healthy fats. It can lower bad cholesterol. It also adds a nice flavor to your salad. Plus, it helps your body absorb nutrients from the veggies. 1. Start by bringing 2 cups of vegetable broth or water to a boil in a medium saucepan. 2. Once the liquid boils, add 1 cup of rinsed quinoa. 3. Lower the heat and cover the pan. Let it simmer for about 15 minutes. 4. After 15 minutes, check that all the liquid is absorbed. 5. Fluff the cooked quinoa with a fork and let it cool to room temperature. 1. While the quinoa cools, chop 1 cup of cherry tomatoes in half. 2. Dice 1 cucumber into small pieces. 3. Next, dice 1 bell pepper of any color into small bits. 4. Finely chop 1/4 cup of red onion for a nice kick. 5. Lastly, chop 1/4 cup of fresh parsley and 1/4 cup of fresh mint. 1. In a large mixing bowl, combine all the chopped vegetables: tomatoes, cucumber, bell pepper, red onion, parsley, and mint. 2. In a small bowl, whisk together 3 tablespoons of olive oil, 2 tablespoons of lemon juice, and the zest of 1 lemon. Add salt and pepper to taste. 3. Add the cooled quinoa to the mixing bowl with the vegetables. 4. Pour the dressing over the quinoa and veggies. Gently toss everything to combine. 5. If you want to use feta cheese, sprinkle 1/4 cup of crumbled cheese on top and fold it in gently. 6. Let the salad sit for about 10 minutes to let the flavors mix well before serving. To make the best quinoa, start by rinsing it well. Rinsing removes the bitter coating called saponin. Use a fine mesh strainer to wash the quinoa under cold water. This step is key for a nice flavor. Next, cook the quinoa for the right time. Bring the vegetable broth to a boil, then add the rinsed quinoa. Reduce the heat and cover the pot. Cook it for about 15 minutes. When all the liquid is absorbed, fluff it with a fork. Let it cool at room temperature to keep it from getting mushy. For the best flavor, let the salad sit for about 10 minutes after mixing. This gives the flavors time to blend. Adjust the seasoning as needed. Taste the salad and add more salt or pepper if you like. You can also add more lemon juice for extra zing. Serve the salad in bright bowls to make it pop. Add lemon wedges to each bowl for a fresh touch. Garnish with extra herbs like parsley or mint. This makes your salad look even more inviting. A little color goes a long way in making it appealing! {{image_2}} You can change the vegetables based on what is fresh. In summer, you might add zucchini or bell peppers. In the fall, consider roasted squash or kale. These swaps keep the salad vibrant and exciting. If you need a gluten-free option, quinoa is a perfect choice. It is naturally gluten-free and packed with protein. Want to make your salad heartier? Adding beans or chickpeas can boost protein. They add texture and flavor. Grilled chicken or shrimp are great options too. Just toss them in right before serving. These proteins make the salad a complete meal. Spice things up by adding cumin or paprika. These spices give a warm, earthy flavor. If you want to change the citrus taste, try lime or orange juice. Each citrus brings a new twist to the salad. Experimenting with flavors keeps it fresh and fun! To keep your lemon herb quinoa salad fresh, store it in the fridge. Use airtight containers to seal in flavor and moisture. This method prevents the salad from drying out. Make sure to let the salad cool completely before sealing it. This step keeps condensation from forming in the container. You can freeze quinoa salad, but it may change texture. If you want to freeze it, store it in a freezer-safe container. Leave some space at the top so the salad can expand. When you're ready to eat, thaw it in the fridge overnight. Serve it cold or gently reheat it. Add a splash of lemon juice to freshen up the flavor before serving. Lemon herb quinoa salad lasts about 3 to 5 days in the fridge. Check for signs of spoilage before eating. If you see mold or notice an off smell, it’s best to discard it. Fresh ingredients like tomatoes and cucumbers can spoil faster, so keep an eye on them. To cook quinoa, start by rinsing it well. This removes the bitter coating called saponin. Then, use two cups of broth or water for every cup of quinoa. Bring the liquid to a boil, then add the quinoa. Lower the heat and cover it. Let it simmer for about 15 minutes. After that, fluff it with a fork. If you see liquid left, it may need more time. Common mistakes include not rinsing quinoa and using too much heat. Rinsing is key for taste. Cooking at a high temperature can make it mushy. Always check the package for specific cooking times, as they may vary. Yes, you can make this salad in advance. Prep the quinoa and veggies ahead of time. Store them separately until you are ready to serve. This keeps everything fresh. Mix the salad just before serving. This way, the veggies stay crispy. Best practices include storing the salad in an airtight container. You can keep it in the fridge for up to three days. If you add feta cheese, do so right before serving to keep it fresh. Definitely! Lemon Herb Quinoa Salad is great for meal prep. You can portion it out into individual servings. This makes it easy to grab and go. Use small containers for each serving. Tips for portioning include using a cup or scale to measure. This helps you keep track of servings. You can also mix and match it with other meals throughout the week. Lemon Herb Quinoa Salad goes well with many dishes. You can serve it alongside grilled chicken, fish, or shrimp. It also pairs nicely with roasted vegetables. For a vegetarian option, serve it with hummus or stuffed peppers. The bright flavors of the salad complement rich dishes well. Don't forget to add a slice of lemon for extra zest! This blog post shows you how to make a tasty Lemon Herb Quinoa Salad. You learned about key ingredients and their health benefits. I shared steps to cook quinoa and prepare vegetables easily. Tips like marinating for flavor make a big difference. You can also swap ingredients for variety. In my view, this salad is refreshing and healthy. It’s easy to make, perfect for any meal. Enjoy experimenting with flavors and ingredients to make it your own.

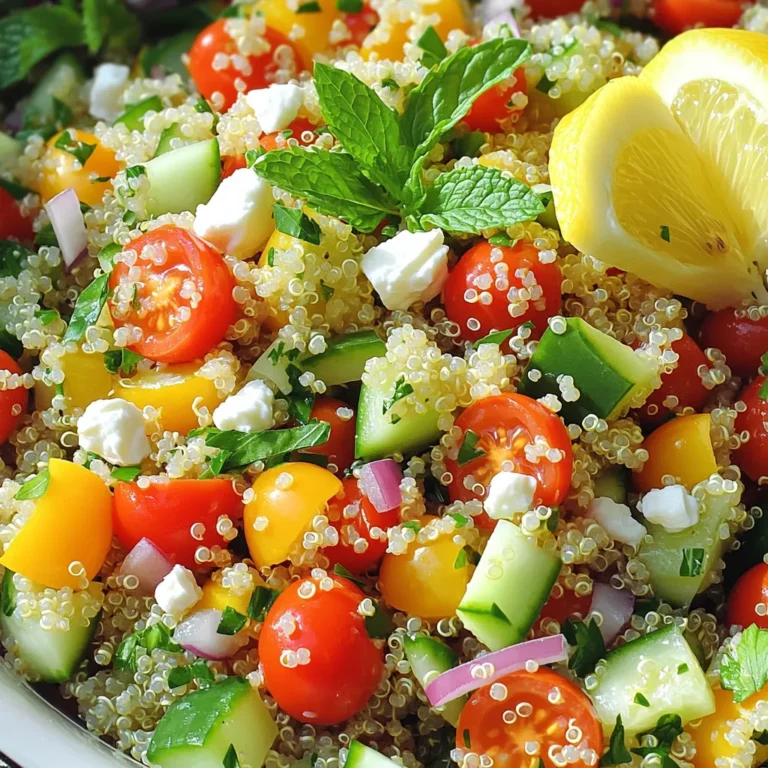
Lemon Herb Quinoa Salad Fresh and Flavorful Side

To make this tasty chocolate peanut butter banana bread, gather these items: - 3 ripe bananas, mashed - 1/3 cup melted coconut oil - 1/2 cup creamy peanut butter - 1/2 cup brown sugar - 1 large egg, beaten - 1 teaspoon vanilla extract - 1 teaspoon baking soda - 1/4 teaspoon salt - 1 cup all-purpose flour - 1/2 cup cocoa powder - 1/2 cup semi-sweet chocolate chips - 1/4 cup chopped toasted peanuts (optional, for added crunch) You can make your banana bread even better with these extras: - Chopped nuts, like walnuts or pecans, add crunch. - A pinch of cinnamon gives a warm spice note. - Swapping in dark chocolate chips can enhance richness. If you need to change some items, here are some swaps: - Use applesauce instead of coconut oil for fewer calories. - Swap brown sugar with honey for a lighter sweetness. - Omit the egg and use flaxseed meal mixed with water for vegan options. - Gluten-free flour can replace all-purpose flour for a gluten-free treat. These ingredients make your chocolate peanut butter banana bread both simple to prepare and delightfully rich in flavor. Start by preheating your oven to 350°F (175°C). Grease a 9x5 inch loaf pan or line it with parchment paper. In a large bowl, mash three ripe bananas until smooth. Then, add 1/3 cup of melted coconut oil. Mix them well together. Next, stir in 1/2 cup of creamy peanut butter and 1/2 cup of brown sugar. Add one large beaten egg and 1 teaspoon of vanilla extract. Mix everything until it is smooth and creamy. Now, sprinkle 1 teaspoon of baking soda and 1/4 teaspoon of salt over the banana mixture. Stir to combine these dry ingredients. Gently fold in 1 cup of all-purpose flour and 1/2 cup of cocoa powder. Make sure not to overmix. Finally, fold in 1/2 cup of semi-sweet chocolate chips and, if you want, 1/4 cup of chopped toasted peanuts for a crunchy texture. Pour the batter into the prepared loaf pan. Spread it evenly with a spatula. Place the pan in your preheated oven and bake for 50-60 minutes. Check if it is done by inserting a toothpick into the center. If it comes out clean, your banana bread is ready! Once baked, let the banana bread cool in the pan for about 10 minutes. Then, transfer it to a wire rack to cool completely. For serving, cut slices of the banana bread warm. You can drizzle some melted peanut butter on top. A sprinkle of cocoa nibs adds a nice touch too. Enjoy this delicious treat! Sometimes, the banana bread may come out too dry. To fix this, add a bit more mashed banana. This will add moisture. If it’s too wet, reduce the banana or flour slightly. If your bread sinks in the middle, it might be due to overmixing the batter. Mix just until combined for the best rise. For a soft and moist texture, use very ripe bananas. They should be brown and spotty. Adding melted coconut oil keeps the bread tender. Make sure to fold in the flour gently. Overmixing can lead to a tough loaf. Let the bread cool completely for the best flavor and texture. You can add 1/4 cup of chopped nuts for extra crunch. Walnuts or pecans work well. Consider adding a pinch of cinnamon or nutmeg for warmth. A splash of espresso powder can deepen the chocolate flavor. You can also mix in extra chocolate chips for a richer taste. {{image_2}} If you want to make this treat nut-free, simply swap the peanut butter. Use sun butter or soy nut butter. These options give a similar taste without nuts. They work well with the bananas and cocoa. Your bread will still be rich and tasty! For a gluten-free version, replace all-purpose flour with a gluten-free blend. Look for a blend that has xanthan gum. This helps mimic the texture of regular flour. Your bread will still rise and be soft. Just be sure to check labels for safe ingredients. You can add spices for extra flavor. Cinnamon or nutmeg makes a warm taste. Try adding a pinch of each to the batter. You can also mix in a splash of coffee for a deeper flavor. If you like a little crunch, add chopped dark chocolate or a dash of espresso powder. Each twist gives your banana bread a fun new twist! To keep your banana bread fresh, wrap it tightly in plastic wrap. You can also place it in an airtight container. Store it at room temperature for up to three days. If you want to keep it longer, the fridge is a good option, but it may dry out a bit. Freezing banana bread is easy! Slice it first for quick snacks later. Wrap each slice in plastic wrap and then place them in a freezer bag. Label the bag with the date. You can freeze it for up to three months. When you want to enjoy it, simply take out a slice and let it thaw. To reheat banana bread, use a microwave or oven. If using a microwave, heat a slice for 10-15 seconds. For the oven, preheat it to 350°F (175°C) and warm the bread for about 10 minutes. This brings back that fresh-baked taste, making it even more delicious! Yes, you can use frozen bananas. Just thaw them before mashing. Frozen bananas work well because they are soft and sweet. They add more moisture to the bread, making it extra delicious. To check if the banana bread is done, insert a toothpick in the center. If it comes out clean, the bread is ready. You can also look for a golden-brown color on the top. The edges should pull away from the pan slightly. You can serve banana bread warm with more peanut butter drizzled on top. Try it with a scoop of vanilla ice cream for a treat. A sprinkle of cocoa nibs adds extra crunch and flavor. Enjoy it with a hot cup of coffee or cold milk. In this blog post, we explored banana bread from start to finish. You learned about key ingredients, how to make the batter, and bake it perfectly. We also shared tips to fix common issues and cool it down right. With variations for different needs and storage advice, you can enjoy banana bread anytime. Remember, use frozen bananas if needed, and test for doneness with a toothpick. With these insights, you can create delicious banana bread that everyone will love. Enjoy your baking journey!

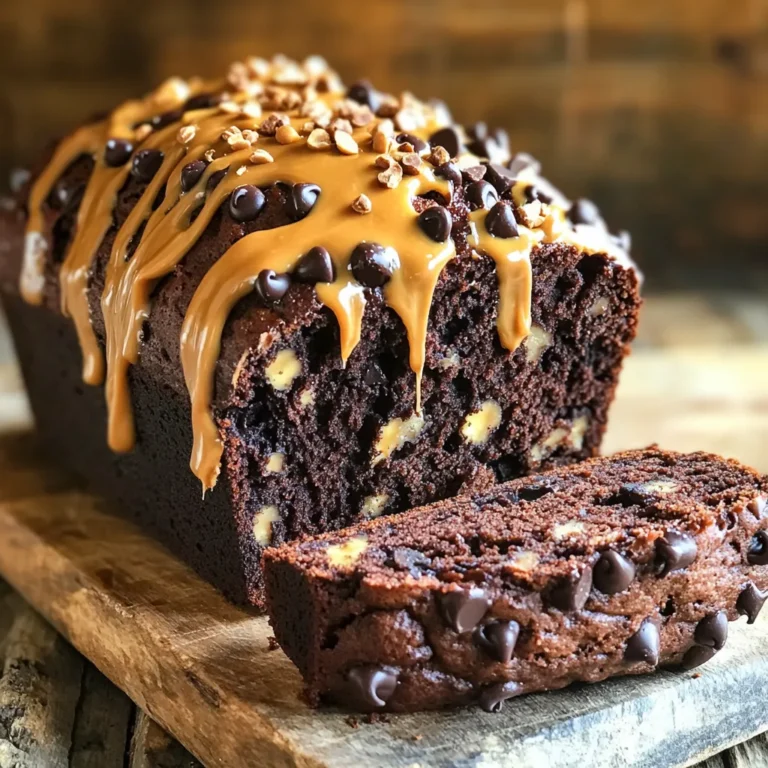
Chocolate Peanut Butter Banana Bread Irresistible Treat

To make Maple Brown Sugar Roasted Carrots, you will need: - 1 lb baby carrots (peeled and trimmed) - 2 tablespoons olive oil - 3 tablespoons pure maple syrup - 2 tablespoons brown sugar - 1 teaspoon ground cinnamon - Salt and pepper to taste - Fresh thyme for garnish (optional) The measurements are key for the best flavor. If you want a lighter dish, you can cut the brown sugar by half. You can also swap out the olive oil for melted butter for a richer taste. For a twist, try using honey instead of maple syrup. I recommend fresh baby carrots for this recipe. They roast better, giving you that nice caramelized finish. Frozen carrots can work, but they may lose some texture and flavor. If you must use frozen, thaw them first and pat them dry to remove excess moisture. This will help them roast better. Start by washing your baby carrots. You want them clean and fresh. Peel and trim the ends if needed. This will help them cook evenly. Keep them whole for the best look. Grab a large mixing bowl. Add the olive oil, maple syrup, and brown sugar. Sprinkle in the ground cinnamon, salt, and pepper. Mix it well. You want the sugar to dissolve mostly. This creates a sweet and tasty coating. Now, add the carrots to your bowl. Toss them until they are well coated. Next, spread the carrots out on a baking sheet. Make sure they lay flat in a single layer. This helps them roast evenly. Preheat your oven to 425°F (220°C). Roast the carrots for 25 to 30 minutes. Be sure to toss them halfway. This gives them a nice caramel color. When done, let them cool slightly. If you like, add fresh thyme for a pretty touch. Enjoy! To get that sweet, golden color, choose small, young carrots. They cook evenly and taste great. Make sure to coat them well in the maple-brown sugar mix. Spread the carrots out on the baking sheet, so they have space. If they are too close, they will steam instead of roast. Toss them halfway through cooking for even caramelization. Bake at 425°F (220°C) for 25-30 minutes until tender. Want to add more flavor? Try these ideas: - Add a pinch of nutmeg for warmth. - Mix in some minced garlic for a savory twist. - Use ginger for a zesty kick. - Try a dash of cayenne pepper for heat. These spices pair well with the sweetness of the carrots. Serve these roasted carrots as a side dish with any meal. They look great on a plate. Pair them with roast chicken or grilled fish. You can also add them to salads for a sweet touch. If you want a fancy look, sprinkle fresh thyme on top. It adds color and a fresh taste. Enjoy these carrots warm or at room temperature. {{image_2}} You can use many types of carrots for this dish. Baby carrots work well because they are sweet and tender. If you want more texture, try regular carrots. Just slice them into sticks or rounds. You can also use rainbow carrots, which add color and fun. They taste just as sweet and make your dish pop. Mixing in other flavors can make your carrots even better. You might add a splash of balsamic vinegar for a tangy twist. If you like nuts, try tossing in chopped pecans or walnuts. They add a nice crunch. Fresh herbs like rosemary or parsley can boost the flavor too. You can cook these carrots in the oven or an air fryer. The oven gives a nice caramelization, which means a sweet, deep flavor. Roasting takes about 25-30 minutes. If you choose the air fryer, cook them for about 15-20 minutes. Both methods will make your carrots tender and delicious. The air fryer cooks them faster and can give you crisp edges. You can store leftover maple brown sugar roasted carrots in an airtight container. Make sure they cool completely first. Store them in the fridge for up to four days. When you want to eat them again, you can easily reheat them. To reheat, place the carrots on a baking sheet. Preheat your oven to 350°F (175°C). Heat them for about 10-15 minutes. This gives them a nice texture again. You can also use a microwave. Heat them in short bursts of 30 seconds. Check often to avoid overcooking. You can freeze these carrots too. First, let them cool completely. Spread them on a baking sheet in a single layer. Freeze them for about one hour. Once frozen, transfer them to a freezer bag. Remove as much air as possible. They will keep well for up to three months. When you're ready to eat, thaw them in the fridge before reheating. Yes, you can make these carrots ahead of time. Cook them as normal and let them cool. Store them in the fridge for up to three days. When you are ready to eat, heat them in the oven. This keeps them tasty and warm. You can roast many other veggies with carrots. Try potatoes, sweet potatoes, or parsnips. Brussels sprouts also work great. Mix different colors and textures for a fun side dish. Just keep the sizes similar for even cooking. To change the sweetness, use less maple syrup or brown sugar. You can also add a splash of vinegar. This will balance the sweetness and give a nice tang. Taste as you go, and adjust to your liking. In this blog post, we explored how to make delicious maple brown sugar roasted carrots. We covered the key ingredients, step-by-step instructions, and helpful tips for perfecting your dish. You learned about variations, storage options, and frequently asked questions to make your cooking easier. Enjoy experimenting with flavors and methods. These roasted carrots can boost any meal. With simple steps, you can create a dish that impresses everyone. Try it out and enjoy each bite!

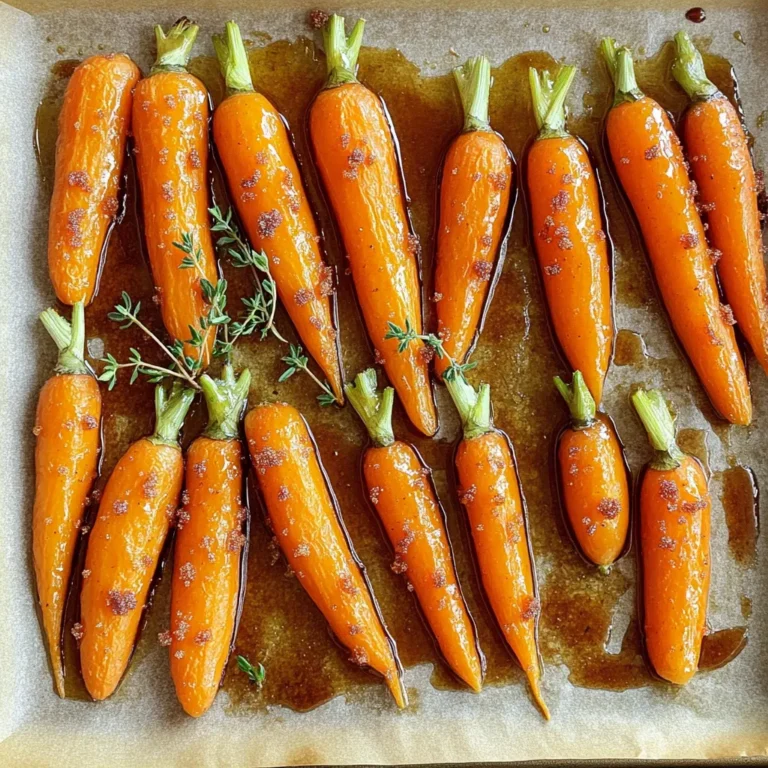
Maple Brown Sugar Roasted Carrots Flavorful Side Dish

- 1 pound boneless, skinless chicken breast, diced - 1 tablespoon olive oil - 1 medium onion, diced - 2 cloves garlic, minced - 3 medium carrots, diced - 2 stalks celery, diced The heart of this soup lies in its main ingredients. The boneless chicken breast gives you tender bites that soak up all the flavors. Olive oil adds a savory depth when you sauté the chicken and veggies. Onions and garlic bring a sweet and rich aroma that fills your kitchen. Carrots and celery add a nice crunch and natural sweetness to balance the dish. - 5 cups chicken broth - 1 teaspoon dried thyme - 1 teaspoon dried oregano - Salt and pepper to taste Chicken broth is the base of this soup, adding warmth and richness. The dried thyme and oregano infuse the soup with earthy notes. Don’t forget to season with salt and pepper to enhance all the flavors. Adjust these to your liking for a personal touch. - 1 cup heavy cream - 2 cups fresh spinach - Grated Parmesan cheese for garnish - Fresh parsley, chopped for garnish Heavy cream turns this soup into a creamy delight. It creates a rich texture that comforts on cold days. Fresh spinach adds a pop of color and nutrition. Topping off your soup with grated Parmesan gives a salty finish. A sprinkle of fresh parsley brightens the dish and makes it look inviting. First, heat 1 tablespoon of olive oil in a large pot over medium heat. Add the diced chicken breast. Cook the chicken for about 5 to 7 minutes. You want it to be browned all over. Once done, remove the chicken from the pot and set it aside. This step builds the base flavor of your soup. In the same pot, add the diced onion. Sauté it for 2 to 3 minutes until it turns translucent. Then, add the minced garlic, diced carrots, and diced celery. Cook these veggies for an additional 5 minutes. This cooking time is key. It helps soften the vegetables and brings out their natural sweetness. Now, pour in 5 cups of chicken broth. Bring this mixture to a boil. Once boiling, add the gnocchi. Lower the heat and let it simmer. Cook until the gnocchi float to the surface, which takes about 3 to 5 minutes. After that, stir in the cooked chicken, 1 cup of heavy cream, dried thyme, and dried oregano. Season with salt and pepper to taste. Just before you serve, add 2 cups of fresh spinach. Cook for another 2 minutes until the spinach wilts. Your creamy chicken gnocchi soup is now ready to enjoy! To get that rich, creamy texture, balance the broth and cream. Start with five cups of chicken broth and one cup of heavy cream. If you want it creamier, add more cream gradually. If it gets too thick, add a bit more broth. Fresh herbs can boost flavor more than dried ones. If you use fresh thyme and oregano, you’ll need more than when using dried. Start with one tablespoon of fresh herbs per teaspoon of dried. Always taste as you season. A little salt and pepper can make a big difference. When you sauté the chicken, make sure the oil is hot. This browns the chicken well. After browning, remove the chicken so the veggies can cook in the same pot. This adds flavor. Timing is key for cooking gnocchi. They float when done, which takes about three to five minutes. Don't overcook them. They should be soft yet firm, adding a nice texture to your soup. {{image_2}} You can switch the chicken in this soup for turkey or tofu. Turkey offers a leaner option. It cooks similarly to chicken, but may take a bit longer. For tofu, use firm or extra-firm types to hold their shape. Cut it into cubes and add it when you would add the chicken. You may need to cook it for 3-5 minutes longer to ensure it heats through. Adding more veggies can boost flavor and nutrition. Consider mushrooms, peas, or even zucchini. If you use mushrooms, sauté them with the onions. For peas, add them right before serving. Adjust the cooking time based on what you add. For example, if you add zucchini, cut it small and cook it for about 4 minutes. Always check for doneness to keep everything tender. For those needing gluten-free options, look for gluten-free gnocchi. Many brands make it from potatoes or rice. For a dairy-free version, swap out heavy cream with coconut milk or cashew cream. Both options will change the flavor slightly but will keep the soup rich. Always taste as you go to ensure it meets your preferences. To store your leftover creamy chicken gnocchi soup, let it cool first. Place it in an airtight container. This helps keep it fresh. In the fridge, the soup lasts for about 3 to 4 days. If you want to enjoy it later, make sure to label the container with the date. Freezing this soup is simple. First, cool it completely. Then, pour it into freezer-safe containers. Leave some space at the top for expansion. The soup can freeze well for up to 3 months. When ready to eat, thaw it overnight in the fridge. To heat, pour it into a pot and warm it gently. This keeps the flavors strong and the texture nice. When reheating, use a pot on low heat. Stir often to heat evenly. You can also use a microwave, but stir halfway through. This helps avoid hot spots. Watch the soup closely to prevent overcooking. If it gets too thick, add a splash of broth or cream to loosen it up. Enjoy your warm and cozy soup! Yes, you can make this soup ahead of time. Preparing it in advance saves time on busy days. The flavors meld well when stored overnight. Just let it cool before putting it in the fridge. Best storage practices: Store the soup in an airtight container. It keeps well for 3-4 days in the fridge. If you want to store it longer, consider freezing it. Use freezer-safe bags or containers. To thicken the soup, you have several options. You can add a cornstarch slurry. Mix equal parts cornstarch and cold water, then stir it in as the soup simmers. Adjusting ingredients for desired consistency: Another option is to use more heavy cream. This adds richness and thickness. You can also reduce the amount of chicken broth used in the recipe. Keep stirring until it reaches your preferred thickness. This soup pairs well with many sides. A fresh garden salad adds a nice crunch. You might also enjoy some crusty bread. Ideas for bread or salads to complement the soup: Garlic bread is a great choice. It soaks up the creamy soup perfectly. For a salad, try a simple Caesar or mixed greens. Both options balance the richness of the soup well. This blog post covered making a delicious Creamy Chicken Gnocchi Soup. We discussed key ingredients like chicken, vegetables, and seasonings. I provided step-by-step instructions to help you prepare and combine these elements. Tips for achieving the perfect texture and flavor were also shared. In closing, this soup is easy to adapt and store, making it a great choice for meals. Enjoy experimenting with different proteins and veggies to suit your taste.

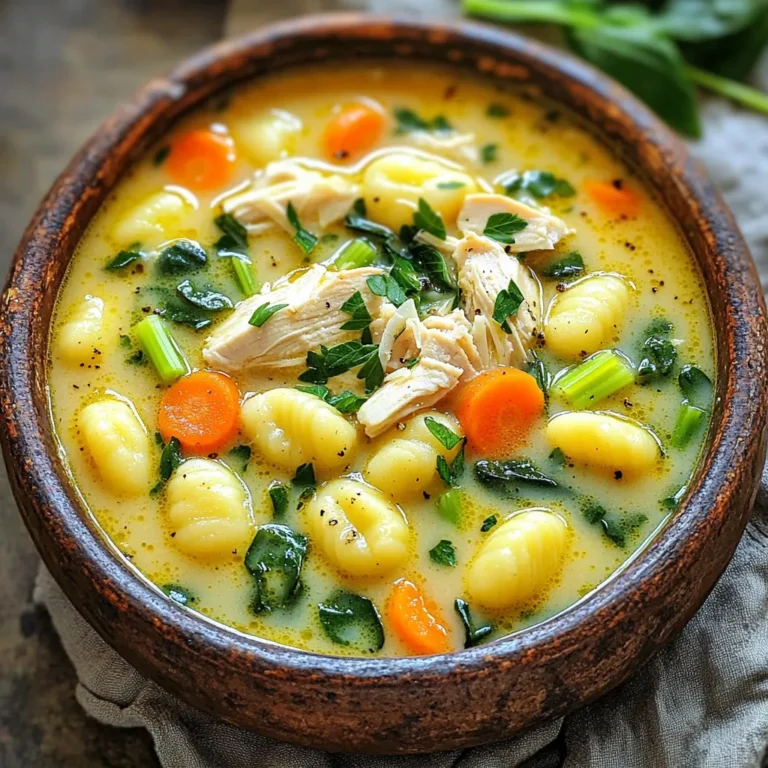
Creamy Chicken Gnocchi Soup Comforting and Hearty Meal

- 1 lb (450g) large shrimp, peeled and deveined - 1 lb (450g) asparagus, trimmed - 6 cloves garlic, minced - 3 tablespoons olive oil - 1 teaspoon smoked paprika - 1 tablespoon lemon zest - 2 tablespoons lemon juice - Salt and pepper to taste - 1/4 teaspoon red pepper flakes (optional) - Fresh parsley, chopped (for garnish) If you can't find shrimp, try using chicken or tofu. Both cook well and absorb flavor. For asparagus, green beans or broccoli can work too. They add a nice crunch. If you don’t have smoked paprika, regular paprika can replace it. It won’t have the same smoky taste but will still be good. Use lime juice instead of lemon juice if you want a different zest. Look for shrimp that smell clean, not fishy. They should feel firm to the touch. For asparagus, choose bright green stalks with tightly closed tips. Avoid any that look limp or have dark spots. Fresh garlic should feel firm and not sprout. When buying olive oil, look for one in a dark bottle for better quality. Always check the expiration date. This ensures you are getting the best flavor for your dish. First, gather all your ingredients. You need 1 pound of shrimp and 1 pound of asparagus. The shrimp should be peeled and deveined. Trim the asparagus to remove tough ends. Mince 6 cloves of garlic. You’ll also need 3 tablespoons of olive oil, 1 teaspoon of smoked paprika, and lemon zest from one lemon. Squeeze out 2 tablespoons of lemon juice. Finally, add salt, pepper, and optional red pepper flakes. In a large bowl, add the shrimp, minced garlic, olive oil, smoked paprika, lemon zest, lemon juice, salt, and pepper. If you like spice, toss in the red pepper flakes. Mix everything well so the shrimp are fully coated. Let them sit for 15 minutes. This helps the shrimp soak up all the flavor. Preheat your oven to 400°F (200°C). Line a large baking sheet with parchment paper. Spread the trimmed asparagus in a single layer on the sheet. Drizzle with a bit of olive oil and sprinkle with salt and pepper. Now, take your marinated shrimp and pour them over the asparagus. Spread them out evenly. Bake for 10-12 minutes. The shrimp should turn pink and be cooked through. The asparagus should be tender but still crisp. After baking, garnish with fresh parsley before serving. Cooking times can change based on your oven and shrimp size. If your shrimp are larger, add a few extra minutes. For smaller shrimp, check them sooner. Always watch your dish closely. You want the shrimp to be pink and firm. The asparagus should be bright green and tender but still crisp. To cook shrimp just right, look for the "C" shape. When shrimp curl into a tight "C," they are done. If they form an "O," they are overcooked. This can make them tough. Marinating shrimp for 15 minutes adds flavor and helps with cooking. Make sure to spread them out on the pan. This helps them cook evenly and prevents steaming. Adding spices can take this dish to the next level. Try adding cayenne for heat, or fresh herbs for freshness. You can also use a dash of cumin or coriander for warmth. A splash of soy sauce or a hint of ginger gives a nice twist. Don’t be afraid to experiment. Cooking is all about personal taste and fun! {{image_2}} You can mix in different veggies for more colors and flavors. Try bell peppers, cherry tomatoes, or zucchini slices. Each adds unique taste and crunch. Just remember to cut them to a similar size as the asparagus. This way, everything cooks evenly. Toss them in the same marinade as the shrimp. This will let the flavors blend well. If you want to switch proteins, chicken or scallops work great. For chicken, use boneless thighs or breasts, cut into bite-sized pieces. Cook them for about 15 minutes, as they take longer than shrimp. Scallops can also be a tasty choice. They need just 8-10 minutes in the oven. They add a sweet, delicate flavor to the dish. Feel free to play with the seasonings. For a kick, try adding curry powder or Italian herbs. You can also use a store-bought sauce like teriyaki or soy sauce for a different flavor. Mix sauces for a unique taste. A splash of sesame oil can add depth. Just remember to balance the flavors so they don't overpower the dish. To store leftovers, put them in an airtight container. Make sure the shrimp and asparagus cool down first. You can keep them in the fridge for up to three days. Label your container with the date to track freshness. If you want to enjoy them later, freezing is a great option. When you’re ready to eat, reheating is simple. Preheat your oven to 350°F (175°C). Spread the shrimp and asparagus on a baking sheet. Heat for about 10 minutes or until warmed through. You can also use a microwave. Just cover the dish and heat for 1-2 minutes. Stir halfway through to warm evenly. If you want to freeze this dish, do so before cooking. Place the marinated shrimp and asparagus in a freezer bag. Remove as much air as possible before sealing. This helps prevent freezer burn. You can freeze it for up to three months. When ready to cook, thaw overnight in the fridge and follow the baking instructions. You can tell shrimp are cooked when they turn pink. They should curl into a C shape. If they look gray or opaque, they are not done. Cook them for about 10-12 minutes at 400°F. This time is perfect for large shrimp. Always check them to avoid overcooking. Yes, you can use frozen shrimp! Just make sure to thaw them first. Place them in cold water for about 15-20 minutes. Pat them dry before marinating. This keeps the dish from getting watery. Follow the same marinating and cooking steps as fresh shrimp. Many side dishes go great with this meal. Here are some ideas: - Rice: White or brown rice soaks up the sauce well. - Quinoa: A healthy option that adds protein. - Garlic Bread: Perfect for dipping in juices. - Salad: A light green salad balances the dish. - Pasta: Tossed with olive oil for a filling choice. These sides will complement your garlic shrimp and asparagus nicely! This blog covered key steps to make a tasty sheet pan garlic shrimp dish. We explored essential ingredients, swaps, and tips for freshness. I shared clear steps for preparing, marinating, and baking shrimp. You learned tricks for perfect cooking and flavor boosts. We discussed fun variations and guide for storing leftovers. With these tools, you can create an easy and delicious meal anytime. Enjoy experimenting in the kitchen!

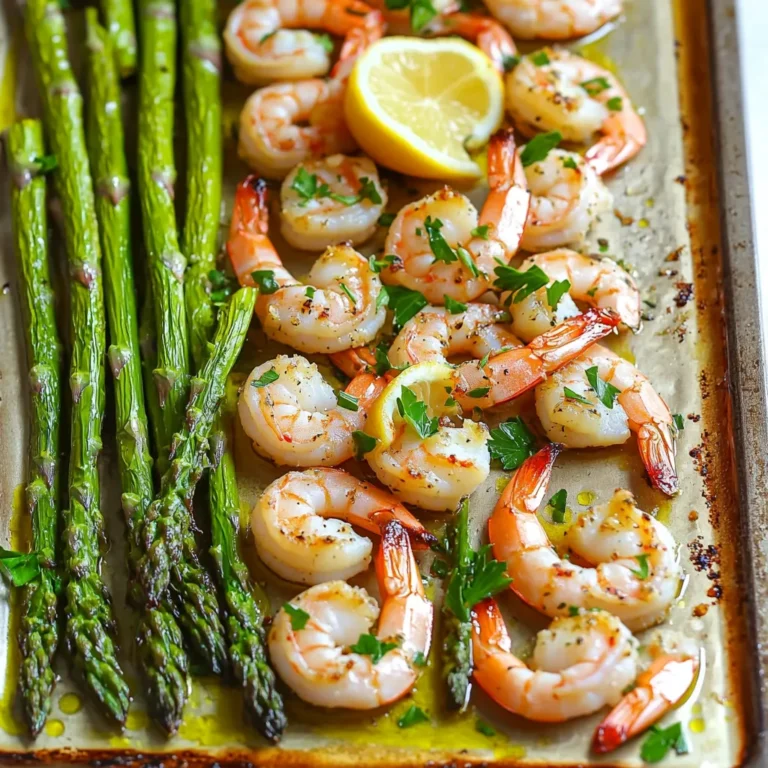
Sheet Pan Garlic Shrimp Asparagus Simple and Tasty

- 1 block (14 oz) firm tofu, drained and pressed - 3 tablespoons cornstarch - 1 tablespoon sesame oil - 2 tablespoons soy sauce (or tamari for a gluten-free option) - 2 tablespoons fresh ginger, minced - 2 cloves garlic, minced - 1 tablespoon maple syrup - 1 tablespoon rice vinegar - 1 tablespoon sesame seeds (white or black) - 2 green onions, sliced (for garnish) - Fresh cilantro, for garnish (optional) Crispy sesame ginger tofu is all about texture and flavor. You start with firm tofu as your base. This tofu holds its shape and absorbs flavors well. Press the tofu to remove extra moisture. This step helps it crisp up perfectly. Next, you coat the tofu cubes with cornstarch. This simple ingredient creates a crunchy crust when you fry the tofu. It’s essential to coat each piece evenly. This ensures that every bite is crispy. For the sauce, use soy sauce or tamari. Tamari is a great gluten-free option. Fresh ginger and garlic add depth and warmth. Maple syrup brings a touch of sweetness. Rice vinegar adds a little tang, balancing the flavors. Garnish the dish with sesame seeds for crunch. Sliced green onions add freshness, while cilantro gives a pop of color and flavor. Each ingredient plays a crucial role in making this dish vibrant and delicious. - Press and cut tofu: Start by pressing your firm tofu. This step removes excess water. It helps the tofu become crispy when cooked. Cut the tofu into bite-sized cubes. You can also slice it if you prefer. - Pat tofu dry: After cutting, use a paper towel to pat the tofu dry. This removes any remaining moisture. Dry tofu absorbs flavors better and gets crispy when cooked. - Toss with cornstarch: Place the dry tofu pieces in a large bowl. Sprinkle cornstarch over the tofu. Toss gently to coat each piece. This coating creates that crunchy texture we all love. - Heat sesame oil: In a large non-stick skillet, heat sesame oil over medium-high heat. Wait until the oil is hot but not smoking. This ensures a perfect fry. - Fry tofu until golden brown: Carefully add the coated tofu to the skillet in a single layer. Fry for about 4-5 minutes on each side. You want them to be golden brown and crispy. Gently turn them to avoid breaking. - Whisk together sauce ingredients: While the tofu cooks, grab a small bowl. Whisk together soy sauce, minced ginger, minced garlic, maple syrup, and rice vinegar. This mixture adds flavor to the tofu. - Combine tofu with sauce: Once the tofu is crispy, pour the sauce over it. Toss gently to coat the tofu evenly. Sprinkle sesame seeds over the tofu. Let it cook for an additional 1-2 minutes. This step helps the sauce thicken a bit. To get that perfect crispy texture, drying the tofu is key. After pressing, cut it into cubes. Use a paper towel to pat each piece dry. This helps remove moisture, which makes the tofu crispy when cooked. Next, you must coat the tofu properly. In a bowl, toss the dried cubes with cornstarch. Ensure each piece is fully covered. This light coating creates a crunchy shell during frying. Want some heat? Add chili flakes to your sauce. A little spice can elevate the flavor and make your dish exciting. You can also play with the sauce. Try adding different flavors like hoisin or sriracha. This way, you can customize the taste to match your mood. Serve your crispy sesame ginger tofu over steamed jasmine rice or fluffy quinoa. These options make a great base for the dish. Add some sautéed veggies around it for a colorful plate. For a fun twist, stack the tofu neatly in a pyramid on the plate. This adds height and makes your meal look fancy. {{image_2}} For a gluten-free version of this dish, use tamari instead of soy sauce. Tamari tastes similar but has no wheat, making it safe for those with gluten allergies. It adds a rich umami flavor to the dish. You won’t lose any taste while enjoying a gluten-free meal. If you want to skip maple syrup, try agave nectar or coconut sugar. These sweeteners blend well with the sauce. They also keep the dish vegan. Both options give a nice sweetness without changing the taste much. You can swap tofu for tempeh or seitan. Tempeh has a firmer texture and a nutty taste. It's packed with protein and works well with the sauce. Seitan offers a chewy texture and is great for those who love a meaty bite. Both options keep the dish plant-based and delicious. To keep your crispy tofu fresh, store it in an airtight container. Place parchment paper between layers to absorb moisture. This helps maintain crispiness. Refrigerate it for up to three days. Before eating, check for any signs of spoilage. If it smells off, throw it away. To reheat the tofu while keeping it crispy, use an oven or an air fryer. Preheat the oven to 375°F (190°C). Spread the tofu on a baking sheet and heat for about 10 minutes. If using an air fryer, set it to 350°F (175°C) for 5-7 minutes. Avoid microwaving, as it makes the tofu soggy. You can prepare the tofu and sauce ahead of time. Cut and coat the tofu, then store in the fridge for up to two days. Make the sauce and keep it in a separate container. When ready to eat, just fry the tofu and mix with the sauce. This saves time and makes meals quick and easy. To achieve crispy tofu, follow these key steps: - Start with firm tofu. Drain and press it to remove extra moisture. - Cut the tofu into bite-sized cubes or slices. - Pat the pieces dry using a paper towel. - Toss the tofu with cornstarch in a bowl until each piece is coated well. - Heat sesame oil in a non-stick skillet over medium-high heat. - Fry the tofu in a single layer for about 4-5 minutes on each side. - Wait until they turn golden brown and crispy. - Finally, pour your sauce over the tofu and let it cook for a minute. Yes, you can freeze crispy sesame ginger tofu. Here’s how: - Let the tofu cool completely after cooking. - Place it in an airtight container or freezer bag. - Remove as much air as possible before sealing. - Freeze for up to three months. When you want to enjoy it, thaw the tofu in the fridge overnight. Reheat it in a skillet to regain its crispiness. Crispy sesame ginger tofu pairs well with many sides. Here are some ideas: - Serve it over steamed jasmine rice or quinoa for a filling meal. - Add sautéed vegetables like bell peppers, broccoli, or snap peas for color. - A simple salad with mixed greens and a light dressing makes a great side. - Consider a side of pickled vegetables for an extra crunch and flavor. This article covered how to make crispy sesame ginger tofu. You learned about the key ingredients, including firm tofu and flavorful sauces. We discussed preparation steps and crucial tips for crispiness. I shared storage tips and variations, such as gluten-free options. In making this meal, you can enjoy a tasty dish while keeping it fresh and exciting. Try adding your favorite sides for a complete meal. Keep practicing, and you’ll be a tofu pro in no time!

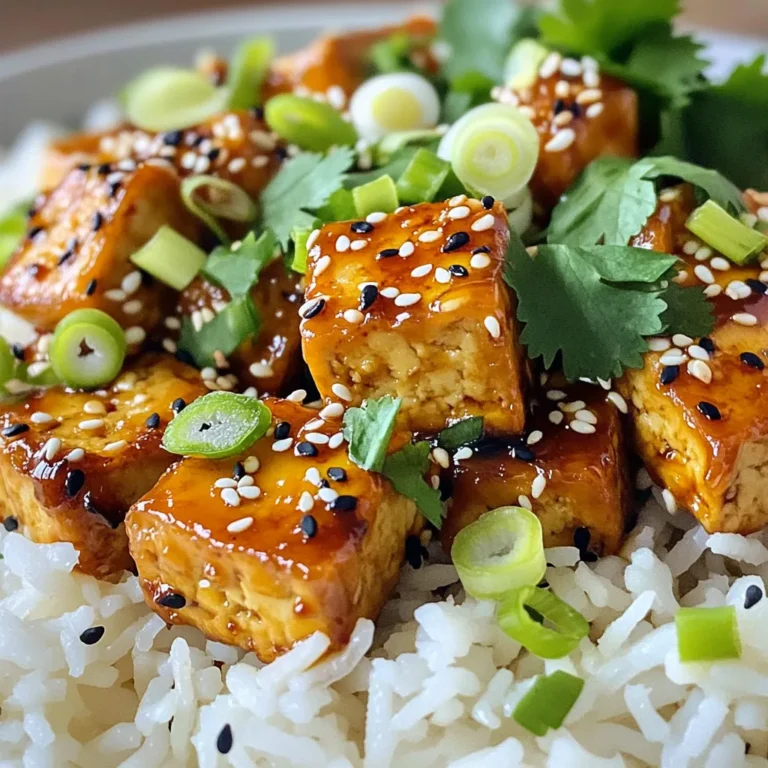
Crispy Sesame Ginger Tofu Flavorful Plant-Based Dish

PREV 1 … 9 10 11 … 57 NEXT
quick dish kitchen

explore

DessertsDinnerAppetizersDrinks

Our Policies

  • Cookie Policy
  • Copyright Policy
  • Disclaimer
  • GDPR Policy
  • Terms Of Use
Back to Top
  • About
  • Contact Us
  • Privacy Policy
© 2025 quick dish kitchen