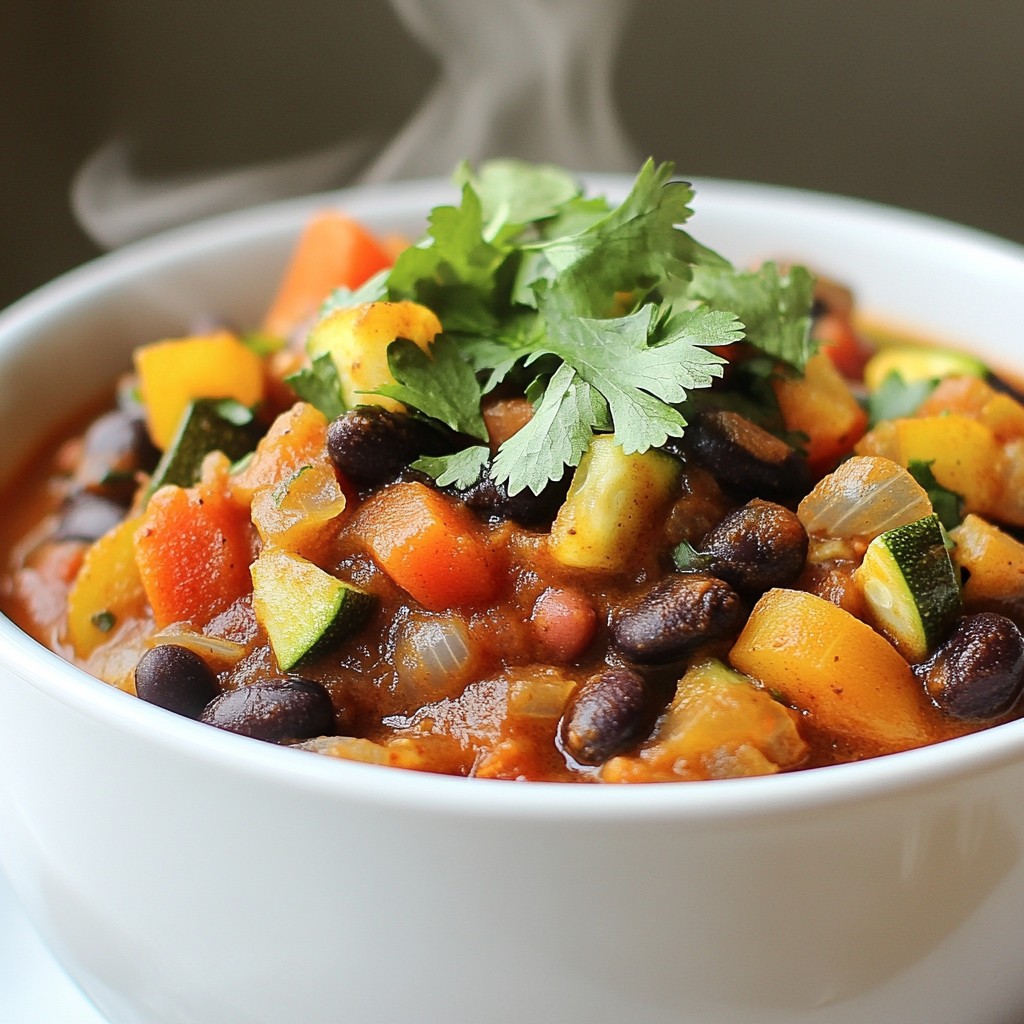
Are you ready to make a delicious and wallet-friendly meal? This Affordable Mixed Bean and Vegetable Chili is perfect for any night of the week. Packed with fiber-rich beans and fresh veggies, it's not just tasty but also budget-friendly. Follow my easy recipe to whip up a pot that warms you up and satisfies your family. Let's dive into the ingredients and get cooking!
Why I Love This Recipe
- Budget-Friendly: This chili is made with affordable ingredients, making it a perfect choice for anyone looking to eat well on a budget.
- Nutritious and Filling: Packed with beans and vegetables, this dish is not only delicious but also provides a great source of protein and fiber.
- Easy to Customize: Feel free to add your favorite vegetables or adjust the spices to suit your taste preferences.
- One-Pot Wonder: This recipe requires minimal cleanup, as everything is cooked in just one pot, making it perfect for busy weeknights.
Ingredients
List of Ingredients
- 1 can (15 oz) mixed beans (black beans, kidney beans, and pinto beans), drained and rinsed
- 1 can (15 oz) diced tomatoes (with juice)
- 1 medium onion, chopped
- 2 cloves garlic, minced
- 1 bell pepper (any color), diced
- 1 medium carrot, diced
- 1 medium zucchini, diced
- 2 cups vegetable broth
- 2 tablespoons chili powder
- 1 teaspoon cumin
- 1/2 teaspoon smoked paprika
- Salt and pepper to taste
- 1 tablespoon olive oil
- Fresh cilantro or parsley for garnish (optional)
This chili is packed with flavor and nutrition. Mixed beans give it a hearty base. The diced tomatoes add a juicy sweetness. Onion and garlic create a strong aroma. Chopping the bell pepper, carrot, and zucchini adds great color and crunch.
Using vegetable broth makes this chili rich and warm. Chili powder, cumin, and smoked paprika build depth. Adjust salt and pepper to suit your taste. Olive oil adds a nice finish.
You can use fresh cilantro or parsley for a fresh touch at the end. Each ingredient plays a role in making this chili special. Enjoy the process of gathering them all together!

Step-by-Step Instructions
Preparation of Vegetables
Start by chopping your vegetables. Use a sharp knife for clean cuts. Dice the onion and garlic finely. This helps release their flavors. Next, chop the bell pepper, carrot, and zucchini into small pieces. Uniform sizes ensure even cooking. Proper prep makes all the difference in texture and taste.
Cooking Process
Heat the olive oil in a large pot over medium heat. Add the chopped onion and minced garlic. Sauté them for about 3–4 minutes. You want the onion to turn translucent and fragrant. Then, toss in the diced bell pepper, carrot, and zucchini. Cook these for another 5 minutes. Stir often, so they soften and mix well.
Now it’s time for the spices! Sprinkle in the chili powder, cumin, and smoked paprika. Stir the mixture for about a minute. This helps the spices bloom, enhancing their flavor.
Final Steps
Add the mixed beans and diced tomatoes, juice included. Pour in the vegetable broth and stir well. Bring the mixture to a boil. Then, reduce the heat to low. Cover the pot and let it simmer for 20–25 minutes. Stir occasionally. This step melds all the flavors together.
After simmering, taste the chili. Adjust the seasonings with salt, pepper, or more chili powder if needed. Serve your chili hot. Garnish with fresh cilantro or parsley for a lovely touch. Enjoy!
Tips & Tricks
Enhancing Flavor
To boost the flavor of your chili, use fresh herbs and spices. Fresh cilantro or parsley adds a nice touch at the end. Spices like chili powder, cumin, and smoked paprika can really shine. You can adjust salt and pepper to your taste. If you want more heat, add extra chili powder.
Making It More Nutritious
You can easily make this chili healthier. Adding leafy greens like spinach or kale packs in nutrients. You can also toss in any leftover veggies you have. For more protein, add extra beans or lentils. This keeps your meal filling and nutritious.
Cooking with Budget-Friendly Ingredients
Finding affordable produce can save you money. Check local markets for fresh veggies at low prices. Canned goods often have deals, too. Buy beans and spices in bulk to save even more. This not only cuts costs but ensures you always have what you need.
Pro Tips
- Use Fresh Vegetables: Fresh vegetables not only enhance the flavor but also add more nutrients to your chili. Try to use seasonal produce when possible for the best taste.
- Adjust Spice Levels: If you prefer a spicier chili, feel free to add fresh jalapeños or a pinch of cayenne pepper to the pot. Start with a small amount and adjust to your taste.
- Let it Rest: After cooking, allow your chili to sit for a few minutes before serving. This helps the flavors to develop and meld together even more.
- Make it a Meal: Serve your chili with toppings like avocado, sour cream, or shredded cheese, and pair it with cornbread or rice to make it a hearty meal.
Variations
Dietary Adjustments
You can easily adjust this chili recipe to suit your diet. For a vegan or vegetarian option, the recipe is already perfect! You just need to skip any meat. The mixed beans provide plenty of protein.
If you need a gluten-free version, this chili works well too. All the ingredients listed are naturally gluten-free. Just double-check any broth or seasoning labels to ensure they meet your needs.
Flavor Profiles
Spice lovers can adjust the heat level. Add more chili powder or some diced jalapeños for a kick. If you want less heat, use mild chili powder or skip it altogether.
You can also swap some ingredients. Try adding corn for a touch of sweetness. Different peppers can change the flavor, too. Use poblano or serrano peppers for a unique twist.
Serving Suggestions
This chili pairs well with many sides. Serve it over rice or quinoa for a hearty meal. You can also scoop it up with bread, making it a fun dish to share.
For toppings, consider shredded cheese or sliced avocado. Fresh cilantro or parsley adds a nice touch, too. These add-ons can elevate your chili and make it even more enjoyable!
Storage Info
Refrigeration Guidelines
Store your chili in an airtight container. Let it cool before placing it in the fridge. This helps keep it fresh. You can keep it in the refrigerator for up to five days. Remember to label it with the date you made it. This way, you know when to use it.
Freezing Instructions
To freeze your chili, let it cool completely. Then, pour it into freezer-safe bags or containers. Squeeze out as much air as possible to avoid freezer burn. You can freeze it for up to three months. When you are ready to eat, thaw it in the fridge overnight. To reheat, warm it on the stove or in the microwave. Stir it well for an even heat.
Leftover Ideas
You can use leftover chili in many fun ways. Try it in tacos or burritos for a quick meal. You can also spread it on a wrap with veggies for lunch. Mix it with rice or quinoa for a filling dish. Get creative and add chili to baked potatoes or nachos. The options are endless!
FAQs
How do I make Affordable Mixed Bean and Vegetable Chili spicier?
To add heat, you can use fresh chili peppers. Jalapeños or serranos work well. Chop them finely and add at the start with the onion and garlic. You can also sprinkle in more chili powder. If you want a smoky flavor, consider adding chipotle powder. Start with a small amount and taste as you go. This way, you can control the heat.
Can I use dried beans instead of canned?
Yes, you can use dried beans! However, you need to cook them first. Soak the beans overnight in water. This helps them cook faster. After soaking, boil them for about 1-2 hours until tender. Drain and rinse them before adding to the chili. This method adds a nice texture and flavor.
What is the best way to store leftover chili?
Store leftover chili in an airtight container. Make sure it cools down first. Place it in the fridge if you plan to eat it within a few days. It will last about 3-4 days. For longer storage, freeze the chili. Just remember to leave some space in the container for it to expand.
How long does it take to cook dried beans for this recipe?
Cooking dried beans takes about 1-2 hours after soaking. Check for tenderness by tasting a few beans. They should be soft but not mushy. If you use a pressure cooker, it can cut the time down to about 30 minutes. Always rinse the beans before cooking them for best results.
This blog post detailed how to make a tasty mixed bean and vegetable chili. We covered the key ingredients, preparation tips, cooking steps, and ways to enhance flavor. I shared ideas for making it nutritious and affordable and offered variations to suit different diets.
When you try this chili, you’ll not only enjoy great taste but also flexibility. Remember, cooking is fun, and using fresh ingredients makes all the difference. Enjoy creating your own twist on this classic dish!