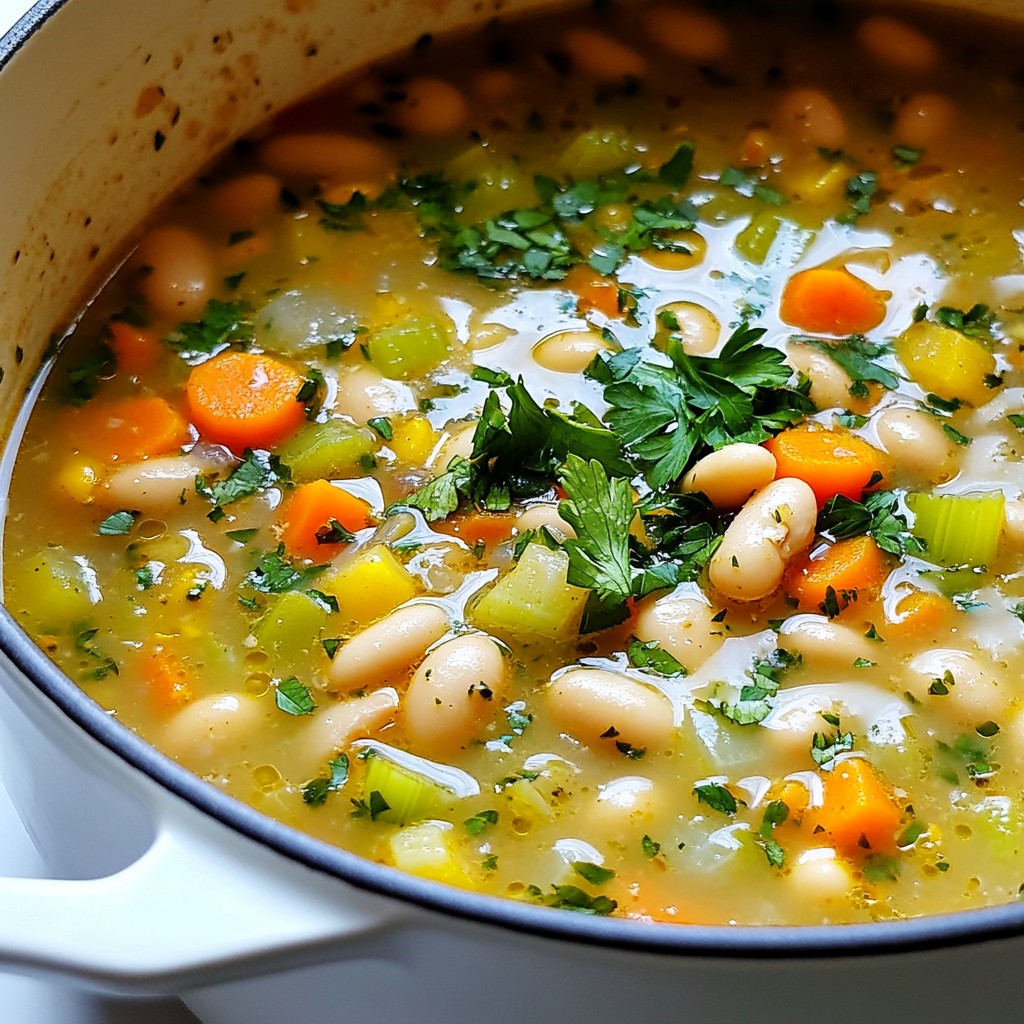
Welcome to your guide for making Affordable Meal Prep White Bean Chili! This easy, tasty dish packs a flavor punch without breaking the bank. I’ll walk you through the simple steps to prepare, cook, and store this meal. You'll learn ingredient costs, smart substitutions, and ways to enhance its flavor. Perfect for meal prep, it saves time and money while keeping you satisfied. Let’s dive in and start cooking!
Why I Love This Recipe
- Budget-Friendly: This white bean chili is made with affordable ingredients, making it easy on the wallet while still being delicious and nutritious.
- Meal Prep Friendly: Perfect for those busy weeks, this chili can be made in advance and stored for quick meals throughout the week.
- Customizable: You can easily adjust the spices and add-ins to suit your taste, whether you prefer it spicier or more savory.
- Healthy and Satisfying: Rich in fiber and protein from the beans, this chili is a filling meal that keeps you energized and satisfied.
Ingredients
List of Ingredients
- 2 cans (15 oz each) white beans (like cannellini or great northern), rinsed and drained
- 1 tablespoon olive oil
- 1 large onion, diced
- 3 cloves garlic, minced
- 2 medium carrots, diced
- 2 celery stalks, diced
- 1 green bell pepper, diced
- 1 can (14.5 oz) diced tomatoes with juices
- 2 cups vegetable broth
- 2 teaspoons ground cumin
- 1 teaspoon chili powder
- 1 teaspoon smoked paprika
- Salt and pepper to taste
- Fresh cilantro or parsley for garnish (optional)
Ingredient Cost Breakdown
- White beans: $2.00
- Olive oil: $0.10
- Onion: $0.50
- Garlic: $0.30
- Carrots: $0.40
- Celery: $0.40
- Green bell pepper: $0.80
- Diced tomatoes: $1.00
- Vegetable broth: $1.50
- Spices: $0.50
- Salt and pepper: negligible
- Cilantro or parsley: $0.50
Total estimated cost: $7.50 for six servings, making it about $1.25 per serving.
Recommended Substitutions
If you can't find white beans, you can use chickpeas or kidney beans instead. Both add great texture. For a richer flavor, try using chicken broth instead of vegetable broth. If you need a fresh herb, parsley works well instead of cilantro. Don’t have diced tomatoes? You can use fresh tomatoes, just chop them finely.
Step-by-Step Instructions
Preparation Steps
1. Start by rinsing and draining the white beans. This helps remove extra salt.
2. Dice the onion, carrots, celery, and green bell pepper into small pieces.
3. Mince the garlic cloves finely. This adds great flavor to the chili.
4. Gather all your ingredients. This makes cooking easier and faster.
Cooking Techniques
1. In a large pot, heat olive oil over medium heat. This helps the onion cook well.
2. Add the diced onion and sauté until it turns translucent, about 5 minutes.
3. Next, stir in the minced garlic, diced carrots, celery, and green bell pepper.
4. Cook these veggies for another 5 minutes. They should soften but not mush.
5. Add ground cumin, chili powder, and smoked paprika. Stir for 1 minute until it smells good.
6. Pour in the rinsed white beans, diced tomatoes, and vegetable broth. Mix well.
7. Bring the chili to a boil, then lower the heat and let it simmer for 20-25 minutes.
Tips for Even Cooking
- Always chop vegetables into similar sizes. This helps them cook evenly.
- Stir the chili occasionally to avoid sticking. This keeps it from burning.
- If you want a creamier texture, blend a bit of the chili with an immersion blender.
- Taste and adjust seasoning with salt and pepper as you go. This makes the flavors pop.
Tips & Tricks
Meal Prepping Strategies
Meal prep saves time and money. Start by cooking a big batch of white bean chili. Use a large pot to fit all the ingredients. This recipe makes six servings. You can enjoy it all week. Divide it into meal prep containers. This way, you grab a meal on busy days.
How to Store and Reheat
Let the chili cool before storing. Place it in airtight containers. Store it in the fridge for up to five days. For longer storage, freeze it. Use freezer-safe containers or bags. When reheating, warm it in a pot on the stove. You can also use a microwave. Add a splash of broth if it thickens.
Enhancing Flavor and Texture
Want to boost flavor? Try adding fresh herbs like cilantro or parsley. You can also add lime juice for a zesty kick. For a creamier texture, blend part of the chili with an immersion blender. If you prefer more texture, leave it chunky. Experiment with toppings like avocado or sour cream for extra richness.
Pro Tips
- Store for Freshness: Allow the chili to cool completely before storing in airtight containers in the fridge. This helps maintain freshness and flavor for up to a week.
- Freezing for Later: This chili freezes well! Portion it into freezer-safe containers and it can last up to 3 months. Just reheat on the stove or microwave when ready to eat.
- Customize Your Spices: Feel free to tweak the spices according to your taste. Adding a pinch of cayenne pepper can give it an extra kick if you like it spicy!
- Serve with Sides: Pair the chili with crusty bread or over a bed of rice for a more filling meal. Toppings like shredded cheese or jalapeños can enhance the flavor even further!
Variations
Different White Bean Options
You can use many types of beans in this chili. Cannellini and great northern beans work well. You can also try navy or pinto beans for a twist. Each bean adds its unique flavor and texture. Feel free to mix and match for fun!
Adding Protein Choices
If you want more protein, add cooked chicken, turkey, or sausage. You can also use plant-based options like tofu or tempeh. Just make sure to cook your protein first. Stir it into the chili when you add the beans. This adds heartiness and makes your chili more filling.
Spicy and Non-Spicy Versions
To make your chili spicy, add jalapeños or red pepper flakes. You can also use spicy chili powder for more heat. If you prefer less spice, skip these ingredients. Adjust to your taste. Remember, you can always add heat but can’t take it away! Enjoy personalizing your chili!
Storage Info
How to Store Leftovers
To store leftovers, let the chili cool down first. Then, scoop it into airtight containers. This keeps it fresh and ready for later. Make sure to fill the containers only halfway to allow for expansion when freezing. You can store it in the fridge for up to four days.
Freezing Tips
If you want to freeze the chili, use freezer-safe containers. Pour the chili in and leave some space at the top. Seal tightly to prevent freezer burn. You can freeze it for up to three months. Label the containers with the date so you know when to use them.
Shelf Life of Meal Prep Chili
When stored properly, your meal prep chili lasts in the fridge for four days. In the freezer, it can stay good for three months. Always check for signs of spoilage, like off smells or changes in color, before using. Enjoy your meals knowing they are safe and tasty!
FAQs
Can I use dried beans instead?
Yes, you can use dried beans. Start by soaking them overnight. Drain and rinse the beans before cooking. You will need about 1 cup of dried beans to replace the two cans. Cook the beans until tender before adding them to the chili. This method takes longer but adds great flavor and texture.
How to make it vegetarian/vegan?
This recipe is already vegetarian. To make it vegan, just skip any dairy toppings. You can use avocado, lime, or cashew cream as tasty options. These add creaminess without using animal products. Check the broth as well, and ensure it is plant-based.
What are the nutrition facts for this chili?
This chili is a healthy choice! Each serving has around:
- Calories: 200
- Protein: 10g
- Carbs: 35g
- Fiber: 10g
- Fat: 4g
- Sodium: 400mg (can vary based on broth and seasoning)
This chili is high in fiber and low in fat. It is perfect for a filling meal.
In this post, we covered chili ingredients and their costs. You found helpful tips for preparation and cooking techniques. Meal prepping strategies help you save time. We also explored flavor variations and storage tips to keep your chili fresh.
Chili is easy to customize and store. Use these insights to create your favorite version. Enjoy making a warm, delicious meal that fits your needs.