WANT TO SAVE THIS RECIPE?
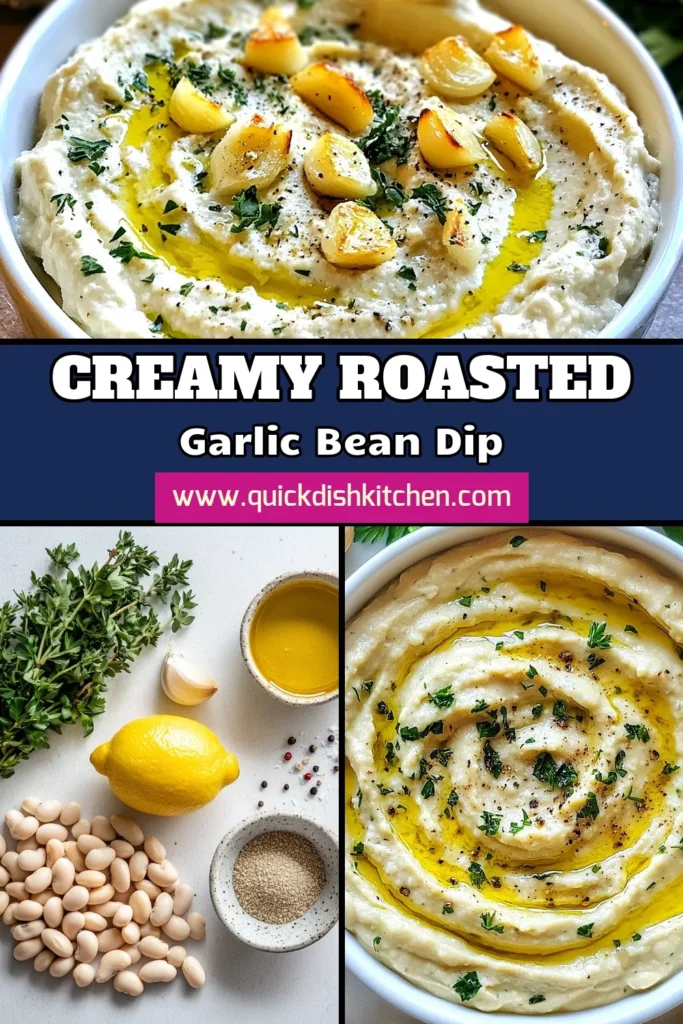
Looking for a dip that packs flavor and creaminess? You’ve found it! This Roasted Garlic White Bean Dip is easy to make and perfect for any gathering. With simple ingredients like cannellini beans and roasted garlic, you’ll create a dish that everyone loves. Let’s dive into the steps and tips to master this delightful dip that’s sure to impress your guests!

Why I Love This Recipe
- Rich Flavor: The roasted garlic adds a deep, sweet flavor that elevates the dip, making it irresistible.
- Healthy Ingredients: Packed with protein and healthy fats, this dip is a nutritious snack option that doesn’t compromise on taste.
- Versatile Dip: Perfect for pairing with fresh veggies, pita chips, or even as a spread on sandwiches and wraps.
- Simple Preparation: With minimal ingredients and easy steps, making this dip is a breeze, perfect for any occasion.
Ingredients
Main ingredients
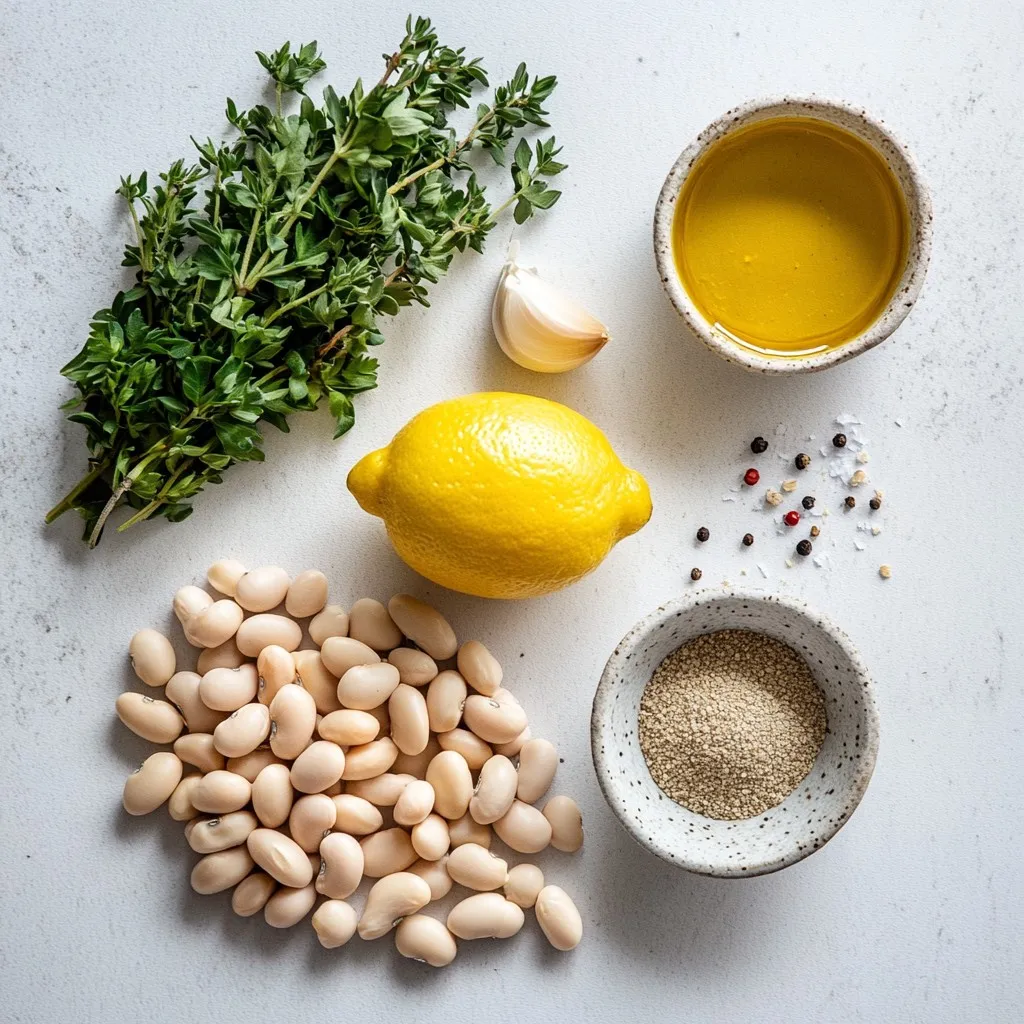
– 2 cups cooked cannellini beans or 1 can, drained and rinsed
– 1 head of garlic
– 2 tablespoons tahini
– 2 tablespoons olive oil
– 2 tablespoons lemon juice
You need cannellini beans for a creamy base. You can use cooked beans or canned ones. Both work well. Roasted garlic adds a sweet and rich flavor. To roast it, slice off the top, drizzle it with olive oil, and wrap it in foil. Bake at 400°F for about 30 to 35 minutes. This makes the garlic soft and sweet.
Adding tahini gives a nutty taste. Olive oil adds richness. Lemon juice brings a bright, zesty note. These flavors blend together to create a perfect dip.
Optional garnishes
– Fresh herbs like parsley or thyme
– Olive oil for drizzling
Garnishes make your dip look pretty and add fresh flavor. Use herbs like parsley or thyme. Chop them finely and sprinkle on top. Drizzling olive oil adds a nice touch and extra richness.
Seasoning elements
– 1 teaspoon ground cumin
– Salt and pepper to taste
Cumin gives the dip a warm, earthy flavor. It pairs well with the garlic and beans. Add salt and pepper to taste. Taste as you go. Adjust until it’s just right for you.
Step-by-Step Instructions
Preparation steps
Roasting the garlic
To start, preheat the oven to 400°F (200°C). Take a head of garlic and slice off the top. This exposes the cloves inside. Drizzle a little olive oil over the cut surface. Wrap the garlic in aluminum foil and place it in the oven. Roast for about 30-35 minutes. The cloves should be soft and caramelized when done.
Preparing the ingredients
While the garlic roasts, gather the rest of your ingredients. You will need 2 cups of cooked cannellini beans, 2 tablespoons of tahini, 2 tablespoons of olive oil, and 2 tablespoons of lemon juice. Add 1 teaspoon of ground cumin, and season with salt and pepper to taste.
Blending the mixture
Combining ingredients in the food processor
Once the garlic is ready, remove it from the oven and let it cool slightly. Squeeze the soft roasted cloves out of their skins. Add these cloves along with the prepared cannellini beans, tahini, olive oil, lemon juice, and cumin into a food processor.
Adjusting consistency and seasoning
Blend the mixture until it’s smooth. If the dip is too thick, add a little water or more olive oil. Blend again until you reach your desired consistency. Taste the dip and adjust the seasoning with salt and pepper if needed.
Serving suggestions
Transferring the dip to a bowl
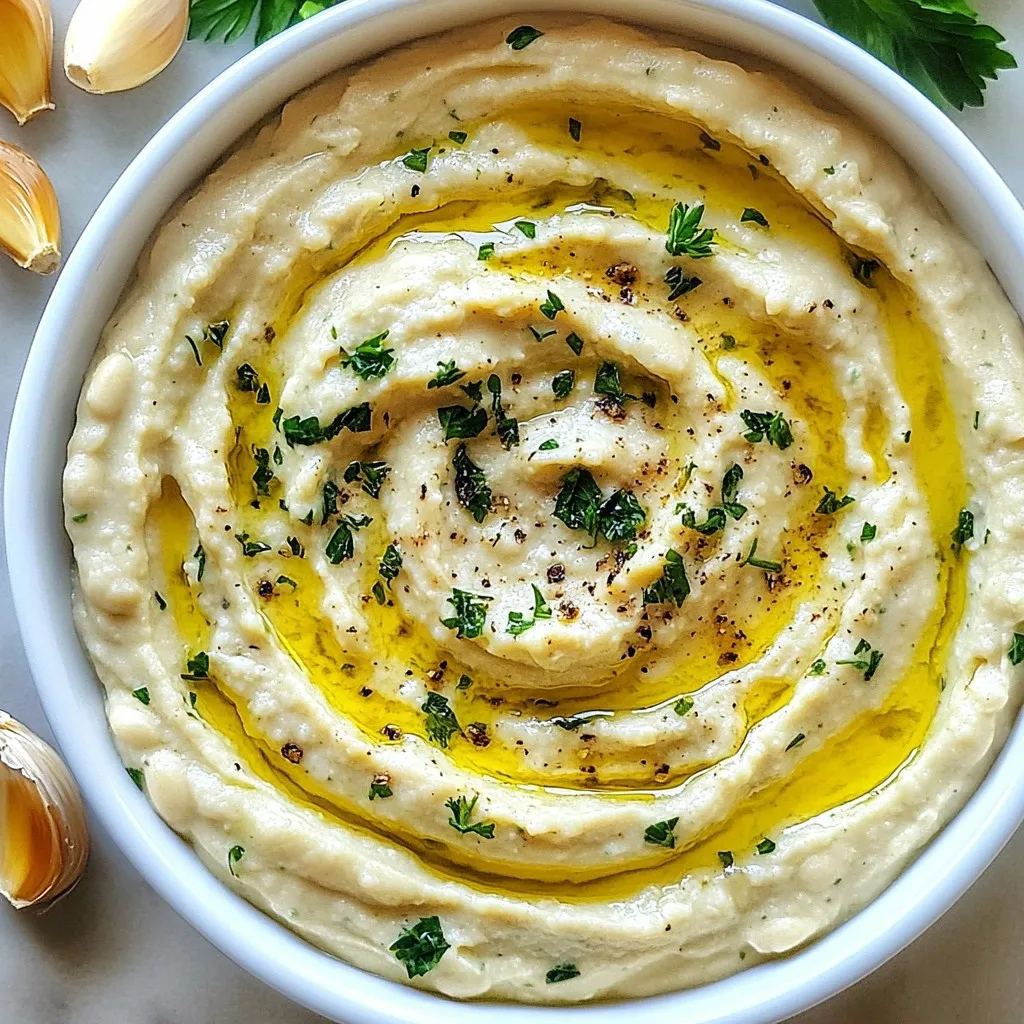
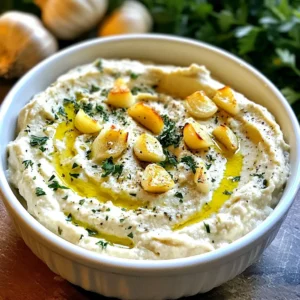
Transfer the creamy dip to a serving bowl. You want it to look inviting and delicious.
Drizzling olive oil and garnishing
Drizzle a bit of olive oil on top. This adds flavor and a nice shine. Finish by garnishing with fresh herbs like parsley or thyme. Serve with fresh vegetables, pita chips, or crusty bread for a tasty treat. Enjoy!
Tips & Tricks
Ideal roasting time for garlic
Roasting garlic is easy. Preheat your oven to 400°F (200°C). Place the head of garlic wrapped in foil. Roast for 30-35 minutes. You know garlic is done when it feels soft. The cloves should be golden and caramelized. This means they will add a sweet taste to your dip.
– How to tell when garlic is done
Check for soft cloves by gently squeezing the head. If they pop out easily, it’s ready. The smell will also be strong and sweet.
– Tips for perfect consistency
If your garlic is too dry, it won’t blend well. Adding a bit of olive oil helps keep it smooth.
Enhancing flavor
You can boost the flavor of your dip easily. Try adding spices like smoked paprika or chili powder. These spices bring a new twist to the dish.
– Adding other spices
Ground cumin gives a warm taste. It pairs well with garlic. You can also try a pinch of cayenne for heat.
– Experimenting with different herbs
Fresh herbs add brightness. Try parsley, thyme, or even basil. Each herb gives a unique flavor. Add them as you blend or use them as a garnish.
Equipment recommendations
A good food processor makes blending easy. It ensures a smooth dip without lumps.
– Best food processors for dips
I recommend a medium-sized food processor. It handles beans well and is easy to clean. Brands like Cuisinart and Ninja work great.
– Alternative tools for blending
If you don’t have a food processor, a sturdy blender will do. You can also use a hand mixer, but it may take longer. A fork can work in a pinch, but it won’t be as smooth.
Pro Tips
- Roast the Garlic with Care: Make sure to wrap the garlic tightly in aluminum foil to prevent it from drying out while roasting.
- Adjusting Consistency: If the dip is too thick, gradually add water or more olive oil until you achieve your desired creaminess.
- Herb Variations: Experiment with different fresh herbs like basil or cilantro for a unique flavor profile.
- Serving Suggestions: Serve the dip with a variety of dippers such as sliced cucumbers, carrots, or crispy pita chips for a colorful platter.
Variations
Flavor variations
You can change the taste of your dip by using different beans. Try black beans or chickpeas for a new twist. Each bean brings its own flavor and texture. You can also add spices like smoked paprika. This spice adds a warm, smoky flavor that really stands out. A pinch of red pepper flakes can give it a nice kick too!
Dietary variations
If you want to make this dip vegan, you’re in luck! This recipe is already vegan-friendly. Just make sure your tahini is pure and free of additives. For anyone who needs gluten-free options, this dip fits the bill. Serve it with fresh veggies or gluten-free crackers for a perfect snack.
Serving variations
Think about how you want to serve your dip. Pair it with crunchy veggie sticks like carrots and celery. Pita chips also make a great side. You can use this dip as a spread for sandwiches or wraps. It adds so much flavor and creaminess! It can even be a filling for stuffed peppers or mushrooms, making it a versatile choice.
Storage Info
Storing leftovers
To keep your Roasted Garlic White Bean Dip fresh, store it in an airtight container. Place it in the fridge right after serving. This dip stays good for about 3 to 5 days. If it seems thick, stir in a bit of water or olive oil before serving again.
Freezing options
You can freeze this dip if you want to save it for later. Use a freezer-safe container and leave some space for expansion. It’s best to eat it within 2 to 3 months. When you want to enjoy it again, thaw it in the fridge overnight.
Reheating recommendations
When you’re ready to serve the dip again, gently heat it in a pot over low heat. Stir well to keep it smooth. If it seems dry, add a splash of olive oil or water. This helps keep the flavor and texture just right.
FAQs
How can I make Roasted Garlic White Bean Dip creamier?
To make your dip creamier, try adding more olive oil. You can also blend in a little water. If you want a richer taste, add more tahini. Blend until it reaches your desired smoothness.
Can I use a different type of bean?
Yes! You can use other beans like navy beans or great northern beans. These beans have a similar texture and flavor. Just make sure to rinse and drain canned beans before use.
Is it possible to make this dip ahead of time?
Absolutely! You can prepare the dip a day in advance. Store it in an airtight container in the fridge. Just give it a good stir before serving.
What can I serve with Roasted Garlic White Bean Dip?
This dip pairs well with fresh veggies like carrots and bell peppers. Pita chips and crusty bread are also great. You can use it as a spread in sandwiches or wraps too!
How do I store leftovers effectively?
To store leftovers, place the dip in a sealed container. Keep it in the fridge for up to five days. If needed, drizzle a bit of olive oil on top to keep it fresh.
In this blog post, we explored the delicious Roasted Garlic White Bean Dip. We discussed key ingredients like cannellini beans, roasted garlic, and spices. I provided detailed steps for preparation, blending, and serving. You learned tips for enhancing flavors and variations to suit your needs. Finally, I shared storage options for your leftovers.
This dip is easy to make and very tasty. Enjoy creating your own twist on this simple recip
Roasted Garlic White Bean Dip
A creamy and flavorful dip made with roasted garlic and white beans, perfect for serving with vegetables or pita chips.
Prep Time 10 minutes mins
Cook Time 35 minutes mins
Total Time 45 minutes mins
Course Appetizer
Cuisine Mediterranean
Servings 4
Calories 150 kcal
- 2 cups cooked cannellini beans (or 1 can, drained and rinsed)
- 1 head of garlic
- 2 tablespoons tahini
- 2 tablespoons olive oil
- 2 tablespoons lemon juice
- 1 teaspoon ground cumin
- to taste salt and pepper
- for garnish fresh herbs (like parsley or thyme)
- for drizzling olive oil
Preheat your oven to 400°F (200°C).
Take the head of garlic and slice off the top to expose the cloves. Drizzle a little olive oil over the cut surface and wrap it in aluminum foil.
Place the wrapped garlic in the oven and roast for about 30-35 minutes, or until the cloves are soft and caramelized.
While the garlic is roasting, prepare the white bean dip. In a food processor, combine the cooked cannellini beans, tahini, olive oil, lemon juice, ground cumin, salt, and pepper.
Once the garlic is done roasting, squeeze the soft cloves out of their skins and add them to the food processor.
Blend all ingredients together until smooth. If the dip is too thick, add a little water or more olive oil until you reach your desired consistency.
Taste and adjust the seasoning if needed.
Transfer the dip to a serving bowl and drizzle with a bit of olive oil.
Garnish with fresh herbs and serve with fresh vegetables, pita chips, or crusty bread.
Adjust the consistency with water or olive oil as needed.
Keyword appetizer, dip, healthy, vegan
WANT TO SAVE THIS RECIPE?